Our Cutlass Heirloom

My husband inherited his father’s Navy cutlass and wanted to display it somehow. I knew there were sword stands that would work and researched a couple online. I originally planned to have a custom one made by the same artist who made his coin holder, but the price was a bit excessive for something that wouldn’t get much notice. At one point the hubs considered making a stand, but that would have required several new tools – which was probably his real motivation – and time that could be spent on other more important projects.

When I found a basic wooden stand on a discount website I ordered it right away. Unfortunately, I soon got an email that they wouldn’t ship to Alaska and had to cancel the order. I searched on and off for the next few days and finally found one for about $15. A few dollars more for shipping and it was on it’s way.

Sword

It’s definitely not fancy, but it does the job. And because we display the flag from his dad’s service in front of the sword you really don’t see it anyway. Together they make a simple display to honor his dad.  And I find it fitting that the custom art I had created from a drawing of the hubs in service hangs above them both.

Sword2

Want some history on the traditions of the Navy Cutlass? This website details the origins of the Navy sword and it’s demise with the advance of modern warfare.

Advertisement

Rules of the Road

Having recently traveled over 5,500 miles, plus commuting 2 hours a day each, the hubs and I are well versed in highway driving. Unfortunately, not everyone is taught highway courtesy before they hit the byways. Alaska is rated as having some of the best drivers in the nation, but I must not travel the same streets they do because my commute often includes asking the good Lord for patience in dealing with other motorists, but at least I’m not as bad as this guy. Here’s my top 7 driving pet-peeves:

  1. Entrance ramps are usually designed to give you an appropriate distance to match the speed of on-coming traffic and merge in without causing disruption to the flow of vehicles. Don’t “putz” down the ramp and then hesitate when faced with moving traffic as your lane ends. Most motorists are fine with others merging in front of them IF you match their speed before moving over and may even flash their lights to signal that they anticipate you moving in. I also typically follow a general rule of one oncoming car between each highway vehicle.
  2. Most exit ramps are also designed to allow you to slow down after leaving the highway, so please don’t reduce speed prior to taking your exit unless you are hauling a load that requires it.
  3. When there are two lanes in the same direction stay right except to pass, especially in hilly areas. If you do pass slower traffic, remember to move back to the right once you’ve given the other vehicle enough room.
  4. Remember that large trucks with trailers can’t stop as quickly as your single vehicle. That’s why they need extra space in front of them when behind other traffic, so don’t see that big open spot as an invitation to whip over in front of them. They also need extra room to turn because they have to compensate for the length of their rig, so don’t try to squeeze in next to them as you approach an intersection. That long load also prevents them from seeing you behind them, even at what you might think is a ‘safe’ distance. A good rule of thumb is if you can’t see the trucks mirrors, he can’t see you.
  5. Yield to emergency vehicles when their lights and/or sirens are active unless you’re on a divided road. When you see an approaching response vehicle, slow down and move to the right if it’s safe to do so, without cutting off other motorists. Failing to do so is illegal in most countries and delays emergency personnel from reaching those in need as quickly as possible. React how you would want others to if you were the one on the needing end of those emergency services.
  6. Slow down as you approach emergency vehicles on the side of the road, but don’t stop and gawk at the situation. It’s usually just someone getting a speeding ticket or a minor fender bender – nothing to write home about. But your brief pause to check things out delays traffic behind you and can cause a chain reaction that could result in a mile long back-up. Or even worse, your nosiness could cause you to not pay attention to those in front of you, creating another fender bender.
  7. Don’t think that it’s your responsibility to slow down speeders or teach other drivers a ‘lesson’. If you see someone driving irresponsibly, call the authorities and let them handle the offender rather than goad them and create a situation of road rage that could spiral out of control causing others injury.

Imagine how much better our commutes would be if everyone used these tips! So now that you know my driving pet-peeves, I want to hear yours! Or have other tips that I didn’t mention? Share them below! Maybe we’ll help the next generation of drivers improve. 😉

Knock-Off Designer Garden Art

While touring my Mother-in-law’s neighborhood on our recent trip I spotted a beautiful craftsman style home that I adore. In addition to beautiful timber columns on the porch they had a large rustic metal sphere in their landscape that I fell in love with even though I it was likely a designer piece that was light years outside my budget.

I thought about that metal sphere on the drive home and decided to look for a way to DIY my own. I’d seen several similar projects for light fixtures so I knew it was doable. I just had to find a material that could stand up to the elements.

I pinned a couple of ideas, but put the project on hold since I had several others already in the works. Then I happened to spot these beauties on a Target clearance rack! They weren’t the color I wanted, but I knew a coat of spray paint could fix that. I got all three for about $21. I all but danced out of the store!

Spheres

They lived as is in the flower bed for a while since I was busy with those other projects I mentioned, but when I started spray painting my cache pot from yesterday’s post I decided to knock these out as well.

Spheres

I love the copper color on the small one, but because it was a metal flake paint it was a little difficult to work with and required several small coats to get all the angles. The ORB color on the other two is a dead ringer for the original designer inspiration and only took two coats. The third sphere has found a home in the new rain garden, which isn’t finished just yet.  A few more steps and I’ll be ready to share that project too! 🙂

Sphere

Cache Update

Remember the pretty little cache pot I created a while back? Well it had a little defect. You see the lid fit so snugly that when you went to remove it you had to hold the pot itself to pry it open. And when it did open the motion created caused the contents already inside to move. Sometime so much that they escaped – onto the person opening it. That’s why my pretty copper canister became cabinet top décor and a replacement was found.

Shortly after we moved to the mainland I purchased this ice bucket at JoAnns on clearance for something like $5. And then I never used it.

Cache

Since my inspiration to DIY a cache pot in the first place came from an ice bucket I decided to give it a try and set it out on the counter for a test run. It was easy to open – just lift the lid. It was easy to clean – just pull out the insert dump and put in the dishwasher. And it was the perfect size. Unfortunately, it wasn’t the perfect color. But that’s nothing a coat of spray paint can’t fix.

Cache

A few coats of spray later and wha-la, I have a new cache pot! Plus because I already had the bucket and the spray paint it didn’t cost me a dime! I’m still not crazy about the stars, so I might rig something to cover those, but for a totally free project I’m not gonna complain.

Something New Underfoot

KitchenRugs2When we decided to do vinyl floors throughout our house due to my allergies and desire for easier cleaning I knew I’d be on the hunt for several area rugs once we moved in. It’s been more difficult than I imagined finding just the right rug in the right size at a price I can swallow, which is why none of our bedrooms have rugs as of yet.

However, I did find some smaller accent rugs for great prices at CostCo while in Portland. When we first moved in I used two brown memory foam rugs we had in our master bathroom at the rental in the kitchen. They worked ok, but they required constant cleaning and didn’t play well with the vacuum. Plus they tended to wander across the floor with the assistance of running paws. I’d considered getting some of the fancy gel mats you see at the specialty kitchen stores, but just couldn’t justify $200 on such a small item. So when I spotted these knock-offs for just $14 I quickly plopped two in my cart.

KitchenRugs

Although they aren’t quite as nice as the specialty store variety, they feel good underfoot, stay put where placed and don’t surrender to the vacuum. I occasionally use a Lysol wipe to get any lingering dirt, but overall they have been a perfect fit for this spot.

ClosetRugMy next bargain find were these runners at $10 each. I planned to use one in the master closet and one in the laundry room, but they were a little too narrow for both spaces, so I paired them up to cover the access panel in the closet floor. Eventually, I want a single rug in here that either matches or coordinates with what I select for the Master Bedroom, but at just $20, this will work for now.

The hubs pointed out some indoor/outdoor mats similar to what his mom has in her garage since I’d mentioned how I liked them. I thought they were a little pricey at $20, but I knew it would be a good option for the back door where the dogs come in and out. I was glad to see that it covered the large opening, plus a little extra, so it catches dirt from both paws and feet, as you can see.  It’s certainly reduced the amount of dirt making it inside!

OutsideRug

I almost bought a second for the laundry room, but I was pretty sure it would be too wide and not long enough. I decided I’d try the one in the laundry room first and if it did fit then it could stay there and I’d check our local CostCo for another for the back door. But my assumption was right and it just didn’t fit the space properly, so the hunt for a long, yet sturdy runner for the laundry room continues.

Over the Bed Art

MasterArt2

I wanted our Master bedroom to be very simple and calming, so I purposely kept things in this space to a minimum but it was lacking character.  I knew I wanted to add some sort of textured art, but hadn’t found anything just right.  Then I spotted a wood carving on clearance at Pier 1 while on our trip down south and knew I wanted it for this space.  Unfortunately, they only had one.  Luckily, the store across town still had a few, albeit not on clearance and they were able to do a phone purchase so I could pick it up later that day.

I originally planned to hang them over the night stands, but when I tested that idea the space above the bed felt too empty.  Although they are fairly large, they weren’t big enough to take up the whole width of the bed, so I opted to center them with some extra space in between.  I decided to hang them half way between the top of the head board and the ceiling since it is such a large space.  Once they were hung I almost wished I’d bought a third, but I think that might have felt a bit too fussy.

MasterArt

I also hung this watercolor print by an Alaskan artist on the small wall by the bathroom door across from the bed.  We purchased it during a trip and got a super sweet deal, frame and all!  It’s a favorite of mine and the hubs, so it’s fitting that we wake up to it every day.  Plus the colors work well in this space.

MasterArt3

I’m not ruling out the possibility that I’ll add other art in this space, but for now I’m enjoying the simple yet unique look.  Now if only I could find the perfect rug and get the bench done for the foot of the bed! 😉

My New Crafty Corner

CraftCab

I’m super excited to share my new craft cart with you!  Although I ordered it back in March with free shipping, the company insisted that offer didn’t apply to Alaska, so we had it shipped to my mother-in-law’s house in Washington, where it sat until we visited a few weeks ago.  It then made the long haul up the AlCan with my classic truck and took shape after several hours of assembly by the hubs.  But it was sooooooo worth it!

I’m still filling some of the drawers, but most are packed with my craft supplies.  I’ve been able to fit everything in this one cabinet, sans fabric – which will soon be organized and stored in a rarely used space, so watch for a post on that too.  The top two drawers have movable dividers which make organizing super easy.

CraftDrawer2

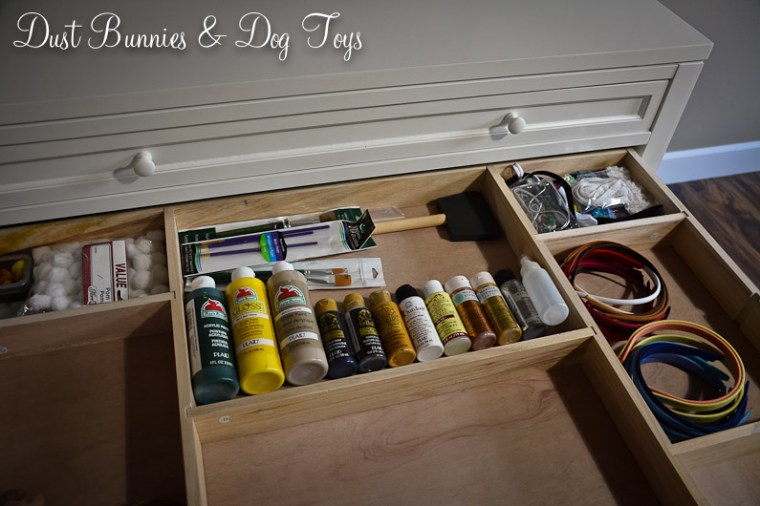
I scored some favor tins at the craft store with a coupon sale to organize the little things like beads and buttons.  The clear tops make it easy to find exactly what I’m looking for and I still have a few empty containers to grow into!

CraftDrawer

I hung my cutting board on the side with a few hooks, so it’s easy to pull out and trim things quickly.  I plan to add a roll of craft paper above the cutting board for gift wrapping and easy cover for messy projects.

CraftCabCutter

On the other side I put a hook for my craft bag, which holds my current craft project.  It’s the best way I’ve found to craft on the go. 🙂

CraftCabWide

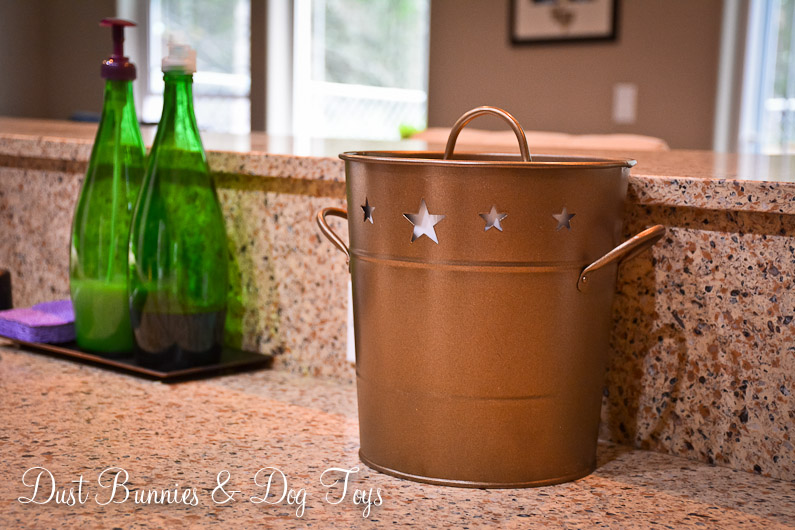
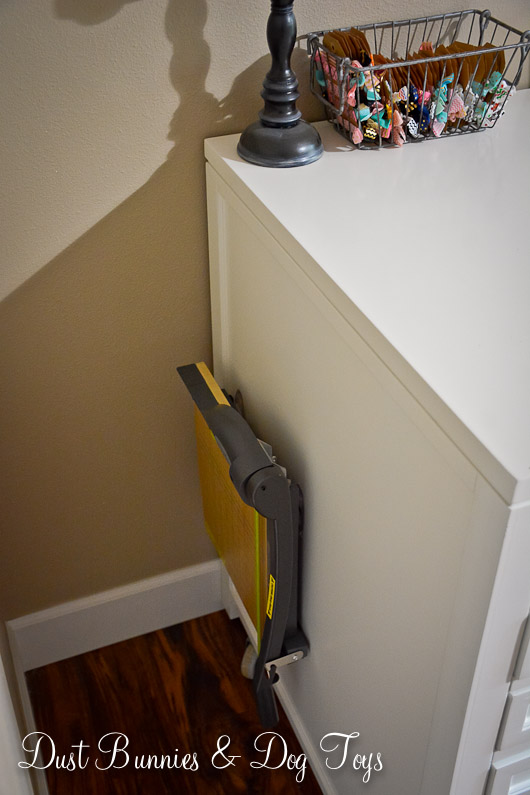
I hung a few display boards above the cabinet and set my mannequin bust on one corner with a wire basket to hold prepped inventory.  The little ceramic pot acts as my trash can and a couple metal tubs hold recent projects that are awaiting prepping for their Etsy closeup.  A fellow crafter is making me an adorable owl tool holder, which I’ll be sure to show off when it’s ready.

Eventually, I’ll add some shelves above the display boards to hold some of my other display pieces and finished inventory, but for now it’s just great to have a dedicated space for creating.  Not having to first find the materials needed, then haul them out and set them all up, to craft for a few minutes and then have to gather it all back up to go back into storage again is HEAVEN!  I can be working on something and realize I need another material or tool, roll out a drawer, grab it and keep on crafting.  That alone inspires me to work on projects.

Even better is that we added wheels on the bottom so it can move!  I can pull it out into the middle of the room so I can work on a project from all sides or invite friends over for a craft session.  But the real reason for the wheels is so I can pull it out into the living room and watch TV with the hubs while crafting!  I did just that when I was organizing everything into it and it was perfect.  Now I just need the stool I want to go on sale, so I have a seat at the ready to serve as a crafting post or a photo prop!

A Little Extra Support

Apparently the little tropical plant I have on my desk at work is very happy in it’s home, because it has grown like wildfire.  It had spread so much that I’d started using nearby picture frames and awards to support the new growth!  It was getting a bit out of hand and the drooping stems weren’t growing strong enough to support the new growth.

PlantBefore

So I decided to give my little purple plant some extra support with a trellis of sorts.  I picked up some copper tubing used for plumbing at the big box hardware store.  I planned to make an upward spiral, but realized I didn’t have a lot of height to work with in this spot and that plan would require tools to cut the tubing, which I didn’t have at my disposal while at the office.  So instead I curled the tube around and then arched it over so I could push the ends back into the pot.

PlantTwist

I added the new twisty trellis to over the plant and started fishing the stems up and threw it.  No rhyme or reason, just gently pulling each through the loops until it seemed to sit well.

PlantStart

A few minutes later my little plant looked like this.

PlantAfter

I showed off my handiwork to my co-workers who were pretty darn impressed and then placed my newly supported greenery back in it’s usual spot.

PlantFinished

Not bad for a few dollars of tubing and a break spent creating something. 🙂

Light It Up

A few weeks ago I shared some do’s and don’ts of flag etiquette, which included keeping the flag lit if you choose not to take it down at dusk.  Here in Alaska, that’s not a problem during the summer since the sun never truly goes down.  However come winter, we will have the opposite – more hours of dark than light.  And the darkness will descend long before we make it home to remove the flag each day.  So rather than not fly the flag all winter, the hubs rigged this fancy light for the flag.

FlagLight

It’s powered by a solar panel, which should still get enough sunlight each day to power the LED light through the darkness, even in the winter.  Installation was pretty simple.  He just picked the best location, attached it to the wall with a few screws and angled the light.  Since he picked it out and installed it without me, I don’t know much of the details beyond that.  I don’t even know where he got it or how much it cost.  I’m just pleased to have a light at the ready that didn’t require extensive landscaping to install and isn’t a monstrously obvious contraption!

FlagLight2

What’s in a name?

NamePlate

I ordered this cut metal name plate on one of my favorite “daily deals” websites for around $20 including shipping and love it, but I’m not sure how I want to use it.  The website showed them affixed to the exterior of a building, but it’s not very large (about 12″ long by 4″ high), so I’m worried that it would get lost on the side of the house plus I’m not crazy about the idea of attaching anything to our new siding.  I originally thought I’d use it out near the road as part of an address sign, but that’s a low-priority project so it will be a while before I work on that.

When it first arrived in the mail I considered making a light box so it would be lit from behind similar to the trendy marque letters everyone is DIYing these days, but I’m not sure where I’d use that either.  I’ve also considered painting it, adding some metal stakes and using it as garden art in the landscaping that will come once the fence is installed around the backyard or in the rain garden.  I even went as far as pulling out some paint options.

Paint

But I just can’t commit.  I’ve searched Pinterest for ideas and haven’t come up with anything beyond what I’ve already considered, so I want to hear your suggestions.  How and where would you use it? Would you paint it?  If so, what color?  I’m betting someone will have an amazing idea that will make me say – Why didn’t I think of that?!  And inspire me to make it happen!