Taking the Plunge In Honor of a Friend

We recently lost a dear family friend, Dick Ossey, after a long battle with cancer. Although I was sad to get the news, I was so glad we’d gotten the chance to visit with him on our recent road trip.  The hubs and I have decided to honor his memory by participating in the 2015 Seward Polar Bear Jump Off, which benefits the American Cancer Society. The event takes place in January and is a spectacle of participants dressed in wacky costumes plunging into the near freezing waters of Resurrection Bay in Seward, Alaska. Luckily another good friend lives there and as the local Assistant Fire Chief, he oversees the safety of all the jumpers. And the local Coast Guard unit where the hubs was once stationed will be on hand, so I feel pretty confident that I’ll survive the experience.

Although I’m not looking forward to the moment of being submerged in icy water, I am excited about some costume ideas I’ve already conjured up. Of course there will be something purple involved, but I don’t want to give away the surprise just yet.

But there won’t be any costumes unless we raise enough sponsorships to be eligible to jump. As a team of two, we each have to raise a minimum of $750, $500 of which has to be turned in by November 30! That means the clock is ticking! We will be asking friends and family to support us in this adventure to honor the amazing fight that Dick made. If you would like to donate to our team please leave a comment below with contact information or message me on the DB&DT Facebook page at https://www.facebook.com/DustBunniesAndDogToys.

At Last!

Remember forever ago when I told you about our plan to install a rain garden? Well it’s finally done! After months of delays waiting for the ground to thaw, our lot to be graded and uncooperative work schedules we put in the last of the plants and mulch this past weekend. Here’s a recap of the process from the beginning.

The free tires we had delivered while the house was still under construction last fall were already covered over with snow when we moved in back in December, so they remained where they had been dropped until spring.   Luna enjoyed them as a lookout spot during this time.

Luna

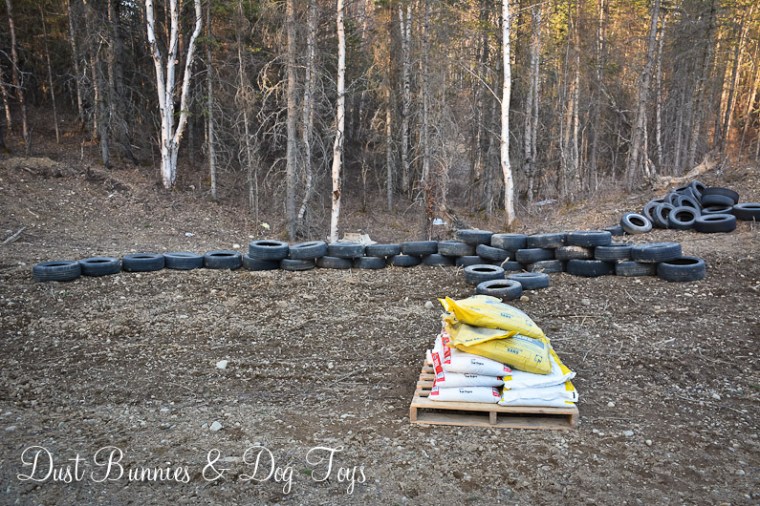
Once the ground thawed, I arranged them into a semi-circle shape to act as the retaining wall at the back of the garden. We placed large rocks from around the property into the center of tires to keep the wall from shifting.

Start

StartWall

As the garden started to take shape, I quickly realized that using individual bags of soil and compost I’d purchased wasn’t going to be efficient, so I decided to order a delivery of top soil mix. Unfortunately, I had to wait for the builder to do our final grade, which was rescheduled several times and finally happened a few days before our road trip. This provided the required ‘dip’ to the area between the driveway and the garden so that water runoff will be directed toward the garden and pool there to be absorbed.

1

The top soil was delivered soon after we returned home, but conflicting schedules didn’t allow me to get back to the garden until several weeks later, when the hubs and I mixed in the sand and compost before spreading everything out to fill the space. There were a few spots where the tires didn’t line up just right, so we filled those with large rocks to keep the dirt and subsequent water from escaping.

2

3

Bacardi and her siblings ‘helped’ throughout this process… BHelping

We decided this was an appropriate opportunity to spread Sangria’s ashes, so we scattered her throughout the soil before planting. I also gathered a variety of rocks to create stone cairns in memory of other special pets either of us had lost. In addition to one for Sangria there is one for the hub’s dog Kenai, our previous cat Kitty Meow and my goats Daisy, Rosy and Quincy.

Stones

Stones2

Stones3

Stones4

Stones5

Stones6

Next I laid out all the plants I’d purchased and collected over the last few months to decide what should go where. Once I was happy with the arrangement I set to planting, filling in the empty areas with spring bulbs.  I had also purchased mulch to top the garden, but ran out and couldn’t find more of the same kind so late in the season.

4

5

Another few weeks passed and I found cedar mulch at the hardware store, so I purchased enough to finish the empty spaces and sprinkle over top of the other mulch so they’d blend together. Most of the annuals I’d planted had already died off, so I replaced them with perennials I’d purchased at a Master Gardener plant sale.  I also added a clemantis on either side of the garden against the retaining wall so it will attach to the tires and cover them as it grows.  Then I planted Aleutian Speedwell along the front edge of the garden. In time it should spread and act as a ground cover for the slope into the garden – part of my agreement with the hubs that the backyard will be the only landscaping that requires mowing.

Mower

As I planted, the hubs and kiddos watched from the lawn mower parked nearby. We rescued both the mower and that cool trailer attached to it from someone who planned to take it to the landfill! Both needed a little work, but it’s been super handy to have them for projects around the yard.

MowerRide

Once I was finished, the hubs loaded the dogs up in the utility trailer and drove them back up to the house so I could get some kiddo free shots of the finished garden. We placed our bargain bench off to the side so there’s a spot to sit and reminisce next to what I’m now calling our Memorial Rain Garden. Eventually I’ll create a paver pad for the bench along with a pathway down the hillside to it, since I plan to fill the rest of the area around the garden with local ground covers that will spread.

6

Here’s the view from the house, where you can see how it is situated in the low spot to collect the run off from the driveway. View

And I’m happy to see that we’ve had an increase in “good insects” like this butterfly since we’ve started planting!

Butterfly

Discovering Hatchers Pass

Little Su

Our new home is a stone’s throw from the amazing Hatchers Pass, but we haven’t gone farther than this first riverside pull off since moving in. That gave me a great reason to plan a photo walk there with my photography Meetup group.   I’d heard the historic Independence Mine at the top of the pass offered great panoramas and had interesting old buildings, so I was excited to see it for myself. I wasn’t disappointed.

scene

Before entering the park around the mine there was this adorable lodge with cabins that can be rented. I’m thinking it might be the perfect spot for the hubs and I to have a little get away. (hint, hint!)

lodge

The mine itself was a mix of restored and deteriorating historic buildings. The amazing textures on the buildings and scenery literally beg or a rustic photo shoot.

porch

outbldgcross

mine

window

I hiked a steep trail that took me up and around the entrance to the actual mine, providing a hillside view of the entire area.

overhead

Rusty pieces of mining equipment were scattered about wherever they were forgotten when the mine closed and several signs explained what each building was used for, along with some interesting historical tidbits.

equipment

bucket

train

train2

drilling

minetrack

tracks

track

quote

I spotted several prairie dogs on the road and then got an up close view of a group of them along one of the trails I took. They were gnawing on the wood of a collapsed building, making a sound I first thought was the building sliding down the hillside! Once they spotted me they scurried around and took cover. Then this guy took up sentry duty barking at me in an apparent message to his cohorts that there was danger afoot.

dogcloseup

dogcloseup2

dogrun

doglook

dogbark

We also made a quick drive over to nearby Summit Lake, which I’m told is only 20’ deep at the center. The water was very chilly, but super clear. I could just envision bringing the fur kids up here to play!

summitlake

Late August into September is prime season for wild blue berries and there are plenty of patches in this area. I’m planning to make a trip back very soon to pick my own batch, which we’ll freeze and save for my hubby’s amazing lemon blueberry bread!

A Pretty Spot to Sit

Several weeks ago we picked up two unfinished wood Adirondack chairs at the big box store. They were pretty as is, but needed something to make them stand up to the Alaskan elements since I don’t plan to bring them inside every winter.

ChairBefore

I had some teal outdoor paint leftover from a project I never got to when we lived in Kodiak, and thought they’d look awesome painted and paired with one of my many garden stools. Turns out I was right.

Chair

I added a couple of bright outdoor pillows from my ever growing stash and some potted oregano just for fun. The wooden stool came home with the hubs from work and makes a handy little table – or footrest!

Chairs

The ultimate plan is to use them next to the fire pit, but until that’s installed they are making the barren deck more hospitable – even in the rain. Oh and that metal thing in the back corner, that’s the cat’s access to the doggie door from the yard.  I can’t wait to no longer need that once the dog run is taken down!

Next year, I plan for this space to be home for a DIY outdoor sectional that will store all the outdoor cushions and pillows during the off-season. And that pretty white cut-out stool will live between some lounge chairs on the master deck that will be installed next to the hot tub.  It’s an evolution, but I’m sure trying to make each stage as pretty as possible.

Let It Grow!

At last, the dirt patch we call a backyard is on it’s way to becoming a lawn! But it definitely took some prep work. After we installed the fence posts to mark where the yard would be, we cleared the space of sticks and large rocks to avoid having the mower kick up such things during the first cutting.  We also had to rearrange the dog run panels so they could still go outside, but stay off the seeded area.  Here’s what it looked like in preparation for the hydroseeding.

YardBefore3

YardBefore2

YardBefore1

And here’s what it looks like with the seed down!  Ok so, it’s not that different, but hopefully, that green coating will turn into a lush beautiful lawn over the next few weeks.

YardAfter3

YardAfter2

YardAfter1

Luckily, it’s rained on and off just enough since they sprayed to keep the seed damp, but not wet like they suggest.  The tech also suggested we lime the area, which we’ll do this weekend with a hand spreader.  The yard still isn’t totally level, but the lay of the land does let water drain away from the house, past the leech fields and out toward the natural gulley on the other edge of the property, all while “watering” the lawn in the process. Plus having a small hillside creates the perfect ‘bank’ for the dogs when they do the Puppy 500!  There was a section of rocks near the deck we weren’t able to get moved before they arrived, but we plan to add a little top soil over that once the grass gets established, which will help level

Notice the progress on the fence in the after photos?  Yeah, LOVING that!  The hubs does good work!  He still has a few sections to do and three gates to install, but we can get that done while we wait for the grass to start coming in.  The posts will be cut down and capped with these pretty copper toppers I found at the box store when it’s all done.  I may have him leave a few a little taller to accommodate hooks for bird feeders and such.

Once the lawn has come in and it’s tough enough for the dogs to be on we’ll take down the dog run panels and they will have free reign of the entire space.  The area they are currently using will become a pea gravel patio with a fire pit at the edge and a deck off the master to match the one the builder provided.  I also plan to put flower beds like the one along the side of the house around both decks to soften the edges.  The empty space on the other side of the house will become our garden, which will be fenced off so roaming wet noses don’t help themselves to the bounty of produce I envision having.  Of course a good chunk of that plan won’t happen until next summer, but that’s alright.  I know it will happen eventually and that’s what counts.

Full Speed Ahead!

Sorry for falling off the face of the blogsphere after my last post.  Things around here have been SUPER busy.  There are a million things going on at work, I had five photography clients on Sunday with several more scheduled this week and there are lots of projects in progress around the house.

The hubs has been working hard on the fence for the dogs and the back yard was just hydroseeded so we’ll have a lawn inside the fence. In preparation for winter, we purchased an old plow truck which needs some fixing and arranged for the mechanic neighbor to bring it back to life. We also started installing a closet kit for the guest room that we picked up for a third of the retail cost on a local buy/sell page.

I’ve been trying to wrap up the rain garden installation and get the yard planted so things take root before fall. And we’re sorting all the heirloom china and glassware we brought back on our recent trip. I’m also painting and staining for a couple décor projects that have been on my to-do list for some time. I’ll be sharing pictures of it all soon.

It’s nice to see progress after feeling frustrated recently. It’s definitely gotten me inspired again, even though I have minimal time to make the ideas in my head reality these days. Such is life, right?

The fun part is getting that twinge of pride mixed with happiness when I subconsciously notice those projects that we’ve completed and turned out to be a perfect fit for the space. I have a feeling that there will be many more of those moments in the months to come!

Curbing the Urge to Rush

When we moved into the our new home I told myself that I’d take my time decorating, so that the end product was a natural evolution of us creating a home and learning how we use the space. But recently I’ve been struggling with that process.

We’ve been in the house about 8 months now and I thought we’d have a lot more done than we do. Part of the problem is my over-estimating how much I can get done in a day, or two, or even a week with a full-time job, a photography business, an Etsy shop, managing this blog and a little down time with my hubby and fur babies every now and then. Another obstacle is my hubby’s swing shift that contradicts my day-job schedule, making working on projects together quite difficult. And there are some projects that just take two sets of hands.

I think part of my frustration is that I dreamed about the details of our house for years before it became a reality, so when I can’t use a space how I planned because we haven’t done that project yet, I get irritated. It was a blessing and a curse that I had most of the spaces decorated and organized in my head way before they were even digging footers! Now that we’re actually in, it’s a constant balance between time, budget and energy to make all those plans come to life.

But there is a silver lining to the wait. It’s caused me to tweak some of my plans to better suit our needs, budget and the space. And it’s allowed me to incorporate things I forgot to plan for, like my hope chest and the hubby’s grandfather clock. Plus it’s eliminated a lot of ‘extra’ shopping for things I ended up not needing.

So my lessons in patience continue. It’s definitely not an easy course for me, but it’s what the Lord knows I need. And it will make the finished product that much more rewarding. 🙂

Ready for a Siesta

A while back I shared a little about the dog bed that the hubs had built and I’d ‘fluffed’ along with our plans to build a few more for other spots around the house. That plan changed a bit when we found a couple of pretty nice dog beds with removable covers during our recent trip to Portland. Removable covers are a huge benefit for me, since I’m actually allergic to both our dogs and cat, but refuse to give up family members for a few sniffles and a headache or two. That means that I need to wash their bedding – and all the other household linens – every week.

2

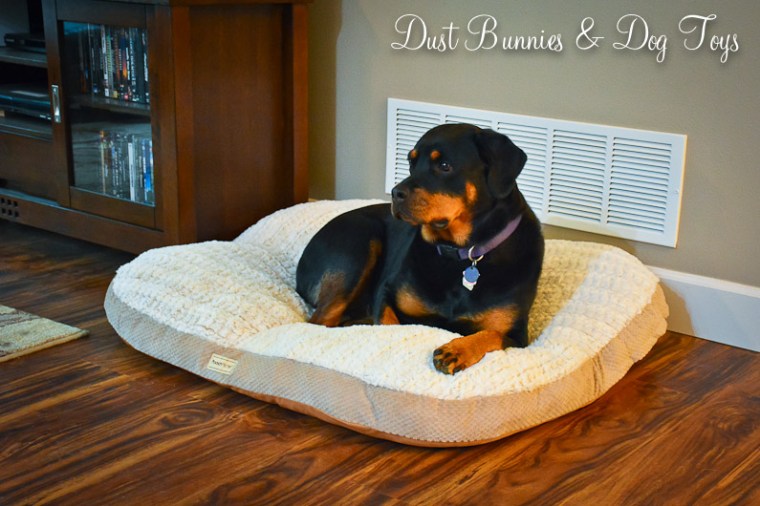
I spotted this large bed at Home Goods for $30 and knew it would work well in the spot where the bed we’d made was in the family room. At first I thought about just using it inside the frame, but it bothered me that the frame covered part of the return vent behind the bed, so I decided to try out the bed on its own without the frame. Not only did I like how it looked and fit below the vent, but the dogs took to it right away. Win #1.

3

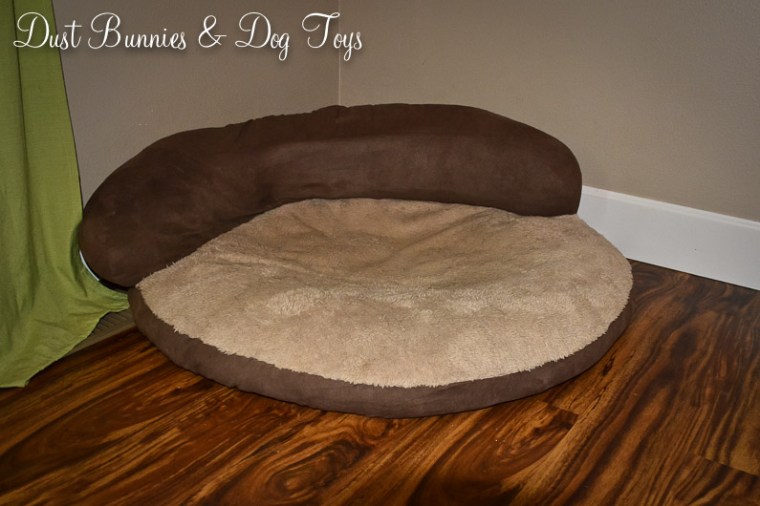
I also found this round bed at Home Goods for $25 and knew it would work perfectly in the corner of our bedroom. It wasn’t quite as cushy as the other Home Goods find, but I figure we can add to the padding later on if needed. It’s the perfect size for this spot, allowing the hubs room to still move around the bed on his side, but large enough that two dogs can snuggle together on it. Plus it replaced a non-removable cover donut bed that harbored dust and hair. Win #2.

1

Just before we left Portland, we found this bed at CostCo for something like $30. I envisioned it taking the place of the non- removable cover donut bed that was behind the chair in the family room. The replacement fit just right and has become a favorite spot for all the dogs since it provides a good vantage point of what’s going on in the main area of the house. Win #3.

We tried moving the bed frame we built into our bedroom, but it didn’t fit well in either spot we had left, so I decided I’d check the CostCos here and see if I could find some more of the round bed we’d placed in the family room.

5

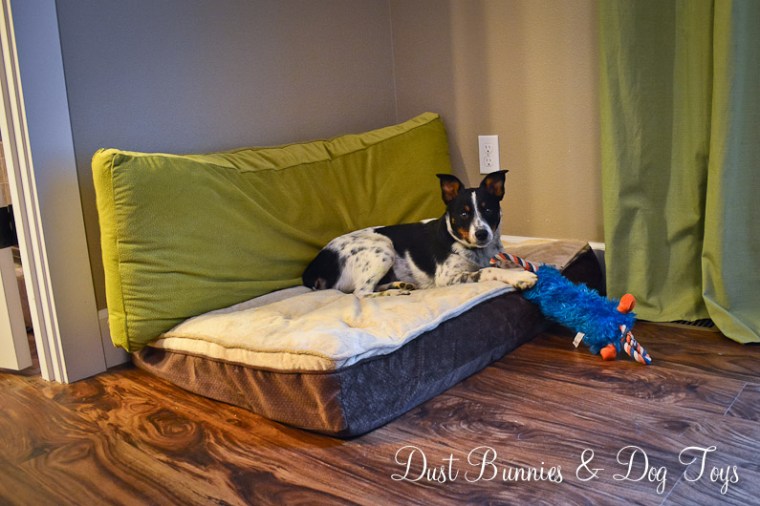
The first CostCo didn’t have any of the round beds, but they did have this memory foam bed for about $40 that I was sure would fit the corner of the bedroom by the bathroom. It did, and adding the body pillow from the previous built bed on the back against the wall made it look like a little sofa. This seems to be Stoli’s favorite spot since he can snuggle into the back while still stretching out. Win #4.

4

The other CostCo in town did have the round beds, albeit for a bit more than we paid in Portland – but we’re used to that here in Alaska. We picked out a different pattern that fit better with our bedroom colors and placed it in the corner on my side of the bed. It fits just right and like it’s cousin in the family room it’s enjoyed by all three dogs at different times. Win #5.

If you’re keep count, that’s about $170 in dog beds. It sounds pricey, but considering we would have spent more than that for materials plus our super valuable time if we’d built beds for each spot it actually ends up costing less. I was also able to sell the pads we bought for the bed frames and the old donut beds so that brought the total down to around $100 for all five. The fancy pillows I had made will be used elsewhere and that nice wood frame has since become part of the top that will be used for our office desk built in, so it didn’t go to waste either.

The pups are happy, momma’s happy and dad’s happy he doesn’t have to build another few projects. Sounds like a win-win-win to me!

My Gifted Garden

No, I don’t have a magical super smart garden. I’m just lucky enough to be gifted an entire flower bed of plants, which I’m now calling “my gifted garden.”  Since we purchased a new construction house, we have a LOT of blank space to fill in our yard. I was chatting about this with a co-worker one day a few weeks ago and she asked if I was looking for any perennials to fill my yard. Free plants that will come back bigger and better each year?! You bet I was game! She told me to let her know when I was ready and we’d set a time for me to come to her house and help her “prune” her garden.

I was finally ready to take her up on the offer last week, so we picked an evening after work for me to come by and I showed up with a couple buckets, a shovel and gloves. I was so excited I actually beat her there, but I knew I was at the right house when I drove up and saw this amazing assortment of flowers.

1

Just to make sure I rang the doorbell and her husband answered. He was mighty confused when I said I was there for plants! She arrived a few minutes later, changed into yard garb and we set to work with shovels and a stash of plastic bags she brought out to hold the roots.   We chatted about what types of plants grew well and which liked particular exposures as we worked our way up one side of the bed and down the other. She’d ask if I wanted this or that, and I repeated that I’d take whatever she was willing to part with and give it a home to grow.

2

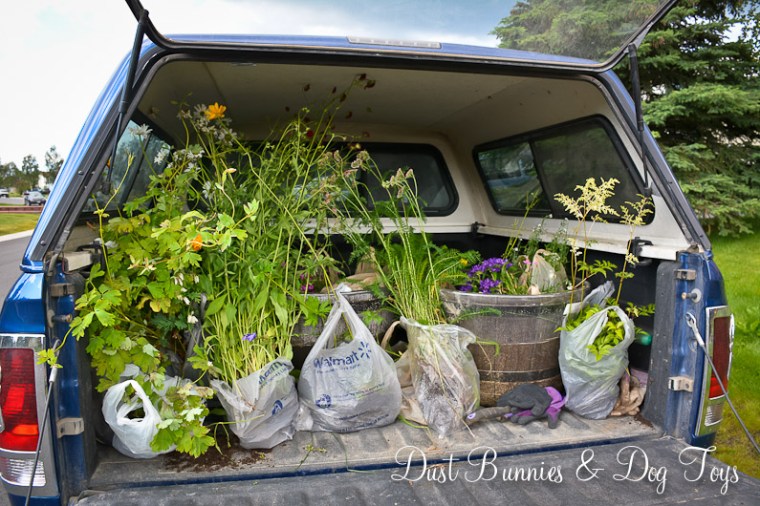
By the time we were done the back of my truck was a wall of plants. Both tubs I’d brought were full of bags and I had other bags tucked in between the tubs and on a small tray I had thrown in the truck just in case! And you couldn’t even tell we’d touched her garden!

1

Ok, so this IS the same picture as above, but it literally did look exactly the same from the road. It was only if you came in for a closer inspection that you’d see the areas we dug into.

3

Once I got everything home, I placed the bags around the flower bed so I could decide final placement for all of them and make sure that I spread things out. I watered everything in the bags since it was getting late and headed for bed. I wasn’t able to get them in the ground for a few more days but I kept watering the roots in the bags and most of the plants seem like they did ok.

Finished

A little fertilizer and some mulch and its done! It will look even better when the hydroseed is done next week and we finally have a lawn too.  I still need to add a line of pea gravel at the back along the house, just like we did out front and add some garden art, but I’m plenty pleased with my gifted garden. I’m anxious to see how it all comes back in next year. I’m hoping most will go to seed, spread a bit and come back even bigger next season. And hopefully, in a few years my gardens will be as established as my co-workers is now and I can ‘gift’ plants to others to continue the chain. 🙂  Here’s a few close ups of the flowers that survived transplant.

Purple

Yarrow

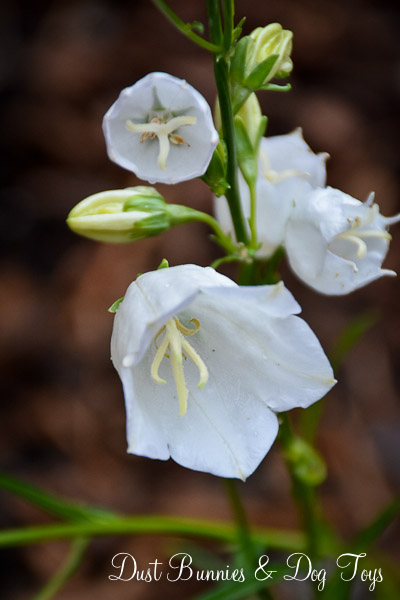
Campanula

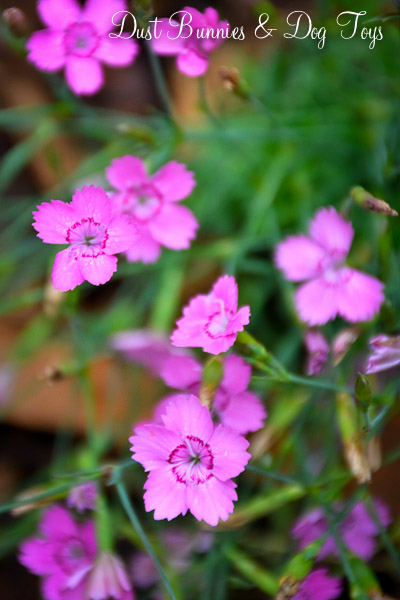
Phlox

Daisy

Finding the Right Fit

Sometimes it takes a few tries to find something just right. That was certainly true when it came to finding the perfect case for my iPad. I loved the purple case I showed you just after I started this blog, but one night I was tucking it away next to the headboard of our bed and some of the keys came off the keyboard! I tried desperately to reattach them, but they just stuck to my fingers the next time I tried typing.

I spotted a similar style for sale on the local buy-sell page for just $10 and quickly bought it as a replacement. It was still new in the box, but it was basic black. And the more I used it the more I realized it just didn’t work well for me. The fold out for the keyboard was difficult to use, I couldn’t switch up the direction the iPad sat due to the flaps that covered ‘non-button’ areas and the grooves to hold the screen at an angle didn’t grip so unless I was sitting totally still it would often slide down.

Then a coworker showed me the keyboard cover she’s just bought and let me test out the different features. Not only was it purple, it had magnetic contact points that were secure but still easy to remove. I was sold.

iPad3

She said she found it on Amazon for half the price she’d seen it elsewhere so that’s exactly where I went. At checkout I was asked if I wanted to use reward points on my credit card to pay for the purchase. Um, yes! And I got free 2nd day air for trying Amazon Prime. I think that’s fate saying I was supposed to have this.

iPad4

iPad2

iPad

Since the keyboard just covers the screen I wanted to find a way to protect the back of the iPad. Then I remembered that my company had iPad sleeves as a promo item! And because our marketing department is super awesome (hint, hint, wink, wink) it didn’t have a big gaudy logo on it. Instead we have a fun catch phrase and artwork.

iPad5

I was able to sell the old case for what I’d paid, so my only financial investment is the minimal price I paid for the original purple case. How’s that for savvy shopping?! 🙂