Windmill As Wall Art

0Happy New Year everyone!  I hope your holiday weekend was exactly how you wanted it to be, wether that was exciting or relaxed.  We took the relaxed approach.  I stayed home and the Hubs went hunting so no big ball dropping parties here.  Today I wanted to share another piece of wall art that came back on our recent trip to Portland.

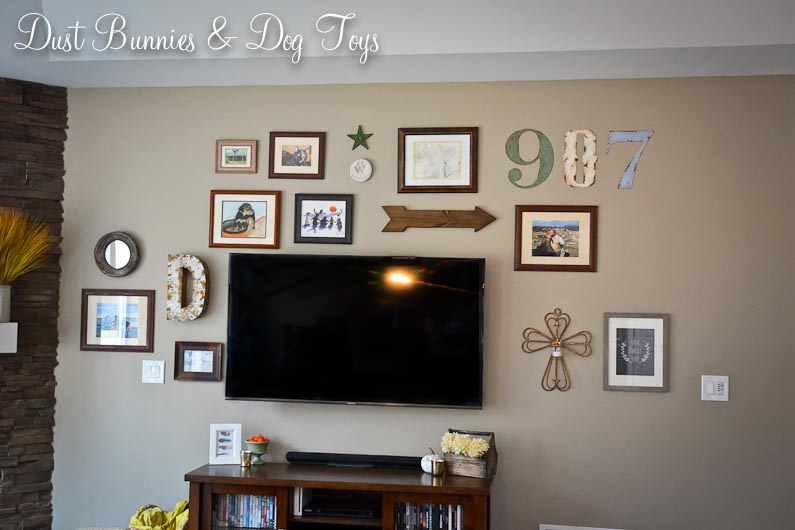
This metal reproduction windmill.  If you remember I purchased an authentic windmill from Alaska Picker about a year ago and planned to display it on this faux shiplap wall but it was SUPER heavy and the Hubs just wasn’t sure we’d be able to locate studs in the right spots to mount it securely.  So when I spotted this baby on DecorSteals.com for $90 a few weeks before our trip I snapped one up and had it sent to my Mother-In-Law’s house since they wouldn’t ship to Alaska.

1
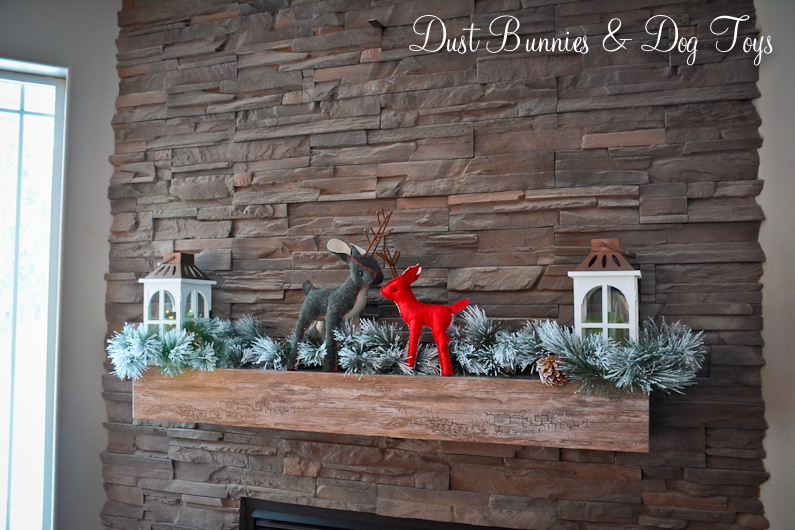
This one is smaller and much lighter than the authentic one we bought.  Plus it comes apart into three sections so should I ever want to change things up I can use them separately without much effort.  It looked so awesome with our holiday decor and my new farmhouse style sign fit perfectly inside the bottom curve.

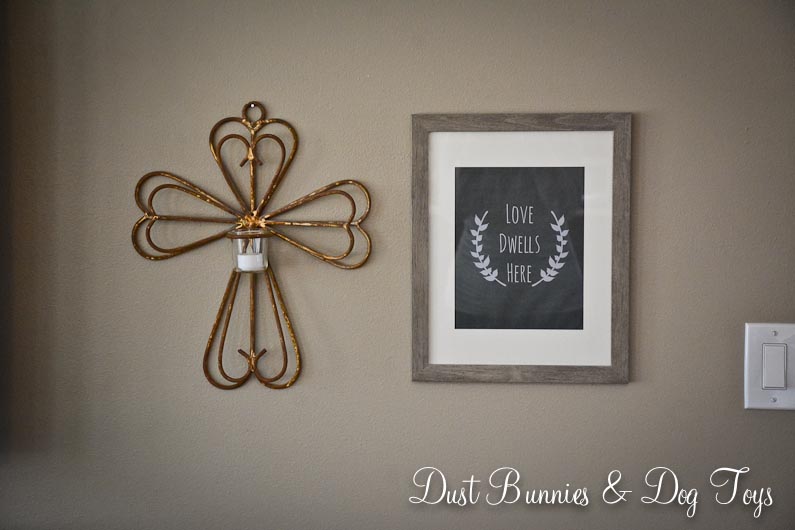
I packed up all the Christmas decorations over the weekend and I’m still working on my ‘winter’ decor for January – March, so we’ll see how I decorate around this in the coming days.  I’m considering adding two hanging lanterns or sconces on either side since the wall is so large, but I’ve got something else from our Portland trip going up on the wall where the barn wood angel hung for Christmas, so I want to wait until I get that up before I make a final decision, in case it would make the space too cluttered.

2So you’re probably wondering what we’ll do with the large and expensive authentic windmill right?  Don’t worry it will still get it’s due – I found a local buyer for it who wants to display it on a wall in her home.   And since she’s buying it for what we paid, we’re breaking even on that attempt.  Hopefully, she’s able to figure out a way to secure it well and enjoys it as much as I do this one.

We’ve also been working on another long-time-coming project recently – barn doors for the office!  The Hubs built the doors over the Christmas weekend and sanded them down so now it’s up to me to finish them with stain or paint.  I’m still debating on what the final choice will be but they should be done and installed this weekend so I can share them with you soon. 🙂

Advertisement

Last Minute Finishing Touches

1It’s the week of Christmas and I’m still tweaking my holiday decorations.  I wanted something above the mantel in the family room and had been looking for a farmhouse style sign that said “There’s no place like home for the holidays” but hadn’t been able to find one locally.  I considered DIY’ing one, but knew that wouldn’t happen with my current to-do lists.  So I came up with a quick DIY alternative using items I already had and a free printable.

I dug out this large classic frame I’ve used on the mantel several times before including St. Patrick’s and Halloween.  I filled it with some light colored burlap material from my fabric stash and used the cardboard baffle inside to keep the fabric tight.

bcOnce it was closed up, I turned it over and added a free printable I found online thanks to  fellow blogger Lil Luna to the glass on the front using glue dots.  This made placement much easier than trying to attach the print directly to the fabric and center it in the frame under the glass.

dHere’s how it looked all put together.  Sorry for the late night photos, but daylight is a rare thing when I’m at home working on projects these days.  Unfortunately this frame has seen better days and no longer has good hanging options on the backside, so we had to get creative when we went to put it on the wall – especially one made of stone.

aThe Hubs and I came up with a solution using more items we had on hand and now it completes the fireplace wall – just in time for Christmas!

eAnd while we’re talking Christmas decor, I’ll give you a quick tour around the house of my other displays, since I’ve been meaning to do that with photos I was able to take during our minimal daylight hours.

Next to the fireplace I used my collection of bottle brushes along with another free printable I found on the Little Glass Jar blog.  I flanked everything with two of our favorite lanterns filled with pine cones and mini light strings.  Please overlook the dust I apparently didn’t notice when taking these photos – because it’s so common in our household, hence the name of this blog!

treestrees2In the entry way a lighted garland is the perfect base for several woodland style characters, including this super cute driftwood reindeer I just added to the herd this year!  I haven’t named him yet, so if you have suggestions I’d love to hear them.  I also picked up that cute little stuffed fox this year and think he makes a perfect buddy for Santa – plus he makes a great prop for winter time photos shoots with small children!  He’s in need of a name as well so share those ideas too.

entrydeerfoxOut front there’s a new wreath on the door as Rusty greets visitors.  I usually get a live wreath, but the fundraiser I used to buy from is no longer available through a friend, so decided to go faux and get something I can use for several years.  The classic combination of silver and gold should fit in with any holiday style I try over the coming years.

doorwreathI shared my decor on the dining room buffet on Facebook a while back, including the new wall decor I got this year so be sure to get a peek at that.  On an adjacent wall I placed another new piece, this barn wood angel.  I picked her up at the Colony High School Holiday Bazaar that I attend every year.  She was created by the same vendor who made the barn wood star that hung above our nativity set last year and then became part of the gallery wall.

angelThere are a few other decorations around the house, but they are minimal and most have been shared here on the blog before so I won’t rehash them.   I hope you enjoyed the project and quick holiday tour!

A Quick Revamp

Aloha!  It’s been quiet around the blog the last few weeks because the hubs and I had a little get away to Hawaii!  It was an amazing trip and I’ll be sharing information on all that we did while there in the next few days once I get a chance to sort through the masses of photos I took.  Until then here’s a quick little upcycle project I did a while back and never shared (hence the lack of snow in the before photo!).

I bought this wooden wall art at a furniture store when we first moved to the mainland about three years ago.  I was drawn to the details of the carved wood and always liked it but it blended in with the wall color at the new house too much for my liking so it languished in the “not sure where to put this pile”.Before

A quick coat of chalk spray paint from Michaels and a little distressing took it from pretty basic to awesome rustic!

After

Now it looks like something you’d see on HGTV’s Fixer Upper!  Although I really love the new look, I don’t have a spot for it in the house any more so I’ve got it set aside for the next bazaar and will post it on the local décor buy/sell page in the meantime.  Hopefully someone else will have the perfect home for it and snag it up.

More Gallery Wall Additions

GalleryWallFull

If you’ve been around the blog for a little while you know I’m slowly curating our gallery wall around the TV in the Family Room.  Today I’m sharing a few recent additions I added over the weekend.  The first is a rustic mirror I got from Michaels for free thanks to a great BOGO sale when I purchased the frame for my whale breach collage.  It originally came with a rope hanger attached to the sides, which I liked but not in this grouping.  So I removed it and will re-use it on another project I hope to wrap up this weekend.

MirrorClose

The whitewash creates a weathered patina that immediately drew me to the piece.   I placed the mirror on the side near the fireplace where it can reflect natural light from the windows. I think it also helps balance some of the bigger items in the whole collection and I love that the round shape breaks up all the square corners.

Mirror

I also added this lovely rusty cross votive holder I scored on the local buy/sell page for $15. I had planned to use it on the deck, but didn’t want to constantly be emptying the votive holder when it rains, so I decided to find it a spot inside and am in love with it here. Next to it I added a freebie frame I got on the same Michaels BOGO order. I filled it with a free chalkboard printable I found online. I might change the chalkboard print seasonally, but I like that this one can transition from season to season if I opt not to.  Plus I love the simplicity and thought behind the quote. 🙂

GalleryWallCross

I plan to DIY a long narrow Alaskan themed sign to fill the space just above the cross and chalkboard print and a shorter narrow piece to fill the space between the fireplace switch and the stone, but it might be a while before those happen.  I also have a piece of family history on the hub’s side that I want to add under the metal 7, but need to figure out how to make sure it’s secure because it’s pretty darn heavy.  Stay tuned to see how this space continues to evolve!

GalleryWallFull

Shared on Knick of Time’s Vintage Inspiration Party #209!

Rustic Windmill Becomes Art – The Plan

So it should come as no surprise that I’m a huge fan of the show Fixer Upper, and if you’ve watched it at all you know Joanna Gaines’ penchant for using windmills as wall art. I loved the look and decided to make the same happen in our home. Luckily, we have a fantastic local antique store who does picking trips across Canada and the lower 48. So when they asked if anyone was looking for something in particular I made sure my request got on the list. It must have been fate because they found one in Wisconsin! Unfortunately they didn’t have room to bring it back that trip, but they were able to store it at a partner’s warehouse until the next trip when they cut it in half and wedged it into the trailer with all their other found treasures.

Windmill

Usually they have a big one day sale a few days after they return from each trip where the items they pick are available, but since it was a special pick just for me,  I got to come pick it up as they were unloading.  It’s definitely a large scale piece, measuring about 8′ wide and 4′ tall!  The picture above is a shot of it on our big flatbed trailer in the yard.  It’s so large that I had to take the photo vertically and rotate it because I couldn’t get high enough to fit the whole thing in the frame!  Although they brought back the better half for me, it is missing half of two of the blades, but because they are in the center it doesn’t bother me much.  And how can you not love the amazing patina this thing has?!

WindmillLeaf

The plan is to mount this massive piece of rustic art on the dining room wall, which I’ve cleared in preparation.  The small yellow stickie notes are an approximate of the size for reference.  I’d like to have a white plank wall (another Fixer Upper inspiration) behind it so that has to happen first because I have no intention of making the hubs help me move and mount this mother more than once. He loves me, but I’m not sure he loves me enough for that! 😉  I’m hopeful that we’ll get that done before December so I can clip all the holiday cards we receive to it, but life might get in the way of that, so we’ll see.

1

For now I’ll just envision it there above the buffet, which includes a sneak peek of my fall decorating that I’ll be sharing soon – including a few DIY revamps!  I’ll be sure to share both the plank wall install and final look with the windmill in place, so stay tuned!

An Artful Disguise

As promised, here’s my other bargain art piece from my recent Target shopping spree.  I’ve been looking for a subway art piece for the wall between the entryway and the office for a while now, and actually purchased a canvas from Michaels to create my own.  Luckily, before I got to that little project I spotted this on sale at Target for around $20.  The color was a great contrast to the wall and I love the phrase, but what I really love is how it’s doing double duty!

Canvas

How you ask?  Well it’s hiding the not so lovely thermostat!  How clever is that?!  Of course I can’t take credit for this brilliant idea since I got it from Pinterest, but I’m still super happy with how it turned out.

CanvasOpen

All it took was a couple of hinges and it was bye, bye boring thermostat!  The hubs did notch out the frame of the canvas just a bit so we could center it on the wall, but that was due to my preference on location.

CanvasHinge

This same idea could be used to disguise other wall mounted items like alarm systems or old intercom systems.  Have you decorated around your thermostat or disguised something in your home?  Tell me how with a comment below!

A Tin Crown

I picked up this beautiful tin tile at an antique show soon after we moved into the new house.  Crafted by the same vendor who I got the entry way dresser from, it was a bargain at just $7!  And I knew I wanted to use it in our Master bedroom where it would tie in with the other Moroccan patterns I’d gathered.

TileClose

Unfortunately I couldn’t seem to find the perfect spot for it.  I considered putting it over by the tub, but it felt crowded there.  I was tempted to replace one of the items hanging on either side of our vanity, but the scale was off.  I also considered using it in the bedroom, but that didn’t seem right either.  At one point I even tucked it away in the cabinet planning to use it on the shelves I want the hubs to install above the toilet.  Then I had a ‘light bulb moment’ and realized it would fit perfectly over the top of the shower tile.

I asked the hubs if he thought it would be ok in such as ‘moist’ environment and he gave a green light.  So armed with a hammer, nail and step stool I proceeded to hang my green treasure in the shower.  I’m pleased to say that I’m very happy with how it looks.  The green coordinates with the green in our decorative tile making it seem like it was painted just for that spot!  Maybe I’d go so far as to say it’s the crowning jewel of the shower.. you know, if crown jewels were made of tin! 🙂

Tile

I’ve never hung anything in a shower before (other than a shower curtain), so now I’m curious – has anyone else decorated a shower with art?  If so, leave a comment and tell me about it!