A Little Change in the Guest Room

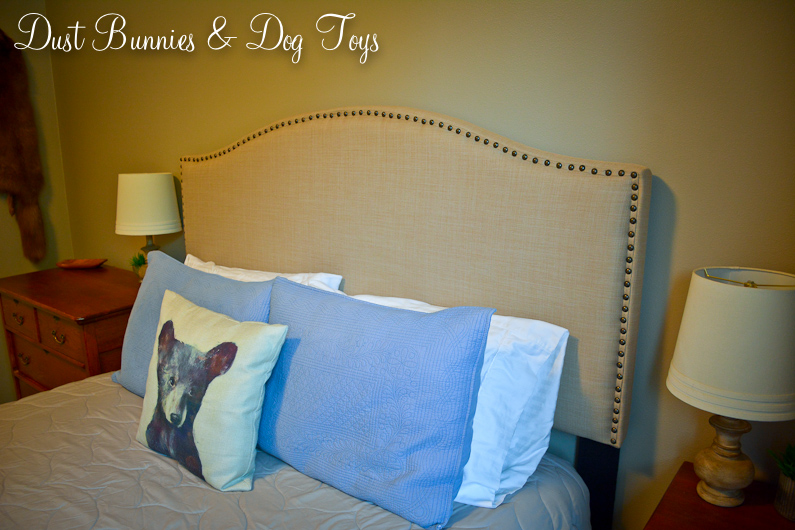
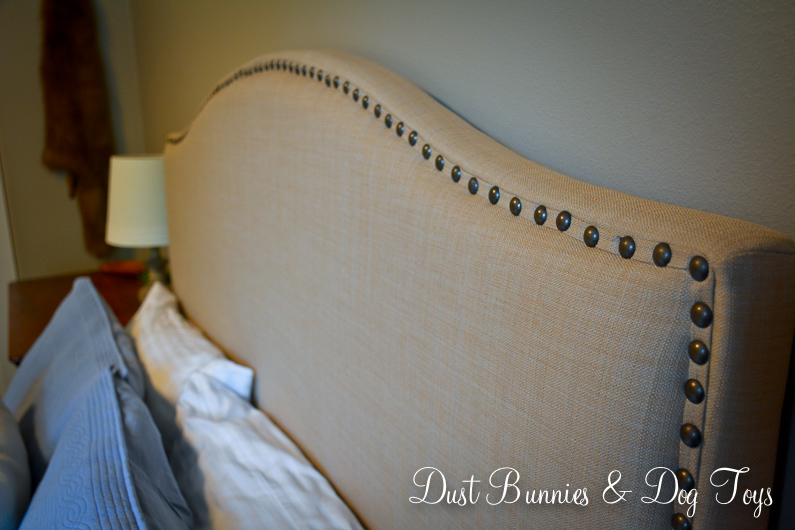
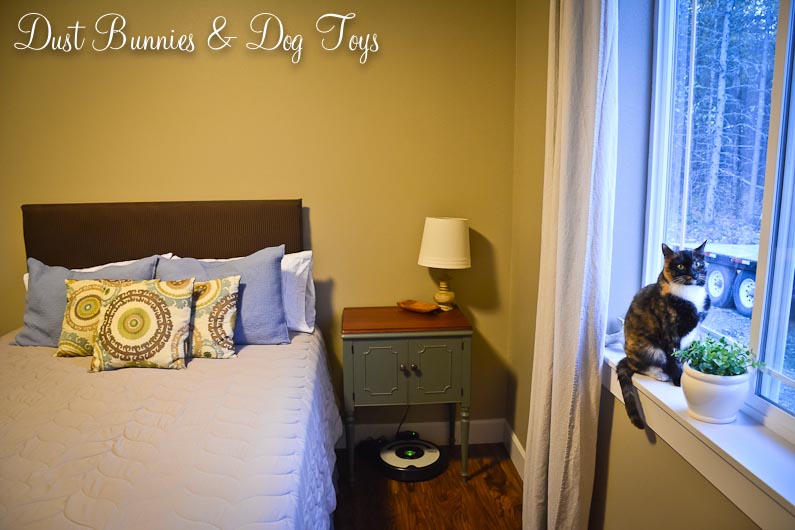
Today I wanted to share a little change I did in the guest room.  The shams we had on the back pillows in this room were on their last legs and desperately needed to be replaced. I wasn’t loving the bedding after we upgraded the headboard and wanted something more modern.

Luckily a friend was making an IKEA run on a trip down south and agreed to pick up a couple items for me, including a duvet set.  Although I didn’t want the duvet itself, the shams were exactly what I’d been looking for to coordinate with the throw pillow we got on our trip to Scotland.

The subtle grey ticking stripes pick up the blues in the new throw pillow and bring just enough pattern to the bedding without being overwhelming.  I also like the combination of the stripes on the throw pillow and the shams.

While I was changing out the shams I decided to swap the throw blanket for a fur one I already had.  It makes the space cozy while we’re still in the grasp of winter.  I also moved the vintage crock from the corner by the closet to the other side to balance out the space a bit more, which allowed me to center the bed on the wall.  I added one of the cute little faux trees I picked up after Christmas to fill the corner and add a bit of greenery.

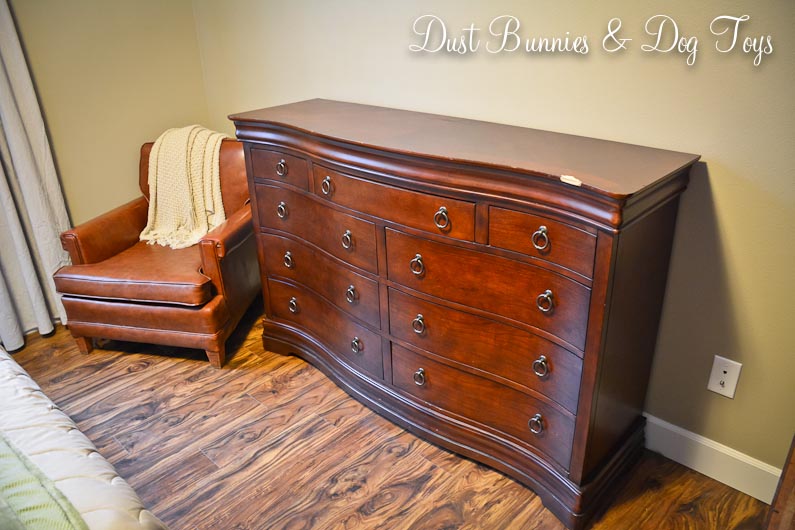
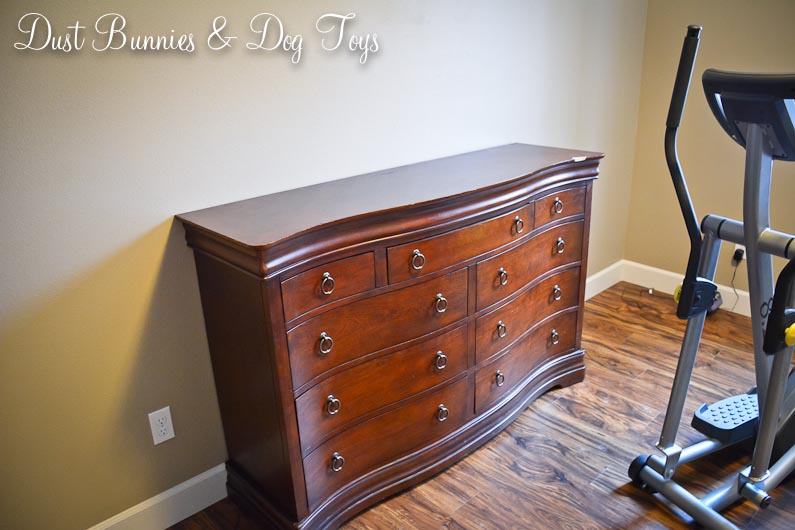
I still need to refinish the dresser, faux shiplap the wall and find art for above the bed.   I tested out the tobacco baskets I planned to relocate here and wasn’t loving them so I’m now thinking about getting one of the big vintage window shapes from Joanna Gaines’ Magnolia line.  But that’s not in the budget right now.  After our recent overnight earthquake I know it has to be something light weight in case it did get shaken off in future quakes so our guests stay safe!  I’d love to hear ideas you might have.

Advertisement

The New Guest Room Headboard


Another quick update we did after our trip to Portland was switching out the guest room headboard.  While the old one the Hubs DIY’ed back when we lived in Kodiak was nice (see it here), I was ready for something a little brighter in this space.  I still wanted something upholstered and had a few earmarked online but they were ranging from $200-600, which was a bit more than I wanted to pay for something that’s only going to see use a few times a year.  Luckily I stumbled across this one at Walmart as part of their Better Homes and Gardens line for $90!

It was only available online but I could do site to store shipping.  Unfortunately they didn’t offer that for Alaska stores so I had it shipped to the store near my Mother-in-Law’s house so we could pick it up while we were visiting back in May.

It’s definitely not perfect.  The nail heads don’t line up quite right in a few spots, but it’s hardly noticeable.  And at a third of the cost of similar ones I was considering I’m ok with the little imperfections.  I plan to sell the old one, which will likely pay for this one, so the change will be low – no cost.

We got it set up just in time for my sister’s visit last month along with the new dresser we added in here.  The two pieces work well together and give the space a calm, simple tone.

Because it’s neutral I can change up the bedding or other furnishings without an issue.  I’ve got plans to add faux shiplap to this wall like we did in the dining room but that’s a project for the spring when it’s still to cold to be outside.  Once we do that I think the headboard will really pop against the white and the space will be even brighter.

Now I just need to get the laundry room sign I want made so I can bring the tobacco baskets currently in it’s spot in here to decorate above the headboard.  Then once I refinish the dresser this room will be about done.. for a while anyway. 🙂

No-Cost Large DIY Tray

5

Here’s another quick project I did as part of my inventory for the holiday bazaar.  This large tray started life as a cabinet drawer.  When we installed the laundry room cabinet we took out the drawer on one side because we needed clearance for the sink drain.  Knowing I could use it for something, I kept it and eventually took the tracks off.  When I did, I immediately thought to make it into a tray.

2

But I was busy and it got set aside for more priority projects.  When it was crunch time to create more inventory for the show I pulled it back out, dug through my stash of supplies and found two handles we had replaced on our desk cabinets.  They were originally gold, but a quick couple coats of ORB gave them more of the farmhouse style I was going for.

3

The hubs helped me attach them, since I’m not good at making things line up.  He also had the brilliant idea to use Q-Tips to paint the screw heads once they were in so they matched the handles’ new paint job!  Have I mentioned recently how much I love that man? 🙂

1

Although it didn’t sell at the bazaar, it’s found a home in our guest room.  It’s just the right size for the bed at 20″ by 20″ and can easily be moved to the hope chest when it’s bedtime.  I plan to stage it with some simple toiletries guests might appreciate when they visit.   I know I’ve seen similar set-ups on blogs I follow so I’ll be looking back to get an idea of what all I should include, but I’d love your suggestions as well.

4

Since I had the handles and spray paint on hand the entire project didn’t cost me a cent.  Functional and free.  It doesn’t get much better than that!

Linking up at: Knik of Time’s Talk of the Town, Tater Tots & Jello’s BFF and Savvy Southern Style’s Wow Us WednesdayStone Gable’s The Scoop and Thrifty Decor Chick’s Before & After Party!

Save

TDC Before and After

A Whale of an Update

7

Although it’s quiet here on the blog, we’ve been slowly completing little projects in-between work, a rush of photography clients and daily life.  One of those projects was creating a collage of a whale breach sequence I shot several years ago while my family was visiting Alaska.  I recently had a client request a framed print showing the sequence of the breach and I liked it so much I decided I needed one for our home.  I found the frame at Michaels and ordered it online for a better price, but it arrived very damaged due to poor packing so I had to wait a few days until I could do an exchange at the local store.

6

Once it was all complete I hung it in the guest room so visitors can enjoy it while staying at our home.  It fit perfectly on the small wall next to the closet, complimenting the fox fur my hubby got long before I came around.  Another item that’s new in this room is the large crock you see in the corner there.  We picked that up as a set of three at an estate sale this summer.  This was the largest of the three.

8

I’ve ‘interviewed’ it in a few spots around the house since buying it but I think I like it here best.  I plan to fill it a large fern – probably a faux version because I’ll never remember to water it in this room!  I still need to figure out a night stand for this side of the bed.  I have a project table in the garage I had planned to use here, but I think it might need more repair than revamp so I’m watching the buy/sell pages for an already finished option instead.

9

Now that we’re starting to get the spare room set up as a foster-child room, I moved Roomba’s dock into the guest room.  He fits perfectly beneath the sewing table nightstand, yet still has room to leave and return to the dock for charging on his own.  Although he’s very visible from this angle you can’t see him from the door, which keeps things looking clean and simple.  You can tell Luna is sooo impressed with my mad skills right? 🙂

10

There are changes coming to the dining room as well, so the lamps that used to live on the buffet needed a new home and I think they look great in here.  I added a little wooden tray I picked up for a few dollars while thrifting earlier this year so guests can keep track of the little items that often get lost when traveling.  I love how it plays off the colors in the lamp and contrasts with the cherry top of the table.

The room is definitely still a work in progress, but it’s starting to look a bit finished now.  I’ve got a few other small projects lined up to share soon, so stay tuned!

A Little Change

Does anyone else feel like we’re barreling through April? I can’t believe we’re half-way through the month already! It’s been another super busy week, but we’re slowly working on a few projects, including finishing up the wall-to-wall desk in the office and creating a tea station in the kitchen. I’ll share those updates soon, but today I thought I’d show you a little change we made in the guest room.

That room was a hot mess while we were installing the closet system. This is what progress looks like during the in-between stages! Just seeing this gives me hives. Luckily, I could close the door and somewhat ignore it until we got things back in order.

GuestRoomMess

Now that the closet is done and my fabric stash is organized, I was ready to rearrange a bit. We finally brought back my family heirloom hope chest last fall when we did our big road trip. I wasn’t sure where we’d use it while we were building but, as the rooms came together I decided it would work best in the guest room. That meant the dresser needed to go elsewhere, so we moved it next door into the spare room, which I hope will one day be a child’s room. Here’s the space with the dresser and then the hope chest.

Dresser

HopeChest

Since the hope chest is smaller and lower it now leaves the whole wall open for a large art piece. I’m contemplating a few ideas and will share some once I narrow it down a bit. I’m also toying with doing a full-length mirror that sits on the floor next to the chest in this awkward space just as you enter the room. I think guests would appreciate having a mirror in the room and it would give me a spot to do outfit pictures when I start doing fashion posts. Another option is to ditch the chair, which looks great but isn’t all that comfortable and put a mirror in the corner.  If I did that I’d probably move the hope chest to the foot of the bed as a bench so there was still a spot to sit.  What do you think?

HopeChest2

I plan to have the chest refinished in a cream color on the base and a dark stain on the top, but that might not happen for a while. In the meantime it’s the perfect place to store all of the extra sheets and blankets. The dresser will also be refinished at some point, but looks good in it’s new home for now. (Please ignore the not-so-lovely elliptical which has since been eliminated.)

DresserSpareRm

Little by little my plans for each space are coming together. I wish we were farther along, but looking back we’ve made pretty good progress in the 15 months we’ve lived here, especially considering we both also work full-time and run a side business! In the end what matters is that it’s home and those I love live there. 🙂