The Keys to Consignment Success

Floor

I’m not one for hosting yard sales – especially since we live in the boonies and no one would find it – and dealing with people on the buy/sell pages can be quite a headache, so when heard about an upcoming consignment sale for women’s and girls’ clothing I figured it was worth a try. I’d recently purged my closet and still had a stack of stuff left from the previous purge so I certainly had plenty to offer. In total I ended up with 115 items!

I registered as a consigner, paid the $10 consignment fee and started entering my items into the online system. Making sure I had the correct size and category for each item was a bit tedious, but it helped when I printed the tags generated by the system and started tagging items since I had several that were similar.

Tags

I rented a tagging gun from the sale’s organizers so I could attach all those tags with the plastic barbs just like the department stores. Although it’s a fairly simple tool I couldn’t quite figure out how to load the barbs. Luckily, a quick online search pulled up a YouTube video that got me rolling. After a few attempts I felt comfortable with the gun and things went pretty quickly.

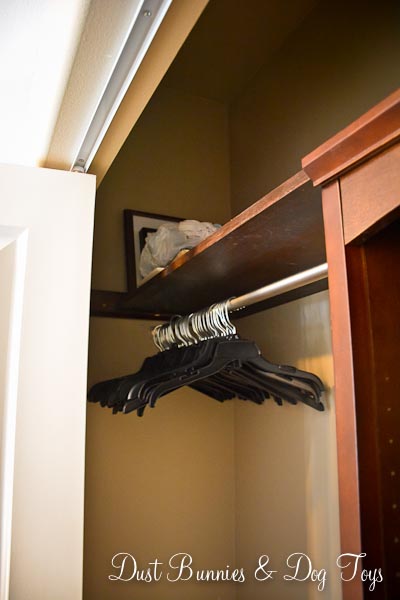
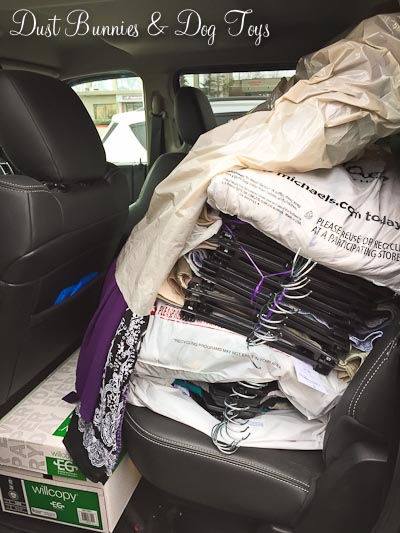
This sale required consigners to provide their own hangers. I certainly wasn’t giving up my nice felt hangers and didn’t want to buy plastic hangers to use, so I was glad to hear other consigners suggest asking local retailers for their extra hangers. I stopped by the Sears where I meet my carpool to see if they could spare some. Apparently they – and many other retailers – just throw hangers away so the cashier was happy to help me load up two large bags from the bins under her register!

Hangers

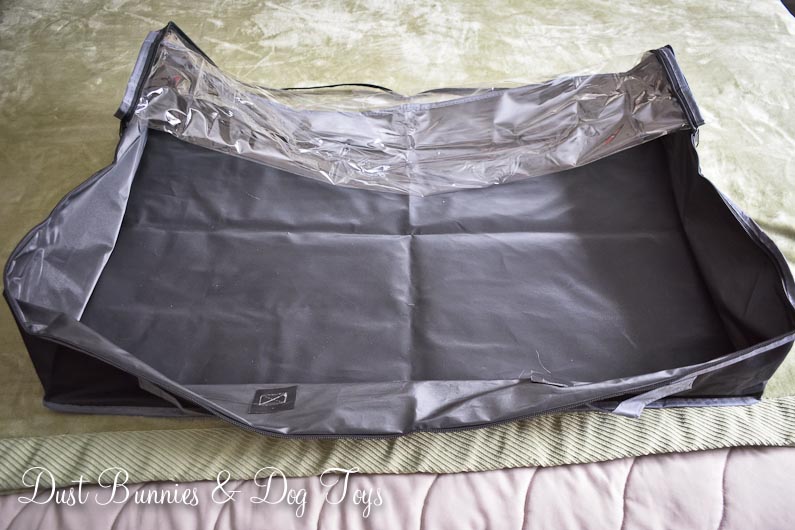
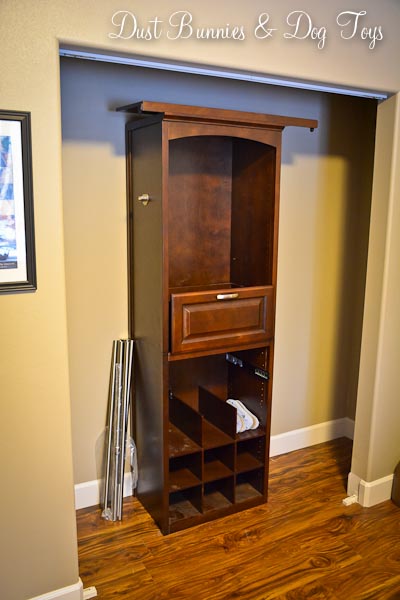
Now that I had everything on hangers and tagged I organized everything by category in the guest closet (which was completed just in time!) and bagged batches of items so they would be easier to transport to the sale. I can’t take credit for this awesome idea, it was another suggestion from the sale’s organizers. But it sure worked well!

Bags

I opted to work a few shifts at the sale so instead of the standard 65%, I got to keep 80% of my sales total. Since the sale was located 45 minutes from my house I decided to work shifts when I already planned to be there such as organizing and putting out items when I dropped off my items, a shift just prior to the half-off presale and a third sorting the left over items when I came to pick up my own items. And because I was out on the floor for all of these shifts I also got to see what was available and set aside a few items I wanted to try.

I ended up buying five items for a whopping total of $14.50 and sold 31 for $148.80! Not bad for items I no longer use! And if I leave all of the items that didn’t sell tagged, I can put them in the fall sale without having to re-enter them. Guess that means part of my guest closet will be in use until then. 🙂

So now that I’ve been both a consigner and a shopper I thought I’d share a few tips on how to make the most of a consignment sale for both roles. Here are my tips for shopping a consignment sale:

  1. Get there early! Sometimes you have to wait in line, but you’ll be able to grab the best stuff at the best prices before they’re gone later in the day
  2. Make a list of items you’re looking to add to your wardrobe so you can keep an eye out for them, but don’t limit yourself to just that (unless you’re shopping on a budget) because you might find a great deal on something you didn’t even consider.
  3. Try on everything before buying. Because this is a consignment sale there are no returns if you change your mind once you get home.
  4. Be open to altering something you try on to make it just right, but be realistic about the options each piece will provide so you don’t end up with something you won’t use.

Here’s a few tips for consigners:

  1. Don’t try to sell items that are obviously out of style, unless your sale is right before Halloween or a community event like 80’s prom!
  2. Consider the season of the sale when selecting items.  Sweaters don’t sell as well at spring sales and shorts aren’t very popular in the fall.
  3. Double check all of your items to make sure there is no damage that might keep it from selling.  And if you find something either mend it or remove it from your sales list.
  4. Price your items fairly.  Here’s a handy chart to help and a few more tips on increasing your sales.
  5. Go for it!  If you’re going to go through the process of registering, prepping and tagging you might as well offer as many items as possible and increase your chances of earning more.

I hope these tips help you find consignment success, either as a shopper or a seller!  If you have additional tips, please share them with a comment below.

Advertisement

Getting My Fabric Stash Organized

Fabric2

When we first moved into the house I decided to store my plentiful fabric stash in the guest room dresser. It seemed like a good plan, but it was difficult to remember what was in each drawer and that sometimes made it hard to find things. Now that my heirloom hope chest came home on our trip last year I’ve decided to move the dresser to the spare room and put the hope chest in its place. Because the dresser is pretty darn heavy, I’d have to empty it before we moved it and that gave me the perfect reason to set up a new system for my stash.

I still wanted to utilize space in the guest room since it doesn’t get a lot of use and I wanted it out of sight yet easily accessible. I decided to use under the bed sealable storage bags and luckily found a pack of two on sale for just a few bucks.

Fabric1

I laid out the first bag on the bed and started adding fabric. Then more…and more…and more! I was amazed at just how much I could fit in one bag!  And because the top was clear I could quickly scan the entire bag to find exactly what I want.

Fabric3

During the process, Luna decided to help sort the remaining fabric whenever a drawer became half full! I told you she loves drawers!

Fabric5

I moved what remained to the second bag and still had empty space, so I added two small containers of items for specific projects and a few circle punches I recently picked up to fill in the gaps. And thanks to the clear top I can still find everything quickly.

Fabric4

I put both bags under the bed behind the dust ruffle so guests will never even know they are there. Although Luna was not too happy that I’ve reduced her hiding space significantly. But since she has plenty of other places to hide out I think she’ll adapt. 🙂

Guest Closet Finished

Closet3 One of my no-spend January projects was supposed to be finishing the guest room closet with a closet kit we’d purchased on the local buy/sell page for $100. Unfortunately, we soon realized that the previous owner wasn’t very adept at assembling furniture so the hubs had to do a little reinforcing and correct some minor issues. Although that didn’t take long, we soon realized the top shelves that came with the kit weren’t quite long enough for the closet we were installing them in. They were supposed to sit on cleats on the wall for support, but ours were just shy of touching the cleat. Closet2 We tried adding L-brackets to the edge of the shelves to secure them into the cleat with screws through the bracket, but that didn’t work so we needed a new plan. Frustrated, we took a break from the project and the closet sat like this for a while. Closet1 After a few days, the hubs suggested we buy a full length piece of wood and stain it to match. That made sense to me and since no-spend January was over by this point, we purchased a board and used some stain we already had to make it match. Once we had the shelf in we added the hanging rods, adjustable shelf inside the cubby and the drawer. I thought about using the unusable top shelves for additional shelves inside the cubby, but we’d cut them down to be narrower so we could still access the space above from the door of the closet so they no longer fit the peg spacing. I’m toying with another idea that they might work for in another room, so I’ve just set them to the side for now. Finally the hubs reinstalled the closet doors, which had been removed to make room for us to work during the project. Closet6 Now that everything was done, I did a little organizing on the top shelf. I arranged some finished craft projects in one corner and a couple bags of batting that were too big to store elsewhere in the other corner. I love that they are out of sight, yet easily accessible when needed. Closet5 Closet4 I also kept a stash of hangers left over from my recent consignment sale (post coming soon) and a few pairs of slippers so future guests can keep their tootsies cozy and their clothes in order. Hooray for one more project crossed off the ever-growing list!

Cabinet Top Décor – The Final Lineup

Cabinets1

Some time back I shared a little update on my cabinet top décor and mentioned I still wasn’t crazy about it as a whole so I’d live with it for a while. I did just that and have finally found the perfect lineup. The previous arrangement seemed a bit crowded, so I removed the green glass jar, which now holds a candle in my holiday décor arrangements.

Cabinets5

Next I swapped out the pitcher for a smaller wooden basket, which better fits the plant and gives more variety in height.

Cabinets2

Then I rearranged the area above the fridge to add my bargain yellow vase, which gives just enough color to that end of the space. I did leave a spot for Luna to sit if she chooses (I figured that was a better option than her trying to rearrange and possibly breaking something), but I haven’t seen her up there since I changed things up.

Cabinets3

The shorter space on the other cabinets remained the same, but here’s an updated picture showing the glass peppers I added last time.

Cabinets4

So there’s the final lineup – at least for the foreseeable future. 🙂 What do you think?

My Fancy New Candles

I love candles. They create instant ambience, making a room feel cozy and romantic. But they can also be dangerous. Especially in the hands of someone like me who tends to forget about them. Long ago the decision was made that real flame candles aren’t allowed in our home because I’d left them burning overnight or unattended too many times and it was a safety issue.

I switched to using wax melts with lighted warmers, which doubled as nightlights around our house. It was a good compromise, but I still missed the flickering glow of candles in my décor so I purchased both votive and pillar sized flameless candles. Although they were safe and filled the need, it just wasn’t the same as a real flame. But safety was the priority so I accepted the trade-off and moved on.

Then last year a family friend introduced me to Luminara at a dinner party while we were visiting Portland. Thanks to new patented technology, this company had created a real flame-effect candle! It was so convincing that I would have never guessed it wasn’t real if she hadn’t told me. They were seriously amazing. Click here to see how real they look!

As soon as we got home I researched them online and soon discovered they were also insanely expensive and not readily available at local retailers. So I continued using my ho-hum flameless candles – begrudgingly. That is until I spotted them in the Bed Bath & Beyond flyer recently! They were still a little pricey at $30-$35 each, but with a coupon I could get them for around $25 each which is a little more reasonable. I decided to buy one each pay period so I could spread out the cost (and use coupons for each) so it’s not a huge hit to my budget all at once. Kohls also carries them, but only online.

So far I’ve bought two and I’m so happy with them. Just look at the difference. Here’s my old flameless candle in my Valentine’s Day centerpiece and here’s the same centerpiece with the new Luminara candle for St. Patty’s Day.

ValTable2

StPatTable15

I chose to use the built-in self-timer which comes on at the same time every day and turns off automatically 5 hours later. Now that’s safety and convenience! It’s so relaxing to come home and see flickering candles. And I can go to bed with them on without a care. It’s perfect. They also offer a remote which can be purchased separately. I’ll use that option when I replace the candles around the tub in our master bathroom since I won’t use or see those as much.

There is one downside to these new beauties. They are wider than my previous flameless candles, so they don’t fit in everything the old candles do. I’d originally planned to sell all my old candles once I replaced them, but I might have to keep a few for pieces like this that the Luminara pillars won’t fit. They do make a smaller votive size Luminara, but it isn’t available locally yet so I’m on the hunt to find an online retailer who not only has them but won’t charge twice the item price for shipping to Alaska.  So if anyone needs an idea for my birthday – there you go! 🙂

Shifting Schedules

The hubs recently started a new job with a schedule that coordinates with mine, except it starts 2 hours earlier because he has a 4 day work week. We thought he might be able to find a share-ride option for the mornings and then ride home with me in the afternoons, but there haven’t been any available spots on the vans that go to his shop. So I suggested an alternate arrangement – I’d come in earlier and drop him off before heading to my office for some quite personal time.

Although this requires getting up an hour and a half earlier than I normally would, which is a huge feat for a night owl like me, it’s working out pretty well. Having almost 2 hours of uninterrupted time to write (hence the increase in blog posts) or complete tasks each morning has been far more productive than working on the same things in the evenings at home. Plus, because I’ve already accomplished several tasks before starting my workday, I’m much less stressed throughout the day and can now relax when I get home in the evenings. I also feel more awake when the work day starts, which makes me more productive at work as well.

At first, it was difficult to resist going into ‘work’ mode when I arrive at the office. Because of that, I’ve set a strict rule of not logging into my work email or opening any work files until it’s time to start working. That way I’m not tempted to “just answer that quick email” which leads to another and another and so on.

Another bonus of my earlier arrival is avoiding the morning crowd on the highway. Before the new schedule I would typically arrive at work 30 minutes early because the traffic wasn’t as congested if I left home just a little earlier than I HAD to and it allowed flexibility if there was congestion. And since the hubs drives most mornings it gives me even more time to catch up on email or check things online with my phone. But mostly I enjoy having an extra two hours of time to chat with the hubs, even if it’s just talking through the day-to-day stuff.

Granted, I admit I’m still trying to get my internal clock adjusted and it is a struggle maintaining an appropriate bedtime, but overall I’m really happy I made the change. In fact, when circumstances don’t allow us to drive together I still maintain the schedule and work on things at home instead. You might recall I made a similar schedule change about this time last year and it worked for a while, but without the added motivation of carpooling and saving money it didn’t last more than a month or two. This time I think I’ll stick with it because it works well for both of us, I’m more relaxed overall and my thrifty side is all about spending less on gas. And that’s worth overcoming the desire to ignore the alarm and snuggle back under the covers.

Driveway Monitor

With a driveway that is over 300’ feet long it’s a little difficult to hear someone pulling up to our house until they are literally at our door. Even in the boonies we sometimes get unexpected visits, so it’s nice to know when someone is on our property for safety reasons.

To solve this problem, the hubs purchased a wireless battery operated system with a range of 300-400 feet. He attached the sensor to a tree along the driveway. Unless you’re looking for it, you don’t even notice it when you drive by.

MonitorTree

The base unit sits in the office window, where it gets a good signal from the sensor and can be heard throughout the house.

MonitorWindow

Now that we’ve had the system for a while, the dogs have figured out that when they hear the chime it means someone is coming, which prompts them to either stand guard at the front door or dash out the doggie door to investigate from the fence line. Needless to say, if someone ever planned to sneak up to our house and break in they’ve got a crowd of fur expecting them by the time they get to the porch!

The one downside to the system is that it just senses movement, but can’t distinguish what kind of movement it is. So when the neighborhood moose wander through the yard they sometimes come close enough to trip the sensor. Guess that’s just life in Alaska.

Blarney and Green

Happy St. Patrick’s Day! Although neither of us have Irish heritage (that we know about anyway) and only claim to speak fluent blarney, I do enjoy decorating a bit for this fun holiday. I typically keep things simple with vignettes of green and gold. Here’s a quick tour of my St. Patty’s Day décor.  In the entry way the dresser holds an Irish blessing I found online last year and a few touches of green and gold in the form of candles and glass.

StPatEntry15

StPatEntry15A

StPatEntry15B My holiday tree got a few shamrocks and a gold garland with a little leprechaun hiding amongst them.

StPatEntryTree15 And my simple St. Patrick’s wall hanging was placed between the closets.

StPatEntryWall15

In the family room the media cabinet also got some green and gold vignettes, including more candles (notice one of my DIY pedestals?!) and a cute little gold shamrock print I found online.

StPatMediaCab15

StPatMediaCab15A

StPatMediaCab15B

The mantel holds a large print and my DIY button rainbow art from a few years back, with – you guessed it – more green and gold.

StPatMantel15

I paired a gold votive with my thrifted white crock filled with shamrocks on the table beside my chair. To finish it off I added our gold-tinged monogram.

StPatSideTable15

The pillow covers I picked up around Christmas time were perfect for my chair and the ottoman near the entryway.

StPatChair15 StPatBench15

The dining room got a simple centerpiece of split pea and a flameless candle, while the buffet in the background holds a cloche of my DIY blarney stone and gold coins.

StPatTable15 StPatBuffet15

Apparently the hubs agrees with my choice of print for the mantel because I found this little addition the other day.  Guess you don’t have to be Irish to be lucky! 🙂

StPatNote15

Our Luna-tic

Luna Hi lovelies. I took a little break from blogging last week to get caught up on that crazy thing called life. Things have been a little overwhelming recently and I just needed some down time to tie up those pesky loose ends that seem to multiply just when things are busiest. But now that I’m back, I thought I’d share a little about our kitty, Miss Luna. She’s had cameo appearances in several posts since we brought her into the family just over a year ago, but I haven’t posted much about her personally during that time. So here’s her moment in the spotlight. Although she wasn’t much pleased to have doggie siblings when she first came home, she’s adapted and certainly holds her own. These days she tolerates standard doggie behavior such as sniffing rears and barking so long as it doesn’t interfere with her kitty duties of monitoring the bird and squirrel population in the backyard and nap time. If you follow the DB&DT Facebook page you’ve seen this photo of her and Bacardi enjoying each other’s company – within limits. 2ofakind While she’s certainly lived up to the nickname “Princess” as most cats do, she’s also had plenty of “Luna-tic” moments such as darting through the house at full speed while the rest of us are snuggling on the couch watching TV or attacking a small remnant of a dog toy as if it were the most interesting prey you’d ever seen. Recently, she’s been climbing the ladder that is sitting in the office for an in-progress project I’ll be sharing in the near future, but she makes her way to the top via the wrong side of the ladder which makes for some hysterical stretching techniques. Occasionally I can document these odd behaviors with photos on my phone such as when she decided to help with the laundry, or when she explored every inch of the garage and the kitchen or when she inspected the kitchen faucet. Sometimes I’m lucky enough to have my real camera ready for these shenanigans like when she attempted to climb the columns on the front porch. Not sure where she thought she was going, but she was pretty determined to get there. Post Plus she’s fascinated with drawers. If you leave a drawer open in our home you’re bound to have a cat in it within minutes. She’s even tried to open drawers herself by pawing at them! But one of her all-time favorite things is plastic bags. Every time I switch out the holiday décor and have a pile of bags on the floor, there’s bound to be a cat in it. BagPile Unfortunately the bags don’t seem to love her back quite as much. She recently took a tumble off the bed when she decided to sneak into an online order shipment bag I had just emptied and we’ve found her in this situation twice now.  The look of embarrassment on her face is priceless! Bag She certainly is a curious kitty, but she’s smart too which keeps her from using up those extra lives in pursuit of adventures. I’m so happy to have her as part of our family and I look forward to many more “Luna-tic” moments in the years to come. 🙂

My Pants Crisis

In the midst of No Spend January my fur babies decided I needed a little extra drama in my life, so they pulled two of my dress pants from the hamper and ‘restyled’ them with huge holes. Yeah…. Let’s just say they’d be considered indecent exposure, especially in a corporate office!

Two may not seem like a huge deal, but because I’d been losing weight I was down to a handful of pants that still fit at the time. So my little problem became a mini-crisis. As an event planner, I am usually on the go at work and don’t often wear dresses or skirts because they just aren’t suitable for what I’m doing most days. Thus, having multiple pants options is a must and now that I no longer had enough to rotate through each week it became something I actually NEEDED, although I hadn’t planned on clothes shopping for the month.

I hit a few thrift stores and consignment shops in the hopes that I’d find the ever elusive style that fits my long legs and curves – in the right size, but that didn’t happen and I didn’t have time to keep searching.   Luckily, retailers were gearing up for the Martin Luther King, Jr. Day sales so I ordered several pants in different styles and sizes from Macy’s. Although the total price tag was a bit hefty even with the sales, I figured whatever didn’t fit would be returned – keeping me on par for No Spend January. Unfortunately, NONE of them fit and I had to return the entire order!  Although that meant I still fit within No-Spend January’s rules I still needed pants.

By this point I was desperate. That’s when I decided to try The Limited. I’d never ordered from them before, but had heard about them on several fashion blogs so I figured it was worth a try. I placed an order for 11 pairs of pants in various sizes and cuts so I could see what worked for me and what didn’t. I ended up keeping two of the 11 pairs which thankfully put me back in balance for my weekly rotation.

Because I’d placed such a large order I received a sizeable amount of “virtual dollars” to use later in February. Now that I knew what style I liked and size fit me, I used those dollars along with the President’s Day sale to purchase another round of 10 pants. This time I kept all but one pair, giving me a whole new arsenal of pants for my wardrobe!

I’m still losing weight, so eventually I’ll have to get most of them taken in, but it was worth it to have the pants crisis abated. I’m still on the hunt for a few additional colors since several of the ones I kept ranged from gold to khaki, so I might pick up a few more with the coupon included in the recent shipment. And since I just purged my closet in preparation for a big consignment sale later this month, I’ll have a few dollars to reinvest!

Hopefully, I’ll find time to start sharing some of my outfits soon so you can see all these new duds in action! 🙂