Adding Function to the Laundry Room

Today I’m sharing a quick addition I made to the laundry room.  Now that we’ve got the counter top finished and the sink operational I found that we needed a spot for a hand towel to dry your hands.  I’d been eyeing this vintage industrial style shelf and towel bar for a while so when I spotted it for a good price I ordered it quickly, figuring it would either work in here or the guest bathroom.  Due to shipping costs I had to have it sent to my Mother-in-Law’s house and wait to pick it up until our trip earlier this summer.

This spot has had several variations since we moved in.  First I had some DIY decor here, then there was a rustic laundry sign, but I decided to sell that and have a different one made for the wall above the board and batten on the other side of the room where the tobacco baskets are currently.  Those will move to the guest room above the new headboard.  I plan on making that change this winter, when there’s not so much going on in the yard.

The metal look ties in perfectly with the DIY drying rack the Hubs built me above the window.  I styled it with one of my faux succulent planters and a blue mason jar that I’ll be filling with vintage clothespins.  I may add a few other little things, but will let those “find” me in the coming months.  You can’t tell from this angle but the bottom of the shelf is an open style wire so whatever I use on it will have to be big enough that it does’t fall through.

As you can see from the winkles in the towel, it’s been getting plenty of use and it’s just the right size for the wall without blocking my DIY soap pump in the corner.  One more project done, and you know functional decor is my favorite kind! 🙂

Advertisement

The Finished Laundry Counter

I’m so giddy to be able to share this finished project with you all!  Remember way back to No-Spend January of 2015 when we installed this cabinet where the plastic sink used to be?  We’ve been living with a plywood top and no faucet for the sink since then which you’ve seen in a few posts like this.  It functioned for what we needed and there were higher priorities to tackle but it secretly drove me NUTS.

So why did this project take so long to finish?  We had a remnant piece of granite to match the kitchen and bathrooms but needed it cut to size and finished with the sink opening.  I’d attempted to barter the service with no luck and every quote we had gotten was insanely high – like in the range of you’d think they were selling us brand new marble counter tops rather than finishing material we provided.  So the hunt continued.  Until the Hubs found a vendor who was willing to cut the granite using a template we provided for just a couple hundred dollars!

He used a gator board political sign that had been left out on the side of the road long after the elections to trace the plywood top.  I was pretty proud of him for being genius enough to recycle material and help keep the roads clean!   Once he had the template traced he cut it down and marked where the sink would be.  The vendor said he did a great job and made it easy for them to layout the cuts.  They also complimented him on the A-Frame he built to transport the slab to them and the finished counter home.  Have I mentioned how I love having a spouse who can get things done?! 🙂

Miss Luna was not to pleased to have “her” space disturbed while we were installing the finished top, but she seems pretty ok with it now.  Especially since it gives her another inch or two above her doggie siblings.  Here, she does an excellent job of showing just how deep that sink really is!

The finished top makes all of my existing decor and laundry products look even better.  On one side is the vintage iron I picked up at the antique store and our DIY laundry soap container.  On the other is the last of our mason jar soap pumps – which I’ve been saving for this spot – and a simple little faux succulent planter from my recent spring project for a bit of greenery.

We did have to replace the faucet because we discovered that the one we’d saved from the original plastic sink didn’t have long enough posts to reach through the granite and the pull out nozzle required an extra line that we didn’t have space for.  So the Hubs picked up a bargain faucet for around $50 and got that installed quickly.  I took all of these pics last weekend with the old faucet standing in for the photo op, but the new one looks very similar.

Since we did the install ourselves, our total cost with the new faucet came in around $400, which was 100% worth it!  I still haven’t really used the sink much since I’m still getting used to having a working faucet in this spot, but I really love having the option and seeing this clean, finished space each day when we come home.

New Décor in the Laundry Room

4

Is anyone else out there a serial fluffer when it comes to laundry? The hubs knows full well that just about every load that goes in the dryer will be fluffed at least once before I break down and pull it out to fold or put away. I’d seen several signs that said “Wash, Dry, Fold, Repeat” but none that included Fluff in the process so I decided I needed one for our laundry room. I originally planned to DIY this but when I discovered Rustic Champagne at the Alaska Chicks Vintage Market I decided to have her create one for me instead.

1

I originally planned to hang the sign above the door to the garage but while measuring the space for it I noticed it would work better where the metal safety pin art I had previously DIY’ed was, so I opted to sell those and replace them with the sign. Luckily, the sale of the pins and another item paid for the new sign, so I was ok with bending the rules of No-Spend April since it worked out to be trading two things for one better one. Plus I started arranging the order back in March so it doesn’t count *cough*cough*.

It will look even better once we get the countertop installed on the cabinets in here, but that will definitely have to wait until No-Spend April is over and based on the quote I got recently it will probably be a while before we commit to that project.

2

I love the rustic finish and the white background lightens up the space by reflecting the light from the window, which the safety pins never did. Plus the simple design keeps it from feeling too fussy or overwhelming the space.

3

And if you look closely, you’ll notice a little clue about the next project I’ll be sharing just outside the window. It’s been a big one, but definitely brought a vast improvement thanks to a lot of hard work by the hubs!  Check back soon to find out what it is!

Board & Batten in the Laundry Room

bWhile we were putting up the shiplap wall in the dining room, we also installed a board and batten treatment in the laundry room.  The last time you guys saw the laundry room it was looking like this.  We put up this small coat rack shortly after moving in so our coats didn’t end up draped across the dining room table chairs and island bar stools.  It was functional, but the short width of the rack meant things bulked up in the middle and started to intrude on the walkway.

3

Here’s what it looks like now.  With spaced out hooks it’s easier to organize the coats we use daily and they lay flatter against the wall making the space less crowded.

a

The process to get this look was minimal and fairly low cost.  We already had the paint on hand, the hooks were purchased with a coupon and the boards were cut down from a single sheet of plywood.  We started by nailing up a header board at the same height as the old coat rack.

1

Next we added the vertical boards to create the panels.  We had to piece together a few of the verticals, but since those spots end up behind the door I wasn’t too concerned about it.  We also removed the handle pad on the wall since one of the vertical boards now runs over part of where it was.

2

We spackled the nail holes and joints between boards so we’d have a smooth surface to paint.

3

It took several coats of paint to get everything covered, and I eventually painted the one trim section of the door casing on either side of the room so it tied in with the new wall treatment.

4

The final step was adding the hooks.  I found these on Amazon after seeing them used in a bathroom revamp on one of my favorite blogs.  They didn’t come with screws so the hubs picked up some at the hardware store that were close to the same finish.

c

I could have staged the space to make it look even more amazing, but I decided to keep it real for you.  The fact that the coats are hung and out of the way is enough to make me happy!

a

I plan to add some sort of artwork or décor on the wall above the top board, but I’ll hold out until I find, or DIY, the perfect pieces. Who knows, maybe I’ll find that this weekend at the local Vintage Market!  But even if I don’t it will be fun to look!  🙂

TDC Before and After

DIY Industrial Vintage Laundry Dry Rack

2Today I’m sharing another industrial pipe project the hubs recently did for me – a dry rack in the laundry room.  I often have sweaters and tops that need to be dried flat, but since I don’t have a space to do that I usually hang those items on a folding dry rack over a vent in the adjacent dining room.  Unfortunately the hubs like his jeans to air dry and are often occupying the folding rack when I need to dry sweaters so my solution was a permanent rack in the laundry room over the sink.

1I originally asked for a bar straight across but the hubs determined that in order to get the best stability we’d have to place the bar higher than I originally thought so he created a small drop down in the design to compensate for the higher spot.  Luckily, I’m pretty tall and can reach the hanger up to catch the rod with the hook easily, so the height is no problem for me.

3

As you can see I’ve already put it to good use. It does infringe on Luna’s eating space a bit, but I think she secretly likes hiding behind the clothes when the rack has several items on it and as long as she can see out the window she’s a happy camper and I’m happy to have a space that functions and looks awesome. Thanks honey! 🙂

Shared on Knick of Time’s Vintage Inspiration Party!

Ballard Knock-Off Laundry Room Decor

http://tatertotsandjello.com/2015/10/link-party-palooza-and-two-project-bag-giveaways.htmlI’ve slowly been re-decorating the laundry room to have more of a rustic/industrial/farm house feel to coordinate with the decor around rest of the house.  I loved these over-sized vintage looking safety pins from Ballard Designs, but I wasn’t liking the price and was pretty sure shipping to Alaska would only make me like it less.  So when I saw some similar pieces on the local buy sell page for $10 each I decided to DIY myself a set.  Here’s what they looked like seconds before their makeover began.

PinsBeforeAnd here’s what they look like now!  I put them on the wall where I’d recently had the metal organizer we got on our recent trip down south.  We hadn’t been using it at all so it didn’t make sense to keep it there.  I’ve stashed it away for now since I really liked it and might find another spot for it later on.

2I like how the black plays off the other elements in the room, but am considering adding a bit of rusty color or grey with some distressing to create more depth, but haven’t decided yet.  When we get the countertop installed on the cabinet the black in the stone should play off the color well, so I’ll probably hold off until then to make a final decision.  What do you think?  Leave them as is, or add a bit of texture with a second color?

Shared on Tatertots & Jello’s Link Party Palooza.

An Update Underfoot

RugDining

When our old dining room wool rug develed a hole, I began the hunt for a replacement.  I eventually decided to go neutral with a jute fiber rug and found this one at Target.  Although they didn’t sell it at any of our local stores in the right size, I was able to order it online with free shipping and it was delivered right to our door!RugDiningTexture

I’m loving the texture of the new rug and it’s super soft underfoot.  There are little hints of color in the cross fibers, which tie in well with the other colors in our decor.RugDiningSnag

Like any jute rug, it does develop loose ends from time to time, but I just tuck them back into the weave of the fibers.  If that’s not possible, I just trim them down a bit so they aren’t noticeable.
RugLaundry

I also found a matching runner for the laundry room, something I’ve been hunting for – for a very long time!  Luna wasn’t very impressed, since it didn’t involve more food in her dish.

RugFamilyRoom

I also replaced the rug in the Family room with an indoor/outdoor rug I found at Lowes for $70.  Because it has a tighter weave than the rug we had here before, it doesn’t seem to collect as much dirt, which is an improvement for my allergies.  RugFamilyRoomTApparently Tequila approves of this change because she often chooses this spot to nap during the day!  So I guess that means it’s a keeper. 🙂

First Project of No Spend January – A Laundry Room Cabinet!

I’m so excited to share this project with you all because I’ve been dreaming about it since before we moved in!  Our builder provided a basic utility sink in the laundry room which is great for washing large items but didn’t make good use of the space around it so the plan has always been to replace it with a cabinet matching the ones over the washer and dryer. We have a large remnant piece of granite from our kitchen that would create a counter top with a deep sink perfect for pretreating laundry or folding while creating lots of storage underneath for cleaning supplies.  Seeing this every day as I enter or leave the house for the last year seriously made me twitch so I was definitely ready for this project to come to fruition.

1

The plan started to become a reality when I recently found a free cabinet on Craigslist that was the perfect size of the space. Someone was remodeling their bathroom and wanted it gone asap. It needed a replacement door and a paint job but that seemed reasonable for being free so I picked it up and hauled it home.

Before I could start working on rehabbing my freebie cabinet, the hubs told me the backordered Christmas present he got me had finally arrived – two base cabinets matching the upper cabinets already in the laundry room!  Because they weren’t a special order item he didn’t have to pay in advance so if we chose not to get them the store would simply sell them as regular inventory with no penalty to us and use the free cabinet to complete the project. Although the new cabinets were obviously more expensive than it would be to update the free cabinet, time was a critical factor making the decision fairly easy. I also knew we’d I’d be happier in the long run if the cabinets were an exact match rather than just similar since they are so close to each other. And because they were my Christmas present they didn’t technically violate my No Spend January!

So the hubs started removing the utility sink and installing the new cabinets as soon as he got them home. I wanted the kitty litter box to be out of sight (and reach of the dogs) yet easily accessible for cleaning so I’d planned to put it inside the cabinet and cut a hole on the side for Luna to use. We did a test fit to determine where we should put the cat door only to discover that the shelf in the back of the smaller cabinet prevented the litter box from fitting all the way into the space. So the hubs removed it. Our second test fit, sans shelf revealed that there wouldn’t be enough room for her to enter the cabinet and get on top of the litter box.  Kinda made me feel about the same as seeing that little present inside the litter box does…

2

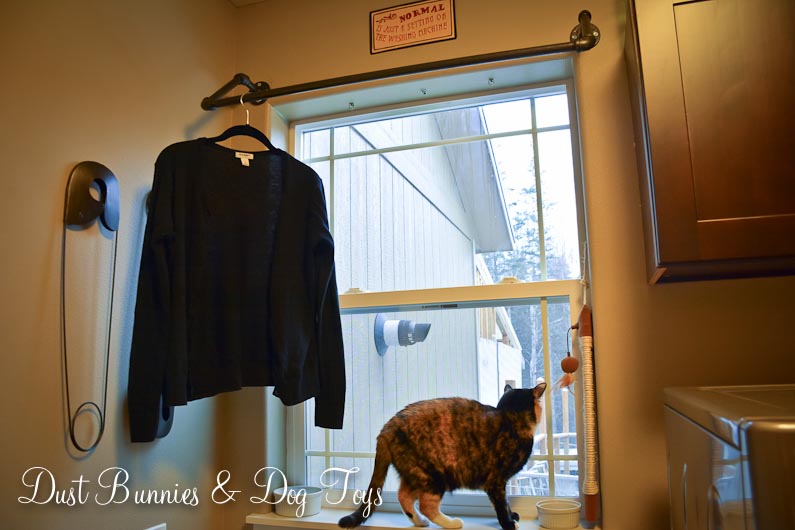
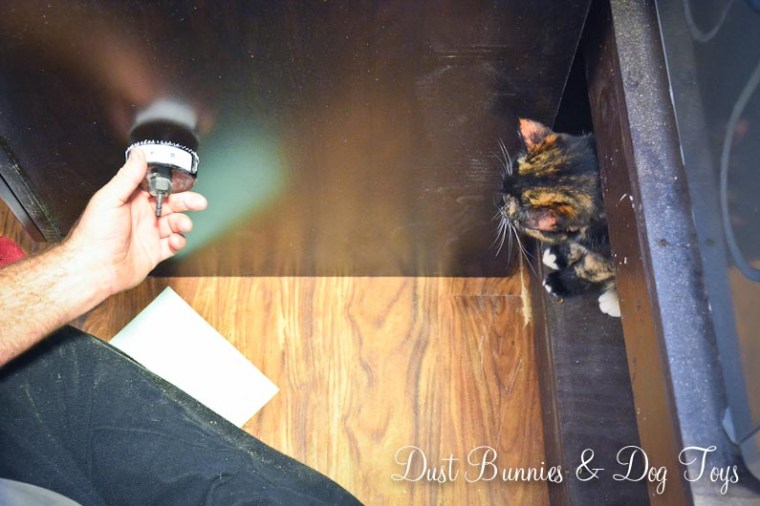
I wasn’t giving up on the plan so I decided the litter box would have to be what changed. We had a small plastic tub that we never use tucked away in the broom closet and I knew it would be the perfect size to fit the space. Since it would now be out of the dogs reach I no longer had to worry about having a box with a top, so problem solved.  Once we’d decided how the litter box would be positioned, the hubs was ready to cut a hole in the side for Luna, who was apparently ready to give her input on the placement of this very important feature.

3

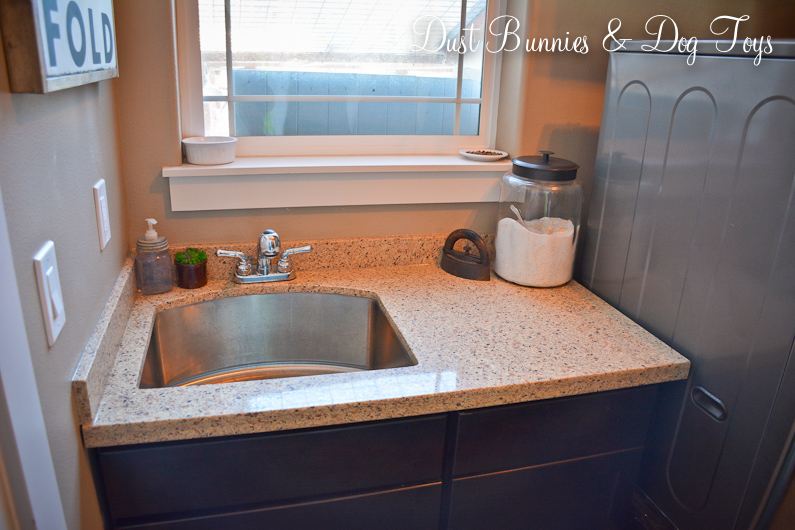
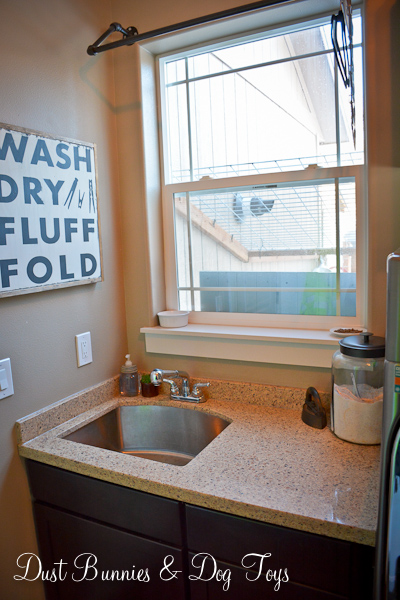
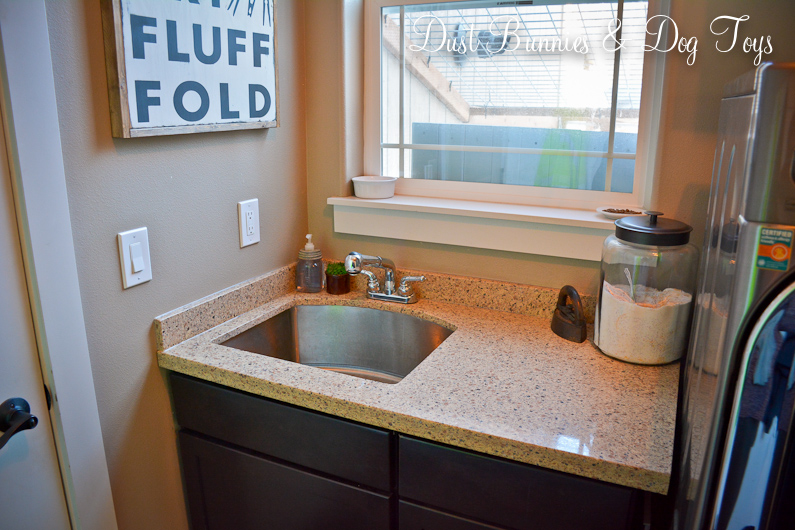
With the litter box situated and the kitty door cut, he moved on to installing the second larger cabinet which will hold the sink. He had to cut a hole for the drain pipe on the side and for the water lines on the floor, but everything fit perfectly. Since we don’t have the countertop and sink ready just yet we covered the top with a board for now and left the shelf in the back of the larger cabinet as is until we see how the P-trap sits. I quickly stashed the cleaning supplies that had lived under the utility sink and in the cabinet above the washer away in the second cabinet and stood back to admire the clean look. Plus I now have a spot to store all my laundry supplies within easy reach of the washer.  (Cue heavenly music!)  It’s so nice I don’t even mind that the cat food storage tin sits in front of the cabinet because it blends in!


4I’m glad we decided to go with the new cabinets because having two cabinets separates Luna’s space from where all the cleaning supplies are stored, which makes storing things she shouldn’t get into easier and keeps kitty litter from migrating into said supplies.  I was tickled to find the litter scoop fit right next to the tub and the current litter rug (which is actually a $2 placemat from Home Goods) filled the rest of the space making the possibility of litter being tracked out of the cabinet pretty slim. Plus the drawer in the top of that cabinet provides additional ‘cat proof’ storage.

5
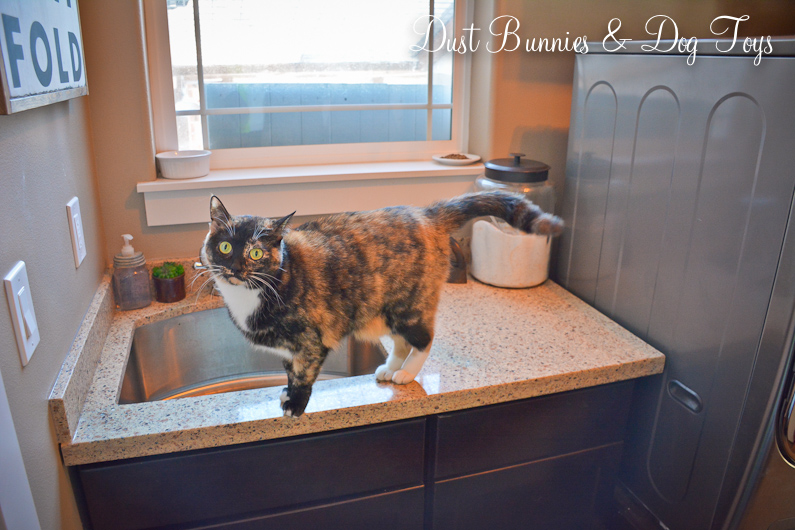
Luna seems to like the new arrangement quite well and took to it without a hitch.  I think she enjoys being able to sneak away to her box without anyone spying on her while she does her “Princess” business. 🙂

Not only does it make our laundry room much more functional it’s improved the traffic flow through the space since this is only access to the garage.  We still need to install the kick panel at the bottom and add some hardware to the drawer and doors but it’s fine as is for now.  I have no idea how much it will cost to have the remnant cut to size and fitted for the sink, but it’s certainly less if we had to purchase the material. The hubs ordered a sink he found on sale at Amazon and it should arrive later this month, which gives us time to get a few quotes and choose a company to do the measure and install – sometime after my No Spend January.  The cherry on top was selling the un-needed freebie cabinet and old litter box for a few bucks to offset the costs and keep clutter at a minimum!  Since I we were on a roll in the laundry room I also tackled labeling my laundry supplies the same day, so watch for a post on that very soon.

Rustic Laundry Room Sign

LaundrySign7

I tackled several projects over the long holiday weekend and this is one of my favorites. When we thought we were being transferred to Florida a few years ago I purchased a couple Uppercase Living vinyl phrases for the house we contracted to rent. But plans changed and we didn’t transfer and the fancy phrases got tucked away for future use. Now that we’re in our own home I’ve been deciding how to use them and knew that the laundry room phrase I had would make a perfect sign for the top of the cabinets in that space.

I found a scrap piece of wood left over from when the hubs took apart the old dog beds. It was destined to be used for this sign because it was the perfect size without any further prep.

LaundrySign1

I painted the perimeter of the board gray since I wanted to rough up the edges and have some color come through.   Then I gave the whole thing a couple coats of white.

LaundrySign2

LaundrySign3

LaundrySign4

Next I randomly sanded the edges until I was happy with the look of the texture. I was pretty pleased with how the grey peeked through.

LaundrySign5

Then came the hard part of prepping the vinyl and making sure I applied it centered and straight! It took a few attempts, but I finally got it right.

LaundrySign6

The hubs helped me add a little more sanding around the lettering and gave the words themselves a light sanding for texture.

I climbed up on the washer and dryer to reach the cabinet top, where I used some shims and a small easel to make it stand just the way I wanted. It ties in with the other fun signs in this room and it fits the space perfectly. Another project done and I couldn’t be happier with the result!

LaundrySign8

Next up for this room is a fold down drying rack and a cabinet for the laundry sink, but those are both projects for the coming months when Alaska’s winter weather traps us indoors.

Moving Right Along…

We went to visit the house again last weekend to find the roof almost complete!  Here’s the latest:

1

2

3The front porch where I’m want a rocking chair in the corner for savoring our slice of mountain view.
4The garage.  Tequila is standing in the doorway to the laundry room.

5The garage from the laundry room doorway.

6The kitchen and great room from just outside the laundry room.

7The kitchen, studio and entry way from just outside the laundry room.

8The dining room and kitchen from the great room.  The laundry room is off to the left.

10   11
The entryway and hall bathroom.

9My studio is taking shape!  EEKK! 🙂

12Guest room #1

13Guest room #2

14The Master Bedroom!

15From the rear, garage side.  I’m thinking my garden will fit nicely in that area behind the garage there!

16The rear, bedroom side.  A little extra cleared room as part of the backyard.

And the best part of the site visit was finding this little gem just a few minutes away from our home!  17SOOO going to be making friends with the owners for access to an AMAZING photo location!  I’m already dreaming up cool ideas for family and senior sessions here!