Tobacco Baskets in the Laundry Room

basketclose

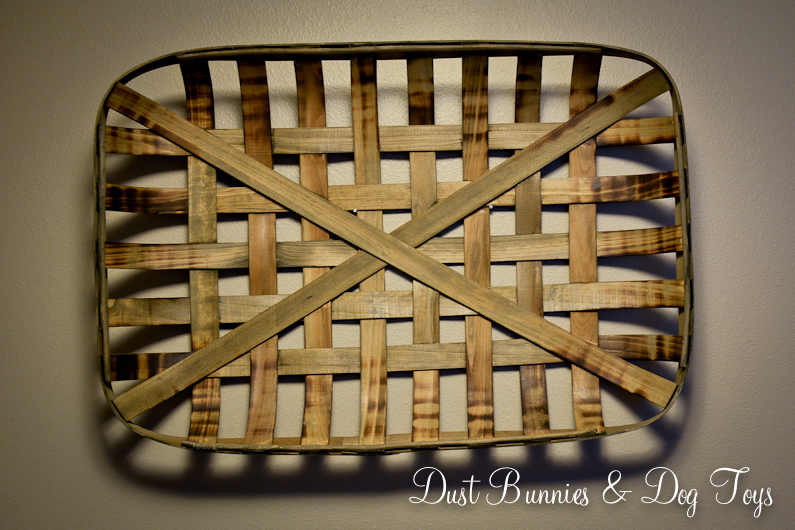
Today I’m sharing another quick project that came together after our trip to Portland in the fall.  I found these amazing reproduction tobacco baskets on a decor website I frequent and purchased two sets of a large size and a small size.  Unfortunately the distributor wouldn’t ship to Alaska, so I had them sent to the Hub’s Mom’s house in Portland knowing we’d be visiting soon.  I told the Hubs that these were part of the “must come back” pile and he made it happen, even with their fragile construction.  Have I mentioned recently how much I love that man? 🙂

basketswide

I’d been on the hunt for tobacco baskets for some time when I found these and knew exactly where I’d use them when I bought them – in the laundry room above the board & batten we installed earlier this year.  My vision of having one large basket in the middle of the wall flanked by the two smaller ones worked out perfectly.

basketsside

It’s just enough to finish out this wall in farmhouse style without being too heavy and it adds a bit more texture to the space.  Plus the fact that I was able to put them up all by myself with a couple of finishing nails made the whole project even simpler.

basketsview

Here’s how things look from the dining room.  I ended up selling the other large basket so my total cost for this project, including shipping to Portland was around $55.  Not bad for three good sized pieces of art.

We also brought back another large piece of art I had to ship to Portland for pick-up.  That piece ended up in the dining room and I’ll be sharing it here soon, so stay tuned for that!

Advertisement

Board & Batten in the Laundry Room

bWhile we were putting up the shiplap wall in the dining room, we also installed a board and batten treatment in the laundry room.  The last time you guys saw the laundry room it was looking like this.  We put up this small coat rack shortly after moving in so our coats didn’t end up draped across the dining room table chairs and island bar stools.  It was functional, but the short width of the rack meant things bulked up in the middle and started to intrude on the walkway.

3

Here’s what it looks like now.  With spaced out hooks it’s easier to organize the coats we use daily and they lay flatter against the wall making the space less crowded.

a

The process to get this look was minimal and fairly low cost.  We already had the paint on hand, the hooks were purchased with a coupon and the boards were cut down from a single sheet of plywood.  We started by nailing up a header board at the same height as the old coat rack.

1

Next we added the vertical boards to create the panels.  We had to piece together a few of the verticals, but since those spots end up behind the door I wasn’t too concerned about it.  We also removed the handle pad on the wall since one of the vertical boards now runs over part of where it was.

2

We spackled the nail holes and joints between boards so we’d have a smooth surface to paint.

3

It took several coats of paint to get everything covered, and I eventually painted the one trim section of the door casing on either side of the room so it tied in with the new wall treatment.

4

The final step was adding the hooks.  I found these on Amazon after seeing them used in a bathroom revamp on one of my favorite blogs.  They didn’t come with screws so the hubs picked up some at the hardware store that were close to the same finish.

c

I could have staged the space to make it look even more amazing, but I decided to keep it real for you.  The fact that the coats are hung and out of the way is enough to make me happy!

a

I plan to add some sort of artwork or décor on the wall above the top board, but I’ll hold out until I find, or DIY, the perfect pieces. Who knows, maybe I’ll find that this weekend at the local Vintage Market!  But even if I don’t it will be fun to look!  🙂

TDC Before and After