DIY Tiki Torches

3

As we continue to spruce up the yard and prepare to enjoy it all summer, keeping the bugs at bay was a top priority.   If you’ve ever visited Alaska you know that our mosquitos are massive and excessively numerous.  We did some DIY tiki torches last year using wine bottles based on this Pinterest idea, but since we wanted them near the deck and didn’t have a spot to hang them from we created some simple stands with a closet rod and tuna cans like this tutorial.

The wine bottles fit perfectly in the tuna can and were certainly pretty, but I was constantly worried that the dogs would break the glass and as the temps cooled in the fall the fluid started to freeze overnight.  We took them down when we closed up the deck for the season, but left a few of the stands out over the winter.  The stands didn’t fair well with the weather and were looking pretty beat up by the time spring rolled around so I knew we needed a better option.

1

That’s when I spotted this idea on Pinterest.  I showed it to the Hubs and he liked it so we picked up the supplies we needed on our next trip to the hardware store and used the handy cutter from our recent Insulator Garden Art project to cut the pipe as needed.  Everything went together very quickly and soon we were ready to add the wicks and fuel.

2

The Hubs did swap out the clamps we’d used to secure them to the deck since the copper pipe was a much smaller diameter than the closet rods had been.  But we were able to reuse the wood blocks he’d attached to the deck to keep them flush with the deck boards.

Clamps

We both like that the slimmer profile of these torches help keep the view open and there’s no glass to worry about.  We have found that the design doesn’t hold much fuel so they do run out every few days, but we keep the tiki fuel on hand in the BBQ table so it’s easy to refill.

5

We placed several around the perimeter of the deck to create a “no-fly” zone for bugs, which seems to work fairly well.  Hint – there’s a sneak peek at two of the projects I’ll be working on finishing up this weekend in the photo below! 🙂

6

What do you think of our new and improved tiki torch design?  They will certainly get plenty of use this weekend!

Our Budget DIY Wedding

Summer has arrived and along with it come wedding season.  Since our wedding was before I started the blog I’ve never shared it here but I thought you’d enjoy seeing our budget-friendly DIY details, so here’s a quick recap.

01-01

We chose a restaurant in Boulder, Colorado as our venue because they had a beautiful garden area where we could host the ceremony.  Rather than spend money on decorations that would only be seen briefly we kept things simple and let the focus be on us and the lush backdrop.

01-01

I ordered bouquets for myself and my sister who was my Matron of Honor from a local grocery store’s floral department and added burlap wraps with ribbon and a rhinestone pin to each.  Since the hubs wore his uniform he didn’t need a boutonniere which was an additional cost savings to not having to buy a suit or tux.  We requested his best man – who was his brother – wear a navy suit, which was readily available in his finance VP wardrobe.  I gave my sister free rein on her dress selection just asking her to pick something navy blue as well, so she found an option she can wear again at a reasonable price.  My mom paid for my dress, which we found at David’s Bridal for around $900.  I had a local seamstress add a purple sash I bought online to the waist to customize it a bit.  I found a rhinestone headband and simple veil online for a good price and bought shoes I could wear again to complete the look.

The reception was held in the restaurant’s upstairs dining room where the tables were arranged in long rows.  We placed a simple burlap runner that my mom made down each and sprinkled river rocks from the dollar store (if I remember correctly we cleaned out their inventory! LOL) between the frosted votives provided by the venue.  I ordered a bunch of daisies from the same vendor we used for the bouquets and snipped the heads off so they could be added in randomly among the rocks and candles.

01-01

01-01
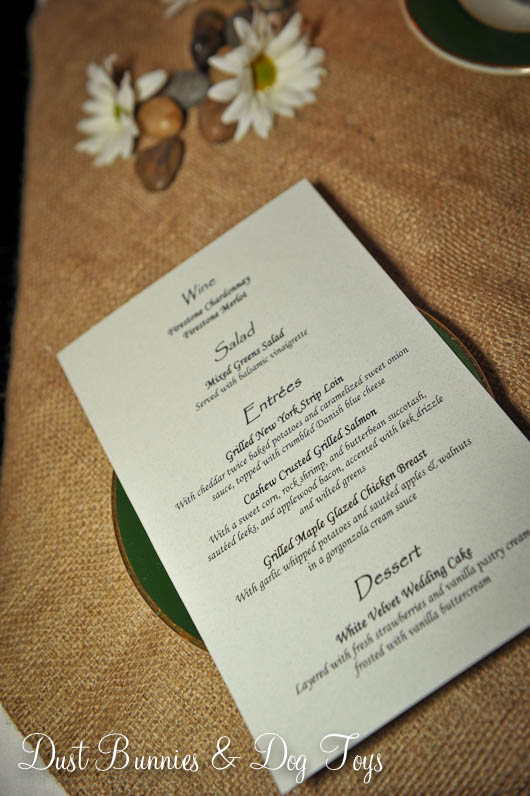
The venue provided printed menus customized for us as part of the package price.  They were simple but worked well with the tone of everything else we had going on.

01-01

Our favors were photo tile coasters I made with modge podge and my own Alaskan photography.  The place cards on top were tied with simple jute twine and the symbols notified the wait staff which entrée each guest had pre-selected.

01-01Our guest book was made of pre-cut card stock in our wedding colors where guests could leave a note and slip it into slots in a scrapbook.  I later added photos of each guest next to their cards to finish the project.  I found the scrapbook on clearance for around $15 and used a coupon to buy the card stock as 12″ x 12″ sheets that I cut down so the total cost with the photo prints came to around $30.

The frame we had nearby held the day’s schedule printed on our wedding stationary – left over stock from a DIY kit I picked up at Michaels with another coupon to make our own invitations and response cards.  The frame later became décor in our home and now holds a recipe for a good marriage which I toasted the hubs with at the reception printed on some left over stationary.

01-01The venue was able to make simple cakes so I requested a two tier Chantilly cake with berries for a garnish, which was DELICIOUS!  (FYI – We’ve since discovered that Whole Foods has a Chantilly cake that is practically identical so we order one whenever we’re in Portland to celebrate.)  The rhinestone monogram topper was another Michaels coupon bargain that ran me around $5.  It later became an ornament for our Christmas tree with the addition of a ribbon hanger so now we can enjoy it every year.

01-01

My mom picked up these little treat bags on clearance and added some of her favorite candies.  We borrowed a basket from the venue and set them out next to the cake with a few extra daisy heads and a votive to dress them up a bit.

01-01

We also saved by not hiring a DJ. Instead we put together a playlist of music for both the ceremony and reception.  A friend helped make sure the right song was selected for the first dance and other important moments, which only took a few moments away from her enjoying the event.

As a photographer myself, I knew the importance of having a visual memory of the details of our wedding, so we made photography a priority with a chunk of the budget (photography credit for all photos to Nicole Nichols Photography).    The other big expense was the food, but it was very good and well worth it.

01-01

I don’t have the exact figures anymore but the final total came to around $8,000 thanks to our budget conscious shopping and DIY choices. That didn’t include the rehearsal dinner which was covered by the hub’s family, but that was something that had been saved and planned for in advance.

I encourage couples planning their wedding to prioritize what they want and compromise on the things that aren’t as important or don’t have as much of a lasting impact. It is possible to have a dream wedding on a budget, it just takes planning and determination. 😉

Vintage Insulator Garden Art

3

While we were in Portland to pick up Brinley we stayed with my mother-in-law and since Mother’s Day was the weekend we were there we decided to create some unique garden art for her gift using some of the vintage glass insulators we got from her sister’s ranch in Colorado.  You might remember some of them from our kitchen island pendant lights.

The entire project was super simple.  We started with various lengths of 1/2″ copper pipe, which the hubs cut right in the store parking lot so it would fit in the truck.  He used this nifty little tool we found in the plumbing section.

1

Back at the house we added some pipe sealant tape to one end so the insulators would have a bit more grip.

2

Next I chose where I wanted each pipe to be in the garden and pushed it down into the soil.  Then you just put an insulator on the top.  Repeat a few more times and you’re done!

6

While the copper and glass combo is quite interesting, we used varying heights on the poles to create additional interest.

5

And here’s the finished project!  Simple and sentimental, that’s my kind of mother’s day gift!  I plan to create a similar display in our garden as well, but have a bit more prep to do before we’re ready for that.

4

And the project took was so easy I had time left over to appreciate the garden including some amazing iris growing nearby!  I was able to bring home a few bulbs from both of these plants so hopefully later this season I’ll have blooms like this in my yard!

Iris

Iris2

Shared on Knick of Time’s Talk of the Town #24.

TDC Before and After

Two Metal Hearts

0I finally found a spot for the metal hearts I picked up at the Alaska Chick’s Vintage Market a few months back!  I toyed with several spots both indoor and outdoor but decided they would work best as a compliment to the flowers in the front beds.

1

3

The rusty metal color plays well off our neutral siding.  And it only took a couple of nails for each to get them to stay just how I wanted.

4

Although the flower bed itself is still in progress, the hearts look great above the blooms and since they sit under the eave of the house they should remain fairly protected from weather.

P

Now anytime someone comes to our front porch they’ll see these rusty hearts.  Plus we can enjoy them every time we’re out on the porch to watch the dogs play.

2

I haven’t decided if I’ll leave them up year round or take them down for winter.  We’ll see how they fair over the summer and make a choice when fall arrives.  Until then I plan to enjoy them regularly! 🙂

DIY Strawberry Gutter Planters in 4 Easy Steps

0Top

The hubs and I tackled several projects over the weekend thanks to some glorious weather.  I’ll be sharing them all in due time, but here’s one of the ones I’m most excited about – our new Gutter Strawberry Planters!

The install was pretty simple, just 4 easy steps:
1.  Install boards across the space to hang the gutters from.

1Board

2.  Hang the gutters from the boards.

2Gutters

3.  Add end caps to each side of the open gutters.

3EndCaps

4.  Fill with dirt and strawberry plants!

4Plant

It took longer to find the materials at the home store than it did to install and finish this project!  The hubs may drill holes in the bottoms of the gutters to allow for drainage, but we’ll see how it goes for a few days before he finalizes that thought.

5Done

I love that they are high enough to be safe from our berry picking dogs and because they are behind the shed they are protected from the moose.  Plus this spot gets full sun for a large chunk of the day which is what makes strawberries sweet.  Hopefully the plants like their new home and start producing sweet success soon!

Save

Getting the Deck Ready for Summer

1

The temperatures are getting warmer and the sun is out longer which means it’s time to get the deck ready for summer!  I switched things up in the yard this year and put the sectional seating elsewhere so we could have a dining table on the deck.  Having one here makes more sense because the grill is nearby and the space is just off the sliding door to the main area of the house where the kitchen is.

I picked up this great table and chairs set on the local buy/sell page for just $100.  I love that the metal design is sturdy and won’t hold water so it should be ready to enjoy all the time.  I originally planned to add cushions to the chairs, but they are surprisingly very comfortable so I just used the throw pillows I already had instead.

The hubs dug out the umbrella and we placed it with the table for extra stability.  It took a tumble off the deck at the end of the season last year which broke the arm the hubs had repaired after we bought it at Goodwill.  This time he used metal tubing and painted it to match so it blends in quite well.

2

You really have to look closely to spot which arm is the one that’s been repaired, so I’d say he did an excellent job!  As an extra precaution we keep the umbrella down when we’re not using it, just in case the winds pick up when we’re not around.

3

Before we got everything set up we also pressure washed the deck (ignore the fact that it’s still sitting off to the side there.) so we had a clean slate to start with.  We’ll be painting the deck at some point this summer since it’s starting to show wear and needs a refresher, but a good wash works for now.  I’ll be adding plants to the various planters you see in the far corner this weekend and tilling the area around the deck to add landscaping there.  Check back next week to see it all come together! 🙂

Welcome Home Brinley!

7

This weekend we brought little Miss Brinley home!  We flew down to Portland to pick her up and bring her back to Alaska and had a great few days away from work and projects to get to know her and bond before introducing her to her siblings.  We were too busy playing and getting to meet her when we first met with her to get pictures but on the ride home she slept in my lap quite content to snuggle.

B

A
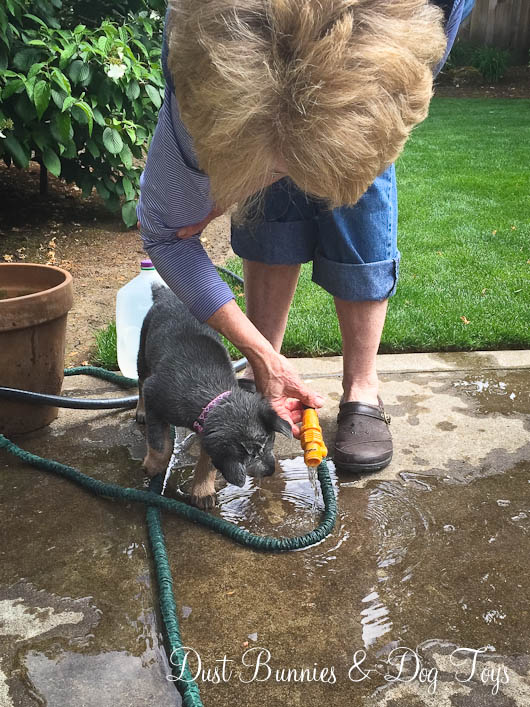
We stopped to pick up puppy food and dinner for us, so while her Daddy and Mimi went into the store I stayed outside to let her stretch and play in the sun with her new toy.

C

And she snuck in a few belly rubs too!

D

Once at Mimi’s house she investigated the basket of toys that belongs to her Aunt Honey.  Honey didn’t seem much amused by this but didn’t voice any objections either.

1

2

After playing for a bit her Daddy shared his water with her for a quick drink and then everyone watched the animals on the TV for a few minutes.

4

5

All that playing made for one tired puppy, so she had to take a little nap.

E

And so did Daddy.  Having a puppy sure wears you out!

SLEEPY2

Daddy took her out to go potty a few times overnight and by morning she had somehow moved into the bed rather than her kennel.

F

The next day was spent exploring Mimi’s garden.  There was lots to see and explore including every inch of the area under the plants and the hose that made fun puddles on the patio!

G

H

Every so often we’d take a break to rest and just enjoy the view.  But soon we’d be on the go again.

6

Eventually she needed a nap to recharge while us humans enjoyed some lunch.

8

After the nap she tried to play with Aunt Honey, but she wasn’t in the mood.

10

So we played with some of Honey’s toys instead.  A family friend came over for dinner with their dog but she was older and didn’t want to play even though Brinley did her best to say she was friendly over and over again.

3

All that excitement sure wore her out so she slept pretty well that night.

SLEEPY

The last day included more exploring in the garden, a couple quick trips in the car and lots of snuggles from Mimi.

9

She loaded up in Aunt Honey’s carrier to make the trip to Alaska and was a hit with everyone who met her, from the ticket counter to security.

I

She was still very tired from the excitement of the day and fought to stay awake, even if that meant just letting her head hang on the opening so she could see what was going on in the terminal.  She eventually fell sound asleep and slept for the majority of the flight home!

J

Since she’s been home she’s getting to know her siblings who were very excited to meet her.  With a moving mass of 4 canines this is the best picture of the interactions I could get thus far!  There have been a few moments of learning who’s alpha and who’s not, but it’s going well.  Sometimes her brother and sister tire of her insistence to play but her new friend Paige – a friend’s dog we are watching – has been exceptionally patient and gentle with her so they have cuddled quite a bit.

K

Her kitty sister has met her briefly, but is in hiding until Paige leaves in a few days.  I’m sure there will be a period of adjustment for both when that happens.  For now, she’s coming to work with me during the week so she can have quick potty breaks and walks every two hours along with a romp at the park during lunch.  There will surely be many more pictures taken in the coming days and weeks so stay tuned for those! 🙂

A Little Pickin’

0

The other day I spotted an ad on the buy/sell page for several old rusty items and decided to spend a few minutes checking out what was available.  One of the items was a set of metal lockers for $10.  Although I don’t really have a spot planned for them I claimed them and made arrangements to pick them up that evening.

2

They turned out to be quite large and heavy.  While moving them we also discovered that there were small drawers inside each!  As the hubs figured out a plan to get them in the truck the property owners told me to look around and see if there was anything else I might want because they were clearing the lot to build and wanted it gone.  Not one to pass up the opportunity for a real life picking moment, I started exploring the piles of stuff tucked between trees and forgotten for years even thought I was still dressed from work at the office.

3

I found these two bed spring frames in an old truck bed and knew they would make awesome trellises for my garden!

5

Then I spotted this large metal tank that had been cut down and immediately fell in love with it.  I’m not sure if it will become garden art or if I’ll make it into a seat for next to the fire pit!

6

I also found some cool bits and pieces of things to fill in the open areas of my gardens including large springs, metal grates for small trellises and a metal twin size headboard that is begging for a second life.  I also spied this amazing jerry can in a pile and snatched it up.  I hunted for a match for it but I couldn’t pass it up.

1

The owner took me up to a conex box he had more stuff stored in and I spotted these larger springs and metal crates.  He made me a deal for on the whole group and I quickly stashed those in the truck too.  At this point the truck was full and it was getting late, so we made arrangements to come back the next day to get the rest of our finds and I quit looking.  Tired, covered in rust and dead leaves we headed home to unload our treasures with smiles.

A

Take a guess at what my amazing haul cost… I paid just $50 for the whole batch!  That’s a whole ‘lotta rusty goodness for a bargain price!  I’m not 100% sure where I’ll use each piece just yet, but now that I have them I’ll find creative uses for them and I’ll be sure to share how I utilize each here on the blog once I do.  🙂

Cluck Club Update

6

There are some new faces in our chicken coop!  We brought home four new hens after seeing an ad on Craigslist from someone who was moving and couldn’t take them.  The ad mentioned that they were already laying eggs so I contacted the poster to find out if they were social.  He responded via text with a photo of his young son holding one of the chickens.  He knew his children would be upset that the chickens were going to a new home but after I described our coop and setup he was sure that they would be happy with us, so we arranged for the hubs and I to stop by after work and pick them up before the weekend.

8

The new ladies have settled in quite well.  We kept them separated from the other chickens the first day and tried to introduce the two groups the next, but it was very clear that the two would not do well together so we found a new home for the previous flock with another local chicken family where they could be free range and happy.

5

We did keep Miss Biscuit who was at the bottom of the pecking order in the last flock as evidenced by her missing feathers and ruffled appearance.  It seems she holds the same position with her new coop mates but after a few squawks and flaps she knows her place and gives them space so everyone seems to be getting along well.  The dogs are loving their new siblings and often go stand at the fence just to watch them.

4

These new ladies are very social and friendly.  They come right up to us and stop and wait to be picked up when we come near them.  They were also in right in the middle of things as we did a little tweaking on the yard this weekend, checking out the ladder, hoping in and out of the hen house as we were working in it and inspecting every little detail.

7

I leveled out the piles of dirt left from the trenches the hubs dug when he installed the chicken yard, so now everything is mostly level and ready for the grass to grow back.  I pulled as much of the rock and gravel as I could out of the dirt while leveling so those piles will be added to the landscaping going in around the back deck.  I also added cinderblocks around the entire perimeter of the yard which will be planted with lobelia soon to attract potential prey for our flock, and just make things a little prettier.

1

The hubs added a few boards over the hen house doors to hold the netting up so it doesn’t catch on the tops of the doors when they open.  It’s not the prettiest setup but it works for now.

2

My favorite new chicken is Charlotte, an Easter Egger who has these fun fluffy feathers around her face and lays greenish blue eggs!  The hubs’ favorite is the black and white chicken, Fluffy.  We may change their names once we get to know their personalities more, which we’re doing quickly thanks to their willingness to be held and petted.

3

The change has brought a new color variety to our egg cartons too!  Biscuit continues to lay her speckled brown eggs, while the two black chickens, Split and Splat, lay dark brown eggs.  Fluffy lays a light brown egg which is actually a white egg with small brown spots when inspected closely, and of course Charlotte’s green egg.  Sure makes our old plain white eggs seem kinda boring!

EGGS

Next up for the coop is some touch up painting, tilling the yard and creating a fun sign for the fence while the hubs builds a new storage area for their food and treats.  Watch for future posts as those projects are completed!