A Flower Farm Tour

It’s been a super busy couple of weeks with a full schedule of photography shoots for clients and projects, so I haven’t been doing much DIY.  But I did make time to enjoy a tour of a local flower farm this past weekend, since I skipped the Willow garden tours this year.  I’ve followed All Dahlia’d Up, which is run by Misty Vanderweele, for a while now, so I was excited when I heard she was offering tours of her farm this summer.

I purchased my tour ticket as a birthday present to myself and I’m sure glad I did.  When we arrived at the farm we were greeted in the driveway so we could sign in and got our name tags.  Once the tour began we were escorted to the backyard where this pretty table set-up greeted us.

It was the perfect garden party spread!  The table was right in Misty’s backyard and was situated next to her original dahlia garden, which now also has a row of sweet pea.  I noticed she had a purple door on her house, just like mine – and I’m totally loving those purple chairs too!  Perhaps the ones I have by the greenhouse need a new coat of paint! 😉

The group was led to the back area of the yard, past another larger garden to where the property opens to her father-in-law’s crop fields and an amazing view of Pioneer Peak.  She uses this area to host small wedding ceremonies during the summer.

She gave us a bit of history about how she started the farm after her son’s passing due to Muscular dystrophy and how he was the inspiration for the farm.  He had brought her home a feeble dahlia plant one year for Mother’s Day courtesy of a class project.  She wasn’t sure it would even survive, but it did and it produced lovely purple blooms, which is her favorite color.  The farm idea took off when she gave a local bride a bouquet of flowers one summer and soon had multiple requests for more.  She did a bit of research and realized that flower farming was indeed a ‘thing’ and decided to run with it.  six years later she has a well-known thriving Alaska Grown business that shares her joy with others near and far.

After the quick presentation we walked across the road to her newest flower patch, located in one of her father-in-law’s fields.  It was a little hike, but it was well worth it.  Here she explained the various types of flowers she grows for bouquets and arrangements.  She chooses flowers that bloom continuously all summer so she can cut from them multiple times.

She turned us loose in the flower patch for a few minutes to take in all the varieties she’s growing.  Some of the most recognizable were bachelor buttons, sweet pea, dianthus, poppies and snap dragons.

She also had a few veggies growing in the back corner of the garden including pumpkins and these pretty flowering kale.

These huge poppy pods were a big hit with several of us on the tour.  They looked like something right out of a Dr. Seuss story, but produced one of the prettiest poppies I’ve seen in a long time.

This pink sunflower was also a favorite of the tour guests.  I’d never seen one this color but really liked the variation.

My favorite area of the garden was the sweet pea row.  I’m considering doing something like this around our bee hive area next summer.  It would provide a nice screen to disguise the hive and provide a bit of wind block, plus I could cut flowers from it for arrangements.  And I’m pretty sure the bees would like it too.  I’m not sure I’d do this variety of colors but it was fun to see all the varieties together.

The view of Pioneer Peak was fantastic from this spot too.  It’d certainly give me an extra reason to be in the garden all day!

We trekked back across the road to the gardens in her yard where she clipped several blooming dahlias for us to use in arrangements.  There were all types of varieties and colors, including some unique spikey ones!

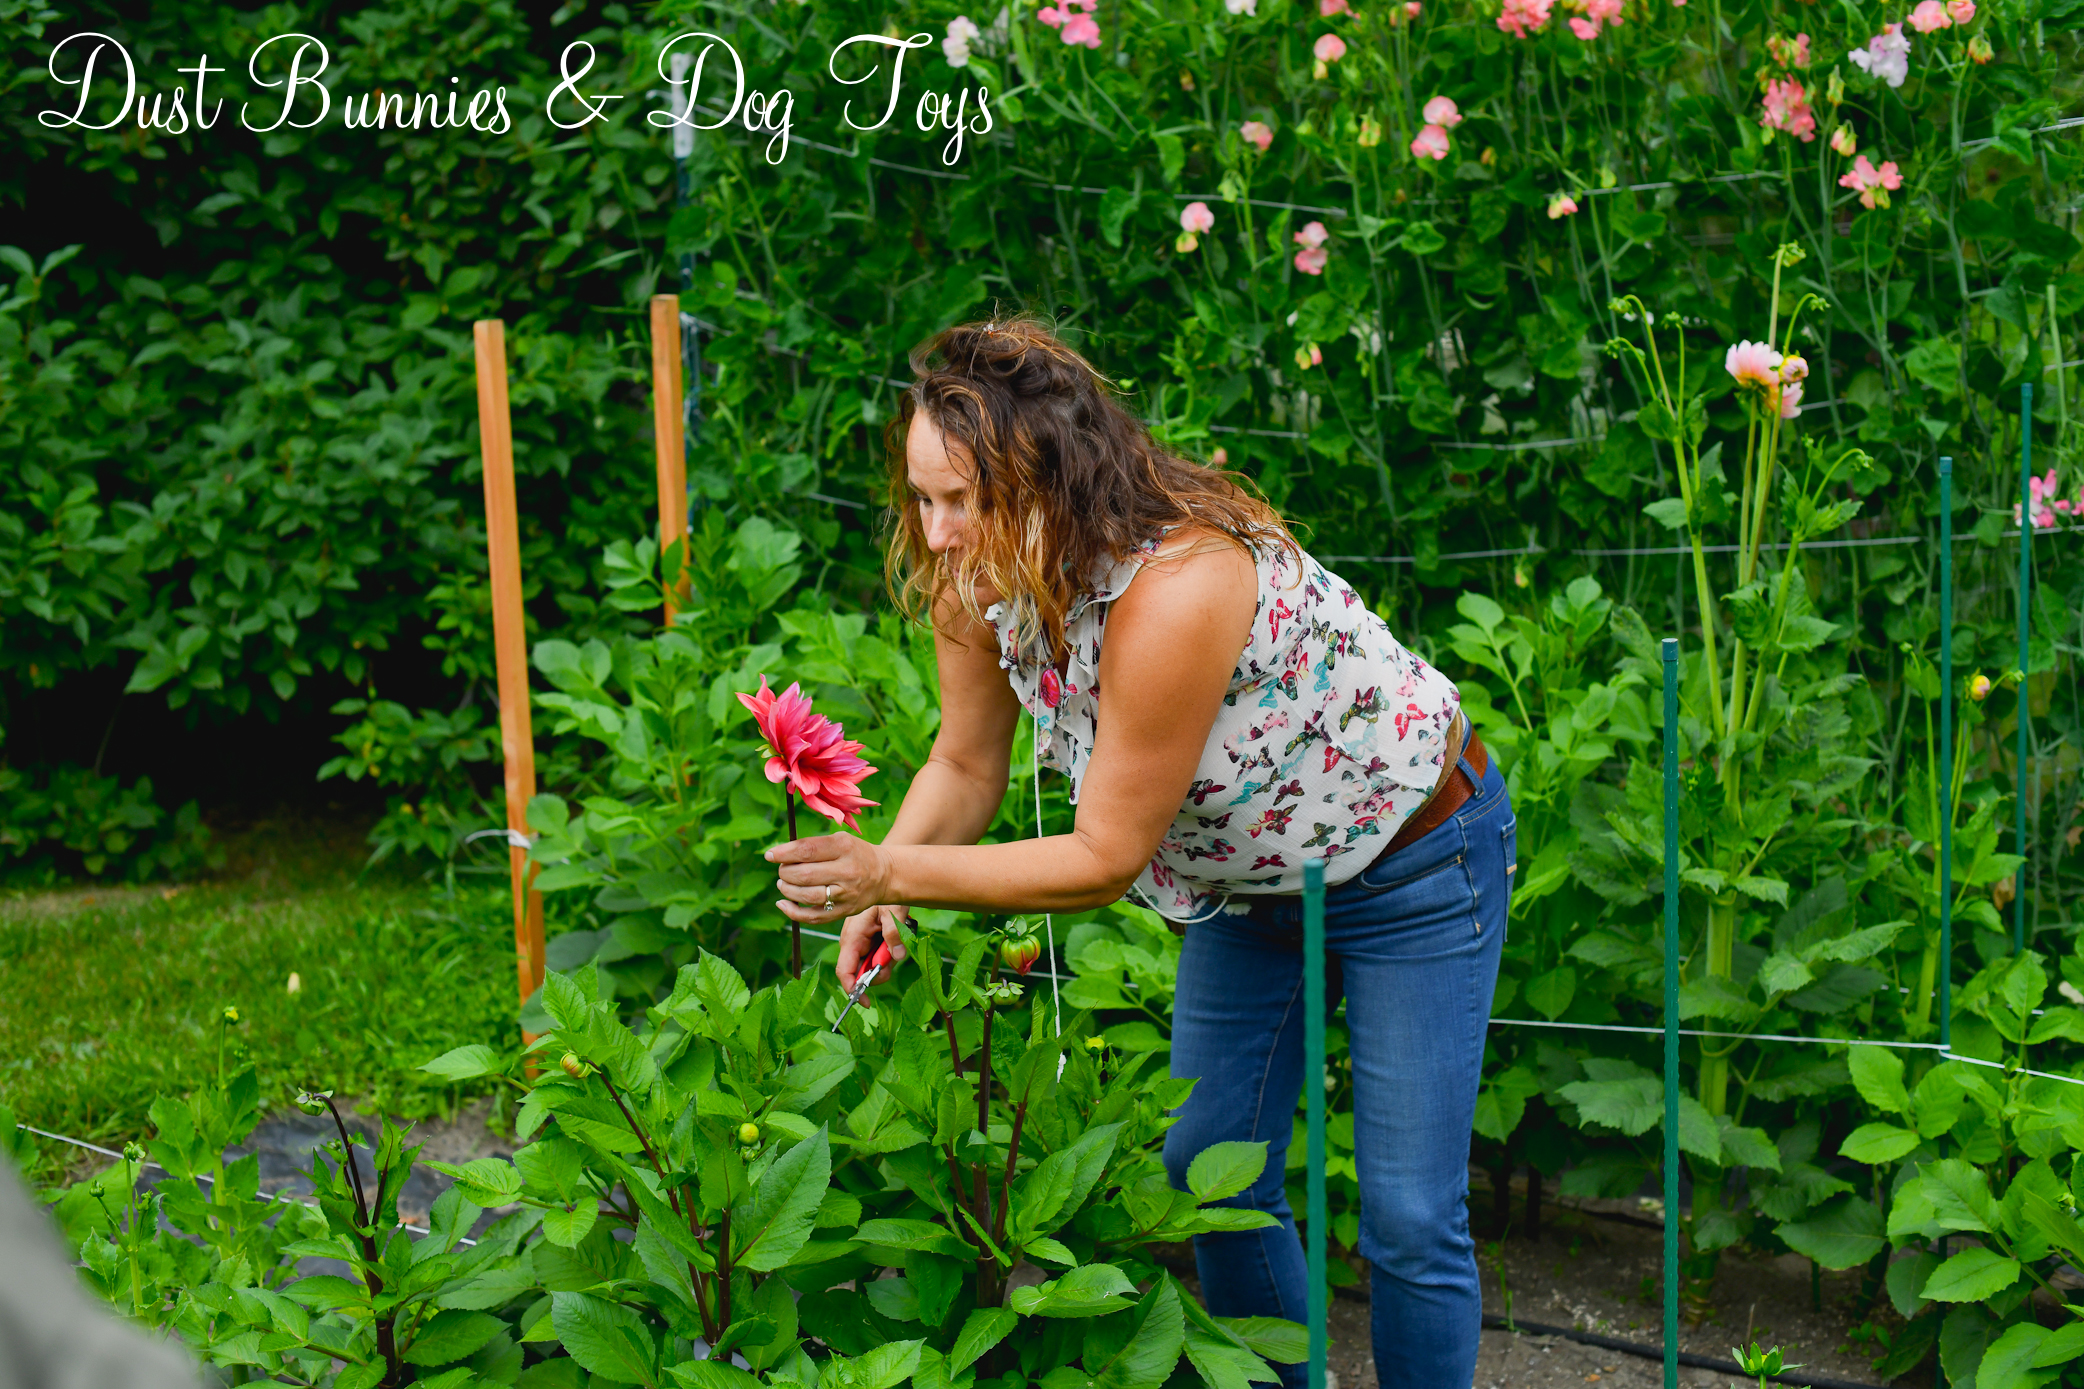
On the side of the larger garden she’s created a sweet pea tunnel, which we got to walk through and squeezed in to do a group picture.  She had a local photographer on the tour taking photos, so I’ll share a link to those when she posts them.

Next we went to the prep tent where we created individual arrangements using the dahlia’s she had cut as the centerpiece.  We had a variety of snap dragons, sweet peas, white dill and stock to add to our bouquets.

I decided to use a variety of purple and pink tones to create a monochromatic backdrop for my pink and white dahlia.  And I chose a seat that had more purple blooms to add to the arrangement.

Once everyone placed their arrangements on the table it really came to life.  Everyone had fun getting pictures of their arrangements and their neighbors!

We wrapped up the tour with a yummy dinner of Alaska grown produce, and local salmon.  I didn’t get any pictures of the food because I was quite hungry and too busy chatting with the ladies seated around me at the table – but I’ll tell you that it was all very delicious!

I’m so glad that I decided to take the tour.  I got to learn a bit more about this local business and the woman who leads it.  Plus I got to take home a beautiful arrangement of local blooms with a full belly, plus a yummy truffle that I saved to enjoy the next day.  If you get a chance to enjoy the tour I highly recommend it!

Advertisement

The Palmer Garden & Art Faire

This past weekend I got to enjoy the Palmer Museum Garden & Art Faire.  This is the third year I’ve gone to the faire (check out the first visit here) and always enjoy it.  The forecast didn’t look great, but the day turned out beautiful and just perfect for this type of event.  There were vendors, live music and instructional classes throughout the day.

I had planned to attend a couple of the classes offered but my schedule didn’t work out.  While browsing the vendors I noticed that Lakeside Forge was instructing a couple of workers.  I’m not sure if they had signed up or if this was part of his display, but they sure looked like they were learning a lot!

The Hubs met me at the Faire on his way to run some errands and we got some lunch from the food vendors.  Because there was another event going on in town there wasn’t as much selection as years past, but we enjoyed the BBQ pork & noodles we got from Momma Rav’s.  While we waited in line, I was eyeing the cool truck next door which was built on an old International truck!  We also sampled a couple of the Rhubarb Rumble entries at the vendor booths while we browsed.  Although we didn’t make it out to all the locations around town with recipes for sampling, our favorite was the rhubarb strawberry salsa with cinnamon chips.

After the Hubs went off to run his errands I checked out a few more of the activities at the fair.  There was a group of painters capturing this lovely scene full of peonies.  Some took the abstract route, while others created a portrait.  As a photographer, it was fun to see the differences these creatives had in their visions of the same set up.

Next, I took in some of the history of downtown Palmer.  The city was started as a farming colony as part of Roosevelt’s New Deal program during the 30’s.  Inside the museum they were playing a documentary that showcased what life was like as the colony was built through interviews of those who were there.  I’m so grateful for those brave families who left everything they knew behind to start over in Alaska.  They were the foot hold for the wonderful community we love today.

The museum also had displays of life in Alaska during those times.  One display featured the history of the Matanuska Maid, a local icon and mascot of sorts for the local dairy & creamery.  They also had displays of the native cultures in the region and the mining history of the surrounding ranges.

They also had displays about the daily life of the pioneers including the giant cabbages they could grow due to the long hours of sunlight and the typical household items they used, including dresses made from flour sacks.  Nothing went to waste due to the limited resources and minimal funds available.

There were also displays about the difficulties the pioneers faced in creating the farms out of the Alaskan wilderness.  Not all of Roosevelt’s plans worked in Alaska and many had to be altered to fit the unique circumstances encountered here.

I spotted these pretty glass emblems in the window of the gift shop area and immediately fell in love with them.  I had something similar with the Norfolk Mermaid on it from when I lived on the East Coast.  There were several designs to pick from, but I think I like the iconic water tower the best.  I decided to think on it some and come back to get one in a few weeks.

This enamelware pot was right near the entrance and drew my eye instantly.  I loved the simple charm of the rusty bucket and the faux lavender was the perfect touch to finish it off.  If it had been for sale it would be in my home right now!

I also toured the exhibition garden next to the museum.  I’ve been to this garden many times and always love seeing how things grow here so I can compare how they will do in our yard which is just a few miles away.

The new truck statue between the museum and the garden looked great with the new plantings starting to fill in.  I’m excited to see how they decorate it for Colony Christmas this winter!

There were also several antique tractors on display outside the museum.  I’ve seen a few of these before in local parades, but it was fun to get up close and see some of their details.  The vintage lawn mower was tucked in between a couple of the big tractors and caught my eye with it’s unique design.

I also learned about a new project some local veterans are spearheading.  They are fundraising to purchase the fuselage of an old cargo plane and turn it into a traveling Alaska and military art gallery, performance venue, and museum.  Learn more about this unique project at their website: www.rollingboxcar.com.

While I didn’t find any garden art that called my name this time around, I did come home with this lovely peony bouquet to brighten our dining room. We also bought two of the mason jar strawberry lemonades I had the first year to enjoy at home.

It was the perfect mid-summer event to celebrate the community, local growers and the season.  I look forward to seeing what they plan for next year’s event!

My New DIY Planter

Continuing my theme of DIY planters this week, here’s another that the Hubs made for me.  It started with this cute wooden caddy I picked up on the buy/sell page.  I had planned to use it as a planter, but the support bar down the middle just wasn’t going to work for that.

 I mentioned my disappointment to the Hubs and we chatted about how I wished it had been configured.  He must have been listening and wanting a project, because a few days later he surprised me with this.

This sucker is solid wood and super HEAVY.  We gave it two coats of the teal outdoor paint we’ve used on other projects like the bin planters and firepit chairs.

Once it was in place I realized how deep it was and knew I didn’t want to fill the whole thing with dirt.  So I had the Hubs drill a couple drainage holes in the bottom and we gathered scrap wood to create a little platform half way up the inside.

Now I needed something to hold the dirt and actually plant in.  I decided to try the foil baking pans from the grocery store, since they were cheap and readily available.  I added two to my grocery order and picked them up the next day.

The pans fit the width of the box perfectly.  I decided to use two, end to end to fill the space as much as possible.  Next came planting.

I had some violas that needed a home so this seemed like a perfect spot for them.  Plus the Hubs really likes these little blooms, so it was fitting that I fill the planter he built me with flowers he likes. 🙂

They still need to grow into the space a bit but they look pretty cute for now and add a bit of color to this corner of the deck.  I like how they spill over the side a bit too.

Next year I’m thinking I’ll use ferns in the caddy since the area will be more shaded when the gazebo cover goes up soon.  Perhaps I’ll snag a couple faux ferns like the ones I used out front in the vintage cart so there’s 0 maintenance!

Repurposed Bin Planters

Today I’m sharing another couple of planters I mentioned in my recap post.  These cuties were made from old conveyor belt scoops that I got from Alaska Picker.  The first I snagged at the AK Picker Day sale – right after finding the garage sale milk can.  I hunted high and low for more of them but someone else had beat me to them.  So when I spotted another at the Alaska Chicks Vintage sale I immediately claimed one.

The first still had a section of conveyor belt attached, but the second was mounted to a piece of old barn wood.  I wanted them both to match so I had the Hubs remove both the belt and board so I could mount them on new boards.

The Hubs cut me two pieces of wood from some scrap we had from another project and I dug out my outdoor teal paint to give them a couple coats.  A little distressing around the edges gave them the perfect rustic look.  The Hubs attached the bins to the new boards and I had this cuteness!

I wasn’t sure where I was going to use them at first but when I came out and saw the big open area on the chicken coop expansion I knew they’d look great there.  After I painted the coop the Hubs drilled some drainage holes in the bottom of the bins and put them up with a couple of screws. I filled them with purple alyssum to finish them off.

I absolutely adore how they turned out.  The combo of teal, rusty metal and purple flowers makes my heart do a happy dance.  And it’s perfect for decorating a chicken coop – not to fussy but not to messy either.

I still have a little painting to do on the lower part of coop and the Hubs plans to finish off the storage area door with siding to match the rest of the coop.  I’ll share more about the expansion and new set up once it’s all done.  We also plan to fill the area in front of the coop with pavers and pea gravel to finish everything off.

Of course neither the chickens nor the dogs – or the cats for that matter – care about any of that.  They just like having a window where they can see each other face to face.  But this doggie/chicken/kitty momma is happy to have a pretty space for them all.

Upcycled Milk Can Planter

One of the projects I mentioned in my recap was an upcycled milk can planter.  This was a fairly simple project that came together quickly.  I spotted this old milk can at a garage sale on my way to Alaska Picker day back in the spring.  When I heard it was just $20 I claimed it right away.  It was pretty rough, but I knew I could at least do something with the shape since it was pretty sturdy and solid.

I tried scrubbing the discoloration off thinking it was dirt, but while I got lots of dirt off the piece the lines remained, so I had to decide the best option to cover them.  After a quick Pinterest search I went with basic black because it would hide all of the flaws and cover the odd pattern.

A couple coats later it was looking pretty good.  I picked up a black pot to match it and shoved it into the opening as far as I could fit it.  And when summer finally arrived it found a spot out on the deck and got a couple of plants to brighten it up.

It’s a perfect fit next to the hot tub stairs and helps hide the plumbing a bit when looking out from the bedroom.  Plus it coordinates well with the lounge chairs nearby.

I filled it with marigolds to help ward off bugs near the hot tub, purple alyssum and some creeping Jenny that trails over the front of the can.  A little birdhouse tucked up next to it brings in the teal I’ve used elsewhere in the yard.

Not bad for a $20 garage sale find and a can of spray paint!  I look forward to using it for many years to come with other trailing plants in a variety of colors.

Catching Up

My lady slipper orchids are blooming in the rain garden!

It’s been a while since my last post because we’ve been pretty darn busy around here the past several weeks.  So here’s a quick run-down of what’s been going on.

The yard is in bloom finally, after a long wet spring.

At the beginning of the year I moved into a new position at work, which requires learning several new software platforms and skills.  It took a while for my old position to be filled so for a while I was basically doing both jobs.  The gal who filled my previous position has been with the company for a few years and worked in our department, but she too had a lot of learning to do in her new role.  When she needed to be out for a bit due to emergency surgery over the spring, I had to help out by stepping back into that role while also continuing to do my new job.  It was a bit chaotic and didn’t leave much time or energy for other things.  Luckily it was only for a few weeks and now she’s recovered and back without restriction so we can both settle into our usual duties.

The new pillows we picked up on our trip look great around the fire pit!

We took a quick trip to visit my Mother-In-Law in Portland, where we did some shopping for the house, attended a beekeeping class (something we’re planning to try next year) and I organized a styled photo shoot.  The Hubs and I also took care of a couple small projects around Mom’s house while we were there.  Since we still had snow on the ground when we left and returned to a snow storm – it was a nice break to enjoy some spring weather and blooms!

The new chicks have traded fluff for feathers and recently moved out to the big yard with the older chickens.  It seems like everyone is adjusting well.

When we returned from our trip we added to our chicken flock with two batches of baby chicks!  These little fluff balls have been living in the garage in a large brooder we made from a stock tank planter I had.  In addition to multiple feedings a day we worked hard to make sure they were handled often as well so they will be friendly when they are adults.  To make room for them outside, the Hubs made a massive addition to the coop, doubling their indoor space and tripling the number of nest boxes.  We’re still putting the finishing touches on that project but I’ll share it soon.

Still buried in snow, this is how the green house looked when we got back from our trip.

I spent many hours getting the green house cleared out and prepped for the season after our trip.  I attended the annual VIP plant sale at my favorite nursery toward the end of April, but the blooms had to hide out in the green house for a few more weeks before it was safe for them to be outside.  While I waited on the weather, the edible crops were all started in the green house and the Hubs revamped the hydroponic system for the tomatoes with bigger tubing so it’s more efficient.  Now everything is growing and we’re already enjoying some of the bounty from our lettuce, spinach and dill plants!

And here’s how it looked after the plant sale – at least until I could plant everything in the yard.
The yard is coming together – here’s a sneak peek at the updates the Hubs made to the egg table and another project I’ll share soon.

We did several projects around the yard as we prepared for the summer season.  I revamped a serving cart for the deck, upcycled an old milk can into a planter and created planters out of old conveyor belt scoops for the new chicken coop expansion.  The Hubs extended his egg table with a spot to store his new smoker and built me potato crates which will double our crop this year.  We sold the old patio furniture to make way for a new dining table and a set of loungers for the deck we installed last summer.  We also started installing a gazebo style covering over the hot tub on that deck.  We hope to have that completed soon – but need to arrange some extra helpers to get the roof on.  Out front, I styled the vintage cart on the front porch for spring and then for summer with patriotic colors.

The new table is a perfect fit for our deck and it expands if we have a big group over.
The firepit is cleaned out and ready for use.
The new lounge chairs (with a hiding kitty) and partially installed gazebo on the big deck.  I’ll be landscaping around this deck later this summer and plan to mirror the rock bed around the other deck.
I updated the wood storage for the fire pit with some cinder blocks that we took out when the Hubs expanded the chicken coop. It was an easy, and free upgrade that also hides the electrical conduit for the hot tub.
I white washed terra-cotta pots to decorate the whiskey barrel tables and filled them with marigolds to ward off the bugs. I also placed small tiki torches on each table as a backup.
I’ve had this thermometer since last summer and we finally found a spot for it right next to the door.

Inside, I changed up a few things, including curtains in all the bedrooms, the rugs in our master bath, swapping Brinley’s kennel for a new entry bench.  Last weekend we took advantage of the neighborhood traffic for a neighbor’s estate sale and had a yard sale to clear out some extra clutter that accumulated around the house over the winter.  We were mildly successful in that goal, but there’s still lots to purge, which is why I only picked up a few small décor items when I attended the spring Alaska Chicks Vintage Market.

I picked up these vintage bells at the market and think they pair well with my wreath on the front door.

Whew – seeing it all written out makes me realize just how much we crammed into a few weeks!  As my Mother-in-Law says “No grass grows under our feet!”  And now that summer is in full swing we’ve got a whole new round of projects and activities planned.  Stay tuned over the next few weeks to see the projects I mentioned plus others that are still in the works!  Hopefully I’ll be able to keep you updated more regularly now.  In the meantime I’ll leave you with more pictures of those silly chicks, who just moved out to the big yard.  🙂

Snack time at the feeder with the fluffy butt club.
We have several Novogens in this batch that will be great egg layers.
And there are a couple Dominiques for some variety.
My favorites are the Easter eggers who will lay greenish blue eggs and have fun little feather beards!
The dogs act as constant security for the cluckers.
They are quite used to us and often come running to meet us at the gate, or investigate our feet to see if they are edible. 🙂
Our flock is now up to 20 chickens so it’s a good thing the Hubs got that expansion completed!

The Shed Bed

It’s been a while since I’ve had time to write for the blog, but I found a few minutes today to share one of the last projects of the season before the snow started to fly.  I added a whole new flower bed along the side of the shed!  This space used to be a dumping ground for pallets and scrap wood we were saving for future projects, but its one of the first things you see as you pull up to the house and now that the green house was over her I wanted the area to have a more structured look.  So the Hubs helped clear out all the wood at the beginning of the season and I started planning out the layout once I confirmed the exposure this space gets is mostly shade.

Here’s how it was looking as fall started to arrive.  I’d used left over edging stones to create a border and placed a few pieces of garden art to start establishing the structure of the layout.  I stopped at an end of season plant sale near my office and got several options that should do well in the shade.  I planned to fill in with other plants from another bed that will be eliminated next summer.  Since this whole area is rocky back fill I put down a layer of top soil to create the base of the bed.

Once the top soil was in and the plants were in the ground I covered the areas around each plant with newspaper to prevent weed growth next season. It was an interesting process since the wind decided to kick up about the same time so I had to quickly put mulch down over the paper to hold it in place.

While I alternated between piecing newspaper sections around plants and chasing them across the yard as they blew in the wind, my assistant was quite busy catching up on her dirt baths…

I used wood chip mulch because it was inexpensive and I had several large areas to cover between this bed and some other projects.  The Hubs got me a full truck load of wood chips for around $20 the same day he got me the load of top soil and gravel to go around the green house.

Since I’m using perennials, I left plenty of room for things to spread over the coming years.  I used lambs ear around the rusty metal tank to create a batch of low visual interest along the front of the center of the bed.

These two hostas were transplants from the shade bed at the corner of the fenced yard which will be eliminated next season when we build a new outbuilding.  I call it “The Barn” but the Hubs thinks it’s a garage.  We’ll see who wins that debate. 🙂

Another transplant is this little astible.   This is the third placement it’s had since coming to our house.  He started in the gifted garden but was getting too much sun so I moved him to the shade bed where he did much better.  Hopefully the third time is a charm holds true for him and he continues to grow even fuller in this spot.

I also used a few new catmint plants since Luna loves the ones we have in other beds already and it’s an easy keeper that fills in areas nicely.  These will give her a couple to choose from so she alternates which she rolls in each day so they all get a break to recuperate!

I also transplanted a Seal of Solomon that surprised me in the gifted garden.  I’d brought him back from my Mother-In-Law’s garden in Washington and hadn’t seen him in the spring so I thought he hadn’t survived the winter.  This spot should be a much better exposure for him and he looks quite cozy behind the little quail family who are now safer from my active four-legged children!

Here’s how things looked once everything was in.  I’m excited to see how it all comes back next spring and watch it fill in the space.

There’s still some finishing touches needed, but this is a much better first impression as you come up the driveway.  It will look even better when I get that gravel the Hubs got me spread in front of it! Fingers crossed the weather will cooperate to let me do that next week when I have some time available so we don’t have piles of material at the corner of the driveway all winter!  And while I’m doing that the Hubs can get the last of the shed’s gutter completed so we have a ready supply of water when spring returns. 🙂

Adding a Porch to the Greenhouse

Since we got the green house set up this summer I’ve been wanting to add a little porch to the front to reduce the step in at the door.  I had planned to build one myself from pallet wood, but the Hubs offered up a few piece of damaged Trex boards that were scrap from our deck projects.  (I’ll be sharing the new deck & hot tub the Hubs has been working on all summer once I get a chance to style it a bit and get some photos!)

I certainly wasn’t going to turn down his help or an option that required less prep work – especially as we enter the last few weeks to get outdoor projects done before winter arrives in Alaska.  He built a simple frame from some some left over pressure treated boards left over from building the new deck and attached it to the frame of the green house on the front.  Because the ground slopes here we used paver bricks to support the frame so we could get it level.  Once we had it attached we pulled out the pavers and the Hubs added a support post using a scrap piece of 4×4, also from the deck construction.

I was busy getting a new flower bed installed next to the shed (I’ll be sharing that update next week) so I didn’t get a picture of that step but you can see it in the edge of the finished photo.  I plan to add fill dirt around the front, side and back of the green house to level things out a bit more before we spread gravel over the whole area around the green house.

Here’s a quick little before and after:

It’s amazing how much that little change elevates the look of the whole green house!  I absolutely love it and can’t wait to see it finished off with the gravel around it.  Now I just need to find a metal R at Alaska Picker Day tomorrow so I can complete the “GROW” sign I plan to add to the top of the front.  🙂  If I find some good treasures I’ll be sharing those next week as well!

Green House Sitting Area

Now that I spend a lot of time at the green house I decided to make a little spot to sit and take a break when I’m tending the garden.  It will also be the perfect spot to enjoy the new flower bed I’m putting in along the shed.

The spot is between the green house and the berry patch, just at the crest of the hillside as it starts to go down.  It’s a simple set-up that came together easily, starting with the chairs, which I found on the buy/sell page for $20.  When I got them they didn’t match – one was red and the other was tan.  If they had both been tan I probably would have left them as is, but since I wanted them to match I picked up a couple cans of spray paint for plastic to make them teal instead.

Apparently I was in such a hurry to get the project rolling that I forgot to take a before picture of the red chair, but here’s the tan one prior to it’s makeover.

And here it is while drying.  The paint went on easily and because it has a built in primer there was no prep work other than a light cleaning to remove any built up dirt.  It’s been about a month since I painted them and they seem to be holding up quite well.

I had a curbside freebie wooden stand I’d snagged while getting some other freebies off Craigslist and thought it would make a fun little table between the chairs.   You can check out a before picture of this little thing on Instagram.  I first tried to paint it white but the wood soaked up the paint inconsistently making it look splotchy.

I dug through the paint cabinet in the garage for an alternative and found two cans of grey spray paint.  The darker color seemed more uniform, although still not perfect.  I figured it would weather anyway so it just adds a bit of character and you can’t beat free paint!

To pull it all together, I added a couple of pillows from my stash for the backyard, along with some planters I’d filled earlier in the season and a citronella candle to keep the bugs at bay.  Not a bad little spot to relax for around $30 (chairs & paint)!  I may add a little shelf on the bottom of the table next season, but for now it works just fine.

We plan to cover the whole open area around the green house with landscape fabric and gravel over the labor day weekend, which will really finish off this space.  Now I just need some extra time to go out and enjoy it! 🙂


Well Float My Rope and Ring My Bell

Yesterday I mentioned making driftwood garlands, like the ones I saw in Homer, but today I’m sharing a similar project I did recently that also has a bit of a nautical flair.  This little project has been in the works for years.  It started when I picked up a batch of wooden floats used for fishing more than 2 years ago.  I only had six and every project I thought up required more so they sat, waiting for more to be found.  Then I happened upon these cool vintage metal floats at Junk Bonanza and decided to pair them together but still didn’t have quite enough to complete the project.

I spotted a pair of metal garden bells in a catalog for $20 and knew they’d be perfect at the end of a line of floats.  Unfortunately the company wouldn’t ship to Alaska so I had them shipped to my Mother-In-Law and picked them up when we visited earlier this summer.  To fill out the rest of the rope I picked up several cork floats from Alaska Picker for a few bucks each.

I used some woven rope I already had in my stash from another project and started with a loop tied with a knot.  I fed the floats onto the rope in a set pattern and tucked the loose end of the rope from the knot at the loop into the center of the first float.  At the bottom I just made a knot and then tied the rope that came with the bell into the knot, again tucking loose ends into the last float.  It was so easy, I did both ropes while watching a movie with the Hubs and it took less than 20 minutes.

The Hubs added hooks we had left over from another project on the front corners of the green house so I could hang the ropes easily and take them down for the season quickly.

Here’s the rope on the other side, where I’ll have a large metal horse trough planter next season.  Right now it’s serving as a brooder for the baby chickens we picked up yesterday!  Get a peek at them on Instagram or Facebook.

The bell on this side is a little smaller than the other, but has the same style and finish.  They don’t get much movement in this spot so they stay pretty quiet, but when they do chime it’s a pretty soft sound that’s soothing and just right for a garden.

I’ve still got several projects to tackle out around the green house before we close up the yard for the winter and I’m already putting together the plan for what we’ll plant and do next year.  Until then these float ropes add a little bit of Alaska style whimsy to the garden and make me smile every time I see them.  One more project checked off the list. 🙂