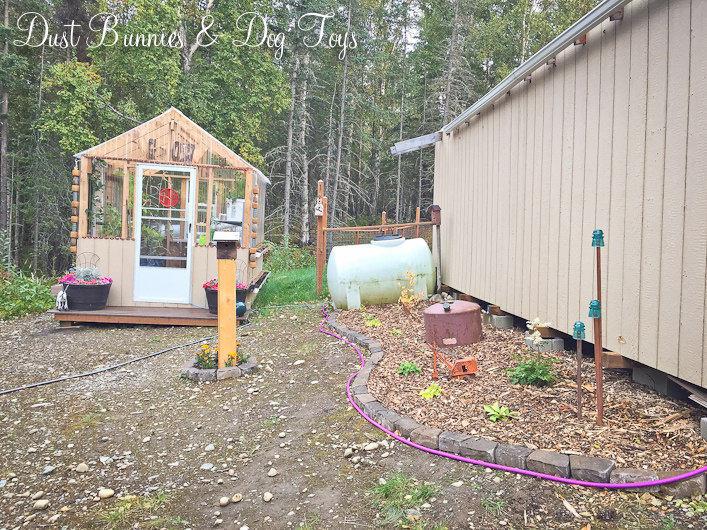
It’s been a while since I’ve had time to write for the blog, but I found a few minutes today to share one of the last projects of the season before the snow started to fly. I added a whole new flower bed along the side of the shed! This space used to be a dumping ground for pallets and scrap wood we were saving for future projects, but its one of the first things you see as you pull up to the house and now that the green house was over her I wanted the area to have a more structured look. So the Hubs helped clear out all the wood at the beginning of the season and I started planning out the layout once I confirmed the exposure this space gets is mostly shade.

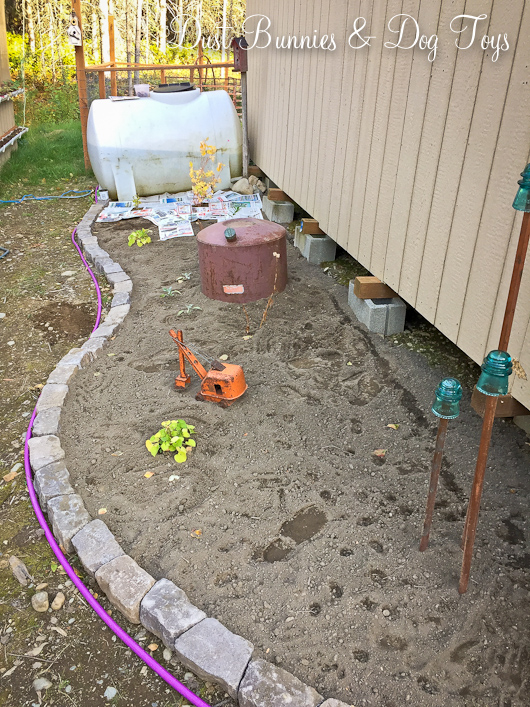
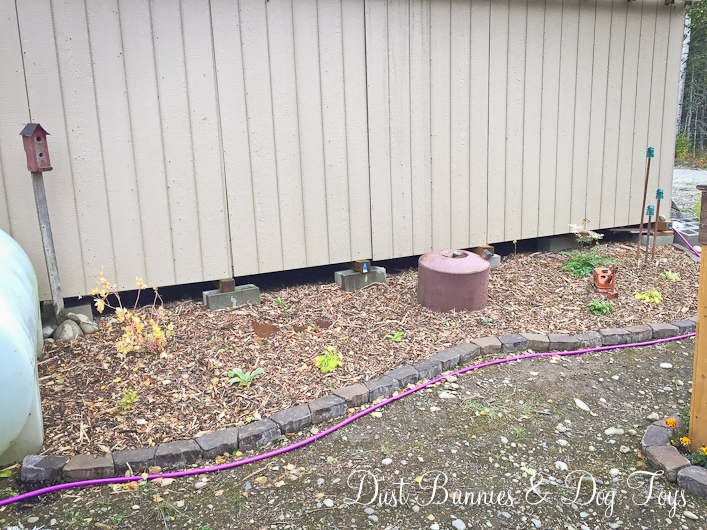
Here’s how it was looking as fall started to arrive. I’d used left over edging stones to create a border and placed a few pieces of garden art to start establishing the structure of the layout. I stopped at an end of season plant sale near my office and got several options that should do well in the shade. I planned to fill in with other plants from another bed that will be eliminated next summer. Since this whole area is rocky back fill I put down a layer of top soil to create the base of the bed.

Once the top soil was in and the plants were in the ground I covered the areas around each plant with newspaper to prevent weed growth next season. It was an interesting process since the wind decided to kick up about the same time so I had to quickly put mulch down over the paper to hold it in place.
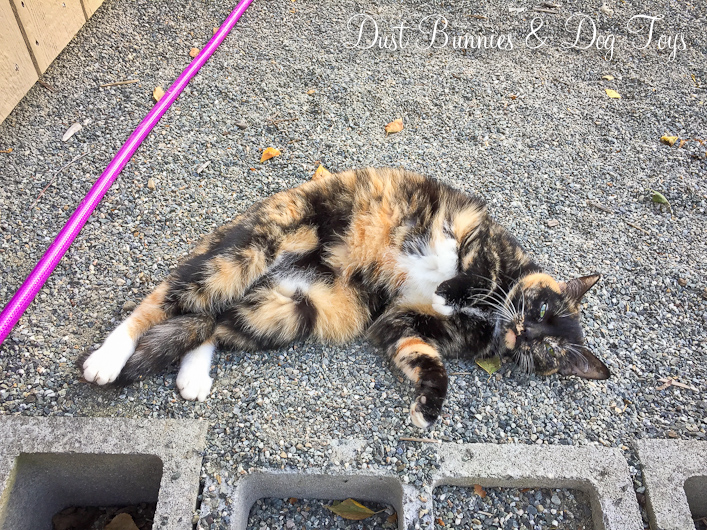
While I alternated between piecing newspaper sections around plants and chasing them across the yard as they blew in the wind, my assistant was quite busy catching up on her dirt baths…
I used wood chip mulch because it was inexpensive and I had several large areas to cover between this bed and some other projects. The Hubs got me a full truck load of wood chips for around $20 the same day he got me the load of top soil and gravel to go around the green house.

Since I’m using perennials, I left plenty of room for things to spread over the coming years. I used lambs ear around the rusty metal tank to create a batch of low visual interest along the front of the center of the bed.


These two hostas were transplants from the shade bed at the corner of the fenced yard which will be eliminated next season when we build a new outbuilding. I call it “The Barn” but the Hubs thinks it’s a garage. We’ll see who wins that debate. 🙂

Another transplant is this little astible. This is the third placement it’s had since coming to our house. He started in the gifted garden but was getting too much sun so I moved him to the shade bed where he did much better. Hopefully the third time is a charm holds true for him and he continues to grow even fuller in this spot.
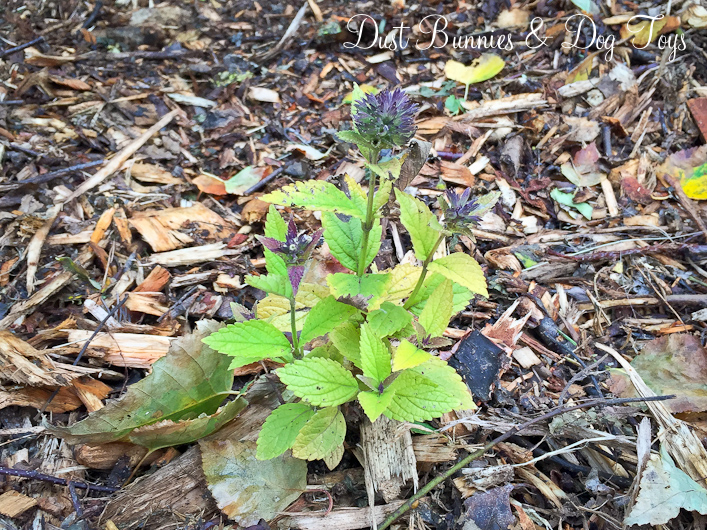
I also used a few new catmint plants since Luna loves the ones we have in other beds already and it’s an easy keeper that fills in areas nicely. These will give her a couple to choose from so she alternates which she rolls in each day so they all get a break to recuperate!

I also transplanted a Seal of Solomon that surprised me in the gifted garden. I’d brought him back from my Mother-In-Law’s garden in Washington and hadn’t seen him in the spring so I thought he hadn’t survived the winter. This spot should be a much better exposure for him and he looks quite cozy behind the little quail family who are now safer from my active four-legged children!
Here’s how things looked once everything was in. I’m excited to see how it all comes back next spring and watch it fill in the space.
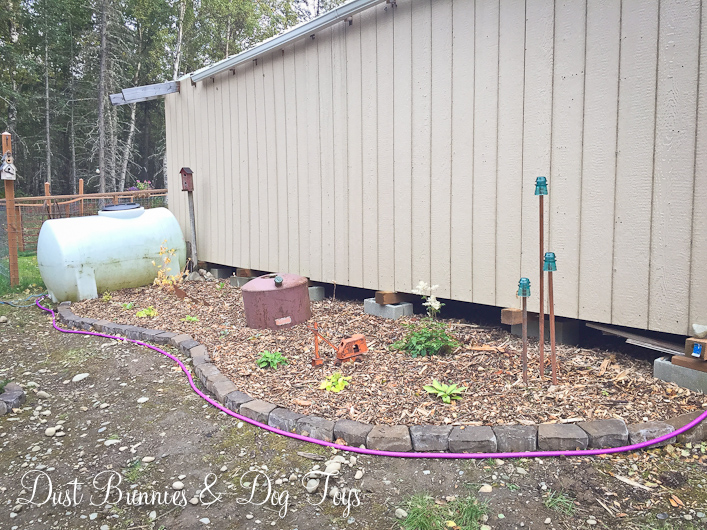
There’s still some finishing touches needed, but this is a much better first impression as you come up the driveway. It will look even better when I get that gravel the Hubs got me spread in front of it! Fingers crossed the weather will cooperate to let me do that next week when I have some time available so we don’t have piles of material at the corner of the driveway all winter! And while I’m doing that the Hubs can get the last of the shed’s gutter completed so we have a ready supply of water when spring returns. 🙂