Our Patriotic Porch

Back before Memorial Day I switched out the decorations on the porch from spring to patriotic for the summer holidays.  I usually decorate with simple red, white and blue items for the whole season to celebrate Memorial Day, Flag Day, Independence Day and Labor Day.  That takes me from May all the way through early September without having to update anything, which is perfect for those already busy summer months.

I added faux ferns to the little vintage cart I got at the Junk Bonanza show, so I don’t even have to water anything.  A cute little patriotic bunting from JoAnn’s makes it festive.  I plan to add some birch logs to the crock, but if I don’t get around to it before the end of the summer that’s ok.  Our little moose statue rounds out the display with that sweet wooden face.

The metal star I already had on the porch works well with this set-up so I left it up.  I’ve traded my various holiday door mats for a classic welcome that will work throughout the year.  It was one of my best finds at Home Goods on our trip to Portland back in April.

The vintage bells I got at the Alaska Chicks’ Spring Market were added to a wreath I already had.  It’s my simple nod to “let freedom ring” and the blooms on the wreath tie in with the door color.  I also added a couple small flags to the potted plants on the steps, but forgot to get a picture of them.

And since I didn’t get a chance to share the spring set up back when it was in use here it is for comparison. J  A few faux bouquets from the clearance bin at Michaels that can double as photo shoot props and my cute new Mr. Bun Bun from Pier One thanks to a gift card and coupon I won during their Enchanted Spring Open House event. A bird house from my ever-growing collection tied it all together.

Do you decorate your porch for summer or for the patriotic holidays?  I’d love to see!  Leave me a comment with a link so I can check out your decorations!

Advertisement

Our Simple Christmas Decor

I’m still tinkering with my Christmas decorations, but since the big day is just around the corner, I thought I’d share what I’ve done so far.  I’ve migrated to a more “winter” look than full-on Christmas so things can stay up well into January without feeling out-dated.  That’s handy since winter in Alaska can last well into the months that most classify as “spring”.   I also find that my style is much more simple than it used to be, perhaps that’s an influence of our recent trip to Iceland where they have a very minimal Scandinavian look, or maybe it’s just a lack of time to create so much detail.

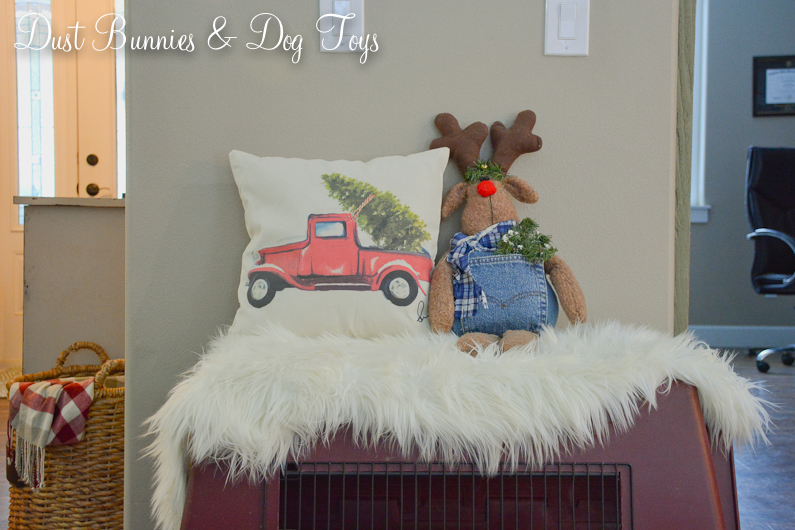
Things start out on the front porch, but I’ll share that in another post later this week.  Today we’ll start in the entry way where Red and Flint are the first of my reindeer herd to welcome guests.

Around the corner Gus hangs out above Brinley’s kennel where my cute storage bench used to be.  It was a victim of her teething stage and so now the kennel lives in it’s place.  Ahh the sacrifices we make for children….

Just past the entry the media cabinet in the family room became a bottle brush Christmas tree farm just like last year.  I’ve added the lighted houses in the pedestal cloches, a few more trees and this cute little red truck, which used to be an ornament.

The mantel has a frosted garland and trees.  All of the trees except the two twig ones light up and create a pretty glow in the evenings – or pretty much most of the day since this is winter in Alaska!

I found the light up bottle brush trees at Joann Fabrics this year and am very pleased with them, especially since I got them for a great price with a sale and a coupon!  I’ll be watching to see if they have any in their after Christmas sales.  The two mercury glass trees came from a local vintage shop called Revive.  I’d been hunting for some all over town and had pretty much given up when I found them tucked away in a display at a great price.  If she’d had more I would have snatched them up too.  They also had hollow centers and access through the trunk section so I crammed a strand of fairy lights into both to give them a soft glow as well.  I may just add a strand of the same lights to the two twig trees so everything lights up!

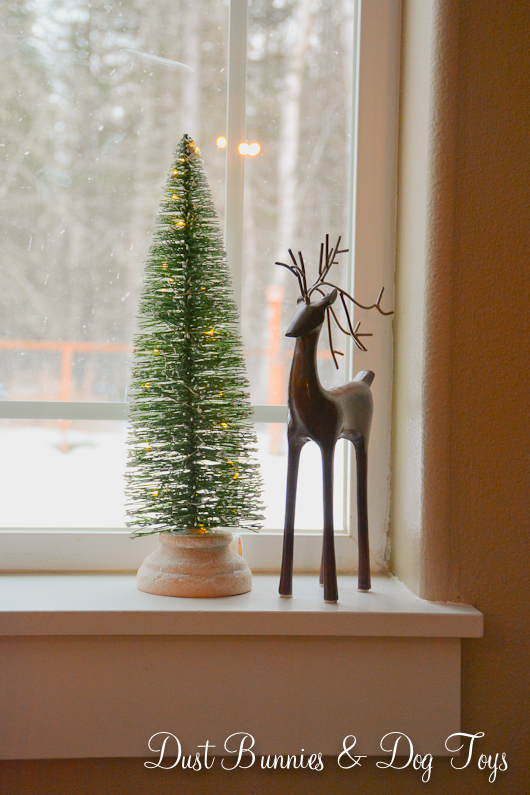
Next to the mantel Sebastian has a view out the window next to his own tree.  Max moved out to the living room this year from the office where he’s been the past few years.  Now he is one window over from Sebastian.

On the couch I’ve got a couple new festive pillows.  I picked up the Ho Ho Ho and tree one from Target’s after Christmas sale last year, but had to ship them to my Mother-In-Law’s house because they wouldn’t ship to Alaska.  Good thing I was able to visit and pick them up earlier this year. 🙂  The red plaid pillows are from JoAnn Fabrics’ fall line.  Pay no attention to the coating of dog hair – that’s what I try to do…

The side table next to the couch got a touch of color with this little wreath and lantern.  I found the lantern at a garage sale earlier this year for just $2 and the wreath was another JoAnn’s sale find for around $5.  I love how they look together.  This is the only time of year I decorate with red, but I love the pop of color during the long winter months.

The tree is behind the couch, next to the nativity on the curio cabinet.  When we first moved in 4 years ago I had a hard time figuring out where to put the tree, but this spot has worked out perfectly and become the tradition in our house.  We have a new tree this year, after our tree of many years stopped lighting up in several sections last year.  It’s an after Christmas clearance deal, so it’s nothing special but it will work for a few years until I can save up and somehow justify the cost of my dream tree along with the vintage style candles for it.

The tree has a bit of Scottish flair after our trip this year.  We picked up a couple of ornaments while there to continue the tradition of growing our collection.  Unfortunately one of those new ones met an untimely fate when Luna and Brinley ganged up to attack the tree soon after it went up (repeat that phrase about things you do for your kids…).  You’ll notice there’s less ornaments on the lower sections of the tree for that exact reason! But our Harris Tweed highland cow and Scottie dog are still safe… for now anyways.

I had this sign for the nativity made last year after the holidays and really like it above the creche.  It’s the perfect compliment to the simple style of my beloved Willow Tree nativity set.

Over in the dining room, Moe found a new home this season on the scroll wall hanging where we put up the holiday cards we receive.  I really enjoy seeing him more often this year and think this will be his ‘usual’ spot going forward.

Next to Moe, this new addition came to us from WA where my wonderful Mother-In-Law went on a mission to find him at an antique shop I follow online.  Several ‘elves’ have made an appearance around our home this year and I think they are great care-takers for our herd.   I haven’t named him just yet, so if you have suggestions I’m all ears.  He reminds me of the Nordic elves we saw depicted in Iceland and even the Scottish Highlands so maybe I’ll do a theme using either of those cultures.

My dear, Milo ended up in the other windowsill, where he’s safe from the dogs.  I’d be pretty heartbroken if something ever happened to him.  His expression seems to say he knows how dangerous being closer to the floor could be in this house!

On the back wall of the dining room I hung my North Pole sign from last year under the windmill and decorated the top of the buffet with faux winter greens, antlers and gold tone votives.  I’d like to make some twig luminary trees to add to this set-up and since the look is “winter” rather than Christmas I’ve got time to do that even after the holiday.

The two votives in the front are new this year.  They were a fun little find at the Alaska Chicks Vintage Market a few weeks ago.  At just $2 each I thought they were a great price too!

The new mug rack also has a few more additions to it for the holidays after the Alaska Chicks show.

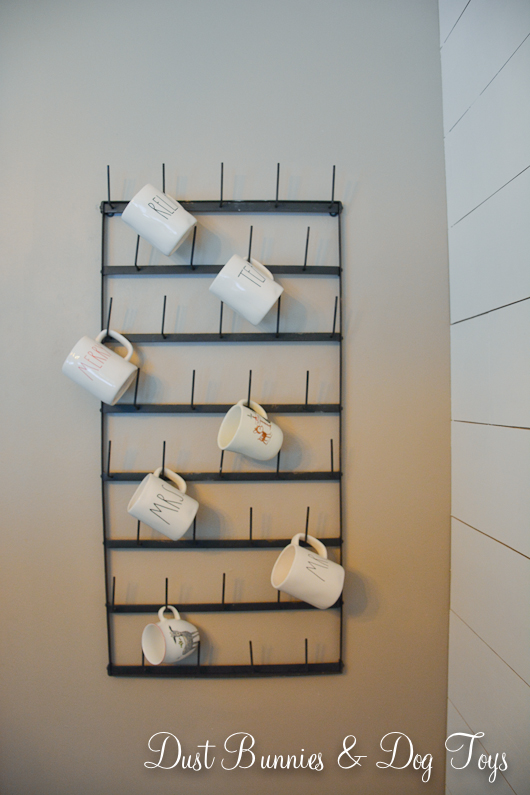
This “Merry” Rea Dunn mug was one of my favorite finds that day thanks to one of my favorite vendors, Rustique Designs.  She’s who I got the other Rea Dunn mugs from and who made the reindeer sign and nativity sign!

This sweet little fella was also part of my Mother-in-Law’s adventure to the antique shop.  Isn’t he just the cutest thing ever?  While he’s not quite “Christmasy” I just couldn’t not put him out right away after she made the effort to find him for me.  Plus the little sprig he’s holding kinda looks like holly and the red rim ties him in to the season – at least in my mind. 😉

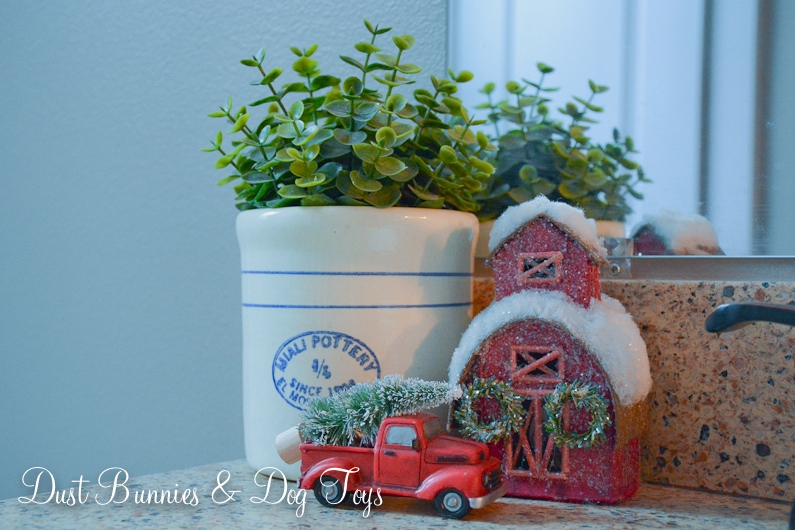
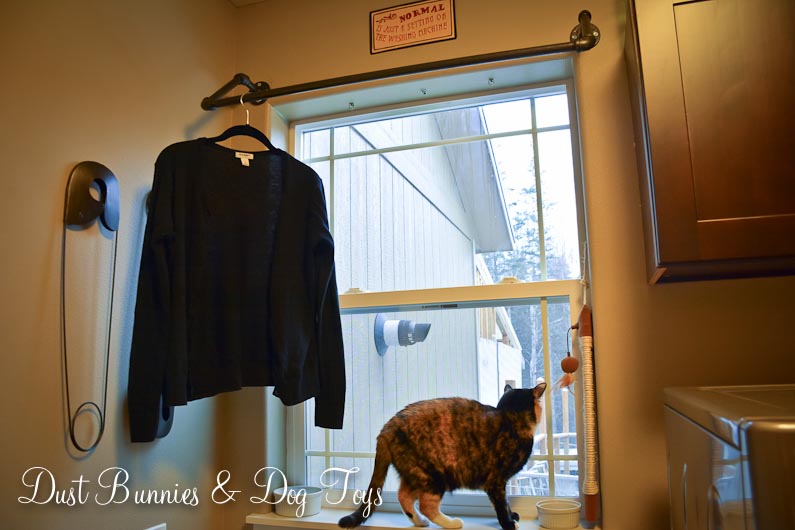
There are also little touches of Christmas in the other rooms, including this little church in the laundry room.  It started out as an ornament, but I like it much better as a decor piece here after a few little modifications.

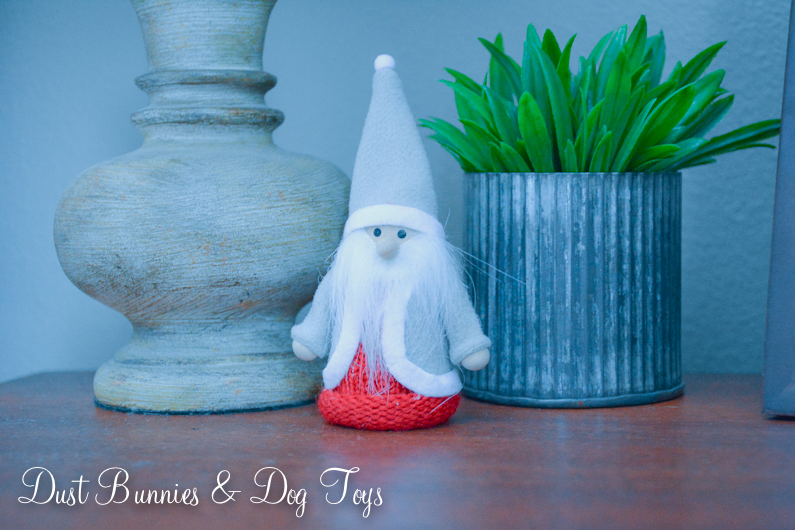
Below the shelf is another little elf with a reindeer buddy just his size to keep him company.  These two also started life as ornaments – I think I’m sensing a trend here.

The office window where Max used to sit is now home to the lovely Daphne who joined the herd last year.  She’s got her own little tree and some pretty votives to light up the dark.

Also in the office is this sweet little fox I found at the grocery store!  He was the last in the display and just begged to come home with me.  He’s looking quite dapper on the daybed, among all the pretty pillows.  He also needs a name so keep those suggestions coming!

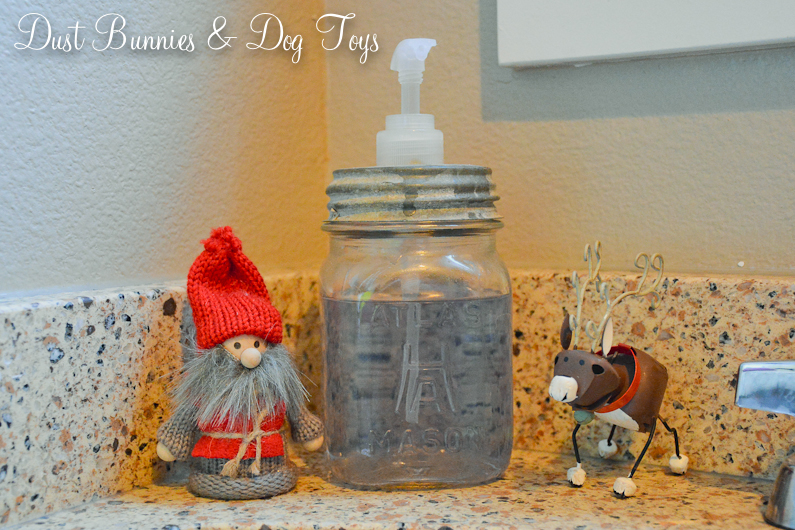
In the hall bathroom another couple of ornaments turned decor add a little touch of the season to the existing decor.

In our bedroom are two pretty little reindeer my sister found for me last year.  They too started as ornaments, but now they hold their own on our nightstands so we have some holiday cheer at the end and beginning of each day.

In the guest room, there are some little Santas on the nightstands.  If you follow me on Instagram, these are the find I made at that lovely store I made it out of only spending $10!

The chair in the guest room also got a little update for the season with this simple pillow I found at Hobby Lobby during our recent trip down south.  I’m so glad they already had Christmas stuff out while I was there!

So that’s the tour of our Christmas decor.  I hope you liked it!  Stay tuned to see what I’ve done out on the porch, or get a sneak peek over on Instagram! 🙂

Adding Function to the Laundry Room

Today I’m sharing a quick addition I made to the laundry room.  Now that we’ve got the counter top finished and the sink operational I found that we needed a spot for a hand towel to dry your hands.  I’d been eyeing this vintage industrial style shelf and towel bar for a while so when I spotted it for a good price I ordered it quickly, figuring it would either work in here or the guest bathroom.  Due to shipping costs I had to have it sent to my Mother-in-Law’s house and wait to pick it up until our trip earlier this summer.

This spot has had several variations since we moved in.  First I had some DIY decor here, then there was a rustic laundry sign, but I decided to sell that and have a different one made for the wall above the board and batten on the other side of the room where the tobacco baskets are currently.  Those will move to the guest room above the new headboard.  I plan on making that change this winter, when there’s not so much going on in the yard.

The metal look ties in perfectly with the DIY drying rack the Hubs built me above the window.  I styled it with one of my faux succulent planters and a blue mason jar that I’ll be filling with vintage clothespins.  I may add a few other little things, but will let those “find” me in the coming months.  You can’t tell from this angle but the bottom of the shelf is an open style wire so whatever I use on it will have to be big enough that it does’t fall through.

As you can see from the winkles in the towel, it’s been getting plenty of use and it’s just the right size for the wall without blocking my DIY soap pump in the corner.  One more project done, and you know functional decor is my favorite kind! 🙂

DIY Indoor Herb Planter

Continuing my willing of Spring to officially arrive in Alaska, I’m sharing the indoor herb garden we recently installed.  We love having fresh herbs to cook with and give the chickens during the summer and preserved some to continue using over the winter at the end of last season but nothing beats fresh, so I decided we should have an indoor garden just for that.  With that in mind we picked up these hanging containers and rods at IKEA on our last trip down south.

They are a perfect fit for this small wall in the dining room and as you can see, this spot gets good light from the window across the room.  The Hubs made sure to secure it to the studs since the plants will have a bit of weight.

For now I just have a few faux plants, also from the same stop at IKEA.  The local nurseries should begin offering herb starts within the next few weeks, but until then the fake stuff provides a bit of greenery.  Unfortunately I didn’t have enough to fill the large containers in the middle, but it still looks ok for now.

I’ll be creating some DIY plant stakes once I have our herbs selected.  I considered a few ready to purchase options I’ve seen in the stores but wanted them all to match and wasn’t seeing all the options I was considering which includes oregano, basil, parsley, rosemary and thyme.  I may try lavender in the larger containers just for the scent, but I’m not sure it would give the plant enough room to flower.

If anyone has used these containers with live plants I’d love to hear about how they worked for you.  I plan to water sparingly at first since there are no drainage holes (good thing since we’re indoors), but there are small trays at the bottom that would provide a place for water to collect below the dirt and the plant to reabsorb the moisture.  Hopefully that keeps the roots from getting soggy, but there may be a learning curve.  I’ll share the finished project when everything is planted and growing!

Welcome Spring

The calendar says that it’s officially spring but in Alaska spring is “break-up” season, which is why we still have about a foot of snow in the yard.  Granted, the snow is disappearing – just not quick enough for my preference.  So rather than lament spring’s tardiness outside I changed up the decor inside to feel a bit more in line with what the calendar says.  The Hubs brought me home flowers recently so that bouquet has been the centerpiece on our table and the large candle I’d had there moved to the windowsill in the family room where the dogs tunnel is below it so they don’t seem to notice it.

I kept things simple in the entryway with two new pedestal cloche stands from World Market, cute little beehive skeeps from JoAnn Fabrics and my Pottery Barn knockoff basket filled with the DIY neutral eggs I made last year.

I love how the little skeeps fit perfectly inside the glass domes.  I love the bright colors of spring but I like to keep my decor simple these days and this gives just enough color while remaining neutral with a farmhouse flair.

Next to the front door my big oil can got some pretty dogwood branches, which are the perfect height to hide the ball chucker we keep in the corner for when we take the dogs out front to play!

The media cabinet got a few little touches of spring as well.  All items I pulled out from storage and one of the little faux planters I recently created.

I don’t remember where I got this little chick or the basket but they fit together perfectly!  Plus pairing two little items together means it’s a little less likely to get snagged by one of the fur babies.  The other side of the cabinet has a free Easter printable I found online a few years ago and my green shamrocks.  Since I don’t decorate for each particular holiday anymore (St. Patricks, Easter, etc.) but rather the season I just use it as greenery now.

The mantel is still a work in progress, but my cutie little wool lambs take safe haven up here away from the fur babies.  I got the white candle sticks on the local buy/sell page for $20 and the brown one was a recent thrift store find.  I’m in the process of painting and distressing it to match the others and plan to add some fun moss or boxwood balls to the tops of each.  The cute birdhouses came from JoAnn’s and will eventually be used as photo props and in the backyard.  The wreath was also from JoAnn’s.  I just couldn’t pass up the pretty purple color.

The tray next to the table got a pitcher of tulips and a cute little bird to accompany the rustic frame I’ve had here for a while now.

Over in the dining room I kept the lanterns from the winter decorating but swapped out the filler for split pea to give them a spring feel and added smaller bee skeeps like the ones in the entry way.  In the middle I paired a cute bunny ornament and a basket of carrots from storage in the cloche I found at Home Goods on our last trip down south.

In the window is my favorite farmhouse lantern, filled with moss for a spring feel and my clearance ceramic bunny I found at the end of last season for just a few dollars. The other side of the windowsill was a safe haven for a few more small pieces, including some hydrangea stems in a green bowl I thrifted some time ago, the fun little moss bunny I love to pull out each year and one of my vintage votives.

Before I had a chance to get this post up I’d already swapped out the wreath above the mantel so I thought I’d share that change.  I got this boxwood wreath from Target and thought it would look good in this spot for most of the year.  It’s just the right amount of farmhouse style mixed with spring.  The purple wreath moved to the front porch where it coordinates well with the purple front door. 🙂

So that’s my attempt to usher in spring indoors while I wait for it’s arrival in my garden!  How did you decorate for spring?

Barn Doors for the Office/Studio/Craft Room

installed

I’m so excited to share this project with you guys now that it’s finally done!  It’s been a long time in the making, but I’m so so so happy with the end result and as it usually goes – the delays that occurred along the way made the end result better than the original idea.

From the moment we found our floor plan and decided the formal dining room would be my office/studio/craft room I knew I wanted barn doors instead of the french doors the builder offered.  But that wasn’t one of the priority projects when we first moved in so it had to wait.  In the meantime I pinned ideas and the Hubs and I drafted out a basic plan for the project so we could start gathering the supplies as we found good deals on them.

We originally purchased barn door hardware at Tractor Supply when we were in VA visiting my family over a year ago and shipped it back to ourselves in AK.  It was nickel, but we planned to paint it black to better fit our style.  Although we had the hardware, we still had other more pressing projects so they sat for several months.  Eventually the Hubs purchased a piece of metal box rail to create the track and then built the barn doors, which I stained.  We now had all the pieces we just needed to install them, so we dug up pictures of the house during the framing stage and quickly realized we didn’t have any of the header over this opening to determine where the studs were!  Thinking back I remembered that because we opted not to have the french doors, the builder didn’t frame in the opening at first.  We noticed this during one of our site visits and made sure he would add framing between the two walls so we’d have a spot to install the track.  Apparently the next time we came back that had been added and drywalled over already.  We could guesstimate where the studs were based on the screws in the drywall, but the Hubs wasn’t sure there was enough support for the heavy track and doors.  I was pretty bummed and started thinking I wouldn’t get the barn doors I’d been envisioning.

A few weeks later we saw a friend’s barn door project they had just installed and as the Hubs discussed the install with his fellow DIY-All-The-Crazy-Things-My-Wife-Thinks-Up husband, a new option was discovered.  Their track and hardware was less bulky and not as heavy, so it didn’t need as much support as the system we had.  They had purchased the kit on Amazon and really liked it so we were pretty confident we would feel the same way.

The Hubs drew up a new plan and determined we needed to build new doors that weren’t as heavy as the ones we’d already prepped.  It was a little disappointing, but I was excited to finally have the project back on track and feeling good that it was actually possible.  I posted the track and the hardware we already had on the buy/sell page and the Hubs ordered a similar kit on Amazon.  The kit arrived quickly, but life got crazy again and the project had to wait.  Over the Christmas holiday the Hubs got things rolling again starting with installing the track in the office.

tracktrack2He had to drill a few new holes for the support rods so we’d hit the studs but he made it work.  And then he built two new doors out of cedar planks using the same design as the original doors he’d built (which became backdrops for a recent show display and are now posted for sale).  Although they were pretty in their natural state, the cedar had an orange tone that clashed with the other wood tones in the space.  I’d been envisioning weathered, rustic doors like something Joanna Gaines would salvage and use.  So we decided to stain them and see how I liked that.

doorA coat of stain later, they were looking much more in line with the other elements in the room, but it was still too much wood for me so I decided to paint over the stain and then distress them so the bits of stain and wood would show through.  The Hubs picked up white paint at the store and I planned to paint over the next few days.  But then I saw the perfect color on a dresser one of my favorite bloggers was redoing for a remodel/flip house she’s working on and I knew that was what I needed.  Unfortunately, she was using Maison Blanche’s Printemps chalk paint and there are no retailers for that brand here in Alaska.

doorstain

So I did some research and found a similar color in Annie Sloan’s chalk paint line (which said favorite blogger also uses often) that was available locally.  It’s called Chateau Grey, but it’s really a greenish grey color.

paint

paintcolor

Now that I had my perfect paint color I set to work.  Since the weather has been in the negative temps and the doors were so large I set up shop in the garage with the doors propped up on various plastic totes.  The Hubs joined me in the garage to organize and clean up a bit from several recent projects.  We left the door to the house open so the kiddos could be with us as well, but they weren’t staying out of the way enough so the Hubs rigged up an impromptu baby gate for the doorway.  The ensuing pitiful faces were hysterical.  They whined and paced and made a few attempts to thwart this annoying obstacle.

pitiful

This was the easiest painting ever, because they recommend you brush in all directions for a rustic finish.  Which means paint like no one’s watching.. except those sad little faces behind the gate!  I cranked up the radio and boogied my way around the doors swishing my brush, and my bottom, to-and-fro.   The end result was two very pretty greenish gray doors.  Both the Hubs and I were really liking the color but my heart was set on that distressed look so he dug out the sander for me.

doorpaint

As I got ready to sand I noticed this heart wrenching little face.  While her siblings had given up and wandered off to nap, she sat like this for hours, sighing every so often just to remind me that she wasn’t pleased with being detained.  Unfortunately for her, it was time to sand so we removed the gate and closed the door to keep the dust out of the house.

pitiful2

A light sanding brought out so much texture!  Just look at how different the one un-sanded panel on the right looks from the rest of the door.  I had to hand sand in a few of the tighter spots but that went quickly as well.

doorsand

Because I was using a chalk paint the next step was wax to seal everything in and protect the finish from those slobbery children of ours.  Although this wasn’t the first time I’ve used chalk paint it was the first time I’ve used it on a project big enough that required sealing, so this was my first experience with wax.  I used Annie Sloan’s clear wax so it would work well with the paint.

wax

Using the “boogie while you brush in all directions method” it went on very quickly although it was a bit straining on my hands because you ‘push’ the wax into the grain.   A little pain was totally worth it because it really highlighted all of the texture the sanding had created.  Just look at the difference between the waxed half on the bottom right and the un-waxed section on the top left!  And up-close it had so much detail!

doorwax

doorwaxclose

To give you a better sense of how much the wax changed the look, here’s a shot of the difference.  The door on the right has been stained, painted, sanded and waxed while the door on the left has not yet been waxed.

doorsdifference

I got the front of both doors waxed and was going to wait a few hours to flip them over and wax the back side (yeah… just think on that for a moment…) but the Hubs made a great suggestion – why not hang them and I could wax the back while they were on the track.  He’s seriously brilliant sometimes – which is one of the reasons I keep him around. 🙂  So up they went.  The rollers on the hardware just sit on the top of the track and are very easy to install – it’s just a matter of lining them up and setting them on the track.

trackinstalledclose

I love how the black hardware looks with the green!  And it’s got an industrial rustic style that fits our home perfectly.

trackhardware

Here’s a few more shots of the doors installed on the track and ready to glide back and forth.

trackinstalled

trackinstalledright

Seeing the green next to the white cabinets makes me so glad I didn’t paint them white.  It would have been too much and this color really makes them look reclaimed rather than new.

installeddesk

installedcraft

I could have stood here and stared at them all day.  They look awesome open.

installedangel

And closed – although the fur babies weren’t fond of this option!  After we had them installed we noticed the door on the right sits at a bit of an angle from the other door creating a small space at the bottom of the seem between the doors.  The Hubs thinks he may have installed the hardware a little crooked which is causing this issue.  We’ll correct that at some point, but since the doors will be open 99% of the time that can wait a bit.

installedclosed

Here’s how the doors look from the other side when closed.  It’s not as dramatic as the office side, but like I said – it will be very rare that these doors are closed.  I’m sure the fur babies are appreciative of that.

installedclosedbackside

In order to fill the whole opening we did have to make the doors a bit wider than the side walls, so they stick out just a bit.  It’s not really noticeable and it actually works well because it provides just enough room to add handles so the doors are easier to move from this side.  I haven’t picked out hardware for that yet, and since it’s not a priority I’ll take my time to find something I really love.

installedoverlap

There’s also a bit of extra room between the doors and the cabinets.  We built the desk when we were planning to use the original barn door hardware which would have hung away from the wall a bit further, so we left extra room for that.  Now that we chose a more flush mount system there’s more room.  I think it still works well and it’s just wide enough for me to sneak the broom in there when cleaning.  Plus on the craft cart side it leaves  plenty of room to reach back for my paper cutter without scraping your knuckles on the doors.

installedoverlapdesk

installedoverlapcraft

I’m so happy to have this big project done and I smile every time I look at these beauties.  They really give the space a finished feel and add so much character.  In fact they were looking so good that my craft shelves were feeling a bit “womp, womp” next to them, so I’ve been changing things up over there to create a more cohesive look.  I will share that update soon. 🙂

installed

I’d love to hear what you think of the end result, so leave a comment below.  And if you have questions about anything I didn’t cover send those over too.  Have a wonderful weekend!

Shared on:

Save

New Bedding in the Master

WideAngleFromDoorI know what you’re thinking, it’s No-Spend April so why is she telling us about new bedding?!  Don’t worry these changes were made back in February and March, I just haven’t had a chance to share them yet.

Just before our vacation in Hawaii we agreed to temporarily take in a friend’s dog when his roommate got deployed suddenly and could no longer watch the dog while our friend was out of state.  The dog stayed with our pups while we were in Hawaii, but apparently had some anxiety about the change and ATE a huge hole in both the coverlet and throw on the bed overnight!  Our poor house sitter was pretty upset to discover the problem.  We confirmed that both pieces were not repairable and had to be replaced so we went shopping for new bedding in Hawaii and brought it home with us.

MasterArt2

Here’s how the room looked the last time I shared it.  Not bad, but not amazing either.  I began changing things up in here last year, starting with selling the art over the bed.  It was pretty but didn’t jive with what we had going on in the rest of the house and I felt it was a tad small for that spot anyway.  I updated the curtains and throw blanket after our trip to last summer, but didn’t share them on the blog because I wanted to wait until it all came together.  You can see peeks of those changes when I shared the bench the hubs built for the foot of the bed.

During that time I also agreed to reduce the number of pillows on the bed.  The hubs is not a fan of multiple pillows and having to move them every night only to put them back the next morning so they often ended up stacked on the tub in our bathroom, which drove me nuts!  Rather than fight the idea I decided to try simplifying and see how I liked it.  Turns out I don’t miss moving the pillows either and I like that making the bed is easier with three pillows opposed to 8!  In fact, I like it so much that I’ve reduced the pillows in the foster room as well!  But even with less of them, the new grain sack pillow in the middle is what really what made this room come together for me.

ColorCloseup

The new coverlet and throw came from TJMaxx in Honolulu and I wasn’t sure about them at first.  It wasn’t a dramatic change from the tan coverlet and blue throw, but it took me a while to get used to the new colors.  Adding the grain sack pillow I ordered at the Vintage Market last month was the key.  The grey stripes coordinated with the grey throw and the black stripe tied into the metal of the bench at the food of the bed.  I moved the magnolia wreath I’d had out in the family room over the bed and suddenly I had a simple but pretty farmhouse style bedroom!

StraightOn

That little bit of green in the wreath and the blues and greens in the curtains pop against the the neutrals but in a classic way.  It feels chic, but simple and very relaxing – just as a master bedroom should be.

AngleFromBathroom

Here’s a shot where you can see the whole combination of the bed, bedding and bench.  There’s a lot of textures going on, but because most are neutrals it’s not overwhelming like the darker bold colors we had before.

Closeup

The grain sack pillow is actually painted rather than authentic fabric.  Although I’d prefer the real deal, it was out of the budget and this option allowed me to support another local artisan who let me customize just what I wanted.  In my excitement about the market I only specified which colors I wanted when I ordered and forgot to mention which direction I wanted the stripe to go, but I think the end result works perfectly.

Ties

The back is closed with simple ties down the length of the pillow, which makes taking it off for cleaning super easy.

DoorAngle

The changes make the space so bright and inviting.  Plus it ties into the modern farmhouse feel in the rest of the house.  Now I just need to find more time to enjoy naps in here! 🙂

TDC Before and After

DIY Industrial Vintage Laundry Dry Rack

2Today I’m sharing another industrial pipe project the hubs recently did for me – a dry rack in the laundry room.  I often have sweaters and tops that need to be dried flat, but since I don’t have a space to do that I usually hang those items on a folding dry rack over a vent in the adjacent dining room.  Unfortunately the hubs like his jeans to air dry and are often occupying the folding rack when I need to dry sweaters so my solution was a permanent rack in the laundry room over the sink.

1I originally asked for a bar straight across but the hubs determined that in order to get the best stability we’d have to place the bar higher than I originally thought so he created a small drop down in the design to compensate for the higher spot.  Luckily, I’m pretty tall and can reach the hanger up to catch the rod with the hook easily, so the height is no problem for me.

3

As you can see I’ve already put it to good use. It does infringe on Luna’s eating space a bit, but I think she secretly likes hiding behind the clothes when the rack has several items on it and as long as she can see out the window she’s a happy camper and I’m happy to have a space that functions and looks awesome. Thanks honey! 🙂

Shared on Knick of Time’s Vintage Inspiration Party!

DIY Industrial Cart Bed

Cart

Remember this cool metal cart I shared last month? Well the hubs has worked his magic and converted it to the coolest bed for our foster room!  I don’t have step-by-step instructions since he worked on this while I was working on other projects, but you can see the basic design in the picture below.

9

He also built a trundle frame based on a plan I found on Pinterest that rolls right underneath so we have the ability to take in siblings if needed.  Both the trundle and the bed are super sturdy so there’s no worries about having a kiddo and all of the dogs on there together, which I can envision happening.

8

Here it is all dressed!  And because we went with a simple day bed style it should be simple and easy to teach kids how to make the bed and keep things tidy.  It’s also a great new place for Luna to explore as you see below.

7

We still need to get a mattress for the trundle frame and figure out a desk and nightstand for either side of the bed, but I think this room is finally starting to come together!

Shared on Knick of Time’s Vintage Inspiration Party!

A Simple Change

4

Ever since we finished our farmhouse desk and industrial shelves in the office I noticed that my craft cart wasn’t quite coordinating with the new look so I decided to switch out the knobs for something more vintage or industrial.  I searched online for a while and found some really cool options like these railroad spike heads and these numbered numbered pulls, but the $8-9 a knob price tags were a bit more than I wanted to spend on this project.  So I did what any bargainista would do – I used spray paint!

1

A few quick coats of my trusty ORB spray paint and I had some industrialesque knobs for FREE!  It made quite a difference when I reinstalled them.

2

They add a bit of dimension to the piece now, where before it felt kind of flat.  It makes me fall in love with this great piece of furniture all over again.

CraftDeskB&A

I’m considering tweaking a few other things in this corner to work a bit better and add a bit more industrial style but I’m enjoying how well it coordinates with the rest of the room now – and didn’t cost a dime!

Finished

Linked to The Scoop @ Cedar Hill Farmhouse, The Everyday Home, Confessions of a Plate Addict, and White Lace Cottage.