The Shed Bed

It’s been a while since I’ve had time to write for the blog, but I found a few minutes today to share one of the last projects of the season before the snow started to fly.  I added a whole new flower bed along the side of the shed!  This space used to be a dumping ground for pallets and scrap wood we were saving for future projects, but its one of the first things you see as you pull up to the house and now that the green house was over her I wanted the area to have a more structured look.  So the Hubs helped clear out all the wood at the beginning of the season and I started planning out the layout once I confirmed the exposure this space gets is mostly shade.

Here’s how it was looking as fall started to arrive.  I’d used left over edging stones to create a border and placed a few pieces of garden art to start establishing the structure of the layout.  I stopped at an end of season plant sale near my office and got several options that should do well in the shade.  I planned to fill in with other plants from another bed that will be eliminated next summer.  Since this whole area is rocky back fill I put down a layer of top soil to create the base of the bed.

Once the top soil was in and the plants were in the ground I covered the areas around each plant with newspaper to prevent weed growth next season. It was an interesting process since the wind decided to kick up about the same time so I had to quickly put mulch down over the paper to hold it in place.

While I alternated between piecing newspaper sections around plants and chasing them across the yard as they blew in the wind, my assistant was quite busy catching up on her dirt baths…

I used wood chip mulch because it was inexpensive and I had several large areas to cover between this bed and some other projects.  The Hubs got me a full truck load of wood chips for around $20 the same day he got me the load of top soil and gravel to go around the green house.

Since I’m using perennials, I left plenty of room for things to spread over the coming years.  I used lambs ear around the rusty metal tank to create a batch of low visual interest along the front of the center of the bed.

These two hostas were transplants from the shade bed at the corner of the fenced yard which will be eliminated next season when we build a new outbuilding.  I call it “The Barn” but the Hubs thinks it’s a garage.  We’ll see who wins that debate. 🙂

Another transplant is this little astible.   This is the third placement it’s had since coming to our house.  He started in the gifted garden but was getting too much sun so I moved him to the shade bed where he did much better.  Hopefully the third time is a charm holds true for him and he continues to grow even fuller in this spot.

I also used a few new catmint plants since Luna loves the ones we have in other beds already and it’s an easy keeper that fills in areas nicely.  These will give her a couple to choose from so she alternates which she rolls in each day so they all get a break to recuperate!

I also transplanted a Seal of Solomon that surprised me in the gifted garden.  I’d brought him back from my Mother-In-Law’s garden in Washington and hadn’t seen him in the spring so I thought he hadn’t survived the winter.  This spot should be a much better exposure for him and he looks quite cozy behind the little quail family who are now safer from my active four-legged children!

Here’s how things looked once everything was in.  I’m excited to see how it all comes back next spring and watch it fill in the space.

There’s still some finishing touches needed, but this is a much better first impression as you come up the driveway.  It will look even better when I get that gravel the Hubs got me spread in front of it! Fingers crossed the weather will cooperate to let me do that next week when I have some time available so we don’t have piles of material at the corner of the driveway all winter!  And while I’m doing that the Hubs can get the last of the shed’s gutter completed so we have a ready supply of water when spring returns. 🙂

Garden Touring

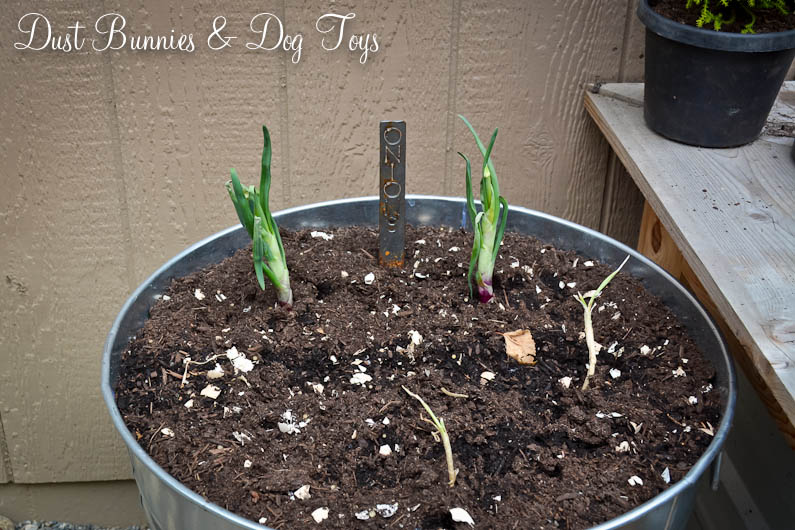
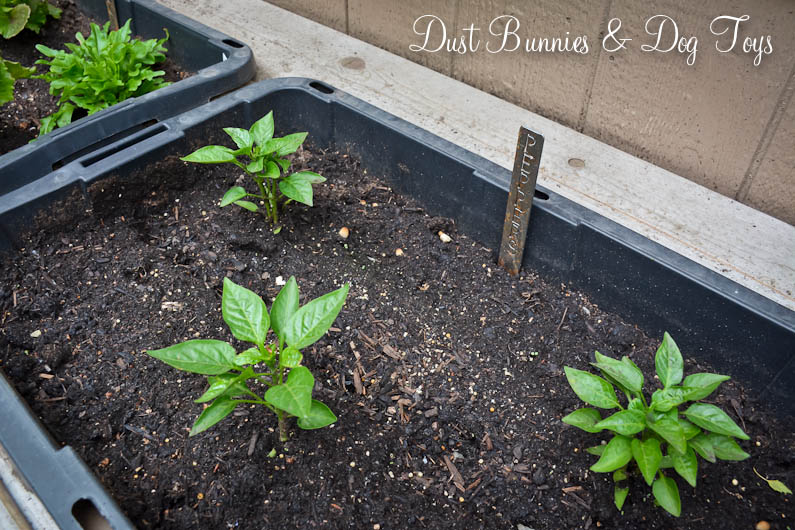
Today I’m sharing a recap of the fantastic garden tour I did last weekend.  Grab something to drink and get comfy because there are going to a LOT of pictures in this post!  The tour started off at the Willow library where the Willow Garden Club maintains this lovely display garden.  I wandered through and enjoyed the flowers while waiting for the maps for the tour to be handed out.  There were several varieties of columbines that were doing quite well.

There was also a Monkshead plant tucked between the columbines.  I was surprised to see how clumped it’s foliage was as when I spot these growing in the woods on our property it’s usually a single stem with just a few ‘hoods’ on it.  I’m going to have to research them a bit more to see if this is a different variety or if it’s just that it is in full sun, versus the shade ours have under the trees.  I’m aware that they can be poisonous so  I won’t be adding them to the flower beds, but I’d still like to know.

The tour organizers gave a brief welcome and introduction to the event, then handed out the maps to the four gardens and lunch location with a short write up about each, which I’ll include in my descriptions below.  Most of the gardens were open for the entire time of the tours so you could visit them in any order.

I decided to visit the two gardens closest to the lunch spot to get started.  The first garden I visited was Janet & Lee Thibert’s Garden on Nancy Lake.  They’ve done a lot of work to the property since purchasing it as a cabin property in 1989.  They tore down the cabin and built a lovely home with a verity of landscaping, including peonies, forsythia, dogwood, bleeding heart, roses and many ground cover plants.  Part of their property has gorgeous rock work that creates a very manicured feeling.  Around their home are many cherry, birch, larch, maple and spruce trees.

The first part of the garden that tour visitors saw is an adjoining property they purchased a few years ago where they created an idyllic terraced grass and flower beds.  The first two beds as you descend the walkway were full of strawberries, which Janet said she uses as ground cover more than a harvest crop, although she did say she will sometimes pick a few to enjoy.  The third bed had a mix of bell flowers and other perennials.  The bottom beds were still under construction but had recently been planted with peonies and poppies that should fill in the space as they grow.

Off to the side there was a small trail through the trees that led to their home on the property next door.

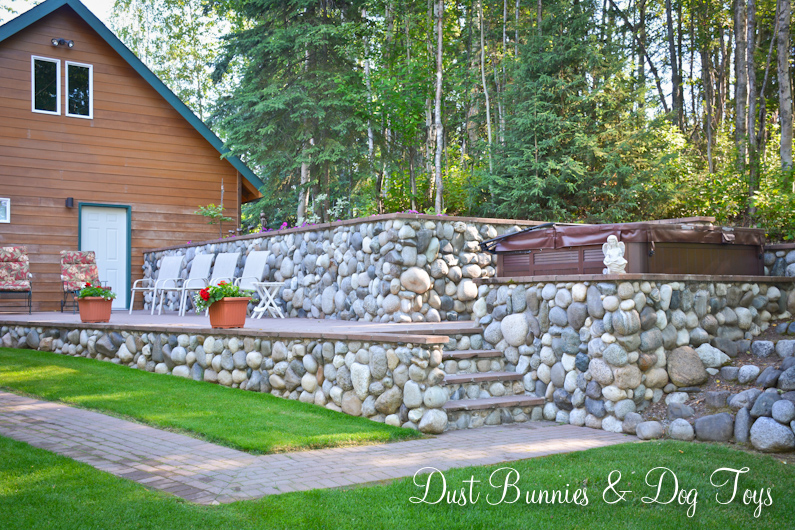
It was a lovely wood style home surrounded by a lush green lawn.  Off to the side they had created a rock retaining wall and raised deck for their hot tub.  The top of the wall was adorned with pretty annuals and several cool rock sculpture ants.

Following the lawn down the opposite hillside led to a beautiful open area with more rock work that reached well above my head before the trail narrowed and led to a dock on the lake.

The front of the house was just as stunning, with more grass pathways and and rock work.  There was a water feature in the top section of the year and a few raised beds off to the side in an area that looked like it was still being developed.

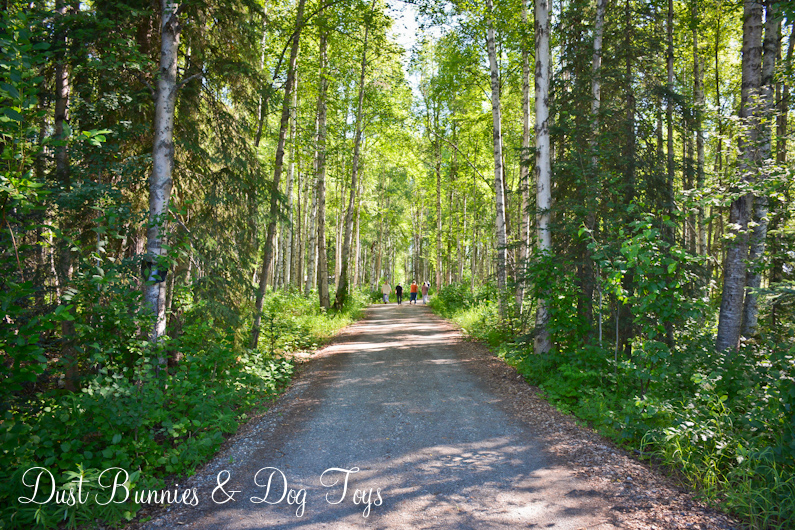
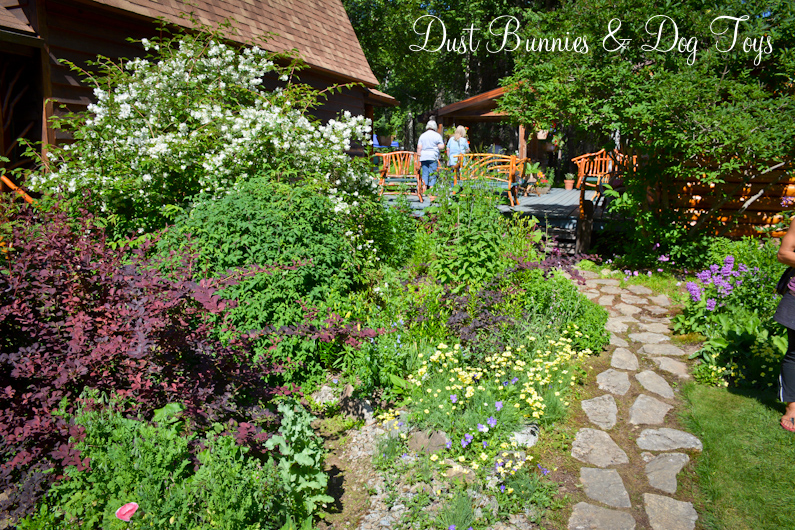
The next garden was “The Birches” on Long Lake.  When I arrived I followed others down this amazing tree lined driveway which opened to an amazing country style garden packed with a variety of ferns, iris, currants, rhododendrons, a massive mock orange and other perennials planted many years ago.  The design of the garden encourages walking through the groupings of plants on several paths.

I followed a main path around the house to find this lovely view of the lake accented with more beds of wildflowers along the shore.

Off to the side was a pathway that ran along the shore.  On the other side of the lakeside lawn was a smaller path that curved around the other edge of the shore.  This area had several areas still in development including a fun boat and trellis planter in the making!

It was time for the lunch stop so I headed a few streets over to the Nuss home on Little Lost Lake.  They had a great open lawn area next to the lake where you could see their boat dock and arbor.  They had set out a large tent which was decorated with fun paper lanterns.

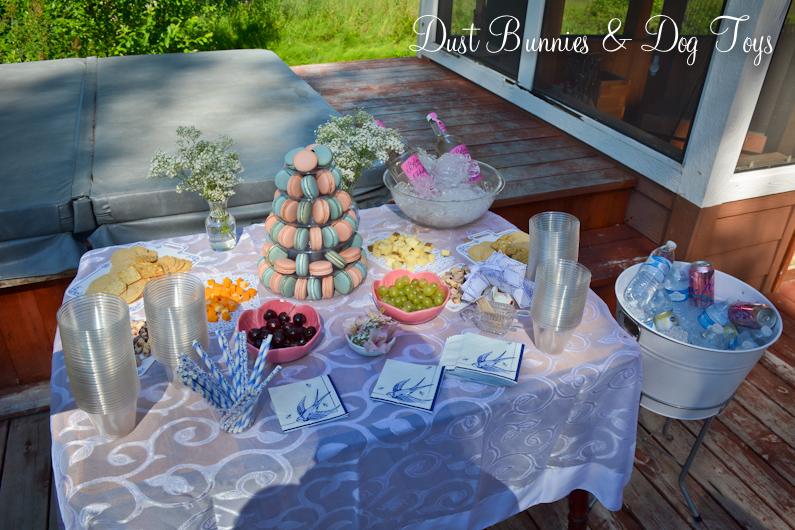
They even had a cute little spread of treats on the deck where they did raffle drawings for plants from several of the host gardens, including several unique and rare varieties.

While enjoying my lunch under the tent I spotted this amazing bird house.  I’m now on the hunt for something similar to add to my yard.  And I got a chuckle out of this guy’s shirt.  I need to find one for the Hubs!

After lunch I spotted this fun little fairy garden out near the driveway as I made my way back to the truck to head to the next garden – the world famous Coyote Garden.!  It was the one I was really excited to see and I knew our neighbor friend would be there helping out!

On the way to the next garden I spotted Denali in the distance and just had to pull over to get a shot.  It’s still amazing that we can see “the great one” hundreds of miles away.

This is Coyote Garden’s 25th year of garden tours!  Created by Les Brake and his partner Jerry Conrad, the garden has been featured in numerous magazines over the years.  It continues to receive kudos from well-respected garden publications all over the U.S. and was featured in last year’s fall issue of Garden Design with an article written by Dan Hinkley.  This year the garden will be profiled in the summer issue of a new magazine for the northwest – Northwest Travel and Life.

Our neighbor, Debra took a break from her duties greeting guests to walk through the garden with me and show me around.  She also introduced me to both Les and Jerry who are good friends of hers.  We started the tour on the deck of the house, which featured several pieces of Jerry’s amazing willow furniture.

The deck leads to a stone walkway along the side of the house where a variety of perennials were blooming.

This is the view from the deck, down the stone walkway.  That’s Les chatting with some ladies from the Anchorage Botanical Garden about – of course – garden stuff.  I enjoyed listening in for a bit until they started talking above my head. 🙂

Near where Les was standing was this amazing poppy.  I’ve never seen one with this coloring or pattern and it was the only one I saw there.

Looking from the pathway toward the house there is a small area of grass which leads to a narrow trail back around to the front of the house.  I’ll share more on that side in a moment.

At the end of the stone walkway you go through this curved structure that Jerry built, which leads out to an open lawn area.  This is the center of the garden as there is more beyond the grassy area that I’ll show shortly.

to the left of the grassy area is a small pathway to the lake.

Across from the curved structure is this newer back section of the garden.  It holds quite a few surprises.

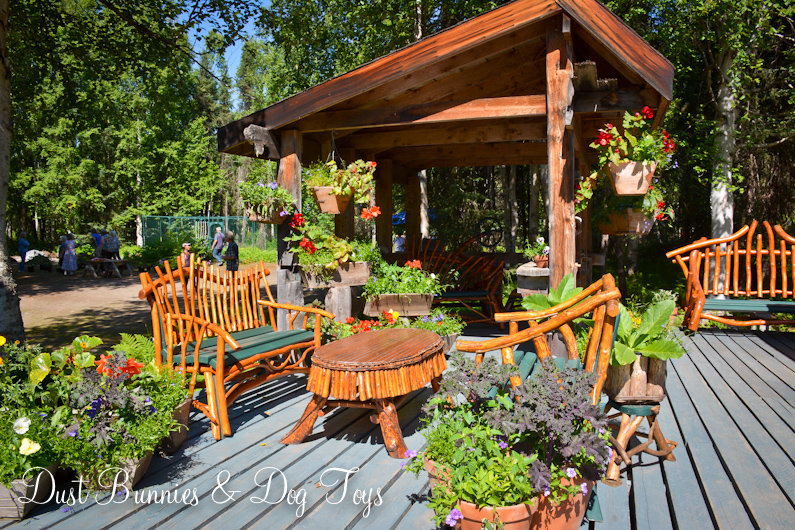
As you enter this area a small gazebo structure is down another stone walkway off to the left.  It was created by Jerry using the same methods he makes the willow furniture from.  It just begs for you to sit and enjoy the garden.

Across from the gazebo is this stunning moss meadow!  I just wanted to lay down on it and pretend I was in a fairy tale movie.  It would be an unbelievable photo session location!

And here’s the view looking back from the moss meadow toward the house to give you a sense of the depth of the gardens.

We made our way back up to the original stone path off the deck and wandered behind the house on the narrow trail I mentioned before that leads around the other side of the house.  Debra told me that this large structure is new.  It replaced an older willow structure that was deteriorating after decades in the garden.

Les was also having a plant sale during the tour and thanks to Debra I already had a pink peony on reserve when I arrived.  I opted to add another to my pile since they were well priced and something I’ve been planning to add to our garden for a while now anyway.  I’ll share where they end up before the end of the season. 🙂

The last garden was Dream a Dream Dog Farm.  Veterinarian Susan Whiton, and Iditarod musher Vern Halter have combined businesses, pleasure and beauty when they decided to create this lovely bed & breakfast with a garden area to complement a bustling dog kennel.  Dream a Dream hosts many visitors every year who wish to savor the true Alaskan experience.  I was quite impressed with the spread as I walked up the driveway from the sign at the road.

Just past the house and kennel building are the main dogs’ quarters.  They were actually very quiet, napping in the sun until one saw my camera and sounded the alarm.  Luckily Vern was nearby and told them to pipe down so they all went back to napping.

Behind the house is this lovely little garden, which was well laid out to contain a lot of crops, yet still feel wide open.

The green house was cram packed and getting good use.

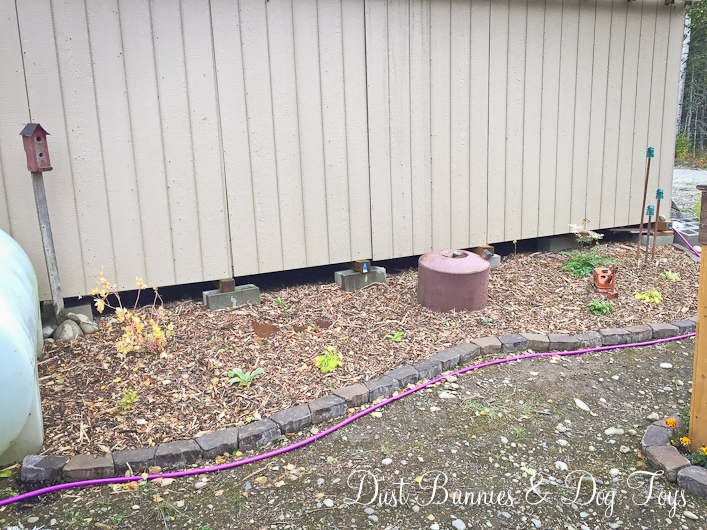
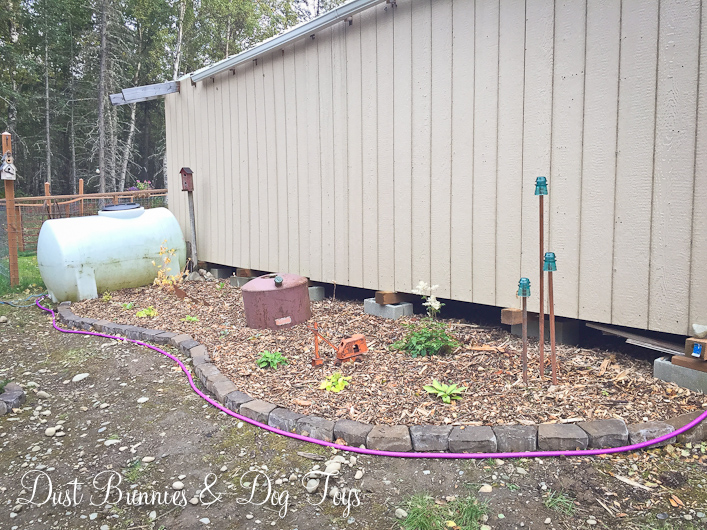
They had a gutter running along the side of the green house that drained into a barrel for rain water collection.  We’re setting up a similar option along our shed which will stock the water tank for the raspberries.

There were several raised beds, some with edible crops and others with flowers.  This one was cram packed with a variety of poppies mixed with a few other perennial wildflowers.

Here’s the view from the far corner at the front of the garden.  It’s amazing how much they’ve fit into this small area.

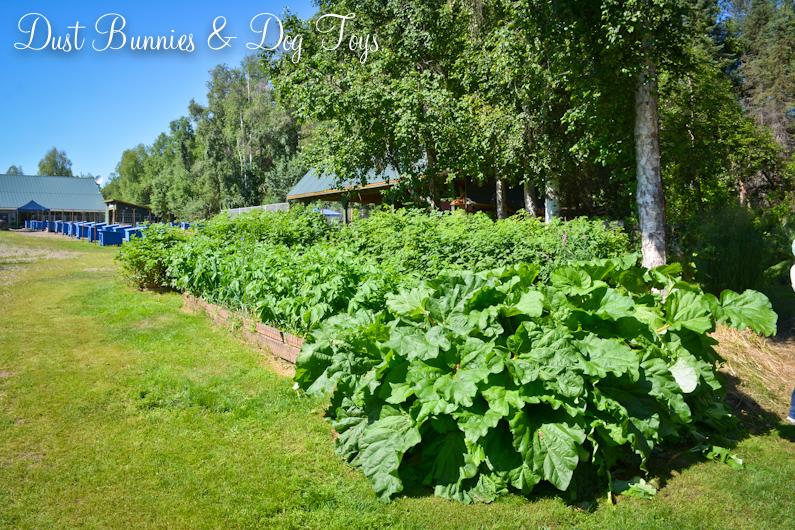
Down the hill from the garden were more raised beds and this monster rhubarb plant.  I hope the one I just adopted from a co-worker is this healthy after acclimating to our yard!

Beyond the gardens was a small enclosure for some of the older puppies.  They were so stinkin cute and super friendly.

Next to their enclosure was this Iditarod sign, which I’m sure is authentic!

This area of the property opened up to a mushing trail, which is perfect placement for training the dogs.

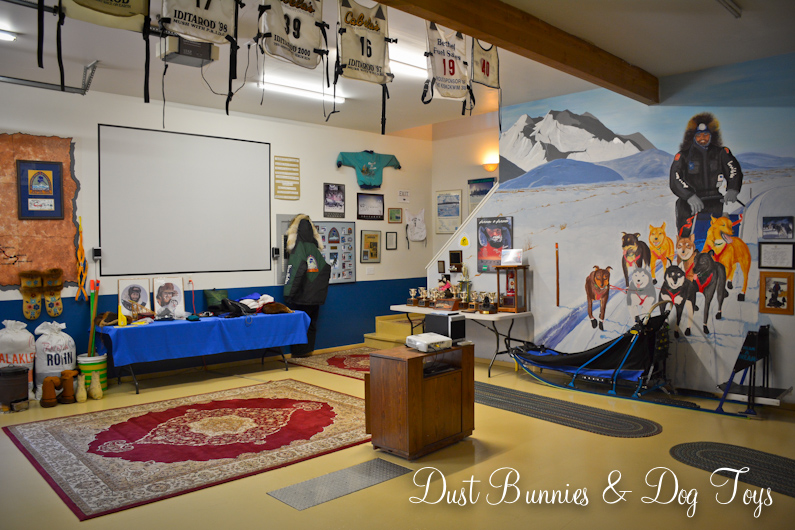
After exploring the gardens I visited the kennel’s building which was set up to entertain tourists and showcase Vern’s mushing career accomplishments.  The mural on the wall was a great depiction of him and it was pretty cool to stand under the bibs he’s worn on the trail.  The inside of the large bay doors also had a mural of Alaskan scenery and wildflowers.

It was a perfect day for touring gardens and it was so much fun to see the different styles and methods used by each host.  I’ll be putting a few of the ideas I got during the tours in reserve for our property and look forward to attending again next year and seeing some new gardens!


A Revamped Freebie Planter

Anyone else amazed that it’s already May?  We’re just flying through this year, but at least it’s almost time to start planting and getting our yard ready for the summer season.  Here in Alaska the temps are still pretty chilly overnight so I don’t dare plant anything outside just yet, but that doesn’t mean I have to sit around and wait.  I’ve been cleaning up the flower beds, looking for signs  of life from my perennials and getting my plan for where things will go together.  That plan includes a few new pieces like this freebie planter I got from someone I bought another item from.  They were moving out of state and were purging items so she said just take all the pots and planters on the porch too!  I was all too happy to help!

The other pots in the freebie group didn’t really suit my style so I grouped them with other pots I no longer needed and traded them on the buy/sell page as part of a deal for another item I’ll share on the blog soon.  But I had a plan for this little gem.  While the bright orange was cheerful it needed a new coat of paint and I knew it would have a classic farmhouse style if I painted it ORB.  So the first sunny day I had time I drug her out in to the driveway and sprayed away.  Here’s how she looked after!

Luckily I’d been hoarding saving a large planter liner for quite some time and it was a perfect fit!  Since I already had the spray paint and liner the only cost I had for this project was the plants I’ll be putting in it!

Now she’s all ready for summer in the front flower bed.  I’ve got two Bacopa set aside just for her.  She also hides the cord that comes out of the garage wall in this corner – which will all but disappear once the plants start to grow and trail over her edges.   One planter down, and a few more to go before the weather cooperates and it’s time to plant! 🙂

Shared on Savvy Southern Style’s Wow Us Wednesdays and Knick of Time’s Talk of the Town.

Save

Our New Green House!

At the end of last summer, the Hubs was suddenly motivated to build a green house and although I had lots of ideas on what I wanted, I didn’t have a plan fully thought out for the project.  But I definitely wasn’t going to take advantage of this unexpected desire to build when it was in my favor and so the green house building began.

I did know where I wanted the green house – behind the raspberry bushes where it would get the most exposure and I could see it from the house and driveway.  Unfortunately this spot is slightly sloped so it’s not an ideal building site, but the Hubs worked that out by building a platform for the floor of the green house with a support for one side to cover the difference.

0

He used a large pressure treated board for this support since it would sit on the ground.  The floor itself was made with pressure treated 4×4 joists topped with 3 sheets of plywood.  The lack of a permanent foundation allows us to move the green house should we determine there’s a better spot for it in the future, but provides adequate support for the current location.

1

I wasn’t sure on the size so based on the spot the Hubs suggested 8′ x 12′ and that seemed reasonable to me, so I went with it.  He framed up the walls for either side and I helped hold them in place while he nailed on supports.

2

Working from the plan in his head based on pictures I’d shown him of designs I liked, he framed out the front and back walls and started adding trusses to create the roof.  He also created a support frame for siding that would go half way up the sides of the all 4 walls.

3It really started to look like something when the siding went up on the lower walls.  He had to get creative with the front corner due to the slope of the ground, but he made it work.

4

The siding will provide a great spot for me to attach the gutters I used for strawberries last year.  This season they will hold lettuce, spinach and chard or kale for salads and the strawberries will move inside the green house to give them a longer growing season.  You’ll notice the large water tank we added next to the shed last year is nearby for easy watering.  The front yard hose reaches the tank fairly easily so filling isn’t too difficult and the natural slope of the yard provides a gravity feed for watering the raspberries and filling watering cans for the green house.

5

Next came the clear plastic siding and a window in the back that can vent heat if needed.  He used the contoured wood slats designed for these clear panels to support the pieces and provide spots to secure them to the frame.  I added some paver blocks we had on hand in front of the the doorway.  I may add a few more once I get things set up, but for now it creates a nice little stoop for the structure.

6

One of his last steps was installing a storm door, which also has a window and screen that can be used to vent excess heat if needed.  He lucked out finding this door on a “returned” clearance rack for much less than it originally sold for. A brand new door for a fraction of the price – he’s learning my bargainista ways quite well!

7

He finished off the open space on either side of the door and we purchased a piece of low cost linoleum to cover the plywood floor.   I chose the grey stone pattern for two reasons: A) I liked the look of it for a green house floor and B) the dark colors should absorb heat during the day and release it back out to the plants during our very short nights during the summer.  Somehow I neglected to take a finished picture of the exterior but here’s some views of the finished interior.

8

Finishing the project just in time for the season to end last year it provided a spot for me to move plants that were starting to struggle with the temps and spots for my garden art I was starting to collect from the yard.  Several pieces found storage spots along the top of the wall, where they fit perfectly.

9

Even at the end of the season it was still getting pretty warm inside the green house so it should work well to extend our growing season which is sadly very short due to being next to the mountains.

10

And here’s how it looked during the final weeks of summer before fall arrived.  Having these containers in the space temporarily really helped me develop a plan for how we’ll set up everything come spring.  With our first snow of the season in late October we opted to leave everything in here and store the patio furniture in here for the winter as well, so it’s a hot mess these days, but come the first sign of spring I’ll be pulling everything out to get my plan in motion.  I’ll be sharing that here on the blog very soon so check back and feel free to make suggestions when I do! 🙂

Shared on:

The Palmer Garden & Art Faire

1

Today I’m sharing a little recap of the Palmer Midsummer Garden & Art Faire.  Although this was the 6th annual faire, this was the first time I’d attended the event and I had an amazing time!  We had perfect weather, a wonderful variety of vendors and a plethora of workshops, as well as entertainment. The photo above only shows one small section of all that was going on!

The first thing I did was join a workshop on Alpine hypertufa container gardens.  Our instructor was Jamie, a local alpine plant expert who owns the Alpine Nursery in town.  He reviewed his recipe for making hypertufa containers (1 part Portland cement, 1 part perlite, 1 part pete moss and water mixed with latex additive and a tablespoon of fiberglass fibers for strength) and explained the process for forming the container using various common garden or household items as molds.  He showed us how to plug the hole at the bottom of the container with embroidery mesh before he started filling it with dirt to plant.

2

3

He added his own special blend of soil, which includes native top soil, pea gravel and sand.  This provides a consistency similar to what alpine plants are used to growing in in their natural environments.  He added two interesting rocks to create various pockets for the different plants, including a rare specimen he acquired from a fellow nursery owner.

4

5

6

Once he had everything planted how he wanted, he added crushed hypertufa from a mold that cracked while curing on top to replicate the gravel topsoil of the native habitat of these plants.  Here’s how it looked when it was all done.

7

As the class was wrapping up I noticed these ladies at the instructor’s booth.  They were definitely channeling their garden spirit with their outfits!  I’m pretty sure they were part of one the many performances during the faire, but it was fun to see them milling about in the crowd.

8

I also browsed Jaime’s plants before heading out to see the other vendors and spotted the impatients my neighbor had gifted me last summer!

9

Next door to Jaime’s booth was a very talented bonsai gardener.  I admired the creativity and patience it took to create these beautiful container gardens.  Here are two of my favorites, which I was surprised included one crafted from a birch tree!

10

11

A little way down the vendor trail I found this fun photo op booth from one of my favorite local thrift shops, Thrifter’s Rock.  Their booth was just as fun with unique display racks and quirky wares.

12

14

Another nearby vendor had this bright and happy chair planter.  I’ve got an old chair frame that I’ve been holding on to so I can create something similar!

13

I was madly in love with these gorgeous hand made bird houses!  The copper roof was a fantastic compliment to the cedar carved steeples and the rustic branch on the front made it just perfect.  Unfortunately they were out of my budget for now, but I did note the vendor’s business name so I can contact him to get one when I do have some extra funds for garden décor.

21

Speaking of garden décor, you might have noticed this cutie in my last post!  This vendor had several tall willow dragonflies available but I liked this little one.  Although they had planned to sell this as part of the arrangement it was displayed in they agreed to separate them and I got the perfect addition to my wheelbarrow planter for just $5!  They assured me that this little guy will weather the winter fine, but I’ll probably put him up in the shed just to extend his overall lifespan.

15

There was lots to see and do at the faire, including this selfie photo op for the Visitor Center.  These tall mushrooms and hanging blooms were so cute I just had to take a picture, even though it’s not a selfie!

16

The Hubs joined me at the event and we decided to get some lunch from one of the food trailers.  The salmon egg roll we ordered was definitely unique but the caprese sandwich I selected was AWESOME!  And the strawberry rhubarb lemonade I had to go with it was just as wonderful.  It was the perfect lunch on a warm summer day.

19

18

17

While we were enjoying lunch I noticed this unique bike contraption nearby and soon discovered it was part of a demonstration some pretty ingenious youth were doing on how to use human power to make smoothies!

20

20B

After I’d seen all there was to see I headed back to the truck enjoying the fun little displays in front of the downtown Palmer shops.  I really liked this garden box which used fishing gear as part of the display!

C

Before heading home I stopped to check out a possible photo location which turned out to a great spot, although it didn’t have many options beyond this vantage point.

22

The neighbors were sure adorable too!  Look at those big floppy ears and spots!  I wonder if I could sweet talk the property owner in to letting me borrow one or two for a shoot! 🙂

23

It was the perfect end to a fun day.  I’ll definitely be attending the faire again next year and already have the tentative date flagged on my calendar.  Check back tomorrow to see all the fun garden art I found at the faire!

Appreciating Progress

Summer is flying by and my list of projects is still pretty long.  I’ve been super busy with photography clients recently thanks to wedding season, which is a good thing but it doesn’t leave much time to work on my gardens and I was getting frustrated by the slow progress of things.  But then I realized I need to remember we’ve only been in the house three years and have made some big improvements in that time.  So today I thought we’d take a look back at just how far we’ve come!

The biggest change is the back yard.  This is what it looked like during the final stages of construction before we moved in after winter had hit.  It was a completely blank slate.

1

And here’s what it was looking like about a week ago. Some of this is just temporary as we add other features in stages, but it’s filled in pretty well for our weekend and evening DIY efforts.

BackCorner

This was the main area of the back yard the first spring we were in the house.  A big field of bare dirt and gravel with the hideous chain link dog run we patched together until we could get the fence in and the yard hydroseeded.

YardBefore2

Now it’s functional and pretty. Eventually the grass will grow back in where we tilled to do the rock garden, and it will look seamless.

BackLong

And just look at how many of the projects I had planned that have already been done!  The gravel patio, fire pit, egg table, raised garden box and deck landscaping are all done or in progress.  And a few of these ideas ended up being changed in favor of a better idea, like putting the strawberries in the gutters around the corner and switching the sectional seating on the deck for a dining table.  There’s definitely some fine tuning and clean up to do, but it’s a space we can enjoy now rather than a bare patch of dirt.

DeckLabels

BackCenter

The raised garden box used to be surrounded by dirt and had a few measly little plants in it that eventually drowned from the rain off the roof.  Now it’s surrounded by pea gravel for a finished look and has a healthy crop growing thanks to the new gutter we had installed.

PlanterPlantedFront

GardenBox

The biggest change is the landscaping around the deck.  It looked like a wild patch of weeds at the beginning of this season.   Now its something you actually want to look at!  And it will only get better and better as the seasons continue and the plants fill in more.

1

DeckLandscape2

Last season we had the new sectional seating on the deck which was nice, but the change to a dining table works so much better for this spot and has gotten a lot more use.  Plus the dogs appreciate being able to “look out” from the edge of the deck this season and the Hubs and I enjoy the shorter walk to the chicken coop from that side of the deck thanks to the stairs he put in.

Patio1

Deck

I had planted these two bushes on the side of the deck at the end of last season and was extremely frustrated when the dogs ripped out the bush on the right before it could establish new roots.  But it ended up being a blessing in disguise because it made a spot for the new steps and rain barrel for the gutter.

DeckBushes

DeckSide

Around the corner we’ve gone from an awkward cubby to a defined planting space and chicken run.  I had planned for a large garden in this space but soon realized that the exposure wasn’t right for that plan so it became the chicken space instead and it’s perfect for that.

YardBefore3

ChickenCornerView

The revised plan for this side cubby has mostly come to pass.  We did add a storage shed, although it’s more for the chicken equipment than the yard tools I’d imagined but again it works for our needs.  And I’ve decided that I won’t ever use a potting bench so I don’t need one, although I’m sure the Hubs would still love to find a spot to install a smoker!  I’ve started on a plan to disguise those not so lovely septic pipes which are inconveniently in the middle of this space so watch for that update soon.

AlcoveLabels

ChickenCubby

Even the chicken space itself has seen improvement.  Going from the original run to a full on chicken yard that’s super secure.  Plus it gave me another little spot to plant.  The lobelia I planted along the side met destruction thanks to Brinley’s rapt interest in the chickens so I pulled them out and put in grass seed so I can pull up the curtains and let the chickens enjoy sections a little at a time.

Final

ChickenSide

Chick BlocksThe new strawberry gutters are doing well too.  It seemed like the strawberries had a slow start, but pretty much all of them now have buds, which should soon be yummy desserts or garnishes for my sangrias!


Strawberries

StrawberriesFlower

Along the fence the giant wheel the Hubs brought home for me has finally found a purpose with the new planting bed.  I think next year I’ll just have flowers in this spot so I’m not worrying about the dogs getting into edible crops, which will all be raised and together over by the garden box.  I’ll probably need to do some weed control in this spot come fall since I was in a hurry to install the bed and didn’t kill the grass underneath before hand, but some newspaper and another layer of dirt should do the trick.

WheelLabels

DeckAngle

On the other side of the house the gifted garden is starting to fill in.  It looked pretty full when we put it in that first summer, but adding the grass next to the rock border became tedious to maintain so I’ve appropriated all of those rocks for the deck landscaping and have begun the switch to the same block edgers we used over by the wheel bed.  I need to figure out what I’ll do around the deck we plan to add on the back corner of the house next year since I’ll need to tie that into this bed somehow so I’m moving slowly on changes over here for now.

Finished

Side

This is how the bed looked at the beginning of last season.  Just a few things coming back and lots of holes to fill in.  Now I’ve got a good base of plants to create the cottage style garden I want over here.

GardenView

BackSide

Out front we’ve went from construction city to looking like a home.  It still isn’t where I want it to be but at least there’s landscaping to welcome guests and dirt isn’t splattered against the house every time it rains.  I’m working through several ideas to change things up out here next season so I can decide on one and start some of the prep work this fall.

2

FrontCorner

3

FrontCenter

The front bed was the first space I planted around the house and I was so excited to have any kind of landscaping that I didn’t plan much ahead when selecting or placing the plants.  Several didn’t survive the first winter, and those that did took a while to come back in the second season.  This season I’ve fill in some of the holes and am starting to figure out what works best out here.  I’m planning to revamp this whole area next season but need to finalize the plan before I do anything else.  For now I’m just enjoying the colors the different flowers bring.

FlowerbedFinished

FrontFlowerBed

FrontBed

This little cubby in the front has been an awkward spot since the beginning.  It at least gave the house a bit of finishing when we first set up the space, but it had the same issue as the other side where several of the plants didn’t survive the first winter and the rest didn’t show much last season.  This season I’ve filled in a few spots and called it good until I can figure out the best way to make this spot function better.

FlowerbedSmallFinished

FrontFlowerbedSmall

FrontBed2

Our freebie raspberries looked quite spindly when they first went in last year, but produced a fantastic harvest well into the fall.  This year they’ve come back even fuller and are budding like crazy.  We added a haskap bush in front of them and moved the water tank over by the shed so the hose can gravity feed when we need to water.

Raspberries

Raspberries

Even the view from the driveway has improved.  The Hubs massive shed hides the ugly meters on the side of the house and the rain garden has become a nice focal point as you approach.  I’m still waiting for my clematis to grow in over the tire wall but when it does I will be amazing.  I’m hoping to get fireweed to fill in behind the tires and dwarf dogwood to cover the ground in front, but those are both low priority projects.

1

RainGarden

This garden has become my home for “lost” plants who need to winter over or no longer have a spot when I change things elsewhere.  This casual approach has created a nice variety and the foundation of what will one day be a very lush space.

View

RainGarden

And lastly, the spirea bush I planted just outside the fence when I got the ones on the side of the deck was looking quite dead earlier this season.  I was planning to tear it out, but luckily hadn’t gotten around to doing it because a few weeks ago I noticed green on it’s branches.  I pruned it back to encourage the new growth and that seemed to work because now it has one stalk of blooms!  Hopefully next season it comes in even more full and completely fills this spot, blocking the view of the leech field pipe just out of the photo from the laundry room window.

Bush


As you can see there’s been some pretty good progress since we started this little adventure.   I’m trying my best to appreciate how things are now and enjoy the little bits of joy I find when out in the yard.  If I hadn’t been so busy I would have ripped that spirea out weeks ago and wouldn’t be blessed with these pretty little blooms now.  So I’ll continue to tinker and tweak, which is what every gardener will tell you they are always doing. 🙂
BushFlower

DIY Metal Planter & a Peek at the Garden

OnionsPotFinished

Today I thought I’d share a quick peek of our veggie garden and a quick DIY planter I installed.  We had a red and white onion sprout in the pantry so I figured I’d give them a shot in the garden this year.  With all the spots in the garden boxes full I decided to add a secondary planter at the end of the box.

I originally envisioned using an antique wash tub and stand, but just wasn’t willing to pay $100+ for a planter.  So I used my DIY skills to create something similar starting with this metal stool we’ve had for several years.  You originally saw it on our balcony at the rental house.  It’s since been painted over and the hubs was using it to position the fan for his big green egg, but now that he has his table he doesn’t use it any more, so it was available to be repurposed.

OnionsStand

I added this large metal tub on top of the stand to create a planting space.  The Hubs drilled a couple of holes in the bottom of the tub for drainage since this sits just under the edge of the roof.

OnionsStandPrep

I used empty pots to add additional drainage space and reduce the amount of garden soil needed to fill the tub.  Luckily, I had quite a few to choose from!

OnionsStandPrepFill-2

And here it is filled and planted.  I’m not sure if this little experiment will yield a harvest but it’s interesting to give it a try.

Onions

It looks pretty cute next to the main garden box, which I decorated with two lemon cypress trees on either side.  I’ve been wanting some of these and finally spotted them at the nursery so I snagged two.  They are supposed to be natural mosquito repellants so that’s a nice added bonus, especially since the windows are right there.

Full

In the box we’re growing peppers, lettuce and cherry tomatoes.  We’ve already harvested some of the lettuce for salads several times and the tomatoes have tiny buds on them.  The peppers are the same as the ones in the burlap planters I shared previously, which sit next to the large whiskey barrels on either side of the slider to our Master Bedroom that hold 4 more tomato plants, although those are a “patio tomato” variety I haven’t tried before.

Peppers

Lettuce

Tomatoes

Between the garden box, onion planter, wheel bed and the strawberry gutters we should have a good crop of fresh produce to use for salads, meals and desserts this summer! 🙂

The Wheel Bed

0

I finally put that amazing rusty metal wheel the Hubs dragged home for me forever ago to use!  It’s now the centerpiece of our new garden bed where the two metal bed frames I found junking recently also found homes.

Cukes

The wheel will serve as a support structure for two cucumber plants and the bedframes will be perfect for the peas to grow up and attach to as they climb.

Peas

Above all this rusty goodness is a Kokopeli figure, who used to be cloaked in an obnoxious multi-color western pattern.  Nothing a coat of spray paint can’t fix!  Now he compliments the rest of the metal tones in the bed.  And hopefully he works his fertility magic to make these plants grow large and strong to produce a good crop!

Koko

I created the bed using some stone edger blocks and backfilling over the grass with dirt left over from the chicken yard install, topped with garden soil.  I added a few marigolds and lobelia along the front of the bed and finished it off with two metal pieces sculptures I found when I salvaged the bed frames.

Finished

Now I just have to water and wait until everything becomes an amazing lush harvest!  Luckily, this is a low spot in the yard so it should get extra watering from runoff.  Hopefully that will mean we don’t have to wait quite as long. 🙂

Burlap Pepper Pots

0Finished

Hi everyone!  I’m feeling quite a bit better and am back to the usual routine, albeit a bit slower than normal.  Today I thought I’d share this quick project I did over the weekend to create planters for some extra pepper plants that didn’t fit in our garden box.  I originally saw the idea on Pinterest but it didn’t have a tutorial so I just kinda made it up as I went along.  These cute pots are actually 5 gallon buckets.

1bucket

This is how they started life.  Not quite the look I was going for.  So I dug out some burlap I’d picked up last season and did a test fit to see how it would work.  Since my pieces were fairly large I folded them in half, which worked well to block the blue color and store logo on the bucket.

2testwrap

To finalize the fit I laid out the burlap on the ground and wrapped it around the bucket until I was happy with the placement.  Then I cut pieces of twine and tied it around the bucket at the top and bottom to hold the burlap in place.

3layout

I fiddled with the burlap on the first bucket, trying it both pulled tight and leaving it loose.  I ultimately decided I like the loose option which made them look like old grain sacks just filled with dirt.  Here they are tied and ready for plants.

4tied

The Hubs drilled a couple of drainage holes in the bottom of each bucket and I filled them with soil.  Each got a single pepper plant so that when it grows I can add a support stake or cage.

5SinglePlanted

And here’s the finished line up.  The Hubs was actually pretty impressed with how nice they turned out – and I know this because he commented on them unprovoked!  Since I took this shot the other day Brinley decided to ‘help’ with the gardening and pulled the pepper plant on the right out of the soil.  Luckily, I caught it quickly and was able to put it back in and give it some extra watering to revive it but I’m not sure it will make a full recovery.

6Trioplanted

But even if it doesn’t I’ve got the two others in buckets and three more in the garden box so hopefully, we’ll get quite a few peppers to enjoy this summer!  I’ll be sharing more of our garden starts next week so watch for that.  Until then have a fabulous weekend! 🙂

Shared on Knick of Time’s Talk of the Town #24.

Talk of the Town featured button

Our Budget DIY Wedding

Summer has arrived and along with it come wedding season.  Since our wedding was before I started the blog I’ve never shared it here but I thought you’d enjoy seeing our budget-friendly DIY details, so here’s a quick recap.

01-01

We chose a restaurant in Boulder, Colorado as our venue because they had a beautiful garden area where we could host the ceremony.  Rather than spend money on decorations that would only be seen briefly we kept things simple and let the focus be on us and the lush backdrop.

01-01

I ordered bouquets for myself and my sister who was my Matron of Honor from a local grocery store’s floral department and added burlap wraps with ribbon and a rhinestone pin to each.  Since the hubs wore his uniform he didn’t need a boutonniere which was an additional cost savings to not having to buy a suit or tux.  We requested his best man – who was his brother – wear a navy suit, which was readily available in his finance VP wardrobe.  I gave my sister free rein on her dress selection just asking her to pick something navy blue as well, so she found an option she can wear again at a reasonable price.  My mom paid for my dress, which we found at David’s Bridal for around $900.  I had a local seamstress add a purple sash I bought online to the waist to customize it a bit.  I found a rhinestone headband and simple veil online for a good price and bought shoes I could wear again to complete the look.

The reception was held in the restaurant’s upstairs dining room where the tables were arranged in long rows.  We placed a simple burlap runner that my mom made down each and sprinkled river rocks from the dollar store (if I remember correctly we cleaned out their inventory! LOL) between the frosted votives provided by the venue.  I ordered a bunch of daisies from the same vendor we used for the bouquets and snipped the heads off so they could be added in randomly among the rocks and candles.

01-01

01-01The venue provided printed menus customized for us as part of the package price.  They were simple but worked well with the tone of everything else we had going on.

01-01

Our favors were photo tile coasters I made with modge podge and my own Alaskan photography.  The place cards on top were tied with simple jute twine and the symbols notified the wait staff which entrée each guest had pre-selected.

01-01Our guest book was made of pre-cut card stock in our wedding colors where guests could leave a note and slip it into slots in a scrapbook.  I later added photos of each guest next to their cards to finish the project.  I found the scrapbook on clearance for around $15 and used a coupon to buy the card stock as 12″ x 12″ sheets that I cut down so the total cost with the photo prints came to around $30.

The frame we had nearby held the day’s schedule printed on our wedding stationary – left over stock from a DIY kit I picked up at Michaels with another coupon to make our own invitations and response cards.  The frame later became décor in our home and now holds a recipe for a good marriage which I toasted the hubs with at the reception printed on some left over stationary.

01-01The venue was able to make simple cakes so I requested a two tier Chantilly cake with berries for a garnish, which was DELICIOUS!  (FYI – We’ve since discovered that Whole Foods has a Chantilly cake that is practically identical so we order one whenever we’re in Portland to celebrate.)  The rhinestone monogram topper was another Michaels coupon bargain that ran me around $5.  It later became an ornament for our Christmas tree with the addition of a ribbon hanger so now we can enjoy it every year.

01-01

My mom picked up these little treat bags on clearance and added some of her favorite candies.  We borrowed a basket from the venue and set them out next to the cake with a few extra daisy heads and a votive to dress them up a bit.

01-01

We also saved by not hiring a DJ. Instead we put together a playlist of music for both the ceremony and reception.  A friend helped make sure the right song was selected for the first dance and other important moments, which only took a few moments away from her enjoying the event.

As a photographer myself, I knew the importance of having a visual memory of the details of our wedding, so we made photography a priority with a chunk of the budget (photography credit for all photos to Nicole Nichols Photography).    The other big expense was the food, but it was very good and well worth it.

01-01

I don’t have the exact figures anymore but the final total came to around $8,000 thanks to our budget conscious shopping and DIY choices. That didn’t include the rehearsal dinner which was covered by the hub’s family, but that was something that had been saved and planned for in advance.

I encourage couples planning their wedding to prioritize what they want and compromise on the things that aren’t as important or don’t have as much of a lasting impact. It is possible to have a dream wedding on a budget, it just takes planning and determination. 😉