My New DIY Planter

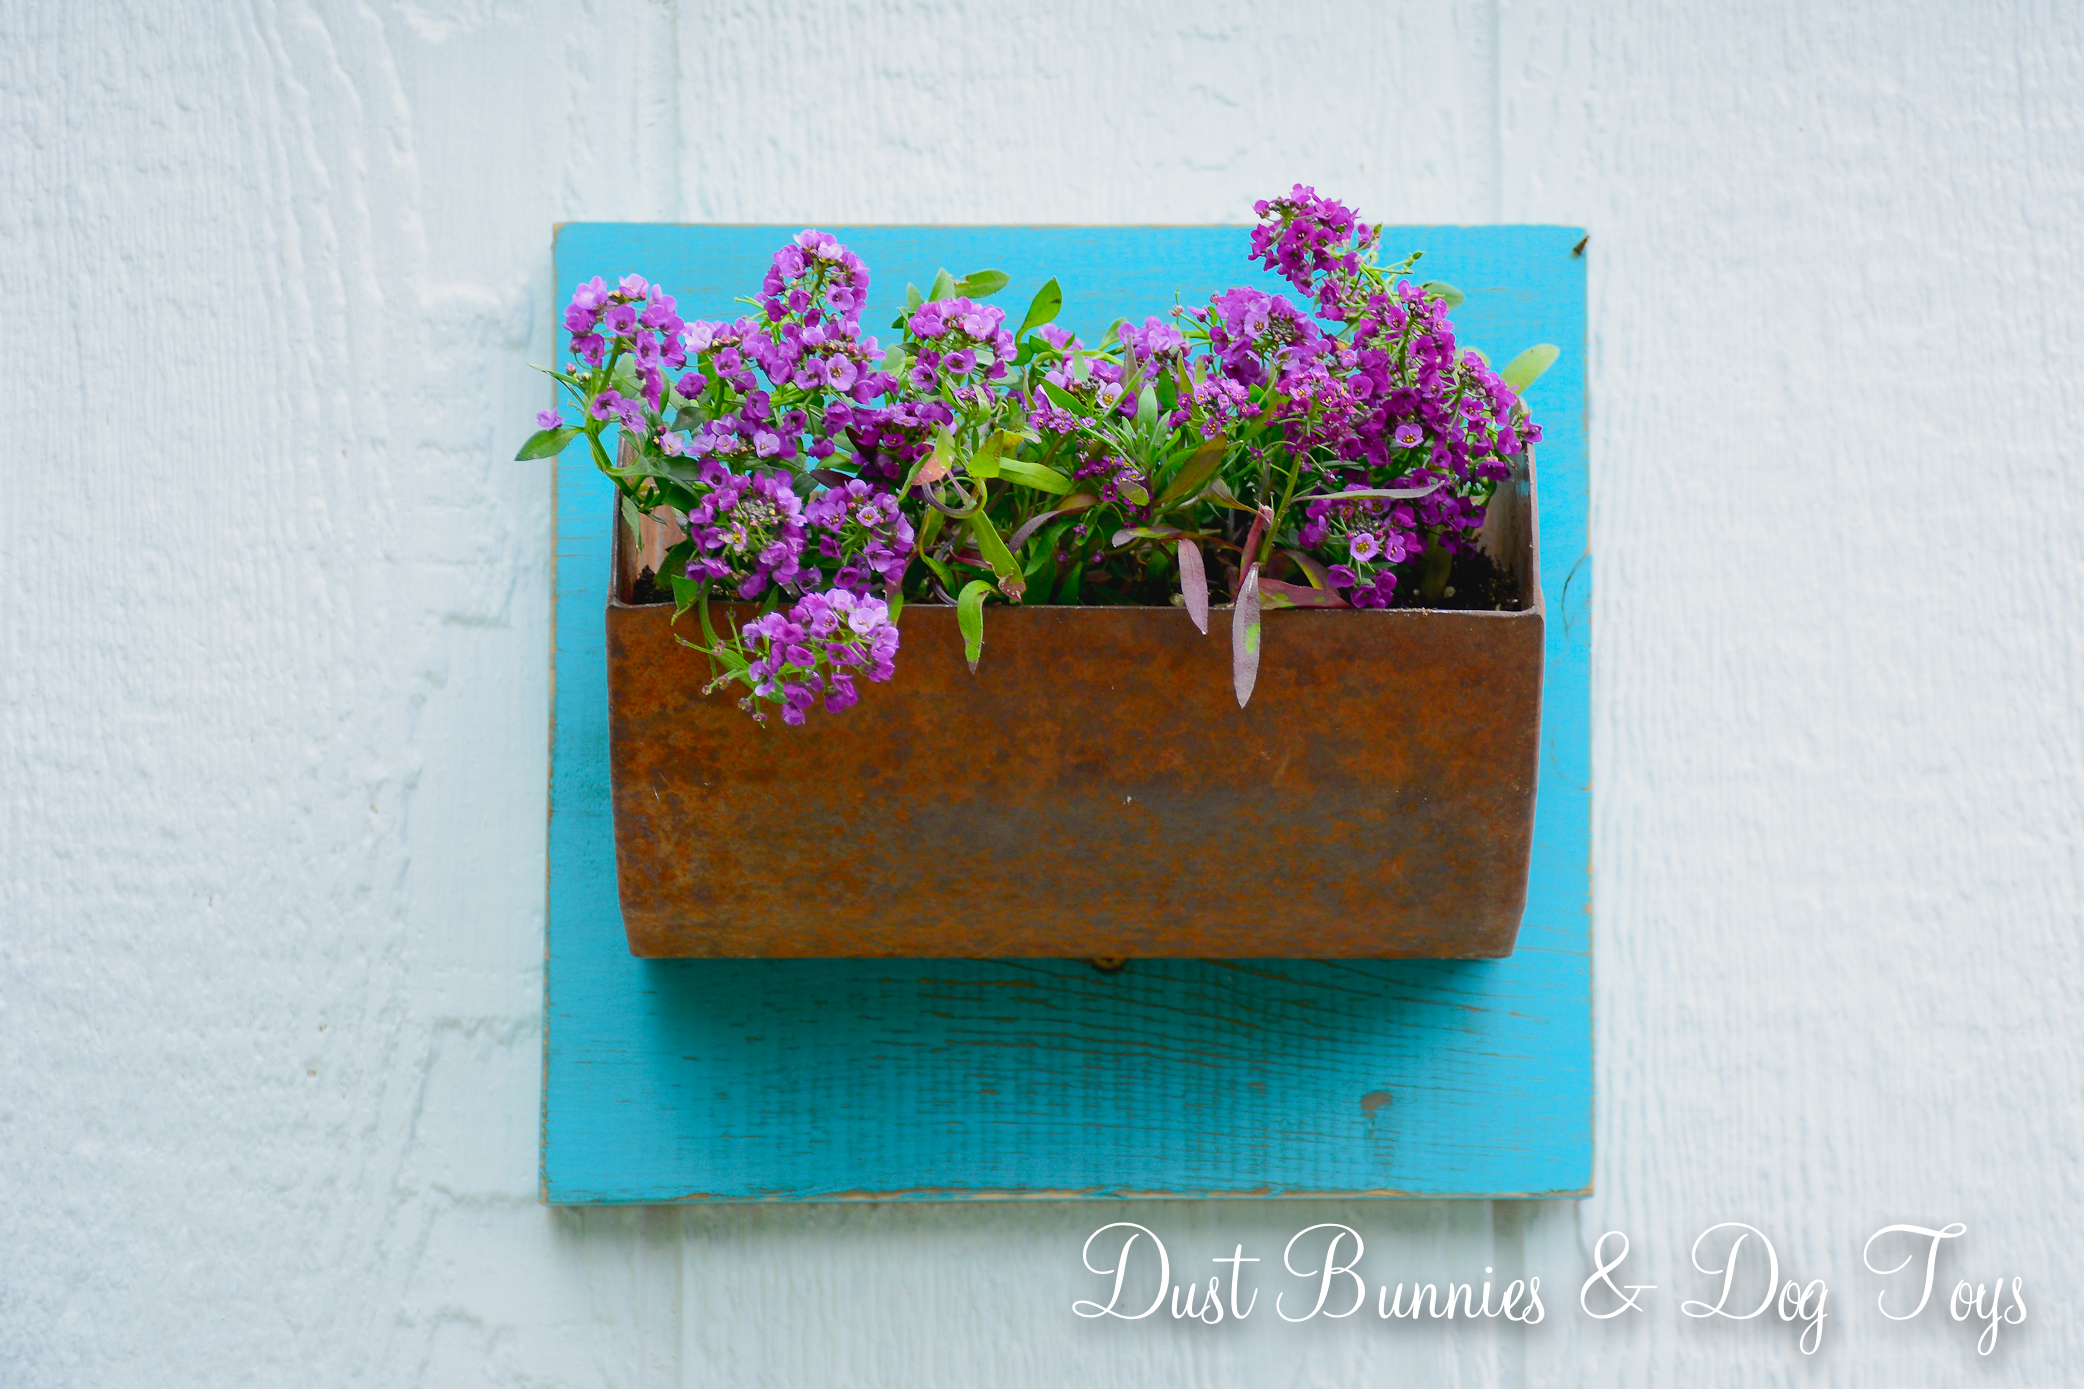
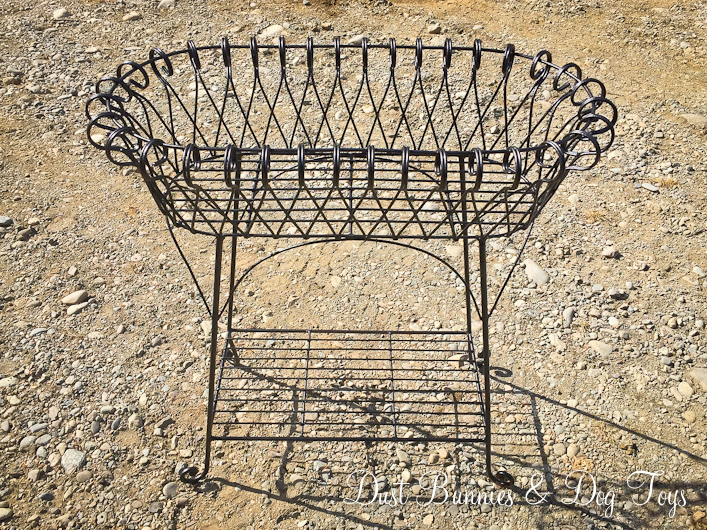
Continuing my theme of DIY planters this week, here’s another that the Hubs made for me.  It started with this cute wooden caddy I picked up on the buy/sell page.  I had planned to use it as a planter, but the support bar down the middle just wasn’t going to work for that.

 I mentioned my disappointment to the Hubs and we chatted about how I wished it had been configured.  He must have been listening and wanting a project, because a few days later he surprised me with this.

This sucker is solid wood and super HEAVY.  We gave it two coats of the teal outdoor paint we’ve used on other projects like the bin planters and firepit chairs.

Once it was in place I realized how deep it was and knew I didn’t want to fill the whole thing with dirt.  So I had the Hubs drill a couple drainage holes in the bottom and we gathered scrap wood to create a little platform half way up the inside.

Now I needed something to hold the dirt and actually plant in.  I decided to try the foil baking pans from the grocery store, since they were cheap and readily available.  I added two to my grocery order and picked them up the next day.

The pans fit the width of the box perfectly.  I decided to use two, end to end to fill the space as much as possible.  Next came planting.

I had some violas that needed a home so this seemed like a perfect spot for them.  Plus the Hubs really likes these little blooms, so it was fitting that I fill the planter he built me with flowers he likes. 🙂

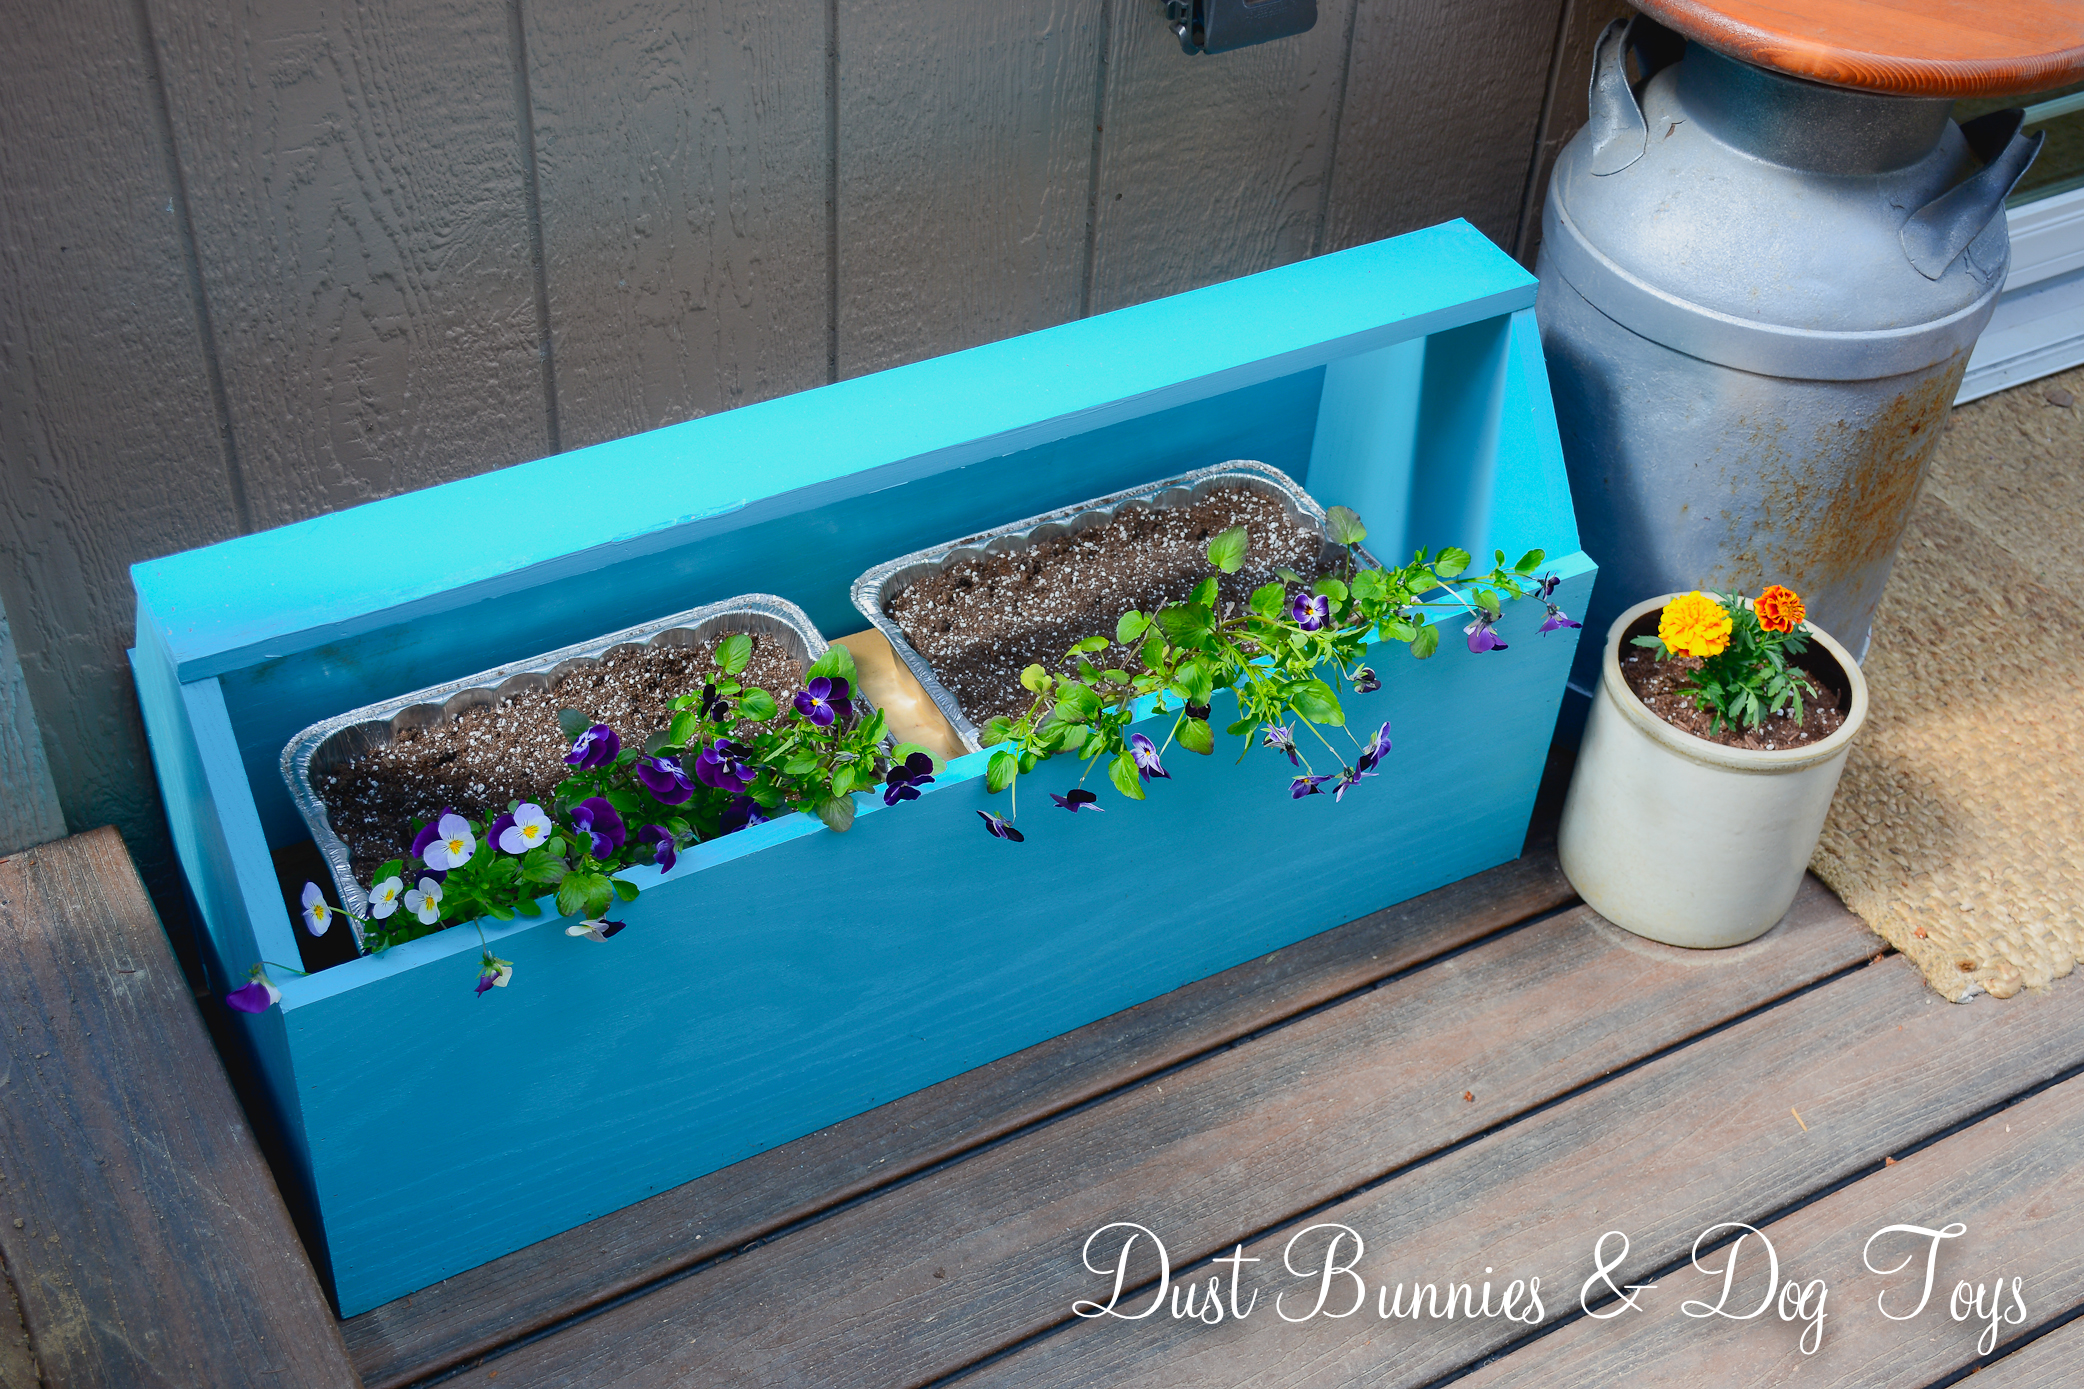
They still need to grow into the space a bit but they look pretty cute for now and add a bit of color to this corner of the deck.  I like how they spill over the side a bit too.

Next year I’m thinking I’ll use ferns in the caddy since the area will be more shaded when the gazebo cover goes up soon.  Perhaps I’ll snag a couple faux ferns like the ones I used out front in the vintage cart so there’s 0 maintenance!

Advertisement

Repurposed Bin Planters

Today I’m sharing another couple of planters I mentioned in my recap post.  These cuties were made from old conveyor belt scoops that I got from Alaska Picker.  The first I snagged at the AK Picker Day sale – right after finding the garage sale milk can.  I hunted high and low for more of them but someone else had beat me to them.  So when I spotted another at the Alaska Chicks Vintage sale I immediately claimed one.

The first still had a section of conveyor belt attached, but the second was mounted to a piece of old barn wood.  I wanted them both to match so I had the Hubs remove both the belt and board so I could mount them on new boards.

The Hubs cut me two pieces of wood from some scrap we had from another project and I dug out my outdoor teal paint to give them a couple coats.  A little distressing around the edges gave them the perfect rustic look.  The Hubs attached the bins to the new boards and I had this cuteness!

I wasn’t sure where I was going to use them at first but when I came out and saw the big open area on the chicken coop expansion I knew they’d look great there.  After I painted the coop the Hubs drilled some drainage holes in the bottom of the bins and put them up with a couple of screws. I filled them with purple alyssum to finish them off.

I absolutely adore how they turned out.  The combo of teal, rusty metal and purple flowers makes my heart do a happy dance.  And it’s perfect for decorating a chicken coop – not to fussy but not to messy either.

I still have a little painting to do on the lower part of coop and the Hubs plans to finish off the storage area door with siding to match the rest of the coop.  I’ll share more about the expansion and new set up once it’s all done.  We also plan to fill the area in front of the coop with pavers and pea gravel to finish everything off.

Of course neither the chickens nor the dogs – or the cats for that matter – care about any of that.  They just like having a window where they can see each other face to face.  But this doggie/chicken/kitty momma is happy to have a pretty space for them all.

Upcycled Milk Can Planter

One of the projects I mentioned in my recap was an upcycled milk can planter.  This was a fairly simple project that came together quickly.  I spotted this old milk can at a garage sale on my way to Alaska Picker day back in the spring.  When I heard it was just $20 I claimed it right away.  It was pretty rough, but I knew I could at least do something with the shape since it was pretty sturdy and solid.

I tried scrubbing the discoloration off thinking it was dirt, but while I got lots of dirt off the piece the lines remained, so I had to decide the best option to cover them.  After a quick Pinterest search I went with basic black because it would hide all of the flaws and cover the odd pattern.

A couple coats later it was looking pretty good.  I picked up a black pot to match it and shoved it into the opening as far as I could fit it.  And when summer finally arrived it found a spot out on the deck and got a couple of plants to brighten it up.

It’s a perfect fit next to the hot tub stairs and helps hide the plumbing a bit when looking out from the bedroom.  Plus it coordinates well with the lounge chairs nearby.

I filled it with marigolds to help ward off bugs near the hot tub, purple alyssum and some creeping Jenny that trails over the front of the can.  A little birdhouse tucked up next to it brings in the teal I’ve used elsewhere in the yard.

Not bad for a $20 garage sale find and a can of spray paint!  I look forward to using it for many years to come with other trailing plants in a variety of colors.

A Revamped Freebie Planter

Anyone else amazed that it’s already May?  We’re just flying through this year, but at least it’s almost time to start planting and getting our yard ready for the summer season.  Here in Alaska the temps are still pretty chilly overnight so I don’t dare plant anything outside just yet, but that doesn’t mean I have to sit around and wait.  I’ve been cleaning up the flower beds, looking for signs  of life from my perennials and getting my plan for where things will go together.  That plan includes a few new pieces like this freebie planter I got from someone I bought another item from.  They were moving out of state and were purging items so she said just take all the pots and planters on the porch too!  I was all too happy to help!

The other pots in the freebie group didn’t really suit my style so I grouped them with other pots I no longer needed and traded them on the buy/sell page as part of a deal for another item I’ll share on the blog soon.  But I had a plan for this little gem.  While the bright orange was cheerful it needed a new coat of paint and I knew it would have a classic farmhouse style if I painted it ORB.  So the first sunny day I had time I drug her out in to the driveway and sprayed away.  Here’s how she looked after!

Luckily I’d been hoarding saving a large planter liner for quite some time and it was a perfect fit!  Since I already had the spray paint and liner the only cost I had for this project was the plants I’ll be putting in it!

Now she’s all ready for summer in the front flower bed.  I’ve got two Bacopa set aside just for her.  She also hides the cord that comes out of the garage wall in this corner – which will all but disappear once the plants start to grow and trail over her edges.   One planter down, and a few more to go before the weather cooperates and it’s time to plant! 🙂

Shared on Savvy Southern Style’s Wow Us Wednesdays and Knick of Time’s Talk of the Town.

Save

Easy Faux Planters

5As I promised earlier in the week, I’m sharing how I made some cute little faux plants.  It started with a variety of small containers I had previously had succulents in along with a few new items.  The succulents had met an untimely fate during one of Brinley’s “puppy moments” and had been empty for a while so I wanted to refill them but with Alaska still well in the grips of winter there weren’t many options to choose from.  While browsing Michaels the other day I spotted these little faux succulent stems (ignore my supervisor’s photo bomb – LOL!).

0I knew they’d be perfect to fill several of the small containers so I picked up a few.  As you can tell from the empty spots on the holder above, I’d tested out the stems on a small piece before I decided to write a post about the process.  But since it went well here we go.  We’ll start with this cute glass cup I picked up at IKEA the last time we were in Portland.

1I fill it 2/3 full of moss I already had on hand to create a base for my arrangement.

2I pulled several of the grassy stems from the holder and started bunching them together.  Once I had a grouping I liked I put them down into the center of the moss in the cup.

34I fluffed things around a bit until I liked how everything looked and called it done.  Next up was this cement bowl I found at a local boutique shop.

6Since this one was larger than the glass cup and solid I filled most of it with crumpled up paper from an advertisement that came in the mail.  I was enjoying the pretty spring colors on the paper, which was a nice little inspiration.

7I added moss on top of the paper, leaving a small area in the center open to put the stems.

8After I added the grassy stems I randomly placed some of the small succulent stems around the perimeter.  It was ok, but looked a bit crowded and not really what I was envisioning.  So I kept fussing with it, trying a variety of arrangements.

9Eventually I pared it down to just the grassy stems and some white flowers left over from a project long ago.  Its the perfect look for early spring.

10Here’s a quick shot of the other planters I whipped up using the same method.  This little galvanized container came from a boutique in Portland and looks sweet next to the lamp in the guest room.

11You might have spotted the succulent grouping in the small crock on the sewing table I shared recently.  It was a little too much brown in here until we refinish the table so it’s moved to the laundry room, which I’ll share soon.

aAnd of course the succulent planter you saw earlier this week with my fun little scroll art.

after

I love how real they all look, yet they require zero maintenance, which is perfect for my schedule these days! 🙂  I’ve got a few more of the succulent stems so there might be a few more arrangements in the coming months, but for now I’m enjoying having a bit of green around the house even though it’s deep white outside.

Linking up at: Knik of Time’s Talk of the Town, Tater Tots & Jello’s BFF and Savvy Southern Style’s Wow Us WednesdayStone Gable’s The Scoop and Thrifty Decor Chick’s Before & After Party!

TDC Before and After

Save

Save

DIY Metal Planter & a Peek at the Garden

OnionsPotFinished

Today I thought I’d share a quick peek of our veggie garden and a quick DIY planter I installed.  We had a red and white onion sprout in the pantry so I figured I’d give them a shot in the garden this year.  With all the spots in the garden boxes full I decided to add a secondary planter at the end of the box.

I originally envisioned using an antique wash tub and stand, but just wasn’t willing to pay $100+ for a planter.  So I used my DIY skills to create something similar starting with this metal stool we’ve had for several years.  You originally saw it on our balcony at the rental house.  It’s since been painted over and the hubs was using it to position the fan for his big green egg, but now that he has his table he doesn’t use it any more, so it was available to be repurposed.

OnionsStand

I added this large metal tub on top of the stand to create a planting space.  The Hubs drilled a couple of holes in the bottom of the tub for drainage since this sits just under the edge of the roof.

OnionsStandPrep

I used empty pots to add additional drainage space and reduce the amount of garden soil needed to fill the tub.  Luckily, I had quite a few to choose from!

OnionsStandPrepFill-2

And here it is filled and planted.  I’m not sure if this little experiment will yield a harvest but it’s interesting to give it a try.

Onions

It looks pretty cute next to the main garden box, which I decorated with two lemon cypress trees on either side.  I’ve been wanting some of these and finally spotted them at the nursery so I snagged two.  They are supposed to be natural mosquito repellants so that’s a nice added bonus, especially since the windows are right there.

Full

In the box we’re growing peppers, lettuce and cherry tomatoes.  We’ve already harvested some of the lettuce for salads several times and the tomatoes have tiny buds on them.  The peppers are the same as the ones in the burlap planters I shared previously, which sit next to the large whiskey barrels on either side of the slider to our Master Bedroom that hold 4 more tomato plants, although those are a “patio tomato” variety I haven’t tried before.

Peppers

Lettuce

Tomatoes

Between the garden box, onion planter, wheel bed and the strawberry gutters we should have a good crop of fresh produce to use for salads, meals and desserts this summer! 🙂

Burlap Pepper Pots

0Finished

Hi everyone!  I’m feeling quite a bit better and am back to the usual routine, albeit a bit slower than normal.  Today I thought I’d share this quick project I did over the weekend to create planters for some extra pepper plants that didn’t fit in our garden box.  I originally saw the idea on Pinterest but it didn’t have a tutorial so I just kinda made it up as I went along.  These cute pots are actually 5 gallon buckets.

1bucket

This is how they started life.  Not quite the look I was going for.  So I dug out some burlap I’d picked up last season and did a test fit to see how it would work.  Since my pieces were fairly large I folded them in half, which worked well to block the blue color and store logo on the bucket.

2testwrap

To finalize the fit I laid out the burlap on the ground and wrapped it around the bucket until I was happy with the placement.  Then I cut pieces of twine and tied it around the bucket at the top and bottom to hold the burlap in place.

3layout

I fiddled with the burlap on the first bucket, trying it both pulled tight and leaving it loose.  I ultimately decided I like the loose option which made them look like old grain sacks just filled with dirt.  Here they are tied and ready for plants.

4tied

The Hubs drilled a couple of drainage holes in the bottom of each bucket and I filled them with soil.  Each got a single pepper plant so that when it grows I can add a support stake or cage.

5SinglePlanted

And here’s the finished line up.  The Hubs was actually pretty impressed with how nice they turned out – and I know this because he commented on them unprovoked!  Since I took this shot the other day Brinley decided to ‘help’ with the gardening and pulled the pepper plant on the right out of the soil.  Luckily, I caught it quickly and was able to put it back in and give it some extra watering to revive it but I’m not sure it will make a full recovery.

6Trioplanted

But even if it doesn’t I’ve got the two others in buckets and three more in the garden box so hopefully, we’ll get quite a few peppers to enjoy this summer!  I’ll be sharing more of our garden starts next week so watch for that.  Until then have a fabulous weekend! 🙂

Shared on Knick of Time’s Talk of the Town #24.

Talk of the Town featured button