Pretty Tiki Torches for the Back Yard

Now that we have so many great areas to enjoy in the back yard we spend more time out there.  Unfortunately the famed Alaskan mosquitoes like to join us!  To remedy that problem we decided to add tiki torches to expand the reach of the citronella candles we already use.

I spotted these Better Homes and Gardens torches at Walmart recently and decided to give them a try.  They come with hardware so they can be used three different ways.  The first option is as a table top torch using the pedestal attachment.  The second option is to position them on a deck railing with the clamp provided.  And the third is as a pole torch using the post extensions.

Because I always seem to use things slightly differently than how they are intended, I wanted to put them to the posts we already had in the yard.  I planned to ask the Hubs to create a galvanized pipe fitting that we could attach to the posts for the deck shade and fire pit lights, which could be affixed to the base of the torch.  Luckily, he had an easier idea.

He suggested using the provided railing clamp on a small block of wood he could attach to the posts.  It was such a great idea and it saved us the cost of creating the pipe fittings.  We did debate about cutting the metal pole on the torches so they didn’t extend beyond the clamp.  The Hubs wanted to keep the extra length and I was thinking it would look better with it cut.  We decided to leave it for now and if I still don’t like it in a few weeks we can cut them down.

We tested them out the other night, now that the days are getting a little shorter.  They sure seemed to keep the bugs at bay and they gave off a nice glow in addition to our cafe lights. (Just ignore those cobwebs, ok?  The spiders seem to appreciate them as well.)

The big reservoir inside the canister means they don’t need to be filled often, so we can just light them and sit back.   Now we just need to make more time to sit out back and enjoy them before the snow flies in about 2 months!

Advertisement

Lighting Up the Yard

Last summer we picked up several strands of cafe lights on our trip to Portland with the plans to put them up in the back yard around the fire pit, but we got busy with other projects and didn’t get them up.  Luckily, we’re playing catch up this summer and crossing off all the projects from last year that didn’t get finished.  Which means we had most of the materials already on hand to get this one done.

It started with creating the posts the lights would hang from.  We used two small metal stock tanks we got from Wilco on our big trip last summer as the base.  We added two bags of sand from the sand bags we use in the bed of the truck for weight during the winter to create a base at the bottom of the tank and provide a bit of drainage.

From there we used concrete footer blocks that had a metal attachment for a pole.  We picked those up on the buy/sell page last summer as well.  We decided to use pressure treated 4×4’s to coordinate with the fence around the yard.  Since the ground slopes away from the house for drainage we knew the tanks wouldn’t sit perfectly level, so we leveled the posts with a handy tool the Hubs had and used long deck screws to secure them in place.

Then the Hubs added a couple of supports around the posts using scrap wood.  These help prevent any sway during the wind or pull from the tension on the light strands.  He kept them a little low in the tank so I’d still have room to plant around the posts.

I spent weeks filling both tanks with plastic bottles and jugs to reduce the amount of dirt needed to fill them.  Luckily I know a coffee shop that was willing to save their large milk jugs each day to speed up the process a bit!  Once I had them topped off with dirt I planted cosmos and dill, which should fill in and grow tall next to the pole for the rest of the summer.  Next year I may try cat mint to see if it survives the winter in the metal tank since both cats enjoy this new vantage point and can often be found sitting in the tanks next to the flowers.

The Hubs strung the lights using small hooks at the top of the posts and securing the ends of the cords to the house with a bracket and zip tie.  The nearest electrical outlet is over on the new deck so he got a tan colored extension cord and used small flexible loops to hang it along the eve of the house so it could run the distance to the deck and then down to the outlet.

Since our days are so long during the summer we haven’t gotten much use out of them just yet, but now that summer solstice has past the days are slowly getting shorter.  I plan to enjoy them through the fall until winter threatens the first snow.

The next step is to add a low profile border of some sort between the gravel and the grass.  Then we’ll add more pea gravel to fill in the area.  We also used a strand of these same lights in the gazebo we put over the hot tub on the new deck.  I’m still getting that all set up and will share that project when I have finished pictures for you!

Our New Deck Shade

Hey there!  I hope your holiday week was fantastic and you got a little time off to enjoy it.  I took a couple days off from work to get caught up on some projects around the house.  The weather was clear and hot the entire week, so it finally really felt like summer.  One of the projects we knocked out was adding a shade cloth to the deck.  The Hubs actually put this up while I was out on a photo shoot so I don’t have many detail shots but it’s a pretty simple setup so you should catch on without them.

We had purchased two sun shades while on vacation down south last summer and had planned to put one over each deck.  Unfortunately when we pulled them out to set them up this summer we realized neither size we’d gotten would work for what we wanted.  So we sold those and purchased a 10 x 10 cover on Amazon.

We added these cement pole foundations in the rock beds against the deck and secured pressure treated 4×4’s into the prongs.  I plan to eventually cover the cement block with more rock so you don’t notice it but that is a project for another day.

The tops of the posts were finished with copper caps like we used on the fence around the yard and a bracket was attached to tie off the corner of shade.

We did similar brackets on the house which connect to the corners on that side  (excuse the cobwebs – I swear I clean them but those industrious little buggers seem to have them back up in no time!).  Next year we’ll swap out the rope for turnbuckle hardware for a cleaner look, but this gives us an idea of size needed for that change.

It ties right in with the other grey and black elements we’ve got going on in the yard.  And the sleek design looks good from every angle of the yard.  The amount of shade it provides changes throughout the day as the sun moves across the sky and we’ve noticed it does give some protection during a light rain.

It really makes the space feel intimate and inviting.  And because we made sure it didn’t hang over the grill it’s safe to stay up for the whole season.  We do plan to take it down for winter, so it doesn’t get too heavy with snow and lasts a little longer.

Not only are we enjoying it, the fur babies appreciate the extra shade too – especially on hot days like we had last week!

Don’t Mess with Momma Moose!

Hi there,  remember me – that crazy gal who writes this blog?  I’m still here, I’ve just been held hostage by real life recently and haven’t had a chance to share much the last few weeks. So here’s a quick recap. The hubs got pretty sick with a nasty head cold and cough that he still has yet to totally kick. I had to fly to the tiny town of Ketchikan, AK for a grand opening of a new branch last week and the day before I left I developed pink eye due to excessive congestion (similar to the hubs) that seeped into my tear ducts! This week it’s started snowing and I’m in the midst of a huge online and live charity auction at work and am finally – hopefully – kicking the congestion that’s been plaguing our house for the past three weeks. Somewhere in there we still managed to get several projects done and a couple more lined up, I just haven’t had time to edit photos and sit down to put words with them. But that will be coming soon. I promise. 🙂

In the meantime, today I thought I’d share a little encounter we had with the neighborhood moose recently. The hubs was off and had been home all day, but I had just gotten home from work.  He told me that a momma moose and yearling had been hanging out around the back yard on and off during the afternoon and as I looked outside I saw they had returned so I grabbed my camera and stepped out on the back deck to get a few shots.

1

Now that I was outside, the dogs became fairly determined to let the moose know they were on guard duty. She wasn’t impressed and stood her ground on the back side of the fence.

2

When Stoli attempted to show some dominance by jumping and barking, she gave him a big snort and stomp as a warning, which he obviously ignored.  Seeing that momma moose was agitated we commanded him to leave the fence and come back inside, which took several attempts because he wasn’t happy about leaving a threat near his turf unattended.

3

That was when Bacardi decided it was her turn on guard duty and started to patrol the perimeter.

4

Momma moose took one step and Bacardi quickly realized she was no match, and she came running back inside before we even had a chance to give her a command.  Smart girl!

5

Momma moose continued to stand her ground for quite a while with occasional snorts in our direction, but eventually wandered off into the woods to find a quieter location to forage.

6

Typically the dogs barks keep the moose at a distance and we don’t have close encounters like this, but fall is their breeding season so I can understand why this momma was more defensive. Luckily we were home and able to monitor the situation so there was no physical contact between them.  Now that the dogs have learned not all moose run off with a few barks, hopefully they’ve learned to keep their distance from the fence when they come in close like this – especially when we’re not home!   It’s always a delicate balance of respecting the wildlife, knowing that we’ve claimed land they used to wander for our home and maintaining safety for both us and our pets as well as the wildlife that surround us, but it’s a balance we value highly and plan to continue. 🙂

The Grand Backyard Plan

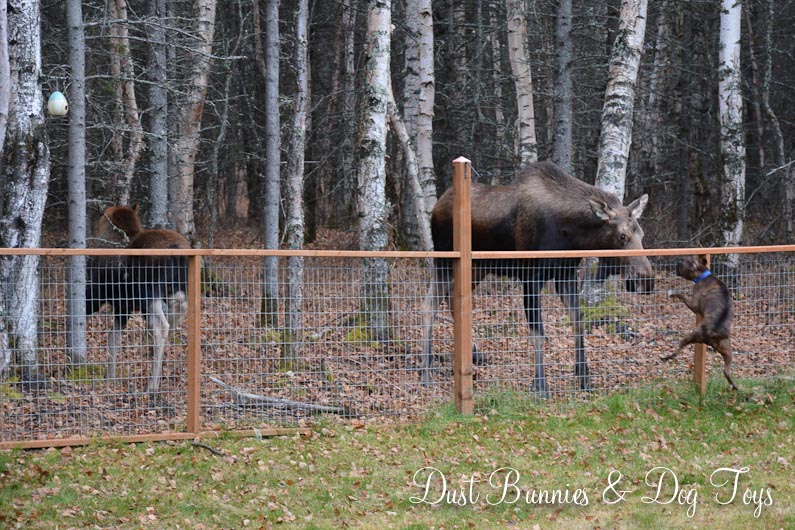
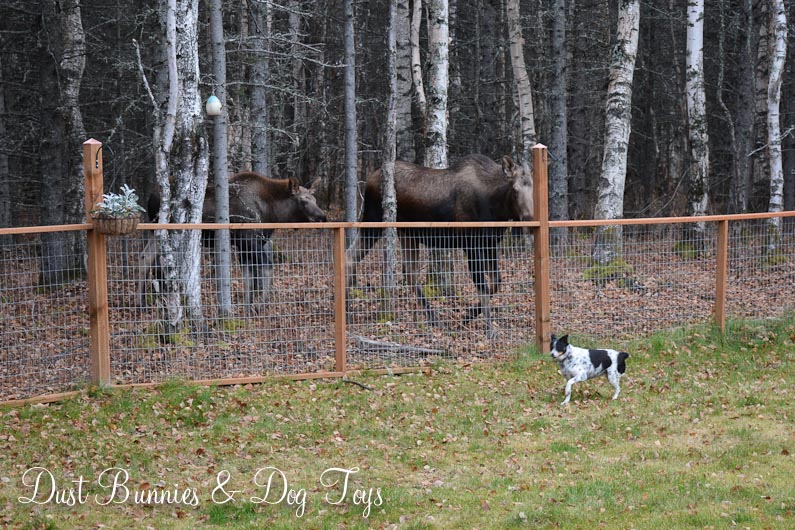
Spring in Alaska is fickle.  It’s been warmer than usual which has me thinking about planting, and then we had snow again yesterday!  Apparently I’ll have to give it a bit more time, but I’m bound and determined that we are going to get the back yard set up this summer! Last year, we were still getting settled and the priority was getting the fence in so the dogs would have room to run. We did get the yard hydroseeded late last summer, although I’m not sure how well it will come back this year after the dogs have been abusing it all winter. Hopefully the additional seed we put down last week will help get things going this season.

In the meantime I’m fine tuning my vision for the entire space. It’s gone through a few revisions, as I talk things through with the hubs and watch exposure, but I think I’ve created a plan to get the basics established this summer so we can build on them each year.

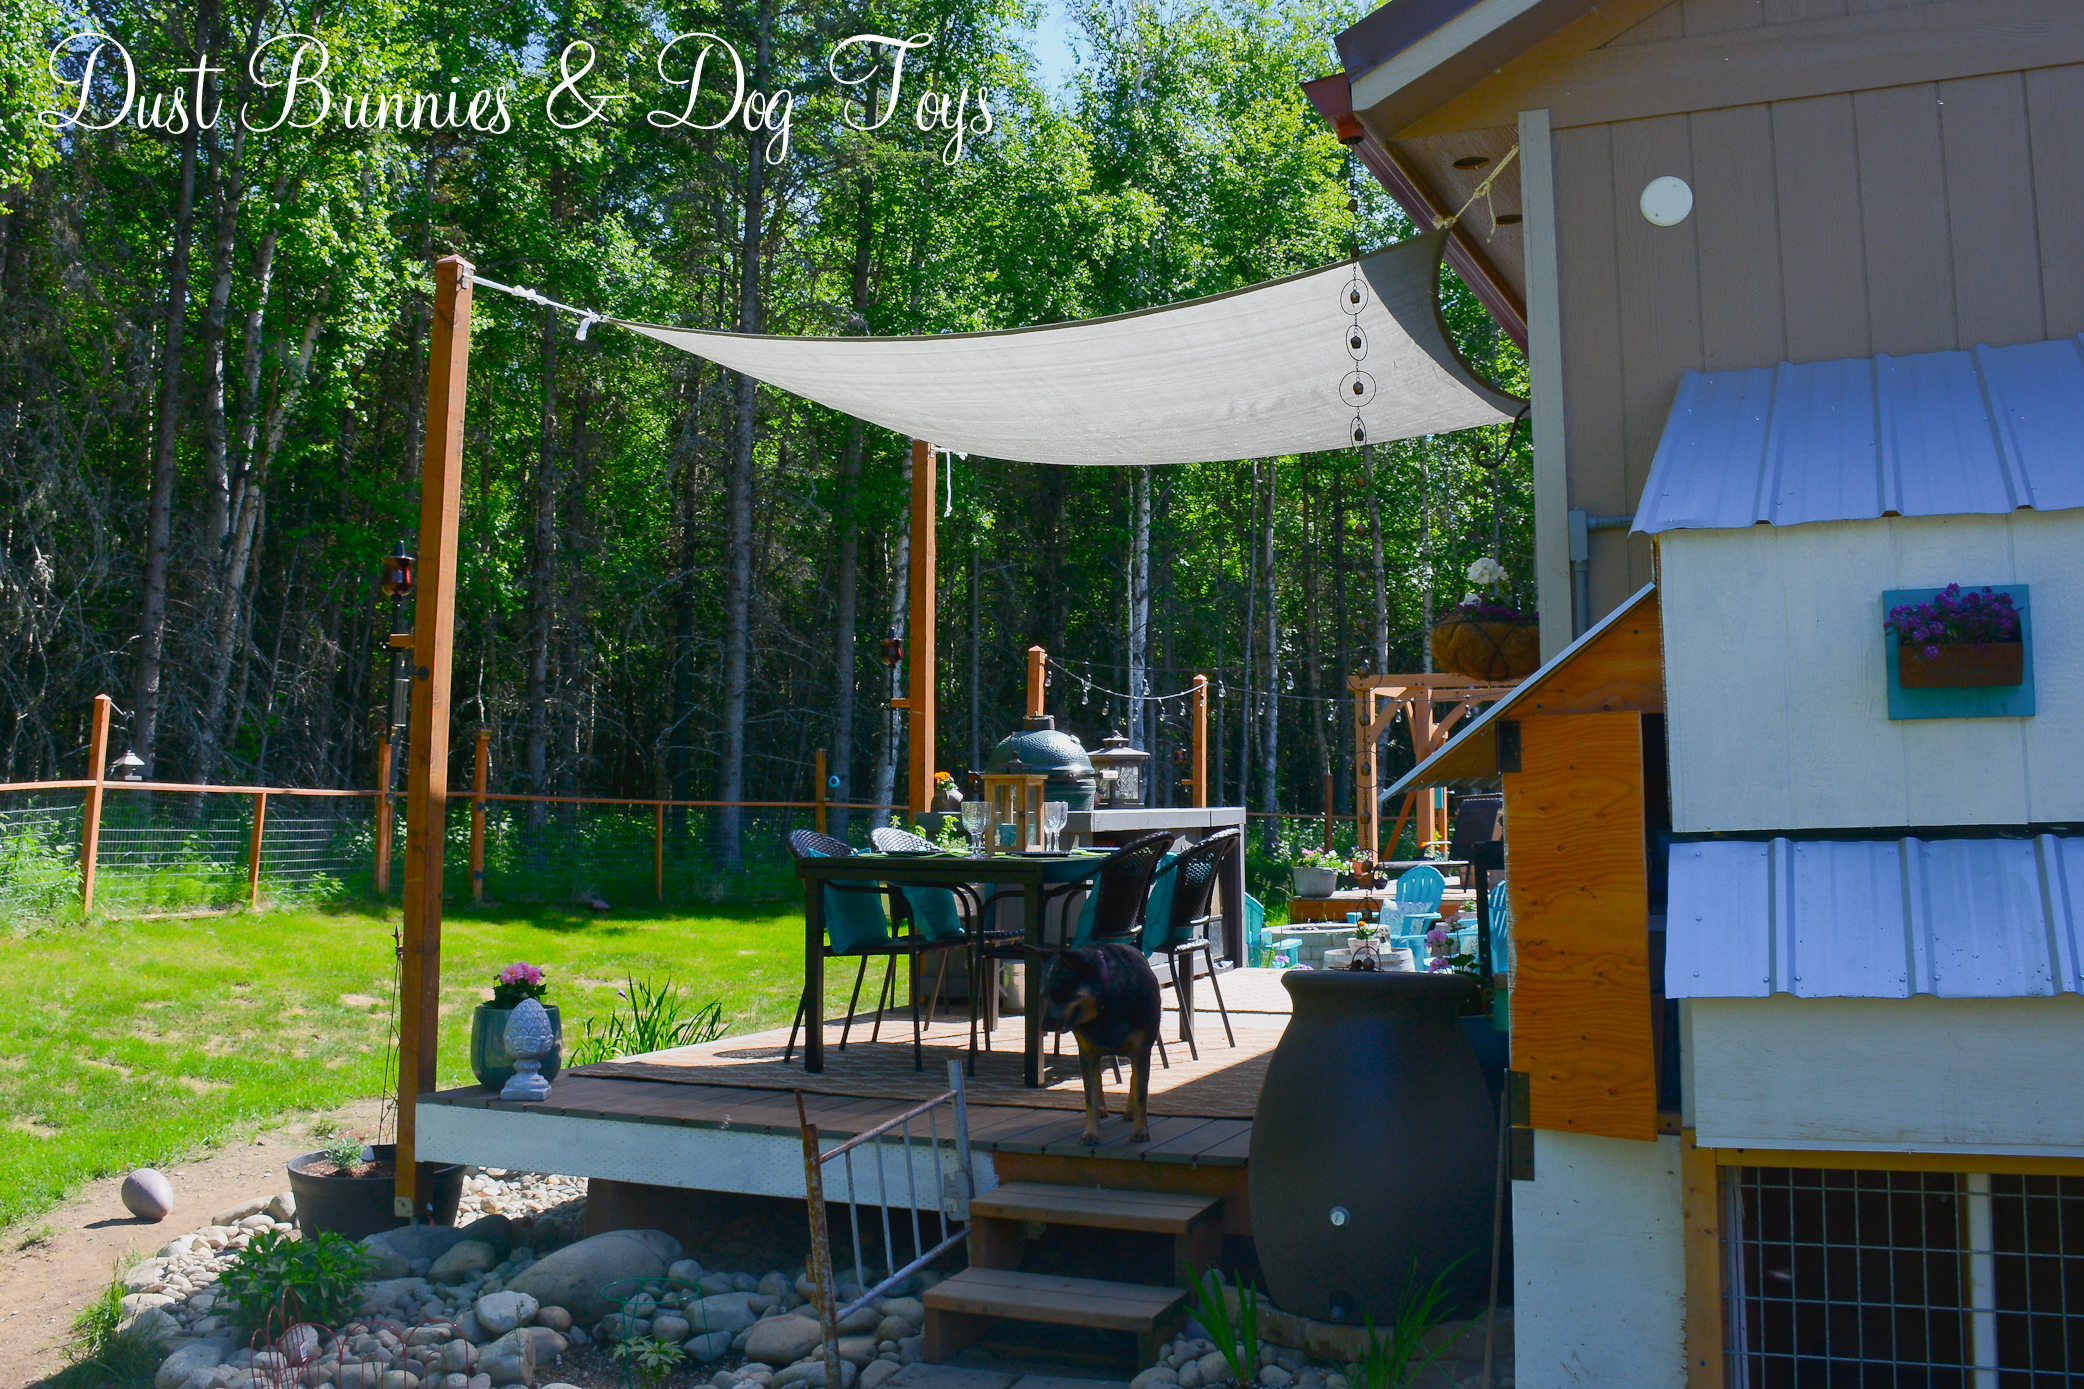
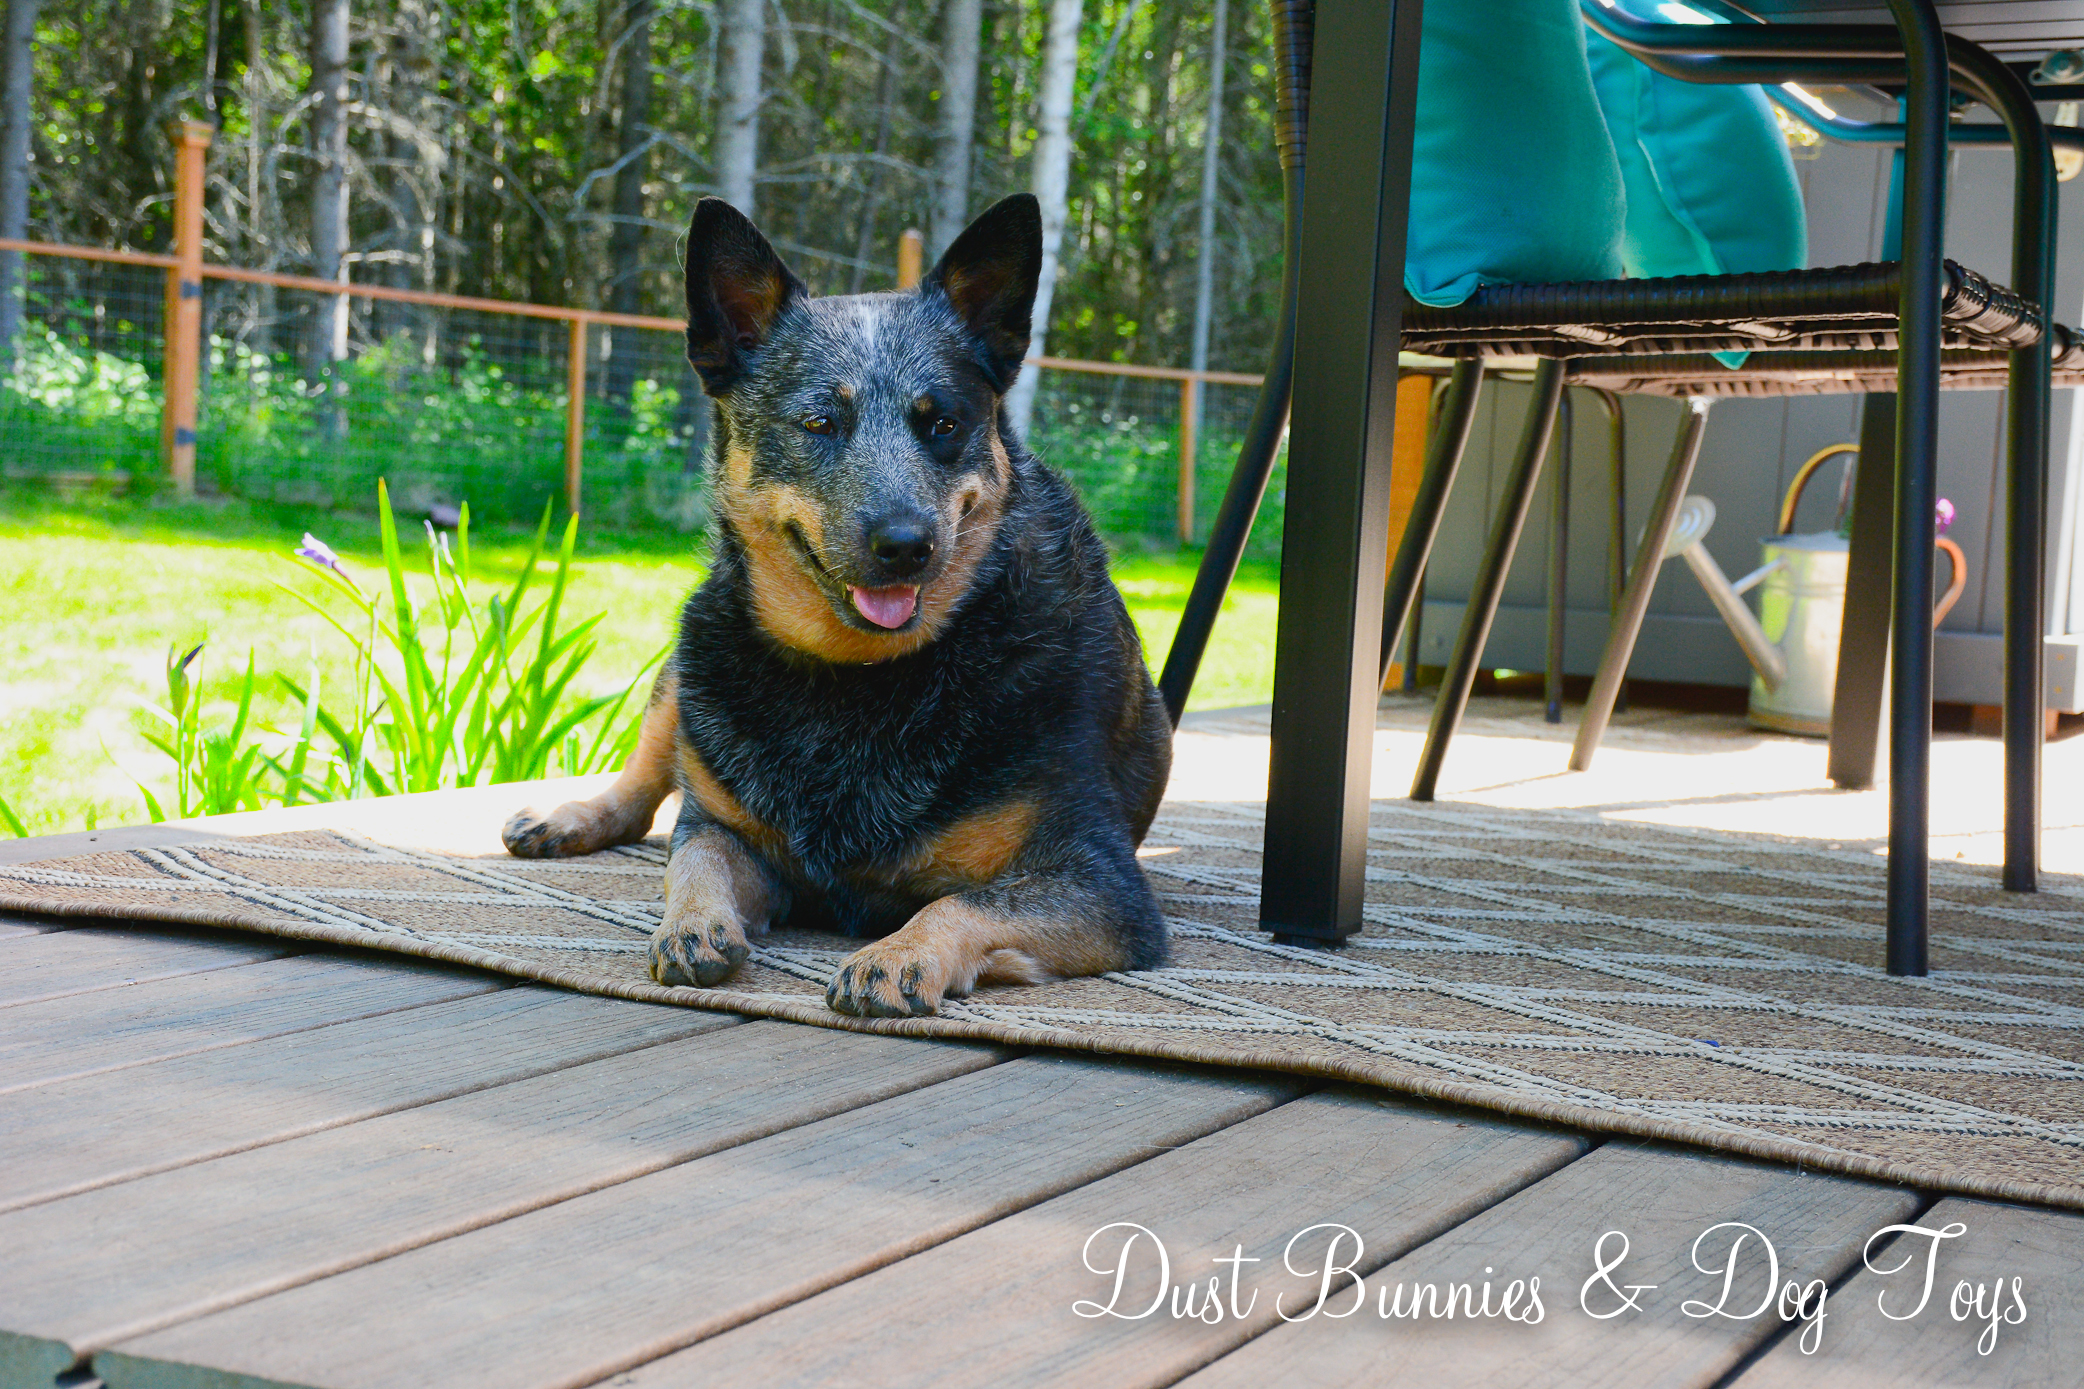
First up is the deck, which I cleaned last weekend to get the juices flowing. We pretty much ignored this space all winter while we focused on indoor projects, so I cleared the space and gave it a good sweeping. I dug out the outdoor rug I bought on the buy/sell page at the end of last summer for $10 and placed the Adirondack chairs and garden stools to create a seating area. I added the lovely lanterns on the hooks and a couple of throw pillows for a little style. It still needs a good pressure wash, but it’s a nice place to sit for a few minutes for now.  Here’s a quick before and after.

DeckBefore

DeckAfter

The plan starts with building a sectional seating unit like this with storage underneath where the cushions can be kept during the winter. I’m envisioning an L-shape along the wall and out from the corner made of a few pieces which could be rearranged for other set ups. I might also do a few ottoman pieces like this to store the propane bottles for the heater and fryer. A table like this would provide a spot to stash little things like candles and bug spray when not in use, but I might just leave the space open since I could also store such things inside the L shape during the season.

The hub’s green egg table will occupy the corner of the deck where the egg currently sits with our new oil-less fryer next to it. I’m excited to finally see the table all finished, set up and ready to use.

DeckLabels

The displaced Adirondack chairs will move to the firepit area that will be created along the edge of a pea gravel patio next to the deck. The pit itself will be created by stacking landscape stones around the freebie washing machine bin we snagged during construction. I love the idea of creating a cover that would make it also function as a table, especially with a little game board for fun!

Behind that, underneath the family room windows we’ll install a raised garden bed made of cinderblock like this, but with removable tubs like this which can one day be transferred to and from the greenhouse I’ll have one day as the seasons shift. I’d like to try a hanging strawberry planter like this, so that might hang from the eave between the windows or over top of the raised bed or maybe I’ll try something like this on the back of the shed.

The massive hot tub we scored on Craigslist has yet to be used because it’s just so huge and costly to run, so we’re passing it on to the family cabin down on the Kenai, where it should be much more utilized and appreciated during fishing season.  We’ve got our eye on a few 2-person tubs and might invest in that later this year or next season.

AlcoveLabels

I’ve realized this alcove along the side of the house where I originally planned to do a full garden just doesn’t get enough sun to be productive, so instead we’ll put the chicken coop here. I’d like something similar to this which should have a small footprint next to the house. Locating them just off the deck will make taking care of the chickens easier and the house should provide extra radiant heat during the winter to keep them cozy.

Beyond the coop I’m considering installing a potting bench with a simple design like this. I’m not convinced that I’ll use it enough to warrant the construction, so I might hold off on this idea until next year when I see how much need there really is. My other idea for the space is to build a smoke house – which I’m sure would get lots of use or a small tool shed to house things like rakes, shovels, etc. so they don’t take up space in the garage or the hub’s storage shed. If we go that route I could always add the potting bench or smoke house along the back wall of the garage, where I could see it from the laundry room.

tent
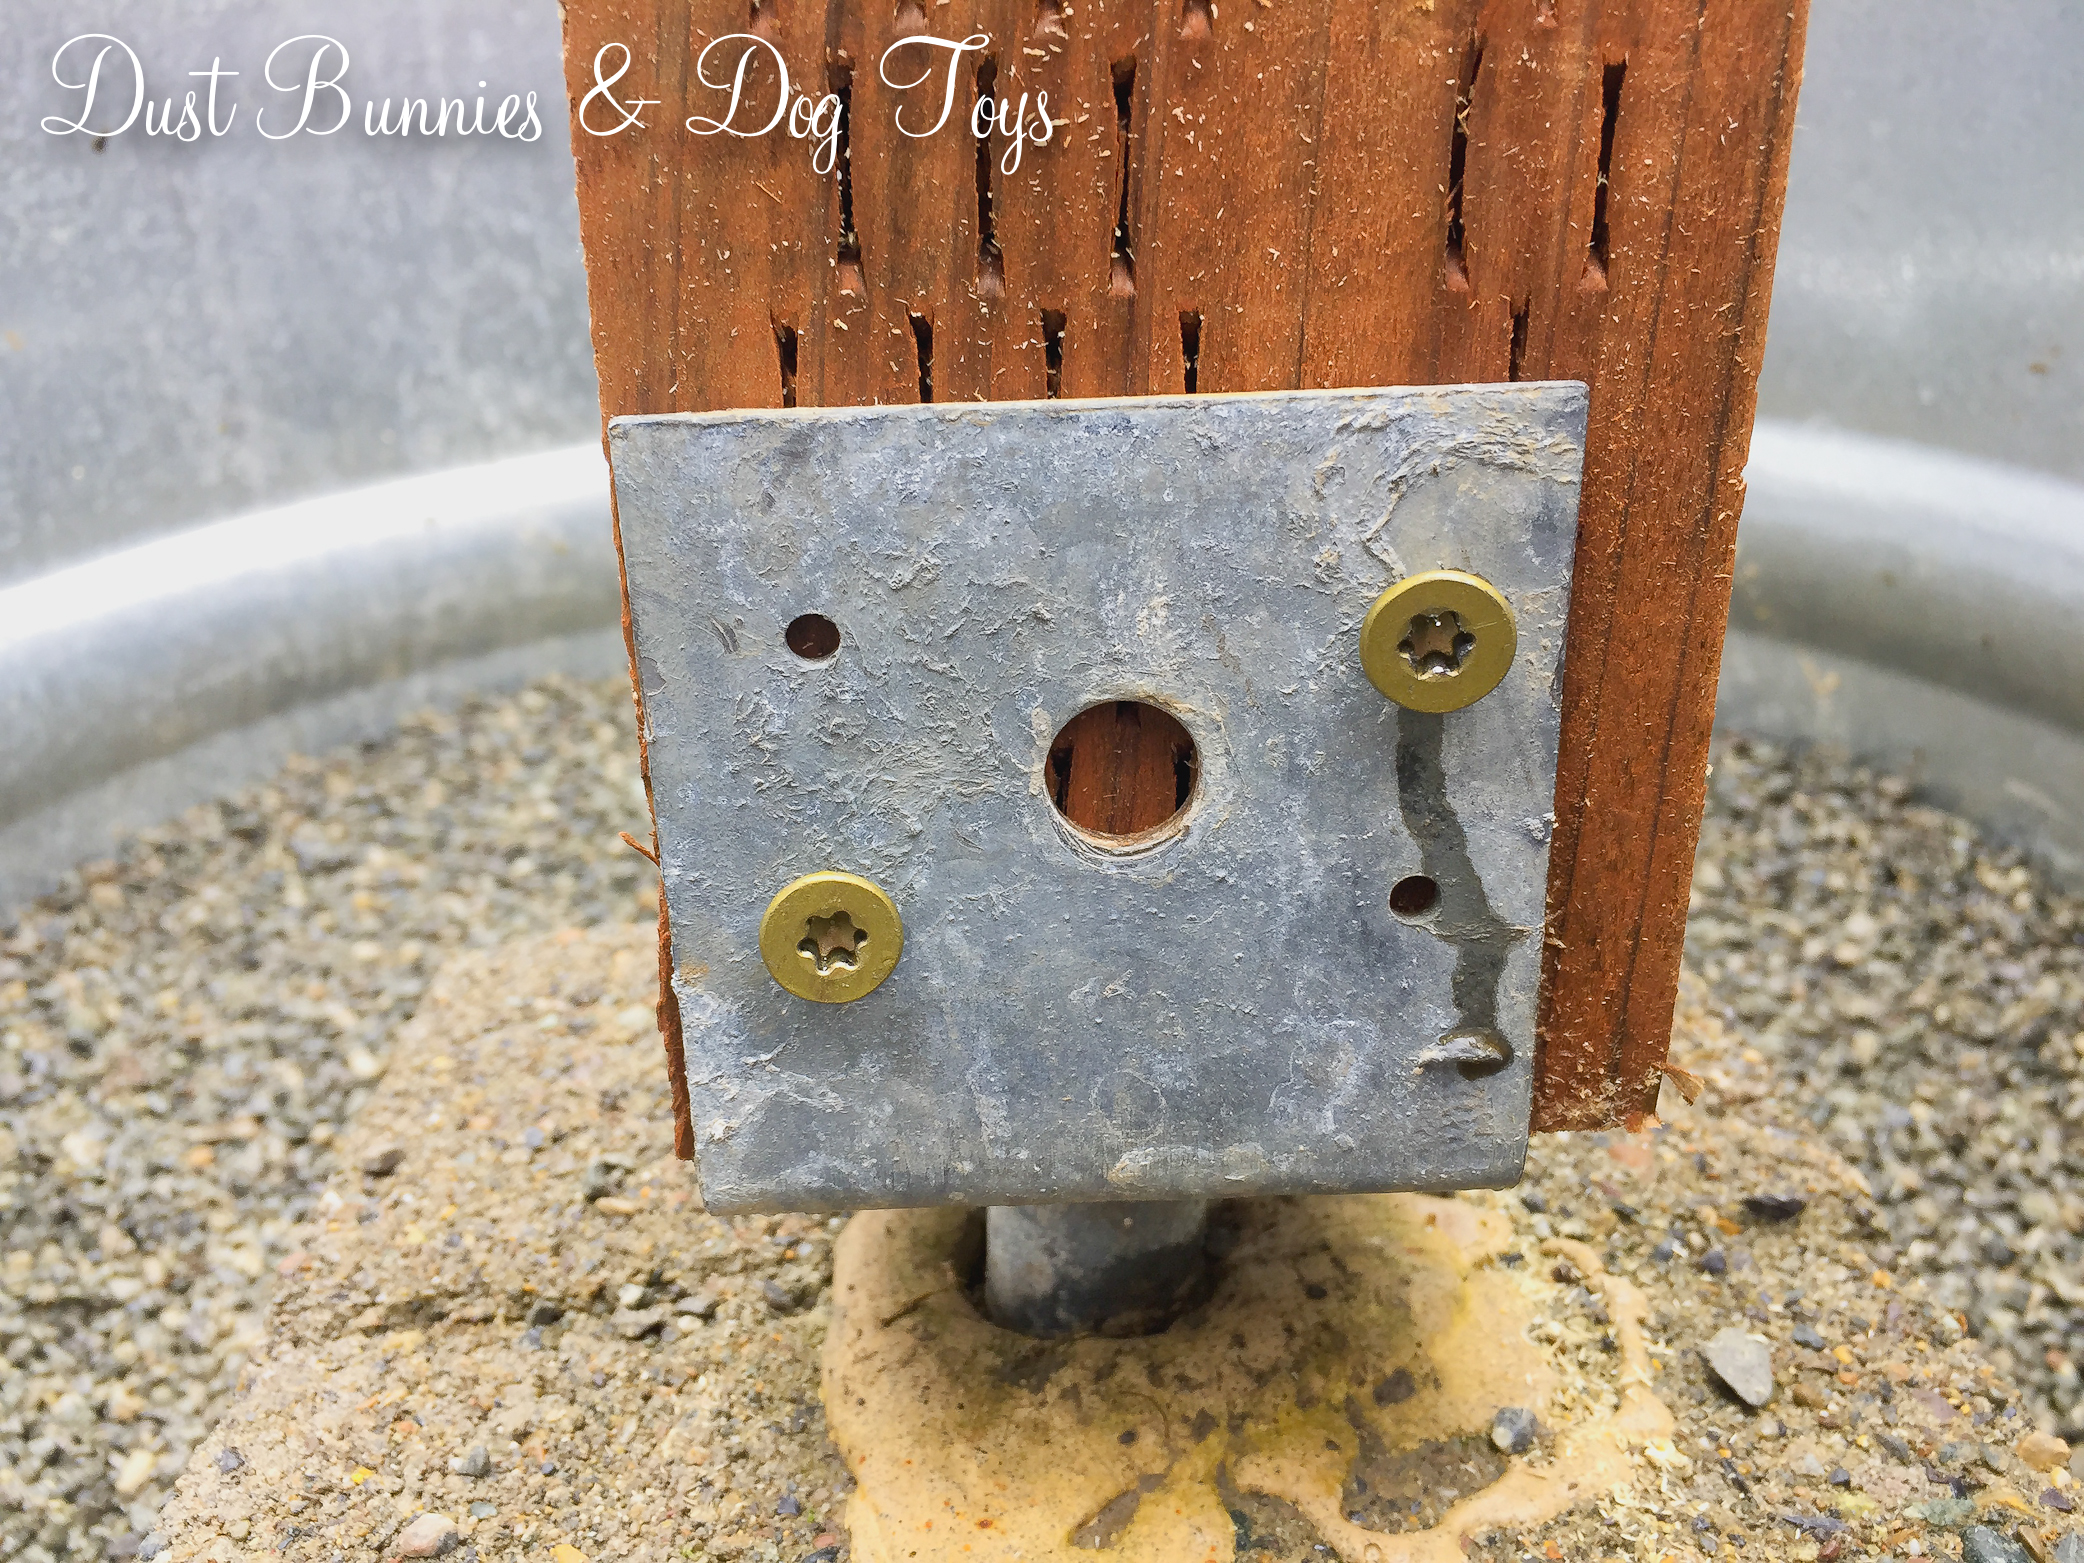
Although we bought a canvas gazebo canopy on the buy/sell page last year, I decided it wasn’t the right fit for the deck so we resold it. Eventually I want to add a pergola to the deck with some sort of shade cloth, but that might be a few years down the road still. In the interim I plan to create a simple shade like this by attaching poles to the sides of the deck with a few simple brackets. We may have to install an eye bolt on the back of the house to complete the set-up but it should be much easier to take down quickly if there are winds in the forecast.

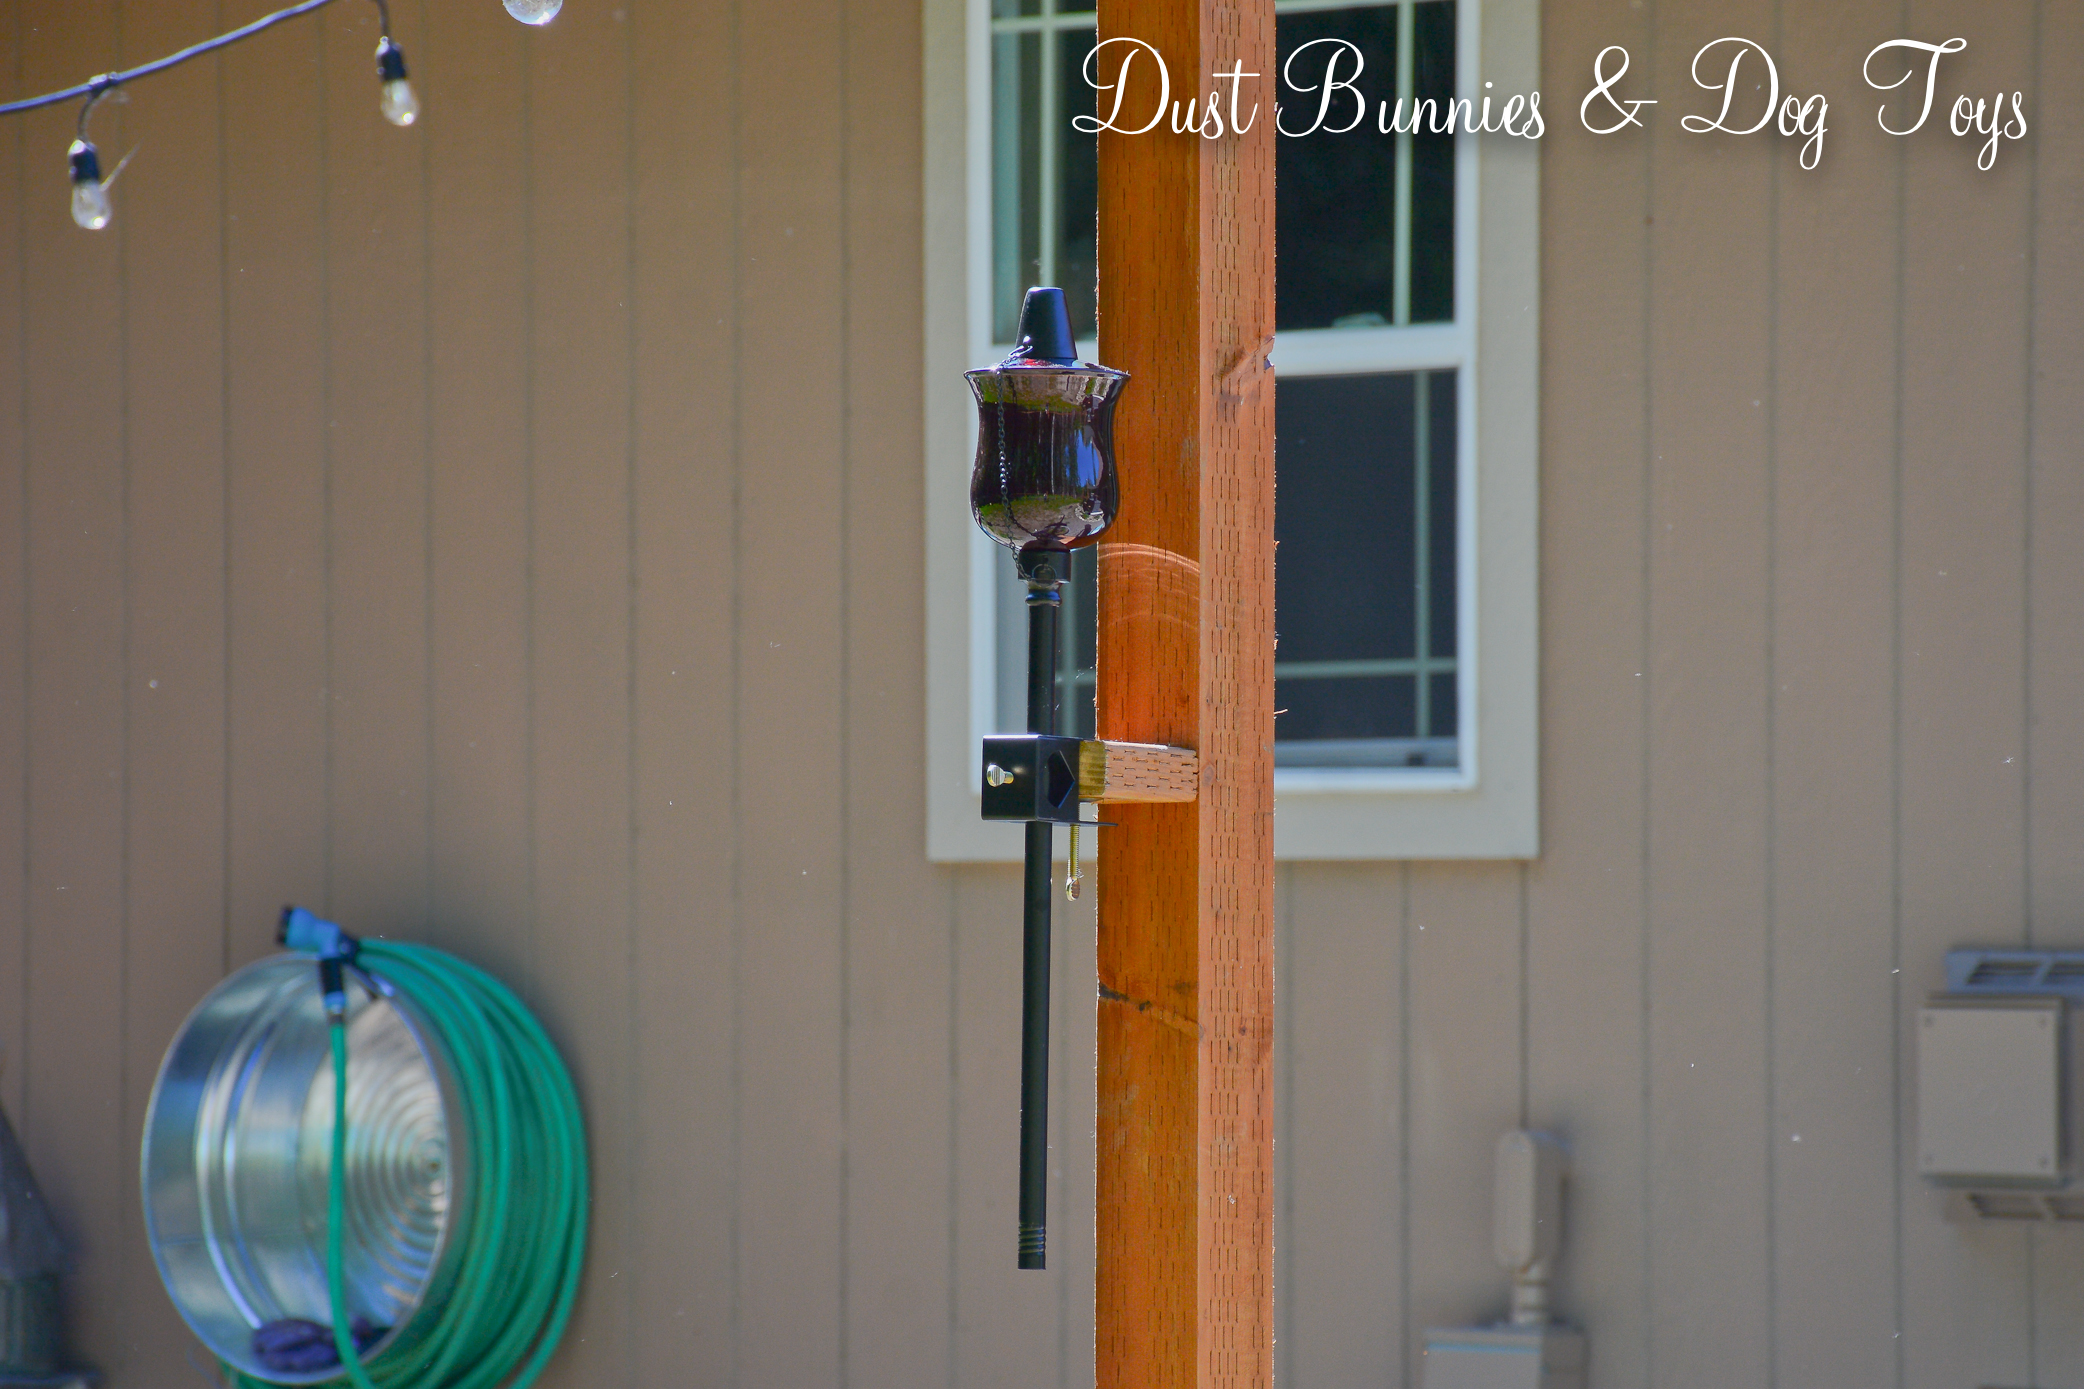
And no deck is complete without some sort of pest deterrent, especially in Alaska. Ours will come from the wine bottle tiki torches we had in Kodiak, but this time around rather than hang from a railing or post they will sit in holders like this around the perimeter of the deck. The poles for the bottles can be attached just like the shade poles mentioned above and I plan to fill the bottles half full with pebbles so they don’t require as much tiki fuel.

WheelLabels

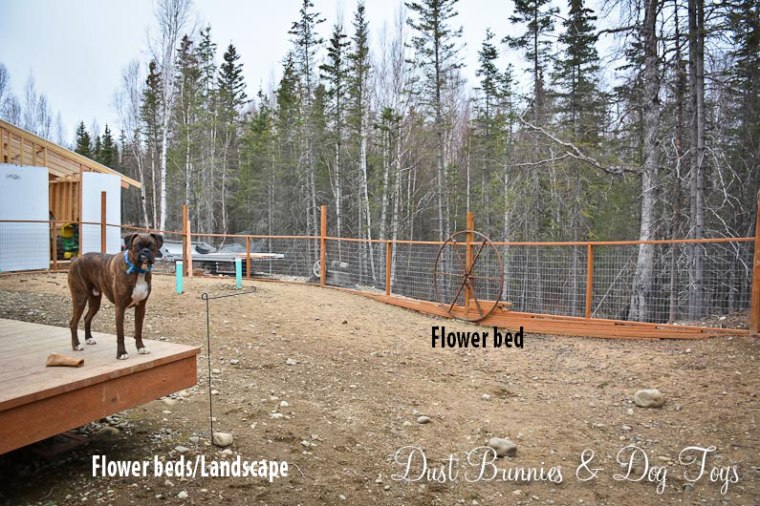
Finally, I’ll add some landscape around deck in the form of flower beds filled with perennials similar to the ones out front and along the far side of the house.   I also plan to add a clematis in front of the big wheel the hubs found me, which is now tied to the fence near the deck. I may disguise the low area around it with a bit of a retaining wall to create a small bed in front of the wheel as well. We’ll see how far I get this year.

If I get all of this accomplished by fall and still have some decent weather to work with I may attempt to create a walkway like this from the patio to the back gate.  So that’s the master plan.  Watch for posts as we attempt each portion!