Last Minute No-Sew Halloween Pillow

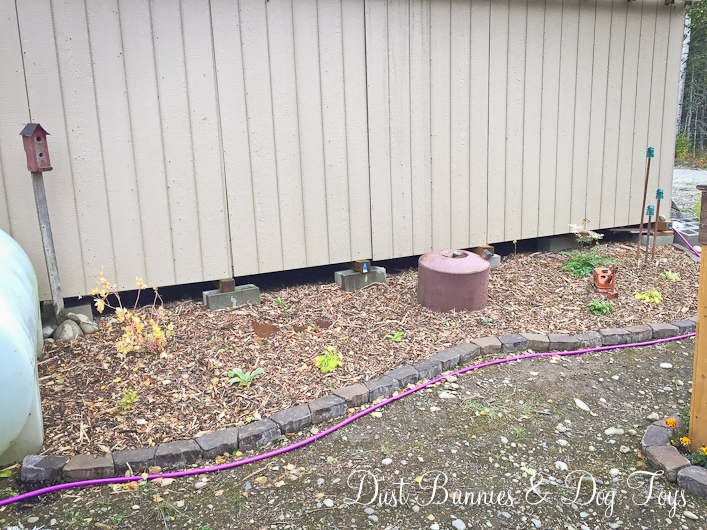
Happy Halloween everyone!  I finished this project just in time to enjoy it today and am so pleased with how it turned out I just had to share.  It started with these fun spider place mats I found in the dollar section at Target.  I think the pair were just $3.

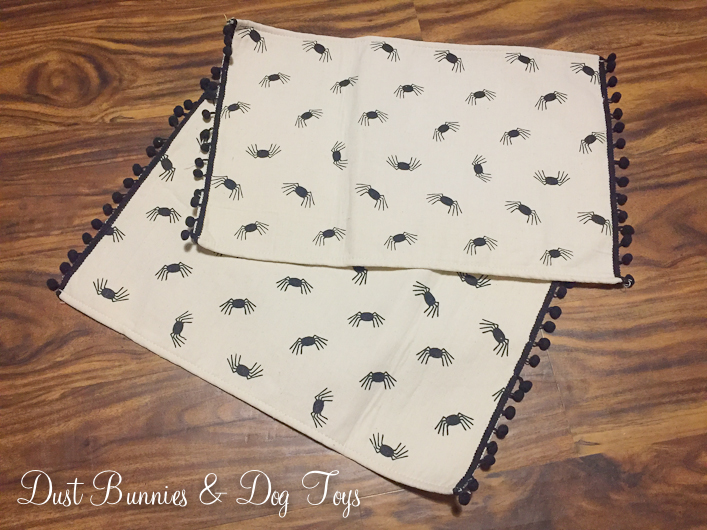
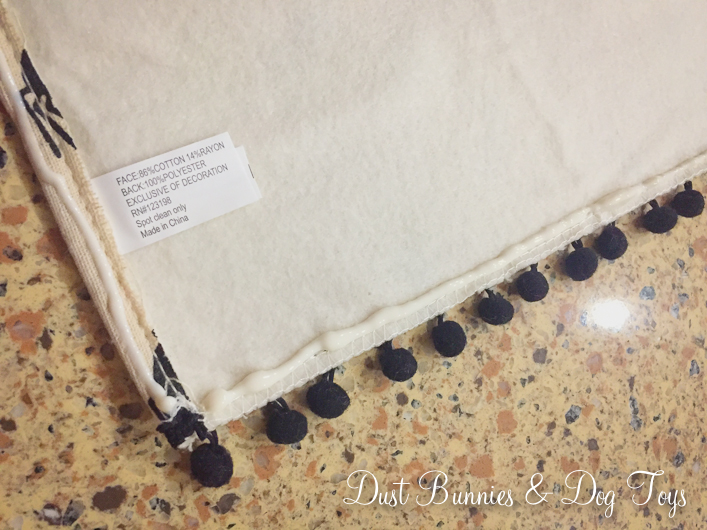
I loved the cute fringe on the edges and that the simple pattern didn’t scream Halloween since I’ve moved to more neutral decor, even for holidays.  The place mats already had hems around each edge and had a felt backing.  I’d seen several tutorials on opening up one side of double sided place mats to make pillows but since these weren’t double-sided and I don’t sew, I took the easy route with fabric glue.

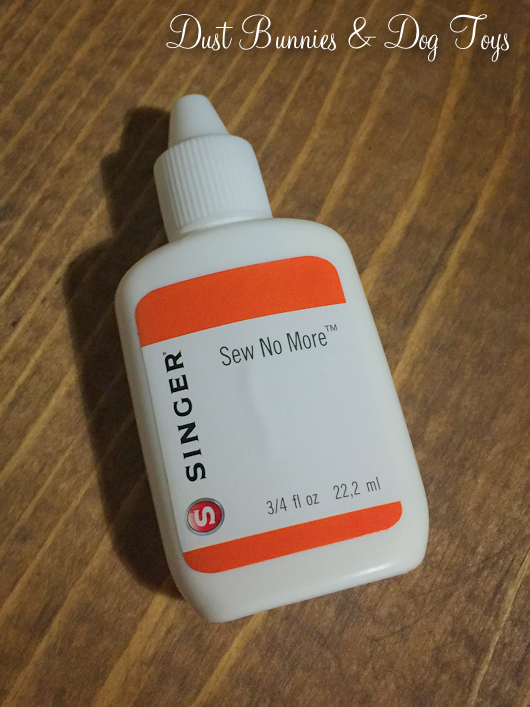
While getting a little TV time in, I put a bead of glue around three edges on the back of one place mat and carefully aligned the other one to match.

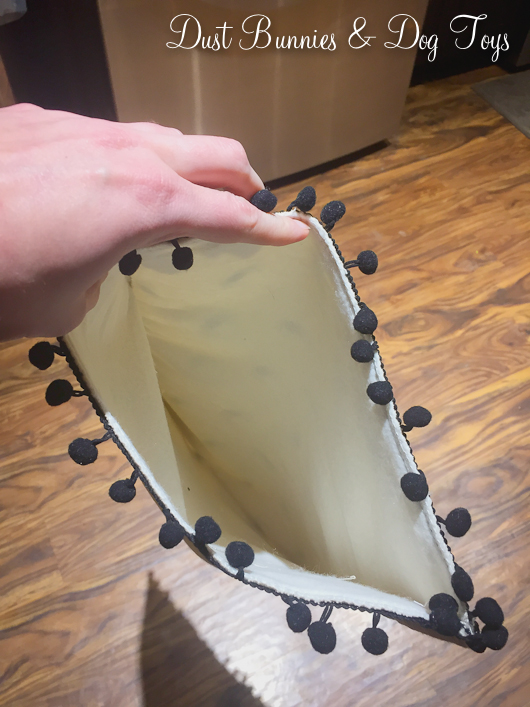
The glue instructions say to wait 30 minutes to allow a good bond.  I compressed the two place mats together under a cutting board with several heavy items on top of it for about 24 hours to make sure there was a really good bond since this would be a pillow – plus it was already late at night and I had work the next day!  I was left with this cute pocket ready for filling.

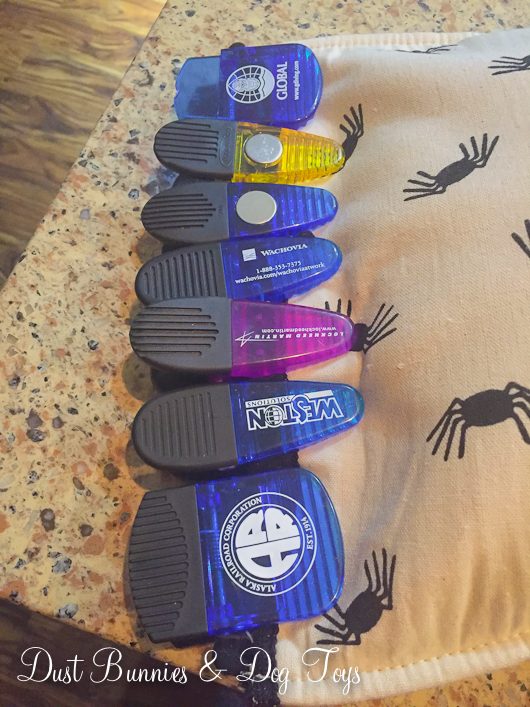
I stuffed fiber fill I’d kept from one of many pillows the dogs had worn out until it started to look like a pillow.  I ran another bead of glue along the open edge and pushed the two edges closed.  Now that the pillow was filled the cutting board compression method wasn’t feasible so I dug out a bag of clips I’ve kept and used those along the edge to keep everything together.  I let that sit overnight as well because I had to be away from the house the whole next day.  One of the clips did stick a bit due to some glue that oozed out the side, but I gently pulled the spot back and was able to remove the clip without any issue.

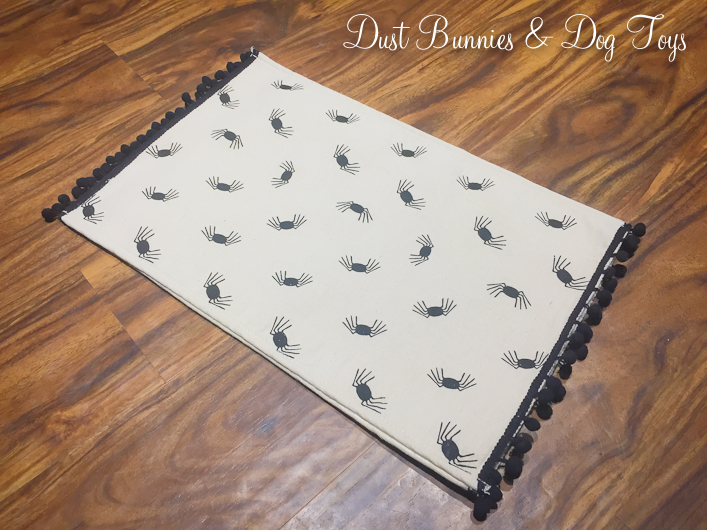
And here’s the finished pillow!  Isn’t it adorable?!  I was at a workshop all weekend so I took advantage of a photo shoot setup to get a couple of good daytime shots for you.

The pom pom fringe was what initially drew me to the place mats and it’s the perfect finishing touch to keep this little pillow fun rather than spooky.

And it looks awesome paired with my velvet boo pillow I got at JoAnn Fabrics this season!  They look so romantic with this set-up and yet still neutral and festive.

Once it was done the Hubs pointed out that I put the place mats together in opposite directions so when you flip it over the other side is upside down, but that’s not a big deal thanks to the semi random pattern.  Since the care instructions are spot clean I plan to keep both of these pieces up high and away from the fur babies, so they last and I can enjoy them for several years.

This was such a quick and easy project that I’m sure I’ll do more like it. In fact I have a couple of place mats from our trip to IKEA last year that I plan to do something just like this with, so stay tuned for those!  Until then go grab your costume and find some treats rather than tricks! I’ll leave you with a few more shots from my fun Halloween themed photo shoot I mentioned in my previous post to get you ready.

Advertisement

DIY Witch’s Broom

With Halloween just around the corner I wanted to share a quick DIY witch’s broom project that was a happy accident.  It started with the purchase of these flower stems at Joann Fabrics.  I was working on creating a headpiece for a Halloween themed photo shoot and loved the look and texture of these flowers.

Upon closer inspection I realized that the flowers stems were just wrapped around branches and could be easily removed.  So I untwisted them, one-by-one while enjoying a little TV time.

I was left with two piles of pretty flowers destined for photo shoots and these two bare branch things.  I considered putting them upright in a vase or bucket with lights for a spooky arrangement, but when I saw the two together I suddenly saw a broom.

I grabbed some scrap black ribbon and wrapped the two stems together.  Normally I would have secured the ribbon with hot glue but I’m not sure I’ll use these the same way next year and I was at my office rather than at home so a few pieces of clear tape did the trick.

It looks pretty good in our office with the other Halloween decorations – follow me on Instagram and Facebook for peeks – but I wanted to get a nice shot of it so I took it back home and propped it up on the wood pile.

Not bad for a free project made from leftovers from another project!  I still think it needs something to finish it off.  Maybe a bow at the base of the stem or a hanging loop, but I can figure that out next year if I use it again.  If you have ideas in the meantime I’d love to hear them! And in case you’re wondering how the flower headpiece turned out here’s a peek from the session!

Isn’t she gorgeous?!  She’s a hair and makeup artist and did the makeup herself based on a couple of inspiration shots I sent her.  I’ll be sharing more of these awesome shots soon and give a quick recap of the location we used, which is a local historical park.  And I’ll be working with this lovely lady again in the future for some other fun ideas. 🙂

The Shed Bed

It’s been a while since I’ve had time to write for the blog, but I found a few minutes today to share one of the last projects of the season before the snow started to fly.  I added a whole new flower bed along the side of the shed!  This space used to be a dumping ground for pallets and scrap wood we were saving for future projects, but its one of the first things you see as you pull up to the house and now that the green house was over her I wanted the area to have a more structured look.  So the Hubs helped clear out all the wood at the beginning of the season and I started planning out the layout once I confirmed the exposure this space gets is mostly shade.

Here’s how it was looking as fall started to arrive.  I’d used left over edging stones to create a border and placed a few pieces of garden art to start establishing the structure of the layout.  I stopped at an end of season plant sale near my office and got several options that should do well in the shade.  I planned to fill in with other plants from another bed that will be eliminated next summer.  Since this whole area is rocky back fill I put down a layer of top soil to create the base of the bed.

Once the top soil was in and the plants were in the ground I covered the areas around each plant with newspaper to prevent weed growth next season. It was an interesting process since the wind decided to kick up about the same time so I had to quickly put mulch down over the paper to hold it in place.

While I alternated between piecing newspaper sections around plants and chasing them across the yard as they blew in the wind, my assistant was quite busy catching up on her dirt baths…

I used wood chip mulch because it was inexpensive and I had several large areas to cover between this bed and some other projects.  The Hubs got me a full truck load of wood chips for around $20 the same day he got me the load of top soil and gravel to go around the green house.

Since I’m using perennials, I left plenty of room for things to spread over the coming years.  I used lambs ear around the rusty metal tank to create a batch of low visual interest along the front of the center of the bed.

These two hostas were transplants from the shade bed at the corner of the fenced yard which will be eliminated next season when we build a new outbuilding.  I call it “The Barn” but the Hubs thinks it’s a garage.  We’ll see who wins that debate. 🙂

Another transplant is this little astible.   This is the third placement it’s had since coming to our house.  He started in the gifted garden but was getting too much sun so I moved him to the shade bed where he did much better.  Hopefully the third time is a charm holds true for him and he continues to grow even fuller in this spot.

I also used a few new catmint plants since Luna loves the ones we have in other beds already and it’s an easy keeper that fills in areas nicely.  These will give her a couple to choose from so she alternates which she rolls in each day so they all get a break to recuperate!

I also transplanted a Seal of Solomon that surprised me in the gifted garden.  I’d brought him back from my Mother-In-Law’s garden in Washington and hadn’t seen him in the spring so I thought he hadn’t survived the winter.  This spot should be a much better exposure for him and he looks quite cozy behind the little quail family who are now safer from my active four-legged children!

Here’s how things looked once everything was in.  I’m excited to see how it all comes back next spring and watch it fill in the space.

There’s still some finishing touches needed, but this is a much better first impression as you come up the driveway.  It will look even better when I get that gravel the Hubs got me spread in front of it! Fingers crossed the weather will cooperate to let me do that next week when I have some time available so we don’t have piles of material at the corner of the driveway all winter!  And while I’m doing that the Hubs can get the last of the shed’s gutter completed so we have a ready supply of water when spring returns. 🙂