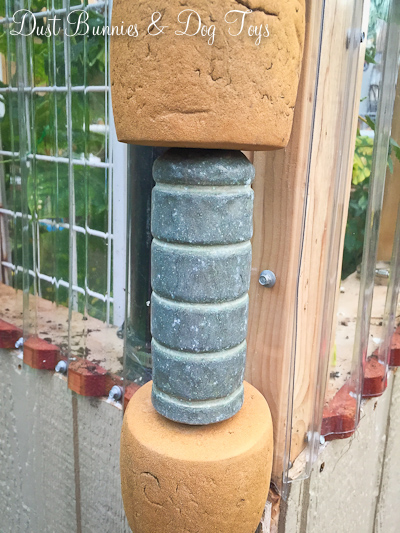
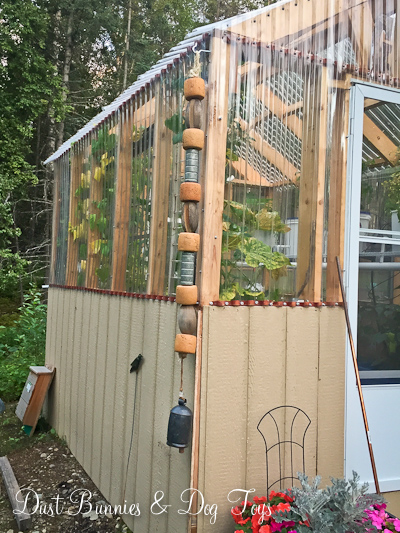
Yesterday I mentioned making driftwood garlands, like the ones I saw in Homer, but today I’m sharing a similar project I did recently that also has a bit of a nautical flair. This little project has been in the works for years. It started when I picked up a batch of wooden floats used for fishing more than 2 years ago. I only had six and every project I thought up required more so they sat, waiting for more to be found. Then I happened upon these cool vintage metal floats at Junk Bonanza and decided to pair them together but still didn’t have quite enough to complete the project.
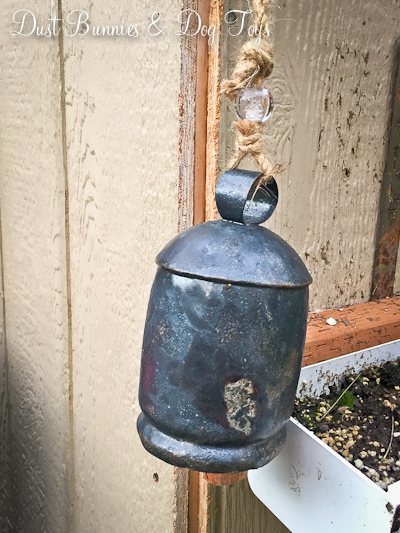
I spotted a pair of metal garden bells in a catalog for $20 and knew they’d be perfect at the end of a line of floats. Unfortunately the company wouldn’t ship to Alaska so I had them shipped to my Mother-In-Law and picked them up when we visited earlier this summer. To fill out the rest of the rope I picked up several cork floats from Alaska Picker for a few bucks each.
I used some woven rope I already had in my stash from another project and started with a loop tied with a knot. I fed the floats onto the rope in a set pattern and tucked the loose end of the rope from the knot at the loop into the center of the first float. At the bottom I just made a knot and then tied the rope that came with the bell into the knot, again tucking loose ends into the last float. It was so easy, I did both ropes while watching a movie with the Hubs and it took less than 20 minutes.
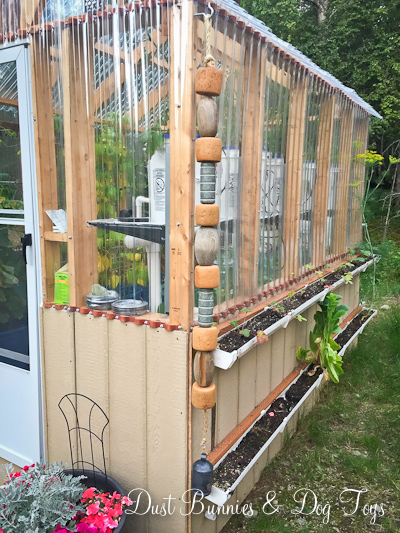
The Hubs added hooks we had left over from another project on the front corners of the green house so I could hang the ropes easily and take them down for the season quickly.
Here’s the rope on the other side, where I’ll have a large metal horse trough planter next season. Right now it’s serving as a brooder for the baby chickens we picked up yesterday! Get a peek at them on Instagram or Facebook.
The bell on this side is a little smaller than the other, but has the same style and finish. They don’t get much movement in this spot so they stay pretty quiet, but when they do chime it’s a pretty soft sound that’s soothing and just right for a garden.
I’ve still got several projects to tackle out around the green house before we close up the yard for the winter and I’m already putting together the plan for what we’ll plant and do next year. Until then these float ropes add a little bit of Alaska style whimsy to the garden and make me smile every time I see them. One more project checked off the list. 🙂
Yesterday I shared the progress our crops have made in the green house during it’s debut season. You may have spotted a unique strawberry planter in the background of several of those shots. Today, I’m giving you a closer look at how those went together and are performing.
We started with a simple 4″ black pipe that the Hubs added a cap fitting to one end and drilled holes in on one side. He then fastened them in the two corners of the green house where we don’t have the hydroponic shelves using simple clamp bands.
Here’s how they looked after they were put together and installed in the green house. He kept the bands loose enough that I could still pull the tube back out to plant it, which sure made planting them much easier!
I love that they don’t take up any floor space in the green house. Their placement on the wall in the corners make great use of an awkward space that wouldn’t work for other crops. And it keeps the berries from sitting on soil where they could spoil as they ripen.
Once they were planted I realized I needed a way to water each hole of the planter without washing away the dirt each time. I’d seen several versions of these planters on Pinterest where they placed a second smaller pipe with drain holes along it’s entire length inside the large tube so water would seep out along the path of gravity. I’ve tried this system before with other set-ups and not had great luck so I decided not to go that route. Instead the Hubs helped me create what I dubbed ‘strawberry straws’ – simple PVC pieces tucked into each hole near the roots of the plant.
They were super noticeable at first when the plants were small, but as they’ve grown the white ‘straws’ start to blend in with the flowers on the plants themselves. And as you can see they are working great!
We’ve now got two of these vertical planters in the corners filled with strawberries and are starting to see blooms which give way to the developing fruit. Hopefully we’ll have an edible crop to enjoy very soon!
And if they produce a decent harvest this year I may have the Hubs figure out how we can fit two tubes into each corner next season! I’ll let you know when we get the opportunity to enjoy the fruits of our labor. 🙂
I’ll be sharing updates on the projects that have been going on while we were offline for the next several weeks. So let’s jump right in with an update in the green house! Temps were staying above freezing by mid-May so I went ahead and planted everything I could but kept it all in the green house as a safeguard against overnight frost.
During that time I tested out a DIY hack for heating the green house I got from a local gardening club – a crock pot of water! It not only provided a bit of heat inside the structure it helped increase the humidity for the plants once I got things started. It worked really well so I plan to do the same thing again next year, although we also picked up a small heater for next season at a garage sale recently. I also ran a humidifier in the green house for several weeks to help the plants get off to a strong start. That’s another little DIY I plan to do again next season.
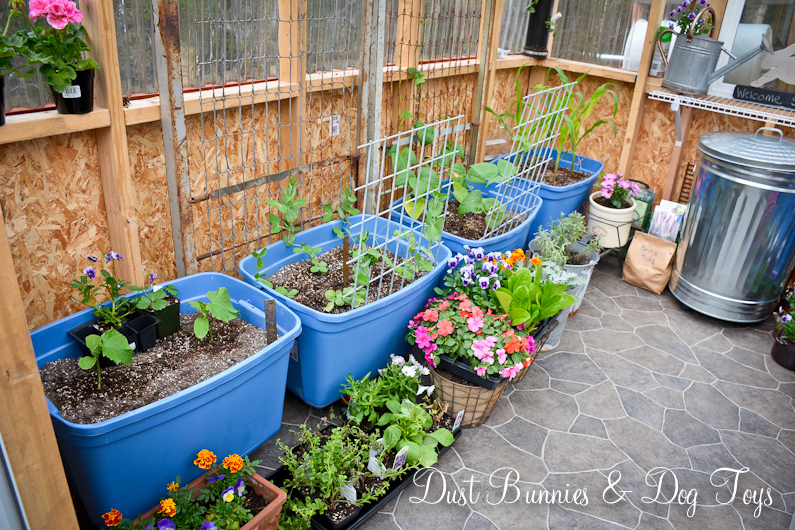
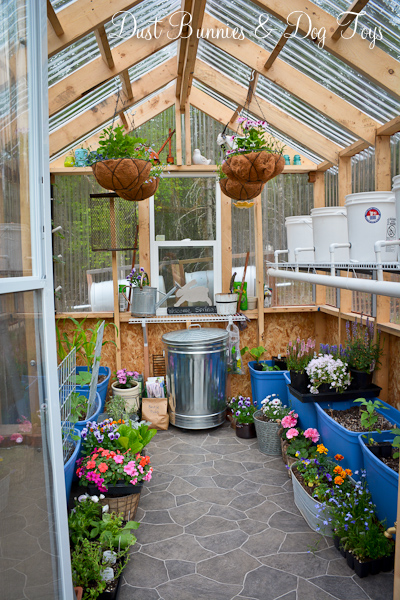
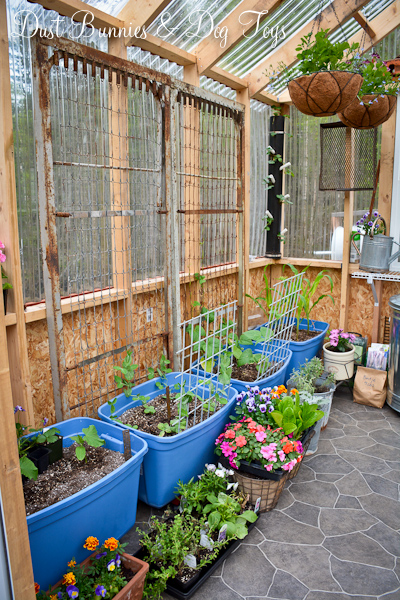
Here’s how things looked at the end of May. My much planned layout was working well – getting the food crops started and providing a bit of room for my flower pots to wait out the slow to arrive summer weather, including hanging baskets I put together myself with geraniums and lobelia. I snagged the baskets at Lowes for just $5 each and they came with the coconut liner, so even with the cost of the plants and dirt they were a far better deal than the crazy expensive ones the stores and nurseries put together – most of which have color or flower combos I’m not keen on anyway.
The freebie metal bed frames I scored last season fit perfectly behind the tubs to serve as a trellis for the peas and green beans. Since I could only get a couple of the plants along the back side of the tub I put a couple along the front as well and the Hubs cut me a couple extra pieces of heavy gauge fencing from some scrap we had sitting around to create a mini trellis for the other side.
I didn’t realize just how much I had packed into this space until I started moving the flowers out to the deck and yard and suddenly had a lot more room – that is until the food crops really got going! The Hubs installed a water barrel in the corner for easy watering and started putting together a hydroponic system for the tomatoes but got sidelined with our trip, so we’re just now finishing that project up. I’ll share the details of that set-up soon.
Although not everything made it through the transplant and adjustment period, a good majority did and things are growing well now. Here’s how things are looking now!
Not bad for our first season with the green house and learning the ropes. We’ve already enjoyed peas and lettuce from our efforts several times and look forward to plenty more before the summer is over. Tomorrow I’ll share a closeup look at the vertical space-saving strawberry planters we’re using and the DIY solution we came up with to water them, so be sure to check back.
Although there’s still more than a foot of snow on the ground and temps have been on the negative side of the thermometer the past several days, I’m already planning what we’ll be doing in the greenhouse for its debut season. Obviously these pictures aren’t recent, but they’ll help you visualize the plan as I go over it. 🙂
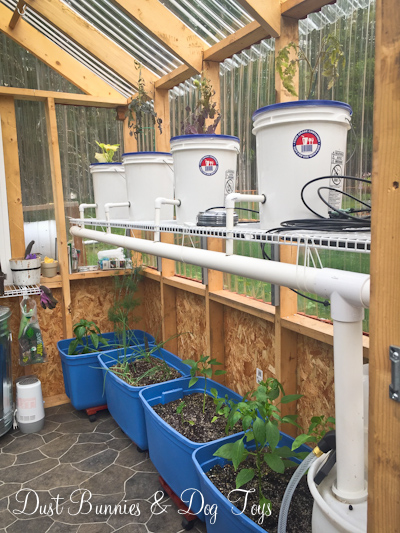
On the right side we will install a hydroponic system similar to one our friends have used in the past with 5 gallon buckets on a wire shelf at chest height for cherry tomatoes, cucumbers, zucchini and squash. This will be the Hub’s first project of the season since I want to get things growing as early as possible due to our very short season.
Two photos courtesy of Anne-Tiques. Hopefully, we have results as good as theirs!
Below the hydroponic system will be 4 tubs where I plan to have garlic, dill, onions and carrots. Each of these tubs will be on a plant caddy so it can be wheeled out for tending when needed.
There will also be 4 tubs on caddies on the opposite wall. I will have two varieties of peppers – one on either end and the two tubs in the center will contain green beans and peas. I plan to use the two bed frames from the wheel bed last season to act as trellises for the beans and peas. I’ll also hang large PVC pipe with holes cut out for planting strawberries in either corner on this side.
The gutters that held the strawberries on the fence last year will be attached to the side of the greenhouse for lettuce, spinach and chard or kale.
Another wire shelf will be installed under the window on the back wall to serve as a potting station. The large metal trash can will hold my potting soil and will sit underneath the wire shelf so it can catch dirt as it falls through. It will also be on a plant dolly so it can also be moved easily when needed. My pruning tools will be kept in a container of fine sand on this shelf as well to help keep them clean and sharp, as well as easily accessible.
I’d like to try a potato tower or crate planter on the back corner of the green house past the gutters. It’s an out of the way spot, but I can water it from inside the yard and the dogs should keep any inquisitive moose away since it’s between the fence and the green house. The set-ups I’ve seen on Pinterest look fairly easy to set-up and maintain so I’m game to have ingredients for stews come fall!
I may add some flowers beds around the side and back of the greenhouse, but we’ll see how far I get with our edible crop this season. I’m thinking either dahlias or peonies since both are great for bouquets and could be cut easily while I’m already out harvesting food items in the greenhouse. Plus, being perennials, they would come back year after year. Luckily the faux rock we got for the septic pipes inside the fence, worked perfectly out here to cover the leach field vent pipe so it’s not an eyesore next to my pretty green house!
And of course there will be plenty of pretty flower pots and garden décor out front of the greenhouse. If you looked closely at the pictures from my last post you might have noticed two wooden chairs off to the side of the building site. I have grand plans to make one into a planter using chicken wire to build a basket where the seat used to be and the other will be a stand for containers of flowers.
Of course moving all of our edible crops to the greenhouse leaves the Garden Box in the back yard available for other things. I’m thinking it might become my cutting garden for bouquets. It would be something pretty to look at out the family room window and would be convenient to use, but I’ll have to plan out which flowers are in each tub since the middle window opens out and we use it quite often during the nice summer weather.
Our herbs will soon have an spot inside the house where they can grow year-round for continued use, so I don’t need a spot for them in the greenhouse. I’ll share that project once it’s installed and finished. I plan to have parsley, oregano and basil. I may do a few varieties of basil if I can find them available locally. We’ve already got mint and chives out in the rain garden so that should give us a good variety to work with and we’ll have room to add other items as we learn what does well and will be used the most.
It’s an ambitious plan but I want to give it a good shot with our first season. If you have suggestions on other crops we should consider or tips for any of the ones I mentioned I’d love to hear them. I also want to hear thoughts on if it’s worth the effort to paint both the interior and exterior of the greenhouse white. I think it would give it a nice clean farmhouse look, but I’m not sure improves functionality or practicality, so I may hold off and do that at the end of the season when we close up the greenhouse rather than before when I need to focus on getting things started. Tell me what you think with the poll below. I look forward to hearing your suggestions and sharing the progress when spring arrives!
At the end of last summer, the Hubs was suddenly motivated to build a green house and although I had lots of ideas on what I wanted, I didn’t have a plan fully thought out for the project. But I definitely wasn’t going to take advantage of this unexpected desire to build when it was in my favor and so the green house building began.
I did know where I wanted the green house – behind the raspberry bushes where it would get the most exposure and I could see it from the house and driveway. Unfortunately this spot is slightly sloped so it’s not an ideal building site, but the Hubs worked that out by building a platform for the floor of the green house with a support for one side to cover the difference.
He used a large pressure treated board for this support since it would sit on the ground. The floor itself was made with pressure treated 4×4 joists topped with 3 sheets of plywood. The lack of a permanent foundation allows us to move the green house should we determine there’s a better spot for it in the future, but provides adequate support for the current location.
I wasn’t sure on the size so based on the spot the Hubs suggested 8′ x 12′ and that seemed reasonable to me, so I went with it. He framed up the walls for either side and I helped hold them in place while he nailed on supports.
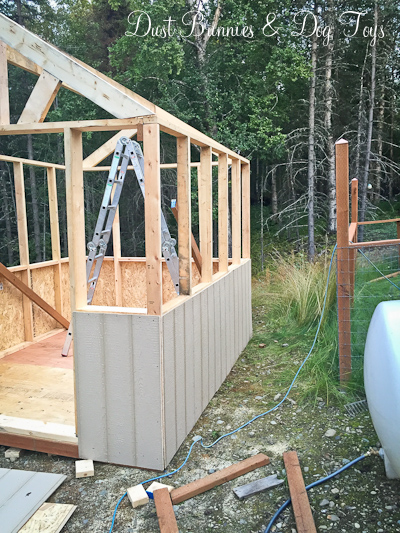
Working from the plan in his head based on pictures I’d shown him of designs I liked, he framed out the front and back walls and started adding trusses to create the roof. He also created a support frame for siding that would go half way up the sides of the all 4 walls.
It really started to look like something when the siding went up on the lower walls. He had to get creative with the front corner due to the slope of the ground, but he made it work.
The siding will provide a great spot for me to attach the gutters I used for strawberries last year. This season they will hold lettuce, spinach and chard or kale for salads and the strawberries will move inside the green house to give them a longer growing season. You’ll notice the large water tank we added next to the shed last year is nearby for easy watering. The front yard hose reaches the tank fairly easily so filling isn’t too difficult and the natural slope of the yard provides a gravity feed for watering the raspberries and filling watering cans for the green house.
Next came the clear plastic siding and a window in the back that can vent heat if needed. He used the contoured wood slats designed for these clear panels to support the pieces and provide spots to secure them to the frame. I added some paver blocks we had on hand in front of the the doorway. I may add a few more once I get things set up, but for now it creates a nice little stoop for the structure.
One of his last steps was installing a storm door, which also has a window and screen that can be used to vent excess heat if needed. He lucked out finding this door on a “returned” clearance rack for much less than it originally sold for. A brand new door for a fraction of the price – he’s learning my bargainista ways quite well!
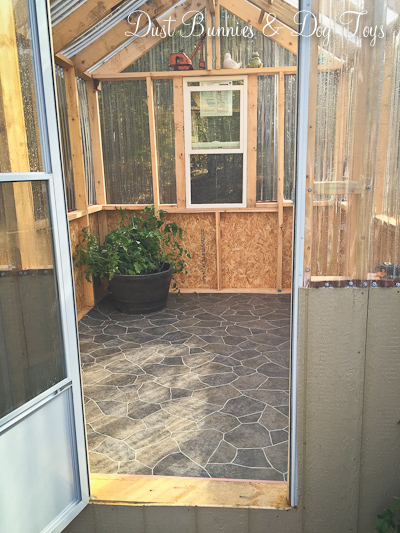
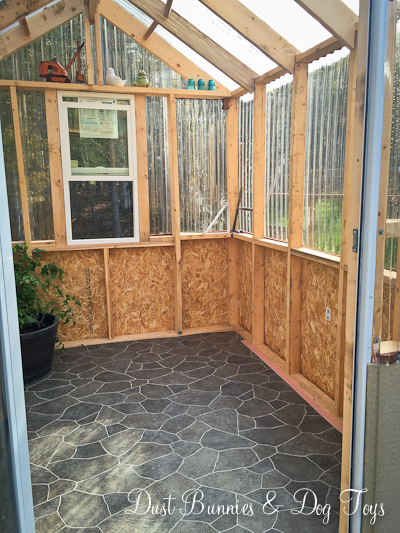
He finished off the open space on either side of the door and we purchased a piece of low cost linoleum to cover the plywood floor. I chose the grey stone pattern for two reasons: A) I liked the look of it for a green house floor and B) the dark colors should absorb heat during the day and release it back out to the plants during our very short nights during the summer. Somehow I neglected to take a finished picture of the exterior but here’s some views of the finished interior.
Finishing the project just in time for the season to end last year it provided a spot for me to move plants that were starting to struggle with the temps and spots for my garden art I was starting to collect from the yard. Several pieces found storage spots along the top of the wall, where they fit perfectly.
Even at the end of the season it was still getting pretty warm inside the green house so it should work well to extend our growing season which is sadly very short due to being next to the mountains.
And here’s how it looked during the final weeks of summer before fall arrived. Having these containers in the space temporarily really helped me develop a plan for how we’ll set up everything come spring. With our first snow of the season in late October we opted to leave everything in here and store the patio furniture in here for the winter as well, so it’s a hot mess these days, but come the first sign of spring I’ll be pulling everything out to get my plan in motion. I’ll be sharing that here on the blog very soon so check back and feel free to make suggestions when I do! 🙂


 Two photos courtesy of