DIY Indoor Herb Planter

Continuing my willing of Spring to officially arrive in Alaska, I’m sharing the indoor herb garden we recently installed.  We love having fresh herbs to cook with and give the chickens during the summer and preserved some to continue using over the winter at the end of last season but nothing beats fresh, so I decided we should have an indoor garden just for that.  With that in mind we picked up these hanging containers and rods at IKEA on our last trip down south.

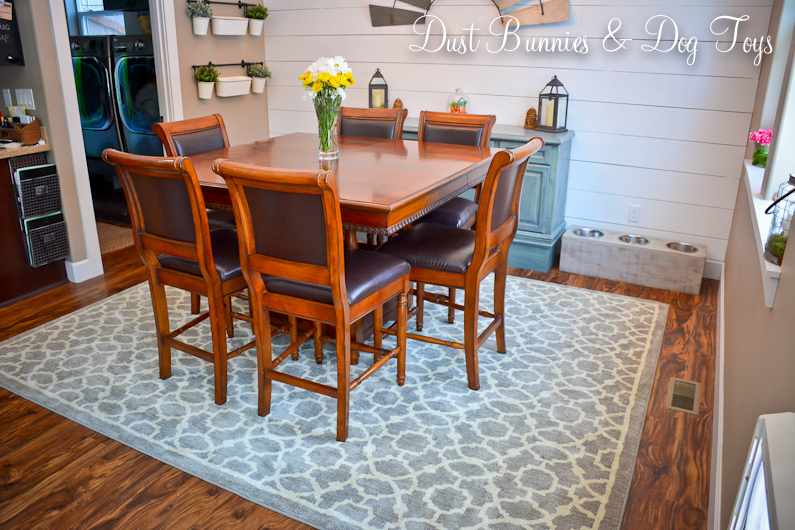
They are a perfect fit for this small wall in the dining room and as you can see, this spot gets good light from the window across the room.  The Hubs made sure to secure it to the studs since the plants will have a bit of weight.

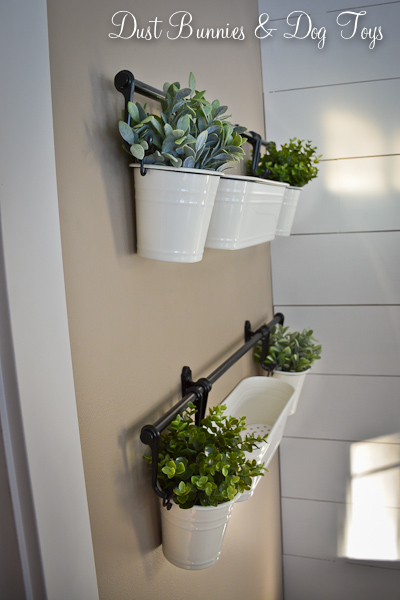
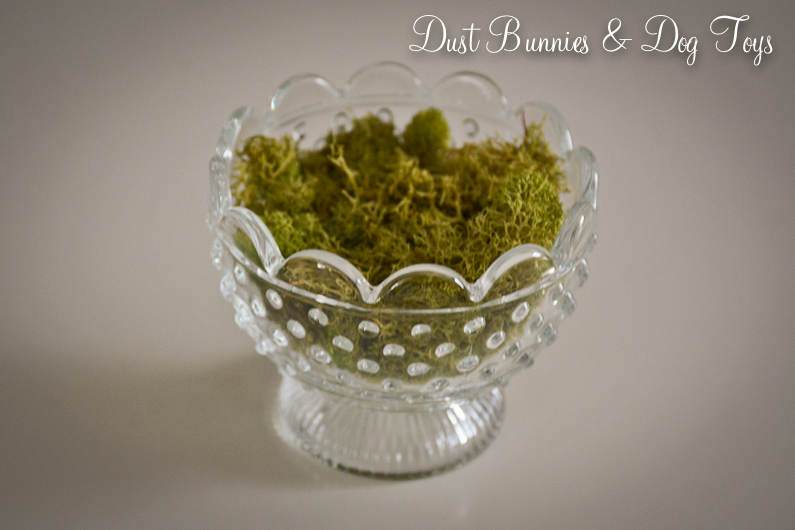
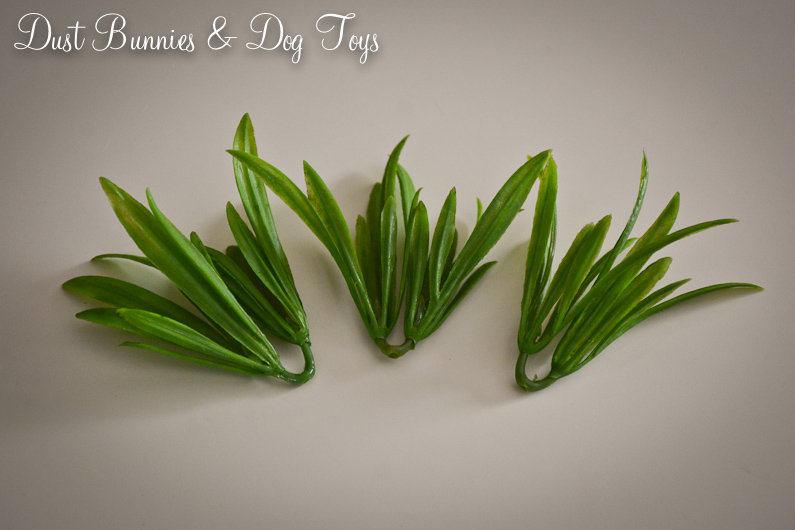
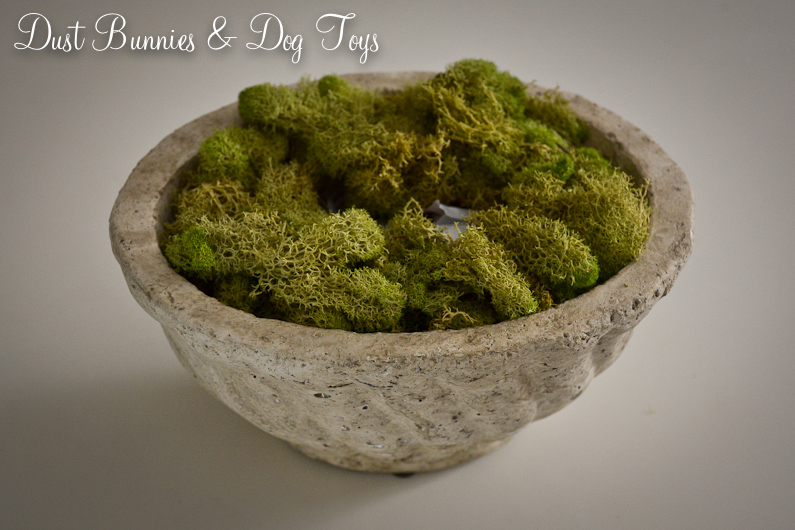
For now I just have a few faux plants, also from the same stop at IKEA.  The local nurseries should begin offering herb starts within the next few weeks, but until then the fake stuff provides a bit of greenery.  Unfortunately I didn’t have enough to fill the large containers in the middle, but it still looks ok for now.

I’ll be creating some DIY plant stakes once I have our herbs selected.  I considered a few ready to purchase options I’ve seen in the stores but wanted them all to match and wasn’t seeing all the options I was considering which includes oregano, basil, parsley, rosemary and thyme.  I may try lavender in the larger containers just for the scent, but I’m not sure it would give the plant enough room to flower.

If anyone has used these containers with live plants I’d love to hear about how they worked for you.  I plan to water sparingly at first since there are no drainage holes (good thing since we’re indoors), but there are small trays at the bottom that would provide a place for water to collect below the dirt and the plant to reabsorb the moisture.  Hopefully that keeps the roots from getting soggy, but there may be a learning curve.  I’ll share the finished project when everything is planted and growing!

Advertisement

Welcome Spring

The calendar says that it’s officially spring but in Alaska spring is “break-up” season, which is why we still have about a foot of snow in the yard.  Granted, the snow is disappearing – just not quick enough for my preference.  So rather than lament spring’s tardiness outside I changed up the decor inside to feel a bit more in line with what the calendar says.  The Hubs brought me home flowers recently so that bouquet has been the centerpiece on our table and the large candle I’d had there moved to the windowsill in the family room where the dogs tunnel is below it so they don’t seem to notice it.

I kept things simple in the entryway with two new pedestal cloche stands from World Market, cute little beehive skeeps from JoAnn Fabrics and my Pottery Barn knockoff basket filled with the DIY neutral eggs I made last year.

I love how the little skeeps fit perfectly inside the glass domes.  I love the bright colors of spring but I like to keep my decor simple these days and this gives just enough color while remaining neutral with a farmhouse flair.

Next to the front door my big oil can got some pretty dogwood branches, which are the perfect height to hide the ball chucker we keep in the corner for when we take the dogs out front to play!

The media cabinet got a few little touches of spring as well.  All items I pulled out from storage and one of the little faux planters I recently created.

I don’t remember where I got this little chick or the basket but they fit together perfectly!  Plus pairing two little items together means it’s a little less likely to get snagged by one of the fur babies.  The other side of the cabinet has a free Easter printable I found online a few years ago and my green shamrocks.  Since I don’t decorate for each particular holiday anymore (St. Patricks, Easter, etc.) but rather the season I just use it as greenery now.

The mantel is still a work in progress, but my cutie little wool lambs take safe haven up here away from the fur babies.  I got the white candle sticks on the local buy/sell page for $20 and the brown one was a recent thrift store find.  I’m in the process of painting and distressing it to match the others and plan to add some fun moss or boxwood balls to the tops of each.  The cute birdhouses came from JoAnn’s and will eventually be used as photo props and in the backyard.  The wreath was also from JoAnn’s.  I just couldn’t pass up the pretty purple color.

The tray next to the table got a pitcher of tulips and a cute little bird to accompany the rustic frame I’ve had here for a while now.

Over in the dining room I kept the lanterns from the winter decorating but swapped out the filler for split pea to give them a spring feel and added smaller bee skeeps like the ones in the entry way.  In the middle I paired a cute bunny ornament and a basket of carrots from storage in the cloche I found at Home Goods on our last trip down south.

In the window is my favorite farmhouse lantern, filled with moss for a spring feel and my clearance ceramic bunny I found at the end of last season for just a few dollars. The other side of the windowsill was a safe haven for a few more small pieces, including some hydrangea stems in a green bowl I thrifted some time ago, the fun little moss bunny I love to pull out each year and one of my vintage votives.

Before I had a chance to get this post up I’d already swapped out the wreath above the mantel so I thought I’d share that change.  I got this boxwood wreath from Target and thought it would look good in this spot for most of the year.  It’s just the right amount of farmhouse style mixed with spring.  The purple wreath moved to the front porch where it coordinates well with the purple front door. 🙂

So that’s my attempt to usher in spring indoors while I wait for it’s arrival in my garden!  How did you decorate for spring?

A Simple Change Makes a BIG Impact in the Dining Room

Two weekends ago the Hubs was in town shopping for some project supplies while I was home cleaning.  He texted me a picture of several large area rugs on sale for half off at one of the stores and asked if I liked any.  I certainly did and he said that was the only one like it that they had, so he swooped it up and headed to the cashier.  When he got it home I noted that it was more grey than the beige it had looked in his text but I actually liked that even more.

We had been in sore need of a new rug in the dining room after the jute rug we had in there had taken the brunt of Brinley’s teething phase.  We had moved the rug from behind the island over under the table as a temporary option but it was too small for the space and the pattern didn’t work there.  This option fit perfectly, had a lovely neutral yet traditional pattern and is so soft and cushy I could probably sleep on it quite comfortably.  Even the Hubs has commented how nice it feels underfoot!

The lighter color brings a whole new look to the space, and coordinates with the other grays and neutrals we already have in this space.  It was a great change for spring – making the whole area light and bright.

Although I probably wouldn’t have picked this pattern if I’d been shopping online, in person it’s just enough style without being over powering.  Plus it lets me have the lighter color I like to incorporate to combat our long winters but in a way that masks the dirt which collects in this high traffic spot – at least from what I’ve seen so far.

Now that we know how plush it is I’m on the hunt for a similar one to replace the aging rug that moved back to it’s original spot behind the island.  We call that space the “playroom” because it’s were the dogs romp and usually take their toys to play with in the sunlight from the slider doors.

It’s surprisingly low profile for how soft it is.  It literally feels like there’s a foam mattress hidden inside!  It also seems fairly tightly woven which should help with my allergies, as things won’t be able to build up between the fibers.  And the packaging says it was made in the USA which we can fully support.

I’m so in love with this new look and smile every time I see it.  There are also a couple of other updates in this space you might have noticed in the photos.  I’ll be sharing more detail about those changes soon, so stay tuned!

Save

Easy Faux Planters

5As I promised earlier in the week, I’m sharing how I made some cute little faux plants.  It started with a variety of small containers I had previously had succulents in along with a few new items.  The succulents had met an untimely fate during one of Brinley’s “puppy moments” and had been empty for a while so I wanted to refill them but with Alaska still well in the grips of winter there weren’t many options to choose from.  While browsing Michaels the other day I spotted these little faux succulent stems (ignore my supervisor’s photo bomb – LOL!).

0I knew they’d be perfect to fill several of the small containers so I picked up a few.  As you can tell from the empty spots on the holder above, I’d tested out the stems on a small piece before I decided to write a post about the process.  But since it went well here we go.  We’ll start with this cute glass cup I picked up at IKEA the last time we were in Portland.

1I fill it 2/3 full of moss I already had on hand to create a base for my arrangement.

2I pulled several of the grassy stems from the holder and started bunching them together.  Once I had a grouping I liked I put them down into the center of the moss in the cup.

34I fluffed things around a bit until I liked how everything looked and called it done.  Next up was this cement bowl I found at a local boutique shop.

6Since this one was larger than the glass cup and solid I filled most of it with crumpled up paper from an advertisement that came in the mail.  I was enjoying the pretty spring colors on the paper, which was a nice little inspiration.

7I added moss on top of the paper, leaving a small area in the center open to put the stems.

8After I added the grassy stems I randomly placed some of the small succulent stems around the perimeter.  It was ok, but looked a bit crowded and not really what I was envisioning.  So I kept fussing with it, trying a variety of arrangements.

9Eventually I pared it down to just the grassy stems and some white flowers left over from a project long ago.  Its the perfect look for early spring.

10Here’s a quick shot of the other planters I whipped up using the same method.  This little galvanized container came from a boutique in Portland and looks sweet next to the lamp in the guest room.

11You might have spotted the succulent grouping in the small crock on the sewing table I shared recently.  It was a little too much brown in here until we refinish the table so it’s moved to the laundry room, which I’ll share soon.

aAnd of course the succulent planter you saw earlier this week with my fun little scroll art.

after

I love how real they all look, yet they require zero maintenance, which is perfect for my schedule these days! 🙂  I’ve got a few more of the succulent stems so there might be a few more arrangements in the coming months, but for now I’m enjoying having a bit of green around the house even though it’s deep white outside.

Linking up at: Knik of Time’s Talk of the Town, Tater Tots & Jello’s BFF and Savvy Southern Style’s Wow Us WednesdayStone Gable’s The Scoop and Thrifty Decor Chick’s Before & After Party!

TDC Before and After

Save

Save

Cluck Club Update

6

There are some new faces in our chicken coop!  We brought home four new hens after seeing an ad on Craigslist from someone who was moving and couldn’t take them.  The ad mentioned that they were already laying eggs so I contacted the poster to find out if they were social.  He responded via text with a photo of his young son holding one of the chickens.  He knew his children would be upset that the chickens were going to a new home but after I described our coop and setup he was sure that they would be happy with us, so we arranged for the hubs and I to stop by after work and pick them up before the weekend.

8

The new ladies have settled in quite well.  We kept them separated from the other chickens the first day and tried to introduce the two groups the next, but it was very clear that the two would not do well together so we found a new home for the previous flock with another local chicken family where they could be free range and happy.

5

We did keep Miss Biscuit who was at the bottom of the pecking order in the last flock as evidenced by her missing feathers and ruffled appearance.  It seems she holds the same position with her new coop mates but after a few squawks and flaps she knows her place and gives them space so everyone seems to be getting along well.  The dogs are loving their new siblings and often go stand at the fence just to watch them.

4

These new ladies are very social and friendly.  They come right up to us and stop and wait to be picked up when we come near them.  They were also in right in the middle of things as we did a little tweaking on the yard this weekend, checking out the ladder, hoping in and out of the hen house as we were working in it and inspecting every little detail.

7

I leveled out the piles of dirt left from the trenches the hubs dug when he installed the chicken yard, so now everything is mostly level and ready for the grass to grow back.  I pulled as much of the rock and gravel as I could out of the dirt while leveling so those piles will be added to the landscaping going in around the back deck.  I also added cinderblocks around the entire perimeter of the yard which will be planted with lobelia soon to attract potential prey for our flock, and just make things a little prettier.

1

The hubs added a few boards over the hen house doors to hold the netting up so it doesn’t catch on the tops of the doors when they open.  It’s not the prettiest setup but it works for now.

2

My favorite new chicken is Charlotte, an Easter Egger who has these fun fluffy feathers around her face and lays greenish blue eggs!  The hubs’ favorite is the black and white chicken, Fluffy.  We may change their names once we get to know their personalities more, which we’re doing quickly thanks to their willingness to be held and petted.

3

The change has brought a new color variety to our egg cartons too!  Biscuit continues to lay her speckled brown eggs, while the two black chickens, Split and Splat, lay dark brown eggs.  Fluffy lays a light brown egg which is actually a white egg with small brown spots when inspected closely, and of course Charlotte’s green egg.  Sure makes our old plain white eggs seem kinda boring!

EGGS

Next up for the coop is some touch up painting, tilling the yard and creating a fun sign for the fence while the hubs builds a new storage area for their food and treats.  Watch for future posts as those projects are completed!

Lantern Love

Can someone please tell me where the heck the week went? We spent a good deal of it dealing with a broken dishwasher, a security breach at our insurance company and damage to one of our couch cushions – all of which required calling various customer service centers, most of whom were not very helpful. I was actually so frustrated with the process I started writing a post about the experience, but felt that it was turning into a rant. Since I’d rather focus on more productive things I decided to share a fun little update I did on our back deck instead.

Spring in Alaska is very different than the rest of the country. There aren’t any flowers blooming here yet, but our occasional days of warmer temps and sunshine have me shifting attention to our outdoor spaces. Last year we installed two hooks on either side of the window on the back of the house for hanging planters. This year, I plan to create sectional seating under that area and worried that hanging baskets would be a ‘head hazard’ for anyone sitting or getting up. Since I didn’t want to take the hooks down, or deal with the holes that would create, I decided to hang lanterns on them instead.

I spotted these at Target during a recent visit and picked up two to try out for just $13 each. I really liked the style and size, but worried that the open top might collect water which could become a mosquito breeding ground if I didn’t take it down when not in use.

Lantern3

The width did fit my new Luminara candles but I wasn’t crazy about how the height worked out. You couldn’t see the flame, which is kinda the point.

Lantern4

Luckily I had a plan B. I also found these at Pier 1 and because I had a reward coupon and a gift card left over from Christmas (thanks sis!) I got them for FREE! I’ve always liked this style and have looked at similar designs many times before. Granted the top isn’t fully covered, but it should reduce the amount of water that might collect if I do leave them up.

Lantern1

Since these are taller than the first option they fit the Luminara candles much better. They also seemed a little sturdier than the first option too.

Lantern2

And who doesn’t love FREE?! I plan to clean the deck and start getting things set up this weekend, so watch for a post about that soon, followed by one on my plans for the yard this season. Until then I hope you get outside and enjoy some spring sunshine! 🙂

Down at the Riverbank

Sorry for being MIA last week, it was a tad bit busy around here between work and appointments.  Because of that I decided to make sure we had some fun with the kiddos this weekend which included a trip down the trails in our side-by-side to a nearby river.  This was the first time both Stoli and Bacardi had been to a river so I was excited to see what their reactions would be.

As soon as we arrived Tequila was ready to jump in, but Bacardi and Stoli weren’t as sure.  They stayed well on the bank checking out this new environment.

Trio

So while their big sister was bounding through the chilly water, they decided to cautiously approach the edge.  Stoli’s approach reminded me of Tarzan’s elephant friend, Tantor.

T

B4

S

Although they never did go in the water, they did seem to enjoy exploring the riverbank while watching their big sister play in the deep end as she crossed the river again and again without hesitation.

B&S

S4

B2

Eventually, Bacardi decided to hang out with Daddy while Stoli, Tequila and I ventured down river a bit to a very picturesque spot!

BDaddy

S3

Then I had the hubs call Tequila back so she would cross the river again, much to Bacardi’s delight.

T2Daddy

And before we left I stopped to snap a few shots of Bacardi in the sprouting grass, since she’s growing so quickly and I don’t want to forget how little she started out.

BGrass

BFace

But my favorite shot was of her showcasing her tiny attitude along the riverbank. 🙂  She’s definitely the perfect fit for our family!

Attitude


A Little Lace Makes A Big Impact

I thought I’d share the story behind the little lace votives that we’re seen in my recent Easter decor post. I made these as inventory for my recent craft show booth, but they didn’t sell so I decided they were the perfect addition to my holiday decor. They were super simple to make. I started with plain glass votives that I purchased for another project and no longer needed.

Votives

I had a bag of lace I’d been hoarding since someone gave it to me so I picked out a couple of sizes that fit the votives well in spring colors.  I measured out how much I needed to go around and added a little extra for room to glue it down.  A little hit glue and about 10 minutes later I had pretty vintage looking votives!

VotivesAfter

This has to be one of the easiest crafts I’ve done in a very long time!  And because I already had everything on hand it didn’t cost me a dime.  🙂

Bright Colors, Bunnies and Chicks

I finally took down the St. Patty’s decor and put up some Easter decorations.  I’ve actually acquired a pretty good inventory, so I spread things out around the main area of the house.

I hung an egg garland across the mantel, where my little lambs found safe haven from becoming chew toys.  I also added the pretty Pottery Barn-esque twig basket I found on sale last year at Target.

Mantel

MantelL

MantelR

Either side of the TV got a few items as well, including the larger lamb I found at a local boutique recently.  Thus far the fur babies haven’t shown any interest in these items so hopefully my fluffy new friend is safe there.

TVL

TVR

The kitchen got a few Easter towels I picked up in the dollar zone at Target and the bunny towel I got a yard sale a couple years back.

EasterTowel

StoveTowel

The entry way’s holiday tree was festooned with eggs and bunny ornaments, which was also the theme on the entry table.

Tree

Entry

EntryL

ScentsyBunny

EntryR

Across from the dresser I hung one of my favorite thrifted items, filled with pretty spring flowers.

Flowers

The front door also joined in on the bunny & egg-palooza with my clearance egg wreath from Pier 1’s end of season sale a few years back.

FrontDoor

Back inside the dining room got the last of the Easter items, my Princess House rabbit dish and some rustic speckled eggs.

Buffet

I updated the St. Patty’s Day centerpiece with a few fuzzy chicks and some more speckled eggs, much to the delight of Luna who believes they were put there just for her entertainment.

Centerpiece

That would be Luna waiting for me to turn away so she can return to playing with her new toys…

Dining

And last but not least, I added some fresh flowers from the grocery store to the side table in the green vase I found on my thrifting spree earlier this year.

Vase

I still feel like my Easter decor is a little juvenile, so I plan to add in a few more biblical pieces – beyond the lambs, which are my current favorite – next year to represent the true meaning behind the holiday.  But for now, I enjoy the pretty colors which remind me of God’s promise to make all things new again.  Did you do any religious decor for Easter?  If so, I’d love to hear about it!

Spring Fling? More Like Break-up!

SpringTomorrow is the first official day of spring, but we do everything a little different here in Alaska, including Spring. When you live near the Arctic Circle spring doesn’t include pretty little green sprouts popping up after misty rain showers. Here, spring brings a continued chance of snow, slushy roads edged with puddles and grey everything – not the 50 shades kind either.

Spring is known as “break-up” season in Alaska, because that’s when the ice on the rivers starts to break apart and move downstream. In fact, traditions are based on it. Many native villages hold contests for residents to guess when a wooden tripod placed on the thawing river will fall as the ice below it gives in to rising temps. It’s usually the talk of the town and you’ll find everyone available on the river bank watching, because it’s what you do in rural Alaska.

One of the things I love most about Alaska is the change of seasons, but now that the beautiful snow of winter is melting and we’re left with wet, slick ice splotches I’m ready to fast forward to summer’s greenery. Maybe it’s spring fever because I didn’t get a “spring break” like the school kids did. Or maybe I’m just eager to get my garden set up and my landscaping installed.

I have big plans for the yard, including hydroseeding a lawn for the dogs, flower beds near the front door and several birdhouses with feeders nearby so our feathered friends stay. Watch for a post on the full plan soon. But none of that can happen until the ground thaws and the warm temps are consistent. Until then my ‘yard pretties’ will remain stashed away in their cabinet in the garage and I’ll continue to day dream about the pretty flowers I’ll be planting.