Revamping Thrift Store Finds into Garden Art

Today I’m sharing a simple upcycle project that took over a year to get just right.  It started when I spotted this decorative finial at the thrift store the winter before last.  It was only a couple bucks and super heavy.  I’d seen similar shaped pieces sell for much more like this one and thought I could create a knock off version with this piece.  Here’s the quick before picture I remembered to snap just before the makeover began.

I used some grey spray paint I had on hand to give it a new look.  It was definitely an improvement, but I thought it still needed more texture.  I put it out on the deck to see if any ideas came to mind, but then got busy with other projects and never did more to it last summer.

This spring, as I prepped items for the yard I decided to give it another makeover while I was white washing some terracotta pots.  I gave it a quick dry brush with the same white paint and instantly fell in love with the look it created.

Now it looks like it’s made of concrete, just like the inspiration example!  It adds just the right amount of style to this corner of the deck where it compliments the potted plants.

And because it’s so heavy it can stand up to the dogs, so it’s placement here is also strategic.  It keeps them from jumping off the deck onto my plants in the flower bed below.  Pretty and functional all for a few dollars and a little paint. That’s my kind of makeover!

Advertisement

A Serving Cart for the Deck

As I was changing up things on the deck this year I decided to add a serving station.  Last year this spot was occupied by the chippy bench we brought back from Portland, but that moved to the new deck this season leaving room for this cute cart I upcycled.

I picked it up on the local buy/sell page for $50 back in the spring.  Since it was still too cold outside to work on the yard at that time, I focused my attention on upcycling items for the deck, including this and the milk can planter I shared recently.  It was in good shape but I knew the red color wouldn’t work with the other elements we had planned for the deck.  I gave it a good cleaning and several coats of spray paint.  I went with black because it ties into my modern farmhouse look and it was the one thing I could count on to cover the red.  Here’s the before and after in my makeshift paint booth in the garage.

It’s always amazing what a coat – or several in this case – of spray paint can do!  It’s the perfect height to fit under the windows and is still narrow enough to not impede the walkway to the chicken coop.

I styled the top with a couple items I had on hand including the outdoor glasses I picked up on our trip this spring and the pottery barn glass pitcher we got as a wedding present.  I borrowed the faux plant from the laundry room.  Lastly, I added the table top tiki torch for a bit of bug protection.

The lower shelf stayed pretty simple with the metal bird house I found during our spring trip and a little succulent planter I made from an old candle container.

The handle is a perfect spot to drape a dish towel, so I used this IKEA one I had in my stash for projects.  And just like that we’re ready for a party on the deck!  I plan to put it to use when we have friends over this evening.

I do wish it filled the space here a bit more so next season I may use it elsewhere and build a narrow console table to go here.  But for now I’ll enjoy my little upcycle design. 🙂

Freebie Doggie Toybox

Today’s post is another DIY container, but this time instead of holding flowers it’s purpose is to corral the numerous dog toys that are always around our yard.  It started with this free crate I picked up at a work event.  The vendor said they had a huge stash of them and wanted to eliminate some so I could keep it.

I first thought about putting cedar boards around it but I couldn’t find a quick and easy way to keep them attached so I moved on to a free covering option I already had in my fabric stash – burlap.  I dug out a large scrap piece left over from previous projects and cut did a quick dry ‘test’ fit.  Then I trimmed it down and grabbed some twine to secure it to the crate.  I pulled apart some of the fibers and threaded the twine through so I could tie it.

The cats decided now was a good time to ‘help’ even though this project wasn’t for them.  Apparently burlap is a good spot for a kitty nap…

I conferred with the Hubs about the best way to wrap the box and secure the liner inside.  He made a few suggestions and then just told me to hand it over so he could work on it while he watched a movie and I edited client images.  Knowing his vast knowledge of knot tying and securing loads from almost 20 years in the Coast Guard I happily accepted the offer.  About an hour later he presented me with this.

He wove the twine through the top edge of the fabric and the holes on the crate pulling it taunt as he went so everything stayed smooth on the outside.  This will keep the fabric from pulling up every time the dogs pull out a toy.

Meanwhile, Stella was still hard at work on that nap…

I took a break from editing photos and placed the box in the backyard.  I was able to fit the toys we had in two smaller baskets into this one container so I went with the spot next to the firewood storage where it’s more out of sight and helps cover the electrical conduit.

It sits under the eave of the house so it’s mostly protected from rain, but because we didn’t cover the bottom any water that does get in it will be able to drain out easily.

Seeing it in place, I’m glad I went with the burlap instead of the cedar.  It blends in more, even when it’s filled with the dog’s brightly colored toys.  I showed the dogs where their new toys and they didn’t waste any time rooting through the pile to find their favorites and head off into the yard with them.  Now if only I could train them to pick up the toys and put them back in the box!

It’s a pretty nice upgrade for spending nada and it keeps the yard a little cleaner. 🙂

Repurposed Bin Planters

Today I’m sharing another couple of planters I mentioned in my recap post.  These cuties were made from old conveyor belt scoops that I got from Alaska Picker.  The first I snagged at the AK Picker Day sale – right after finding the garage sale milk can.  I hunted high and low for more of them but someone else had beat me to them.  So when I spotted another at the Alaska Chicks Vintage sale I immediately claimed one.

The first still had a section of conveyor belt attached, but the second was mounted to a piece of old barn wood.  I wanted them both to match so I had the Hubs remove both the belt and board so I could mount them on new boards.

The Hubs cut me two pieces of wood from some scrap we had from another project and I dug out my outdoor teal paint to give them a couple coats.  A little distressing around the edges gave them the perfect rustic look.  The Hubs attached the bins to the new boards and I had this cuteness!

I wasn’t sure where I was going to use them at first but when I came out and saw the big open area on the chicken coop expansion I knew they’d look great there.  After I painted the coop the Hubs drilled some drainage holes in the bottom of the bins and put them up with a couple of screws. I filled them with purple alyssum to finish them off.

I absolutely adore how they turned out.  The combo of teal, rusty metal and purple flowers makes my heart do a happy dance.  And it’s perfect for decorating a chicken coop – not to fussy but not to messy either.

I still have a little painting to do on the lower part of coop and the Hubs plans to finish off the storage area door with siding to match the rest of the coop.  I’ll share more about the expansion and new set up once it’s all done.  We also plan to fill the area in front of the coop with pavers and pea gravel to finish everything off.

Of course neither the chickens nor the dogs – or the cats for that matter – care about any of that.  They just like having a window where they can see each other face to face.  But this doggie/chicken/kitty momma is happy to have a pretty space for them all.

Upcycled Milk Can Planter

One of the projects I mentioned in my recap was an upcycled milk can planter.  This was a fairly simple project that came together quickly.  I spotted this old milk can at a garage sale on my way to Alaska Picker day back in the spring.  When I heard it was just $20 I claimed it right away.  It was pretty rough, but I knew I could at least do something with the shape since it was pretty sturdy and solid.

I tried scrubbing the discoloration off thinking it was dirt, but while I got lots of dirt off the piece the lines remained, so I had to decide the best option to cover them.  After a quick Pinterest search I went with basic black because it would hide all of the flaws and cover the odd pattern.

A couple coats later it was looking pretty good.  I picked up a black pot to match it and shoved it into the opening as far as I could fit it.  And when summer finally arrived it found a spot out on the deck and got a couple of plants to brighten it up.

It’s a perfect fit next to the hot tub stairs and helps hide the plumbing a bit when looking out from the bedroom.  Plus it coordinates well with the lounge chairs nearby.

I filled it with marigolds to help ward off bugs near the hot tub, purple alyssum and some creeping Jenny that trails over the front of the can.  A little birdhouse tucked up next to it brings in the teal I’ve used elsewhere in the yard.

Not bad for a $20 garage sale find and a can of spray paint!  I look forward to using it for many years to come with other trailing plants in a variety of colors.

My New Garden Bell

With all the other yard projects we’ve been working on the Hubs finally got my upcycled propane tank garden bell installed!  This was my first purchase at the Junk Bonanza show in Portland 2 years ago and it had to stay at my Mother-In-Law’s house until we made a trip with the trailer because it was so heavy.

I wasn’t sure exactly where I’d hang it but when we ended up with an ‘extra’ footer while constructing the new deck the Hubs suggested we make it into an arbor for the bell.  I was totally game and knew it would look great there.

He worked out the footings for the other side and put in a cross bar at the top last season before winter arrived.  We picked up from there this season, hanging the bell with the chain it came with and building a box around the base to act as a planter for a clematis I needed a trellis for.

Once the planter box was constructed I filled it with dirt and transplanted the clematis, then covered the dirt with wood chip mulch to reduce weeds.  I’ve been slowly training the clematis branches up the two posts.  Eventually it will cover the entire structure and frame the bell beautifully.

I also had the Hubs install the coordinating bird bath on a hook off to the side.  That way I can fill it when I water on dry days.  Now I just have to let it grow and enjoy the pretty rusty patina as I  wait for the blooms to show!  And work on incorporating the planter box into the rock landscape I have planned for around the deck. 😉

Antiquing in Camas

During my last visit to Portland I made a point to stop in and see an antique mall I’ve been following on Facebook for a while now.  Camas Antiques is located in the heart of the historic downtown Camas, WA and is just as charming in person as it is online. Just look at this sweet storefront!  It just begs you to come in – although I certainly didn’t need any convincing!  Inside there were numerous vendor booths, each with a unique style.  Since it was early summer during my visit many of the booths featured garden themes.

I spotted this simple window upcycle in one of the booths and showed it to the Hubs so he’d know what the heck I was talking about when I create something similar with the ones I still have stashed away in the shed.  I’m thinking they would be great done up for hanging stockings at for my holiday show in November.

This chalkboard message made both myself and my mother-in-law, who is also a novice gardener giggle.  At least we know we’re stretching our gardening muscles! LOL

The European vibe in this booth near the back of the store drew me right in and I lingered for quite a while, although I didn’t find anything that came home with me this trip.

I was amazed to realize there was a basement full of even more vendors!  It was like getting a second scoop on your ice cream cone.

I loved the lace tied to the light strands above this booth and might appropriate the idea for my booth at the bazaar if I have room.

I also pointed out this display to the Hubs since he always teases me for collecting driftwood!  I loved the wreath made out of the larger pieces.  I have a whole bucket full of pieces similar to this that I could use to make something similar.

This farmstyle area had me at first glance and I spent a good amount of time checking out all of the items.  That goat pillow gave me an instant smile and almost came home with me.  Those little faces were just so adorable.  I just couldn’t bear to think of putting them away after the summer season so I left them for someone else to find.

I finished touring the rest of the upstairs, ending at this fun booth in the front of the store, just behind the checkout counter.  It was full of great inspirations for little touches.  I may have to recreate those hanging lights somewhere in our home.

After I’d seen all of the booths, I paid for my rather large pile of finds that had been collecting at the front counter as I shopped and we headed out to find some food since we’d been there a few hours.

We ended up at a delicious Mexican restaurant, Nuestra Mesa, just a block away where I enjoyed a sangria with very yummy tacos.  It was the perfect way to wrap up a sunny vacation day in the Portland area!  If you’re ever in the area I definitely recommend planning a stop at both of these great spots.


Bubbling Brook Farmhouse Market

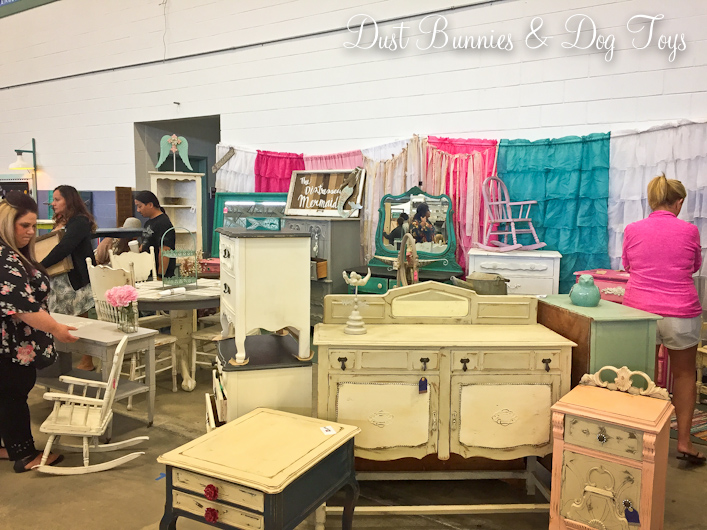
Hi everyone!  I hope you had a fabulous weekend.  The Hubs and I visited family from Arizona in Kenai and I went on a wonderful garden tour.  I’ll be sharing recaps of both of those events this week, but today I wanted to share a bit about the Bubbling Brook Farmhouse Market I attended the previous weekend.  This is the 2nd year for the event, although last year it was put on by a different organizer and was called Urban Junktion.

Several of the same vendors returned this year, including one of my faves Rustique Designs, who has made a couple of pieces for our home.  I made a bee-line for her booth when I arrived and made sure to check every nook and cranny of her displays to find new unique items.  I’ll share what I got at the end of this post.  I was so busy shopping her beautiful displays and chatting with her about ideas for some more custom pieces that I  forgot to get a picture of her booth.  Although I’m sure if I’d remembered to it would have been so crowded you couldn’t see much as she was one of the most popular vendors at the show, but you can see it right after she set up here on her Facebook page.

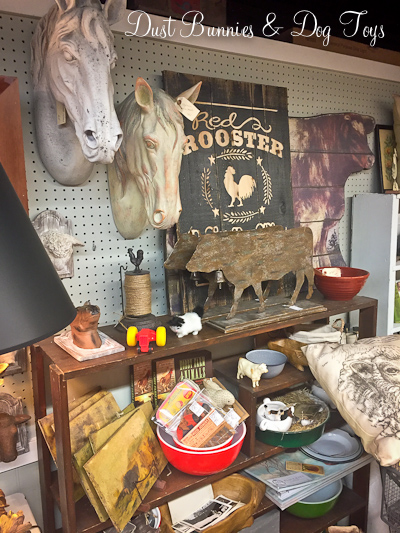
The next booth was Sweet Louise Designs who had a variety of adorable home decor pieces and furniture.  Although I didn’t find anything that screamed “take me home” I enjoyed browsing their adorable displays.  I almost pulled the trigger on this heart piece for my nephew’s wedding in October but the colors weren’t quite right.  I’m going to check in with the bride and groom to see what they think and may order a custom one for them instead. 🙂

Another booth that drew me in was Snarl Design, eclectic industrial style.  They had some ingenious light fixtures that included spigot knobs as the switch!  I chatted with the owner for a while about the insulator lights the Hubs and I made for our island and how I loved the history behind them.  I’ll definitely be following Snarl online to see their other creations as they continue to grow.

Of course I had to stop by Brown Chicken, Brown Cow’s booth to browse.  I’ve been a fan of hers for quite some time and love her style.  Thanks to a custom order I placed, I’ll be adding a fun new sign to my kitchen from her in the coming weeks, so stay tuned to see that.

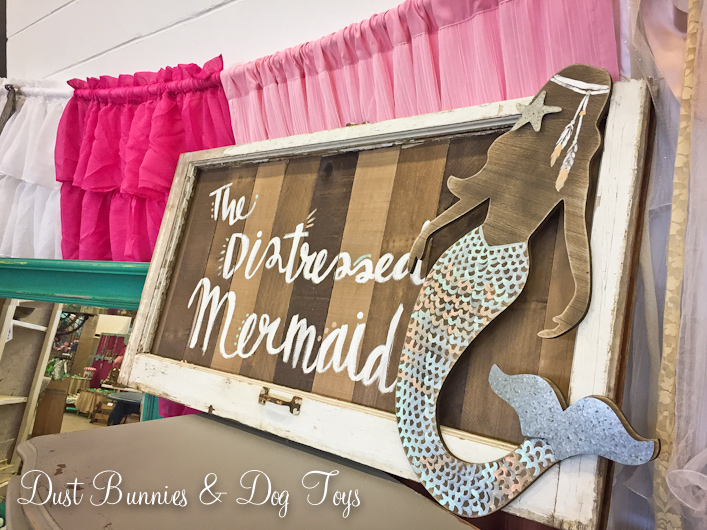
I fell in love with The Distressed Mermaid’s sign.  It was a fresh idea for an old window and a perfect fit for her style.  If I had a little girls room I’d order one of a mermaid just like that!  Although I was in the market for accessories more than furniture I enjoyed browsing her booth and will be watching her online to see what else she creates in the future.

My friend Anne-tiques had a booth full of her Harry Potter themed furniture and accessories, which was a huge hit.  I couldn’t get a shot of her booth without gobs of people in it, but you can see the details of several of the pieces on her page.

A well-known local vendor, Blessed and Distressed was also at the market, which is their last show before they relocate out of state.  Their new hometown is gaining an amazing resource!

Spunky Monkey had amazing scented candles and wine themed decor.  This husband and wife team had a great booth set-up and unique items.  I’d never heard of them before, so I’m glad I was able to meet them and add them to the list of vendors I’ll be watching for future gift and home decor shopping.

Right behind Spunky Monkey was Pioneer Peonies – which made for the most amazing aromatic combination!   I enjoyed picking a bouquet of white, blush and pink peonies to take home at just $2/stem and learned several helpful tips to plan my own peonies.

The local Hannah Yoter band was playing during the event who fit the vintage vibe perfectly.  They’ve been getting some great press recently so be sure to check them out and see them in person if you can.

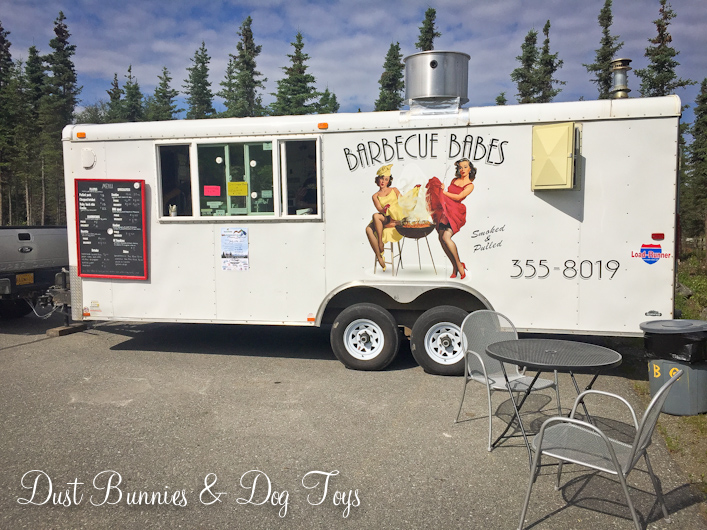
Outside the event hall there were several food trucks, which was perfect because I’d sure worked up an appetite with all my shopping.  The Barbecue Babes truck was super cute, but since I’d just had BBQ the day prior, I opted to try out a vendor who is a sister to a good friend of ours.

I was pretty bummed that I missed Love’s 907 at the Palmer Garden Faire the weekend prior, so I’m glad they were at the market event.  I ordered the Philly steak, which was messy but pretty darn tasty.  I enjoyed filling my belly in the warm sunshine and wished I’d had room to try their ice cream too!

So here’s a quick look at what I got at the market.  This fun wooden bead garland with lace tassels from Rustique Designs.  They found a home on the mantel well above Brinley’s reach so it stays as pretty as I bought it!

I also got these Rea Dunn mugs from Rustique Designs.  It’s the perfect start to my collection, which will be displayed in the dining room after I pick up the rack I had to have sent to my sister’s house since they wouldn’t ship to Alaska.  First world problems here….

I also got this fun sign from Rustique Designs for the guest bathroom.  I thought it was a perfect for for the space. 🙂

And lastly here’s my bouquet of peonies in my recently upcycled vase. It’s been a wonderful addition to my desk and I love enjoying their fragrance when I’m editing photos.

It wasn’t a huge haul, but like I mentioned, there are a few custom pieces in the works so you’ll be seeing more from these talented vendors.  Next year’s market will be held June 23-24, 2018, so be sure to mark your calendars now and follow Bubbling Brook Farmhouse on Facebook for updates!

From Lantern to Vase

The best thing about thrifting is that you often find pieces that can be reworked into something new.  Usually that involves a coat of paint or major altering of the original item, but every once in a while you stumble upon a super simple upcycle that requires barely any effort.  That’s exactly what happened with my new vase.  The mason jar style and the green tint to the glass are what caught my eye at the thrift store.  But it had a different purpose when I first saw it.

It was a lantern for a small votive candle!  I didn’t originally intend for it to be used as a vase but when the Hubs brought home flowers and I needed another large container for a second bouquet this new treasure was on the counter and the idea was sparked.  I simply pulled out the votive holder rack, filled it with water and plopped in the flowers.  That has to be the quickest upcycle ever – literally 30 seconds flat!

I kept the votive holder rack in case I ever want to use it that way again, but I see many more days as a vase with summer bouquets in it’s future! 🙂

Save

No-Cost Large DIY Tray

5

Here’s another quick project I did as part of my inventory for the holiday bazaar.  This large tray started life as a cabinet drawer.  When we installed the laundry room cabinet we took out the drawer on one side because we needed clearance for the sink drain.  Knowing I could use it for something, I kept it and eventually took the tracks off.  When I did, I immediately thought to make it into a tray.

2

But I was busy and it got set aside for more priority projects.  When it was crunch time to create more inventory for the show I pulled it back out, dug through my stash of supplies and found two handles we had replaced on our desk cabinets.  They were originally gold, but a quick couple coats of ORB gave them more of the farmhouse style I was going for.

3

The hubs helped me attach them, since I’m not good at making things line up.  He also had the brilliant idea to use Q-Tips to paint the screw heads once they were in so they matched the handles’ new paint job!  Have I mentioned recently how much I love that man? 🙂

1

Although it didn’t sell at the bazaar, it’s found a home in our guest room.  It’s just the right size for the bed at 20″ by 20″ and can easily be moved to the hope chest when it’s bedtime.  I plan to stage it with some simple toiletries guests might appreciate when they visit.   I know I’ve seen similar set-ups on blogs I follow so I’ll be looking back to get an idea of what all I should include, but I’d love your suggestions as well.

4

Since I had the handles and spray paint on hand the entire project didn’t cost me a cent.  Functional and free.  It doesn’t get much better than that!

Linking up at: Knik of Time’s Talk of the Town, Tater Tots & Jello’s BFF and Savvy Southern Style’s Wow Us WednesdayStone Gable’s The Scoop and Thrifty Decor Chick’s Before & After Party!

Save

TDC Before and After