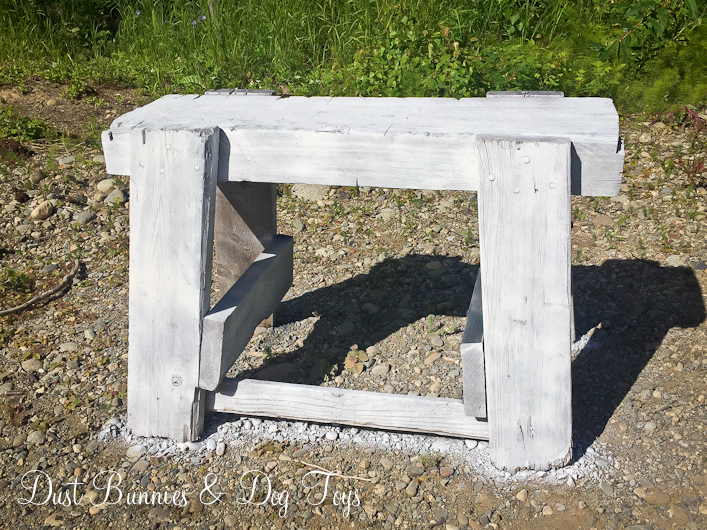
 One of the projects I mentioned in my recap was an upcycled milk can planter. This was a fairly simple project that came together quickly. I spotted this old milk can at a garage sale on my way to Alaska Picker day back in the spring. When I heard it was just $20 I claimed it right away. It was pretty rough, but I knew I could at least do something with the shape since it was pretty sturdy and solid.
 I tried scrubbing the discoloration off thinking it was dirt, but while I got lots of dirt off the piece the lines remained, so I had to decide the best option to cover them. After a quick Pinterest search I went with basic black because it would hide all of the flaws and cover the odd pattern.
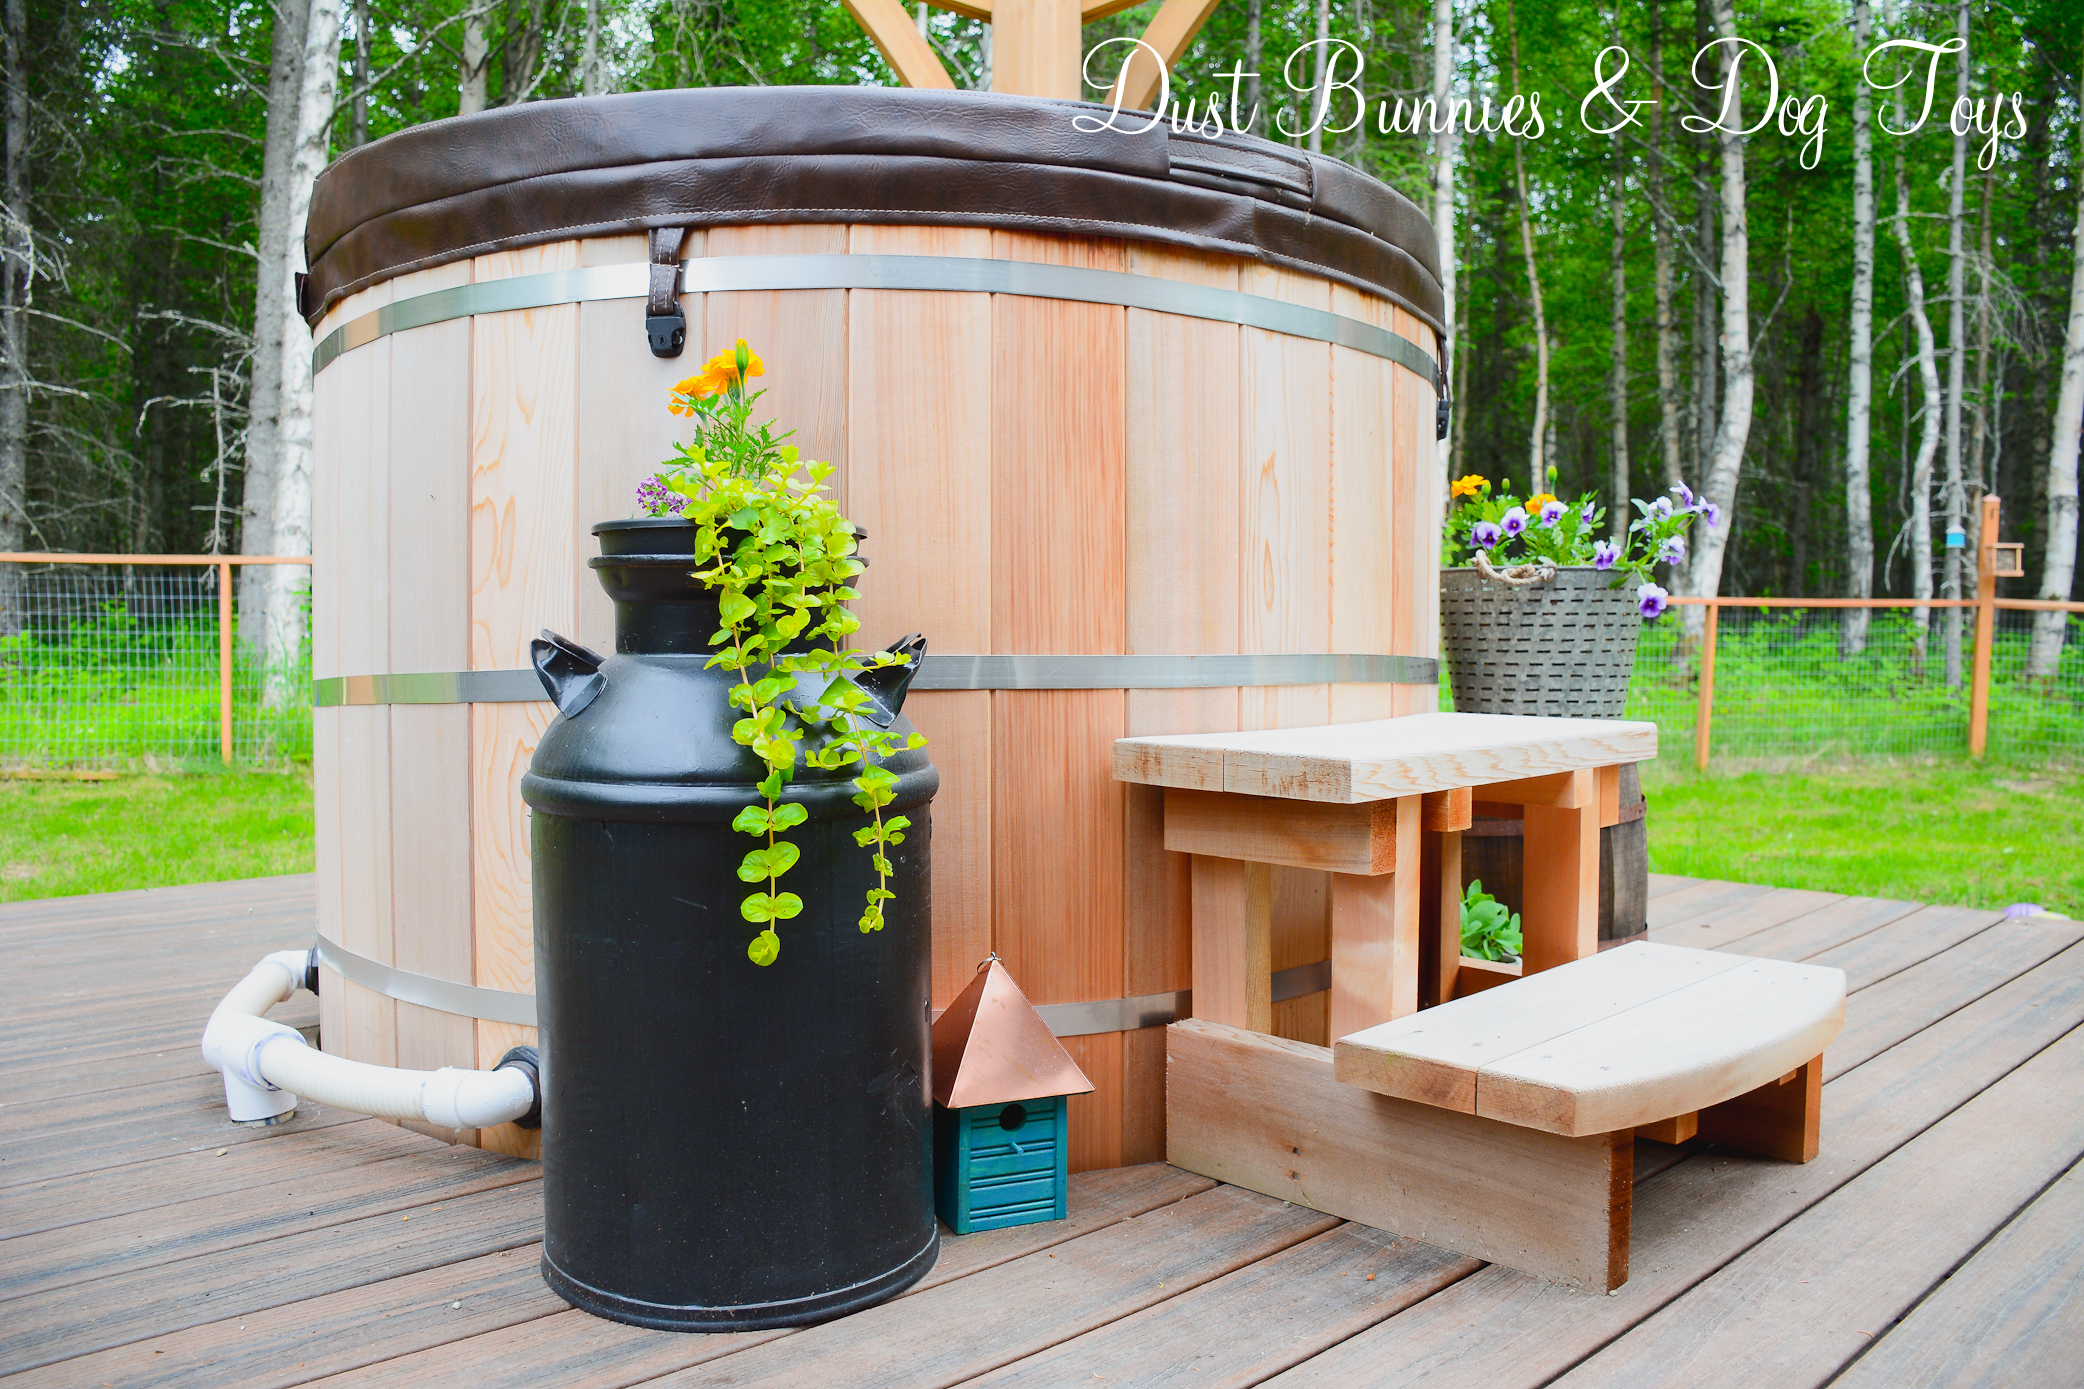
 A couple coats later it was looking pretty good. I picked up a black pot to match it and shoved it into the opening as far as I could fit it. And when summer finally arrived it found a spot out on the deck and got a couple of plants to brighten it up.
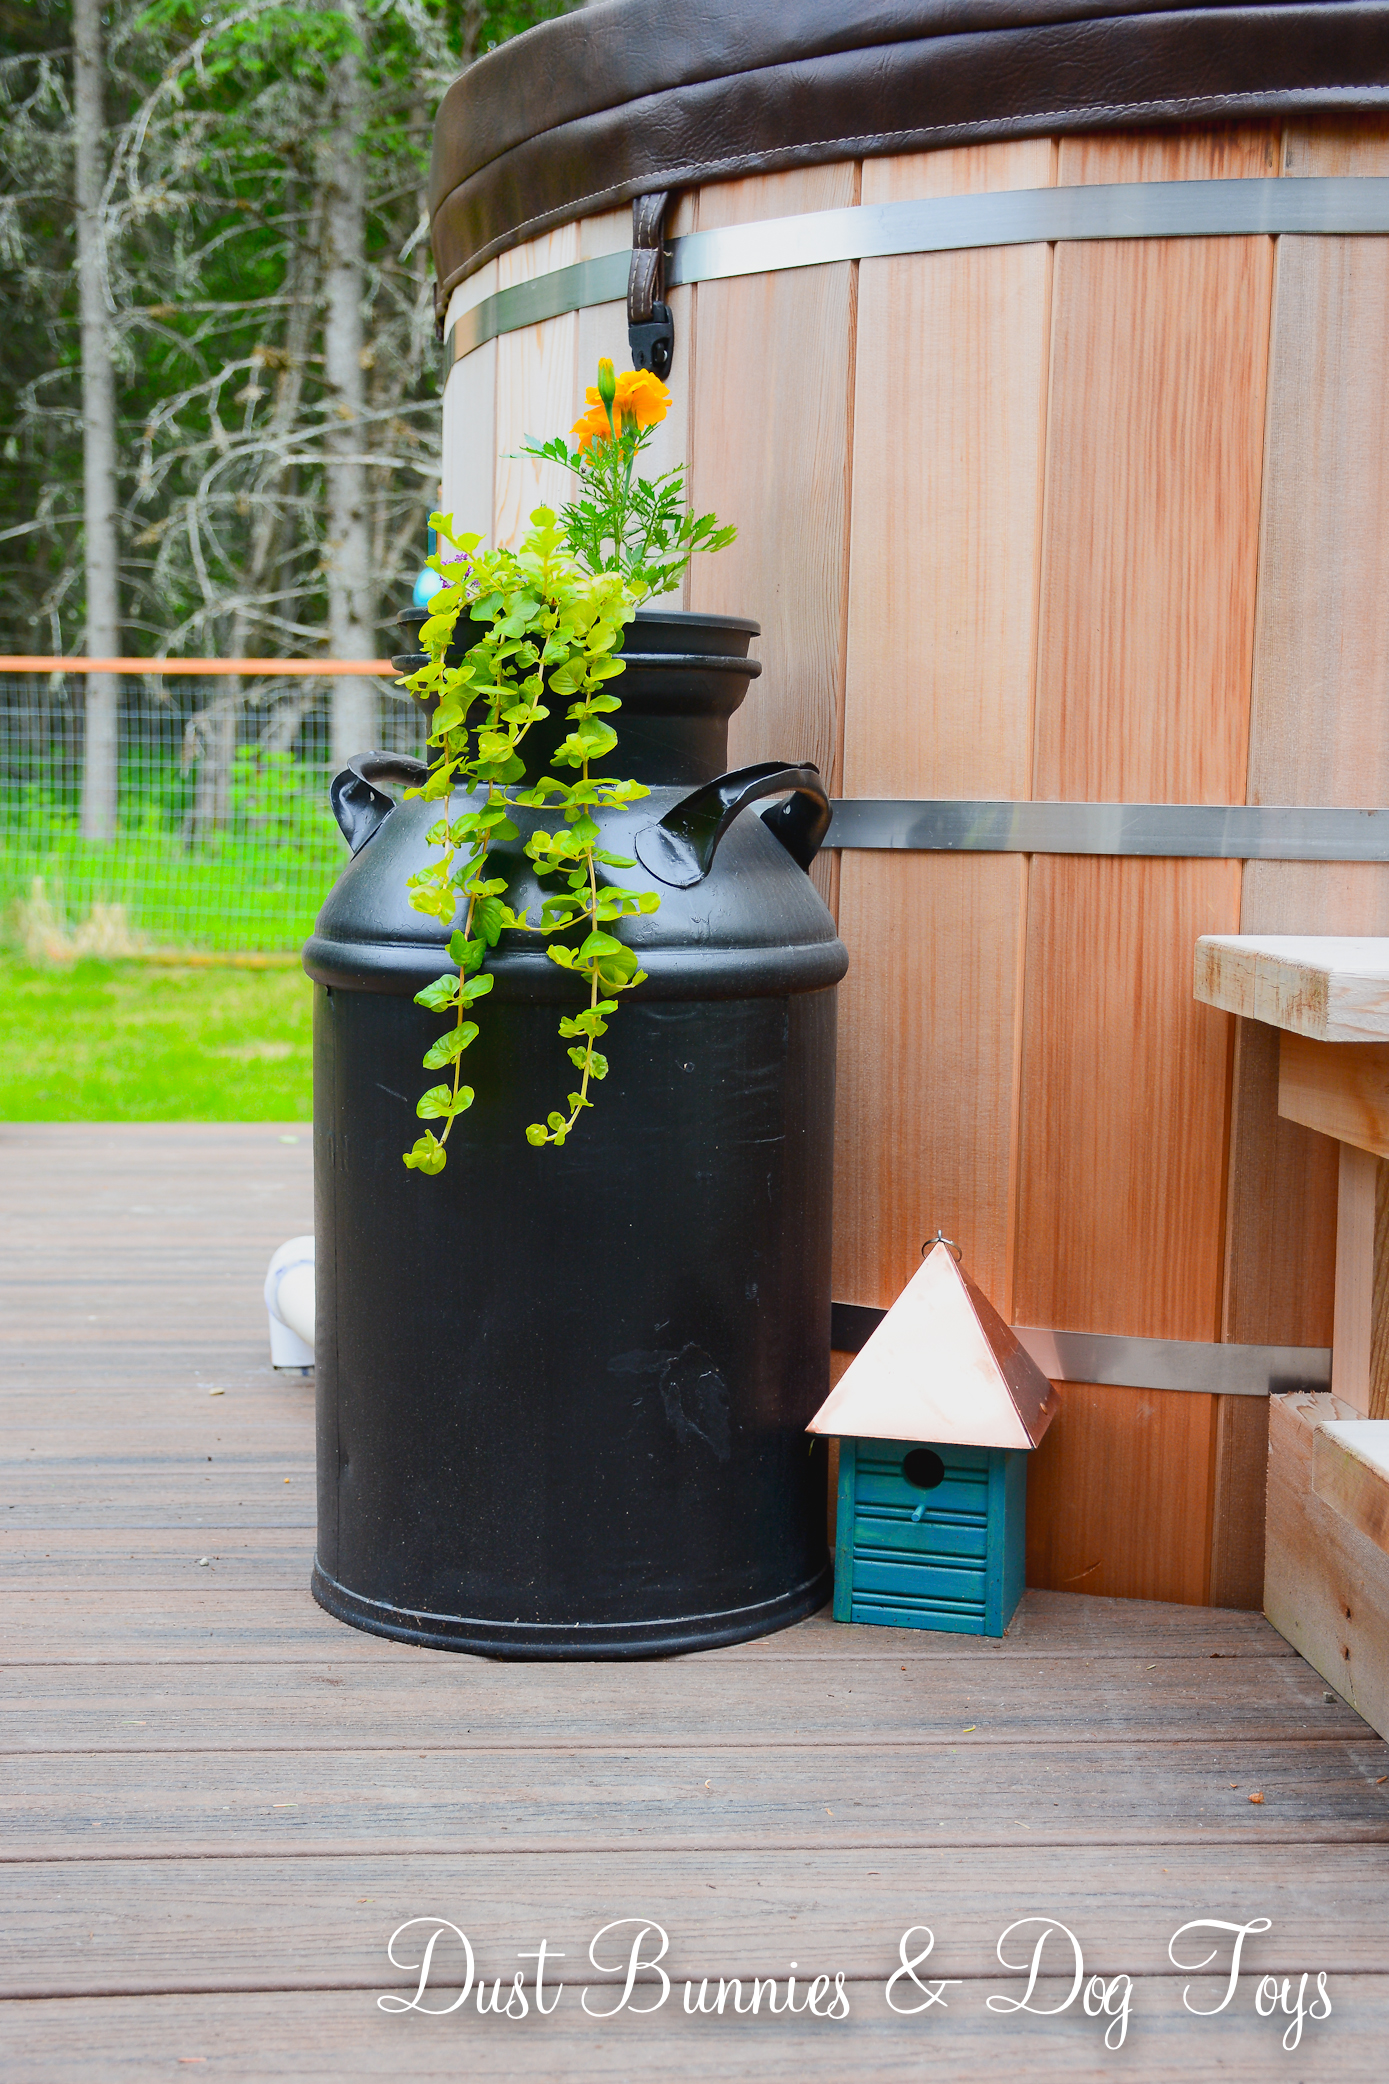 It’s a perfect fit next to the hot tub stairs and helps hide the plumbing a bit when looking out from the bedroom. Plus it coordinates well with the lounge chairs nearby.
 I filled it with marigolds to help ward off bugs near the hot tub, purple alyssum and some creeping Jenny that trails over the front of the can. A little birdhouse tucked up next to it brings in the teal I’ve used elsewhere in the yard.
 Not bad for a $20 garage sale find and a can of spray paint! I look forward to using it for many years to come with other trailing plants in a variety of colors.