My New Rack!

Hey there everyone!  I know it’s been quiet around here since our trip.  Life has been super busy and I’ve barely had time to work on projects let alone share any.  But today I’ve got a little change in the dining room to share.  We replaced the indoor herb wall that wasn’t growing to well with this simple farmhouse style rack.

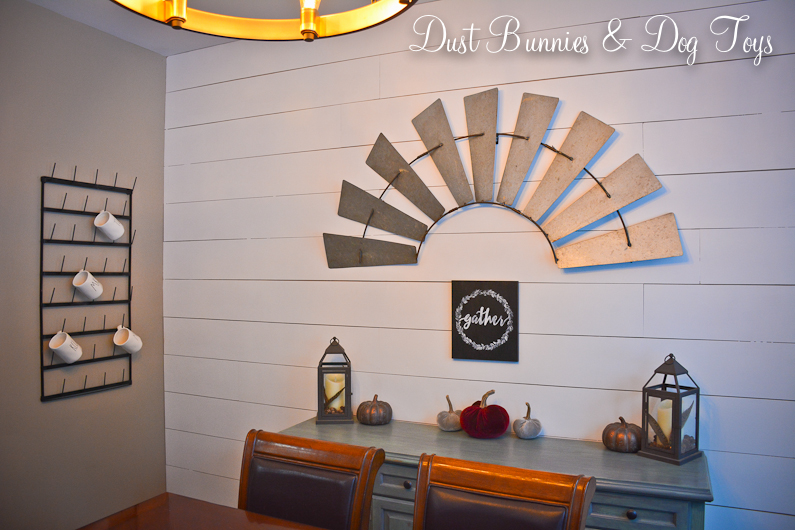
It’s a perfect fit for the short wall just off the laundry room and has become the spot to display my budding collection of Rea Dunn mugs!  This was one of several larger items we hauled back to Alaska on our recent trip.  I’d ordered it some time ago and had to ship it to my sister’s house in VA so I could pick it up when we were there for my nephew’s wedding.  Here’s a wide shot to give you an idea of where it’s located, along with a sneak peek of the minimal fall decorating I did.

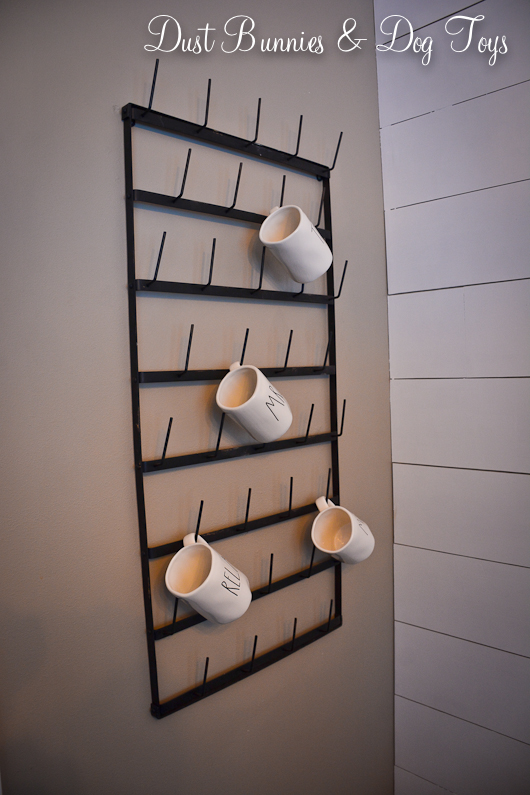
I love the contrast of the black distressed metal and white mugs against the tan wall.  I wish the mugs could face out to the left so they were readable from the main area, but overall it’s just what I envisioned.  I plan to add a little bunting or garland during holidays to add a bit of flair, which might be my next DIY project.

My collection is still pretty small with only four options. The MRS. one is my fave at the moment and the Relax is a close second.  The Hubs has enjoyed using the MR. a couple times already so I guess he thinks this is a good update, even if it did require patching the holes from the herb rack and repainting a section of the wall.  Good thing he loves me right?!

I’ve added a few more mugs to my collection recently that feature holiday designs so don’t be surprised if those show up on my social media feeds! 😉  I’ll be back in a day or two with another little project I did this fall, so stay tuned.

Advertisement

Getting Back on Track & Putting Old Glory Back Together

It’s been quiet here on the blog for several weeks because life decided to jump the rails and train wreck my schedule.  A HUGE project at work went sideways the first week of May, requiring me to help out in another department plus do my regular tasks to coordinate several events, including our largest customer event of the year. The Hubs and I have been working on several projects around the house and then we were out of town to visit family over the Memorial Day weekend, which required a bit of prep and catch up afterwards.

In the mix of all that I had a full line-up of photography clients and then attended a photography workshop the first week of June, which gave me a whole new set of goals to work on as well. We also lost a close family friend and a family member to cancer over the Memorial Day weekend, which shifted our perspective to enjoying the days we are given rather than the to-do list.

July is set to be full of opportunities for just that, with my sister and brother-in-law visiting for the 4th, us visiting with the Hub’s cousins in Kenai mid-month, the Palmer Garden Art Faire and a vintage market on the calendar. We are also planning a trip to Iceland and possibly Scotland to tie in with our trip to D.C. for my nephew’s wedding this fall!

1As we celebrate Independence Day, I thought it was a perfect time to share this quick little project I did with a rustic flag decor piece.  I’ve had this metal flag wind chime for years and the original metal fasteners had worn out causing the stripes to fall off the main support rod.

3Since the pieces themselves were still in good shape, I knew I could put it back together fairly easily.  I originally planned to use twine for a rustic look, but the holes were too small, so I pulled out some thin gauge metal cording from my crafting cart and replaced all of the joints.  It only took a few minutes to re-do all the connecting points and the hardest part was not poking myself with the end of the wire.

2And here she is, all updated and ready for several more years on display.  I don’t currently  have a spot for her so she may end up in the sale pile, but I’m sure someone else would appreciate her rusty glory as much as I do.

I hope you all had a safe and happy holiday.  We spent the day watching our fellow Alaskans launch cars of a cliff in Glacier View with my sister and brother-in-law in tow on the first day of their Alaskan vacation.  It was a great way to celebrate our independence and create unique memories that will last a lifetime. 🙂

Save

Save

A Quick & Easy Makeover

afterHere’s one of the quick little projects I’ve done recently.  I spotted this little scroll decor piece on one of the local buy/sell pages for $1 and just couldn’t pass it up.  Here’s how it looked when I bought it.

beforeAlthough it was cute in it’s original state I thought it would look better with a metal finish rather than the faux stone one it had.  A couple quick coats of ORB spray paint and it’s got a whole new look.

finishI’m not sure where I’ll use it just yet, but for now it looks pretty next to another of my quick projects, this mini faux succulent planter.  I’ll share how I made that later this week!

Linking up at: Knik of Time’s Talk of the Town and Savvy Southern Style’s Wow Us Wednesday and Thrifty Decor Chick’s Before & After Party!

TDC Before and After


Garden Art From the Faire

Pig2

Today I’m sharing the fun new pieces of garden art I picked up at the Palmer Midsummer Garden & Art Faire I told you about yesterday.  One of my favorites is this little rusty flying pig stake.  At $10 he wasn’t a bargain, but I couldn’t say no to his cuteness.  He’s a perfect fit for our farmhouse style, but his wings give him just the right amount of whimsy for the garden.  I put him in the watering can planter which provides the perfect launching point for him over the pink lobelia.

Pig

If you were paying close attention last week when I shared our septic pipe disguise project you probably already saw the willow and birch dragon fly I added to the wheelbarrow planter.  I’ve got a few other dragon flies around the garden – including some very large live ones! – so he fits right in.  The vendor making them had larger versions available for $15, but I spotted this guy as part of an arrangement and knew he’d be better sized for where I wanted him.  Luckily, I was able to get the vendor to agree to break up the arrangement and sell him separately for just $5, which I thought was a fantastic price!

DragonFly

This glass crow is probably my favorite find from the faire and was also the first I bought that day.  I absolutely love the iridescent colors on his wing and tail that catch the sunlight.  He was only $20, which I thought was an amazing price, knowing the skill and time glass work take. The vendor also had other designs as yard stakes and wall hangings.  I told him if he makes puffins and salmon as yard stakes in the future I want to add them to my garden.  I may eventually paint Mr. Crow’s stake a dark color so it blends in a bit more, but for now I love how he’s perched over top of the dianthus.  Even the Hubs commented on how he looks good there!

Crow2

Crow

And lastly was this sweet metal wheelbarrow planter I scored for just $16.  It turned out to be a perfect fit for the crock I already had on the deck.  Now that I know it gives the crock good height, I’ll pick something that trails down the sides for this planter next season!

Wheelbarrow

Notice that little rusty bee in the crock?  That’s a bit of garden art I DIY’d.  I did a few others as well which I’ll be sharing soon, so watch for that.  Until then, I’d love to hear what you think of my garden art haul from the faire, so leave a comment below.

DIY Metal Planter & a Peek at the Garden

OnionsPotFinished

Today I thought I’d share a quick peek of our veggie garden and a quick DIY planter I installed.  We had a red and white onion sprout in the pantry so I figured I’d give them a shot in the garden this year.  With all the spots in the garden boxes full I decided to add a secondary planter at the end of the box.

I originally envisioned using an antique wash tub and stand, but just wasn’t willing to pay $100+ for a planter.  So I used my DIY skills to create something similar starting with this metal stool we’ve had for several years.  You originally saw it on our balcony at the rental house.  It’s since been painted over and the hubs was using it to position the fan for his big green egg, but now that he has his table he doesn’t use it any more, so it was available to be repurposed.

OnionsStand

I added this large metal tub on top of the stand to create a planting space.  The Hubs drilled a couple of holes in the bottom of the tub for drainage since this sits just under the edge of the roof.

OnionsStandPrep

I used empty pots to add additional drainage space and reduce the amount of garden soil needed to fill the tub.  Luckily, I had quite a few to choose from!

OnionsStandPrepFill-2

And here it is filled and planted.  I’m not sure if this little experiment will yield a harvest but it’s interesting to give it a try.

Onions

It looks pretty cute next to the main garden box, which I decorated with two lemon cypress trees on either side.  I’ve been wanting some of these and finally spotted them at the nursery so I snagged two.  They are supposed to be natural mosquito repellants so that’s a nice added bonus, especially since the windows are right there.

Full

In the box we’re growing peppers, lettuce and cherry tomatoes.  We’ve already harvested some of the lettuce for salads several times and the tomatoes have tiny buds on them.  The peppers are the same as the ones in the burlap planters I shared previously, which sit next to the large whiskey barrels on either side of the slider to our Master Bedroom that hold 4 more tomato plants, although those are a “patio tomato” variety I haven’t tried before.

Peppers

Lettuce

Tomatoes

Between the garden box, onion planter, wheel bed and the strawberry gutters we should have a good crop of fresh produce to use for salads, meals and desserts this summer! 🙂