Finishing Touches in the Pantry

Thanks to a great BOGO Free sale and gift cards from Christmas I recently finished up the pantry.  Because I wanted to add some more baskets now that we had more room, I decided to replace the ones we’d been using since we were in Kodiak – which will be repurposed in the studio and the spare room.

5

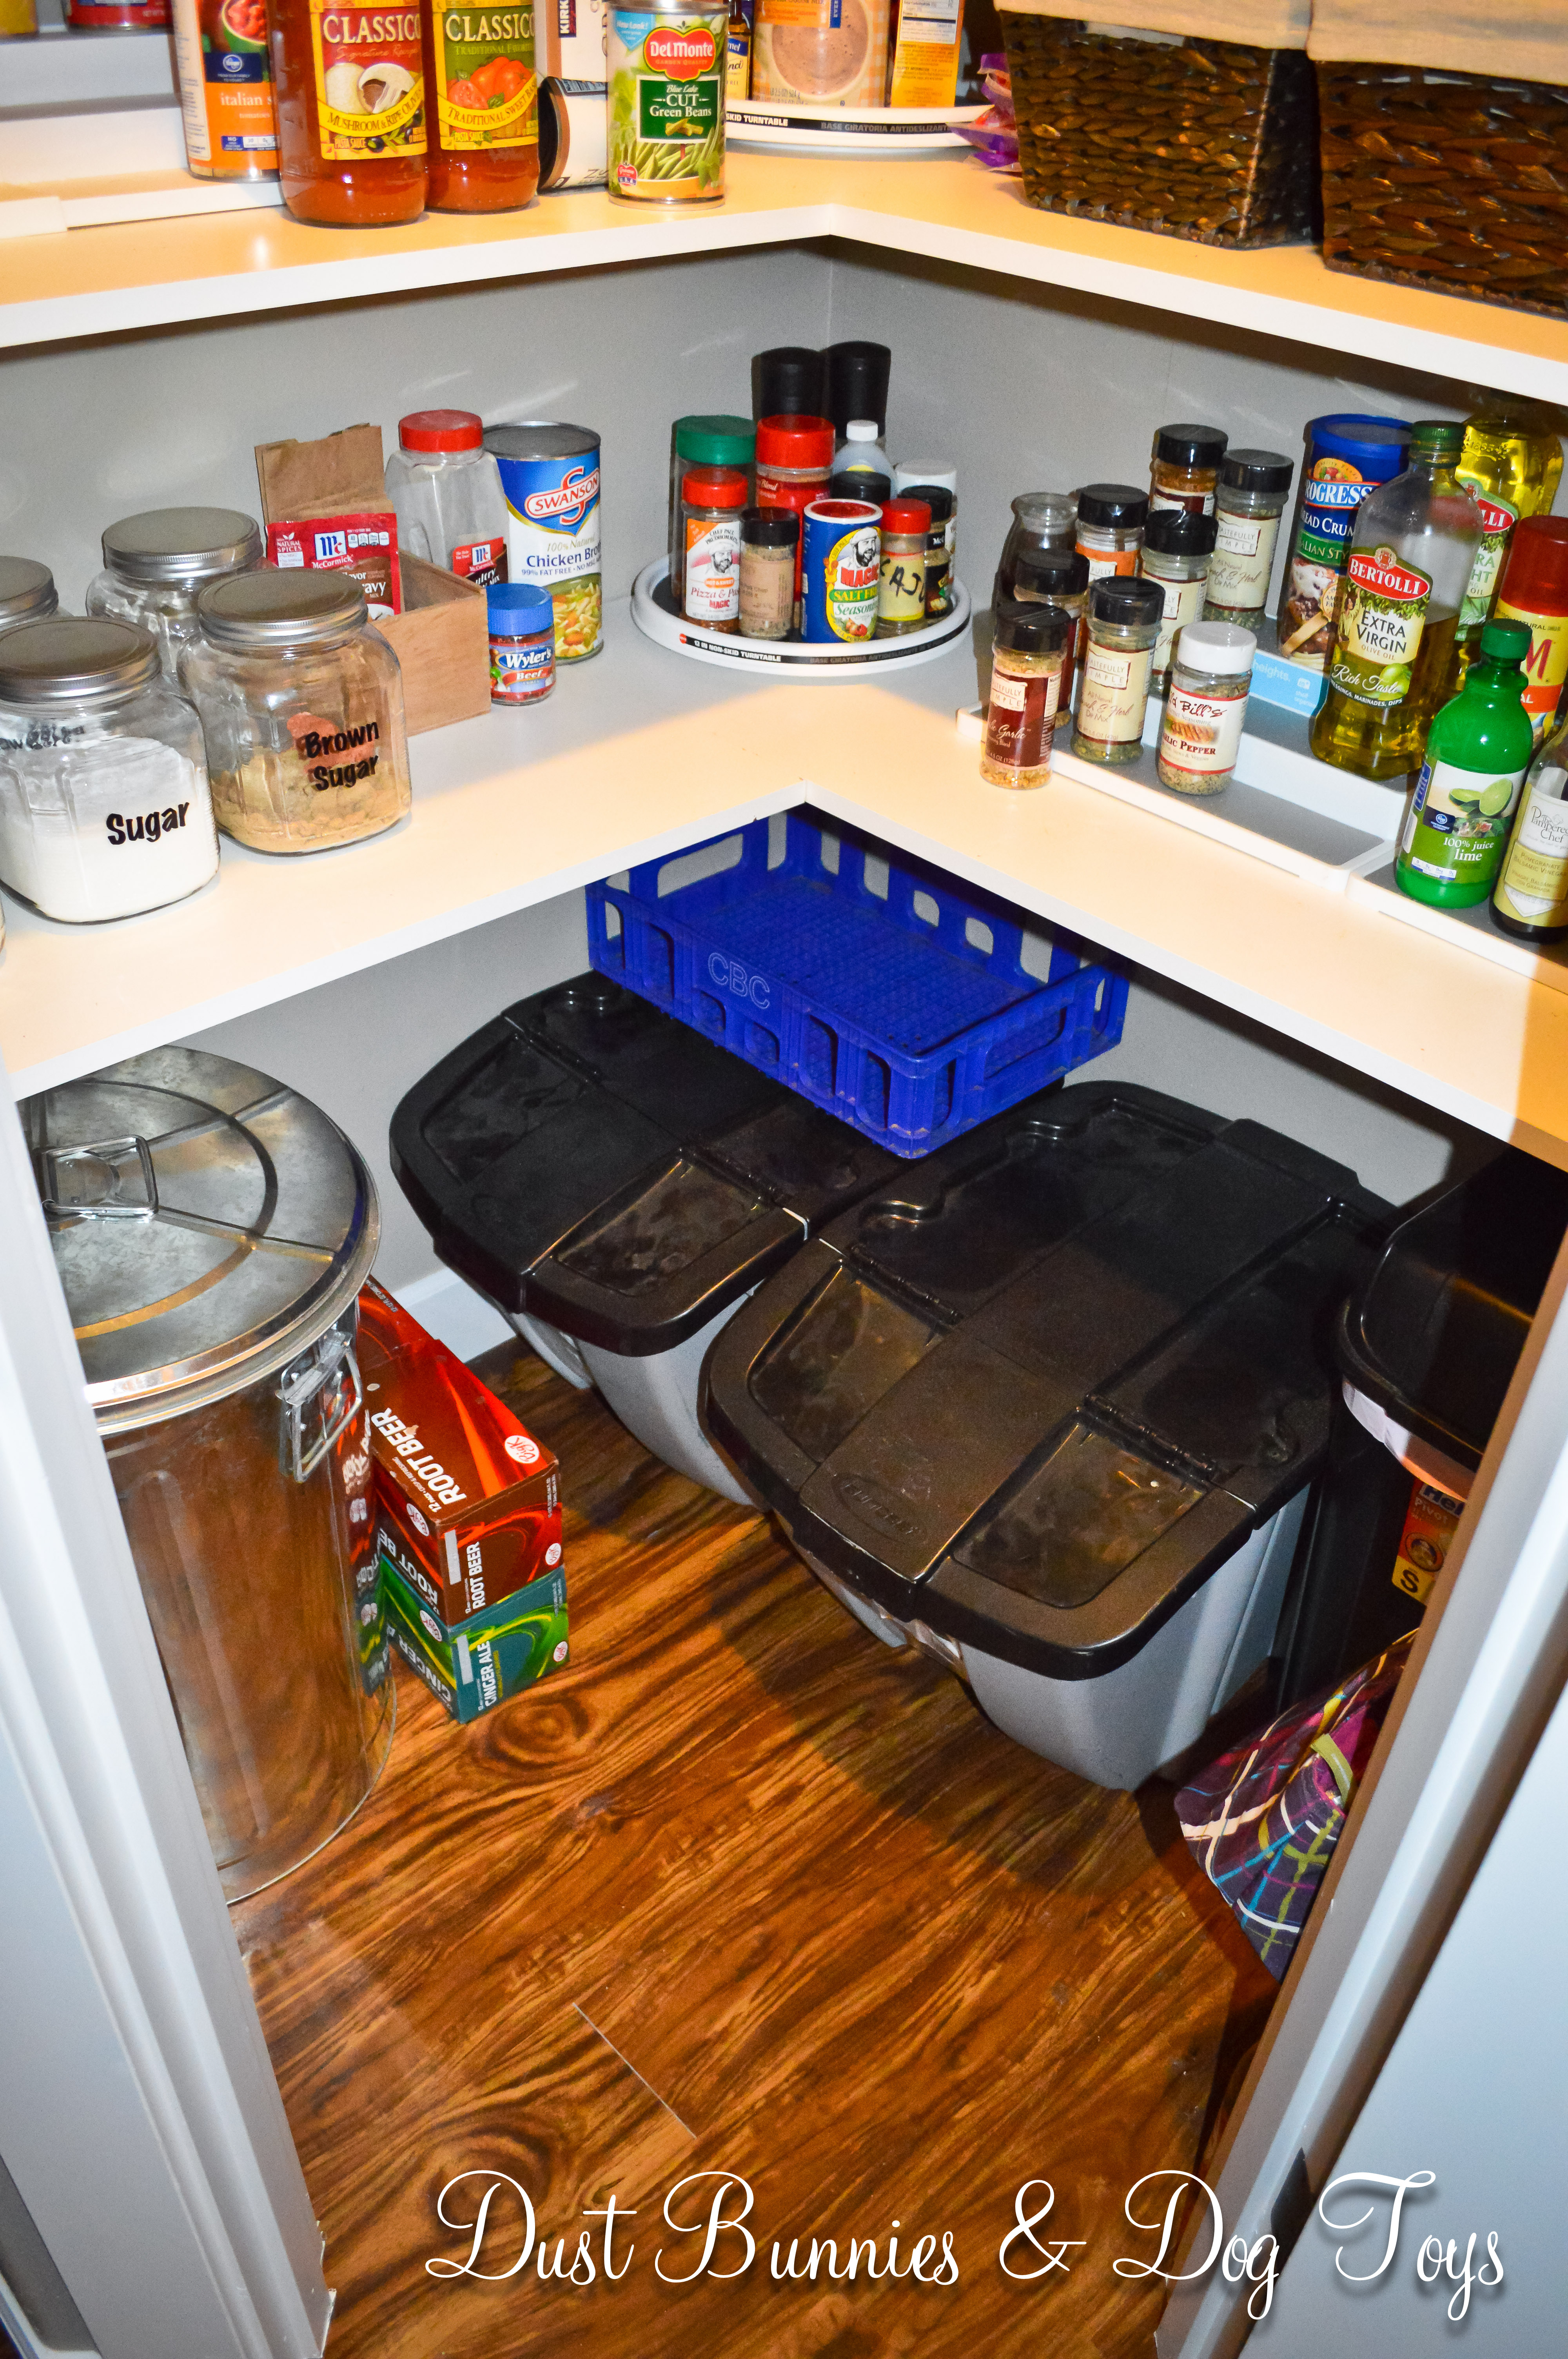
I also picked up some tiered racks for things like olive oil, bbq sauce, etc, and added a lazy susan next to it for the spices that didn’t make it into the spice rack.

7

6

Additional turntables in the remaining corners created accessible storage for drink ingredients, sauces and jellys.

8

9

10

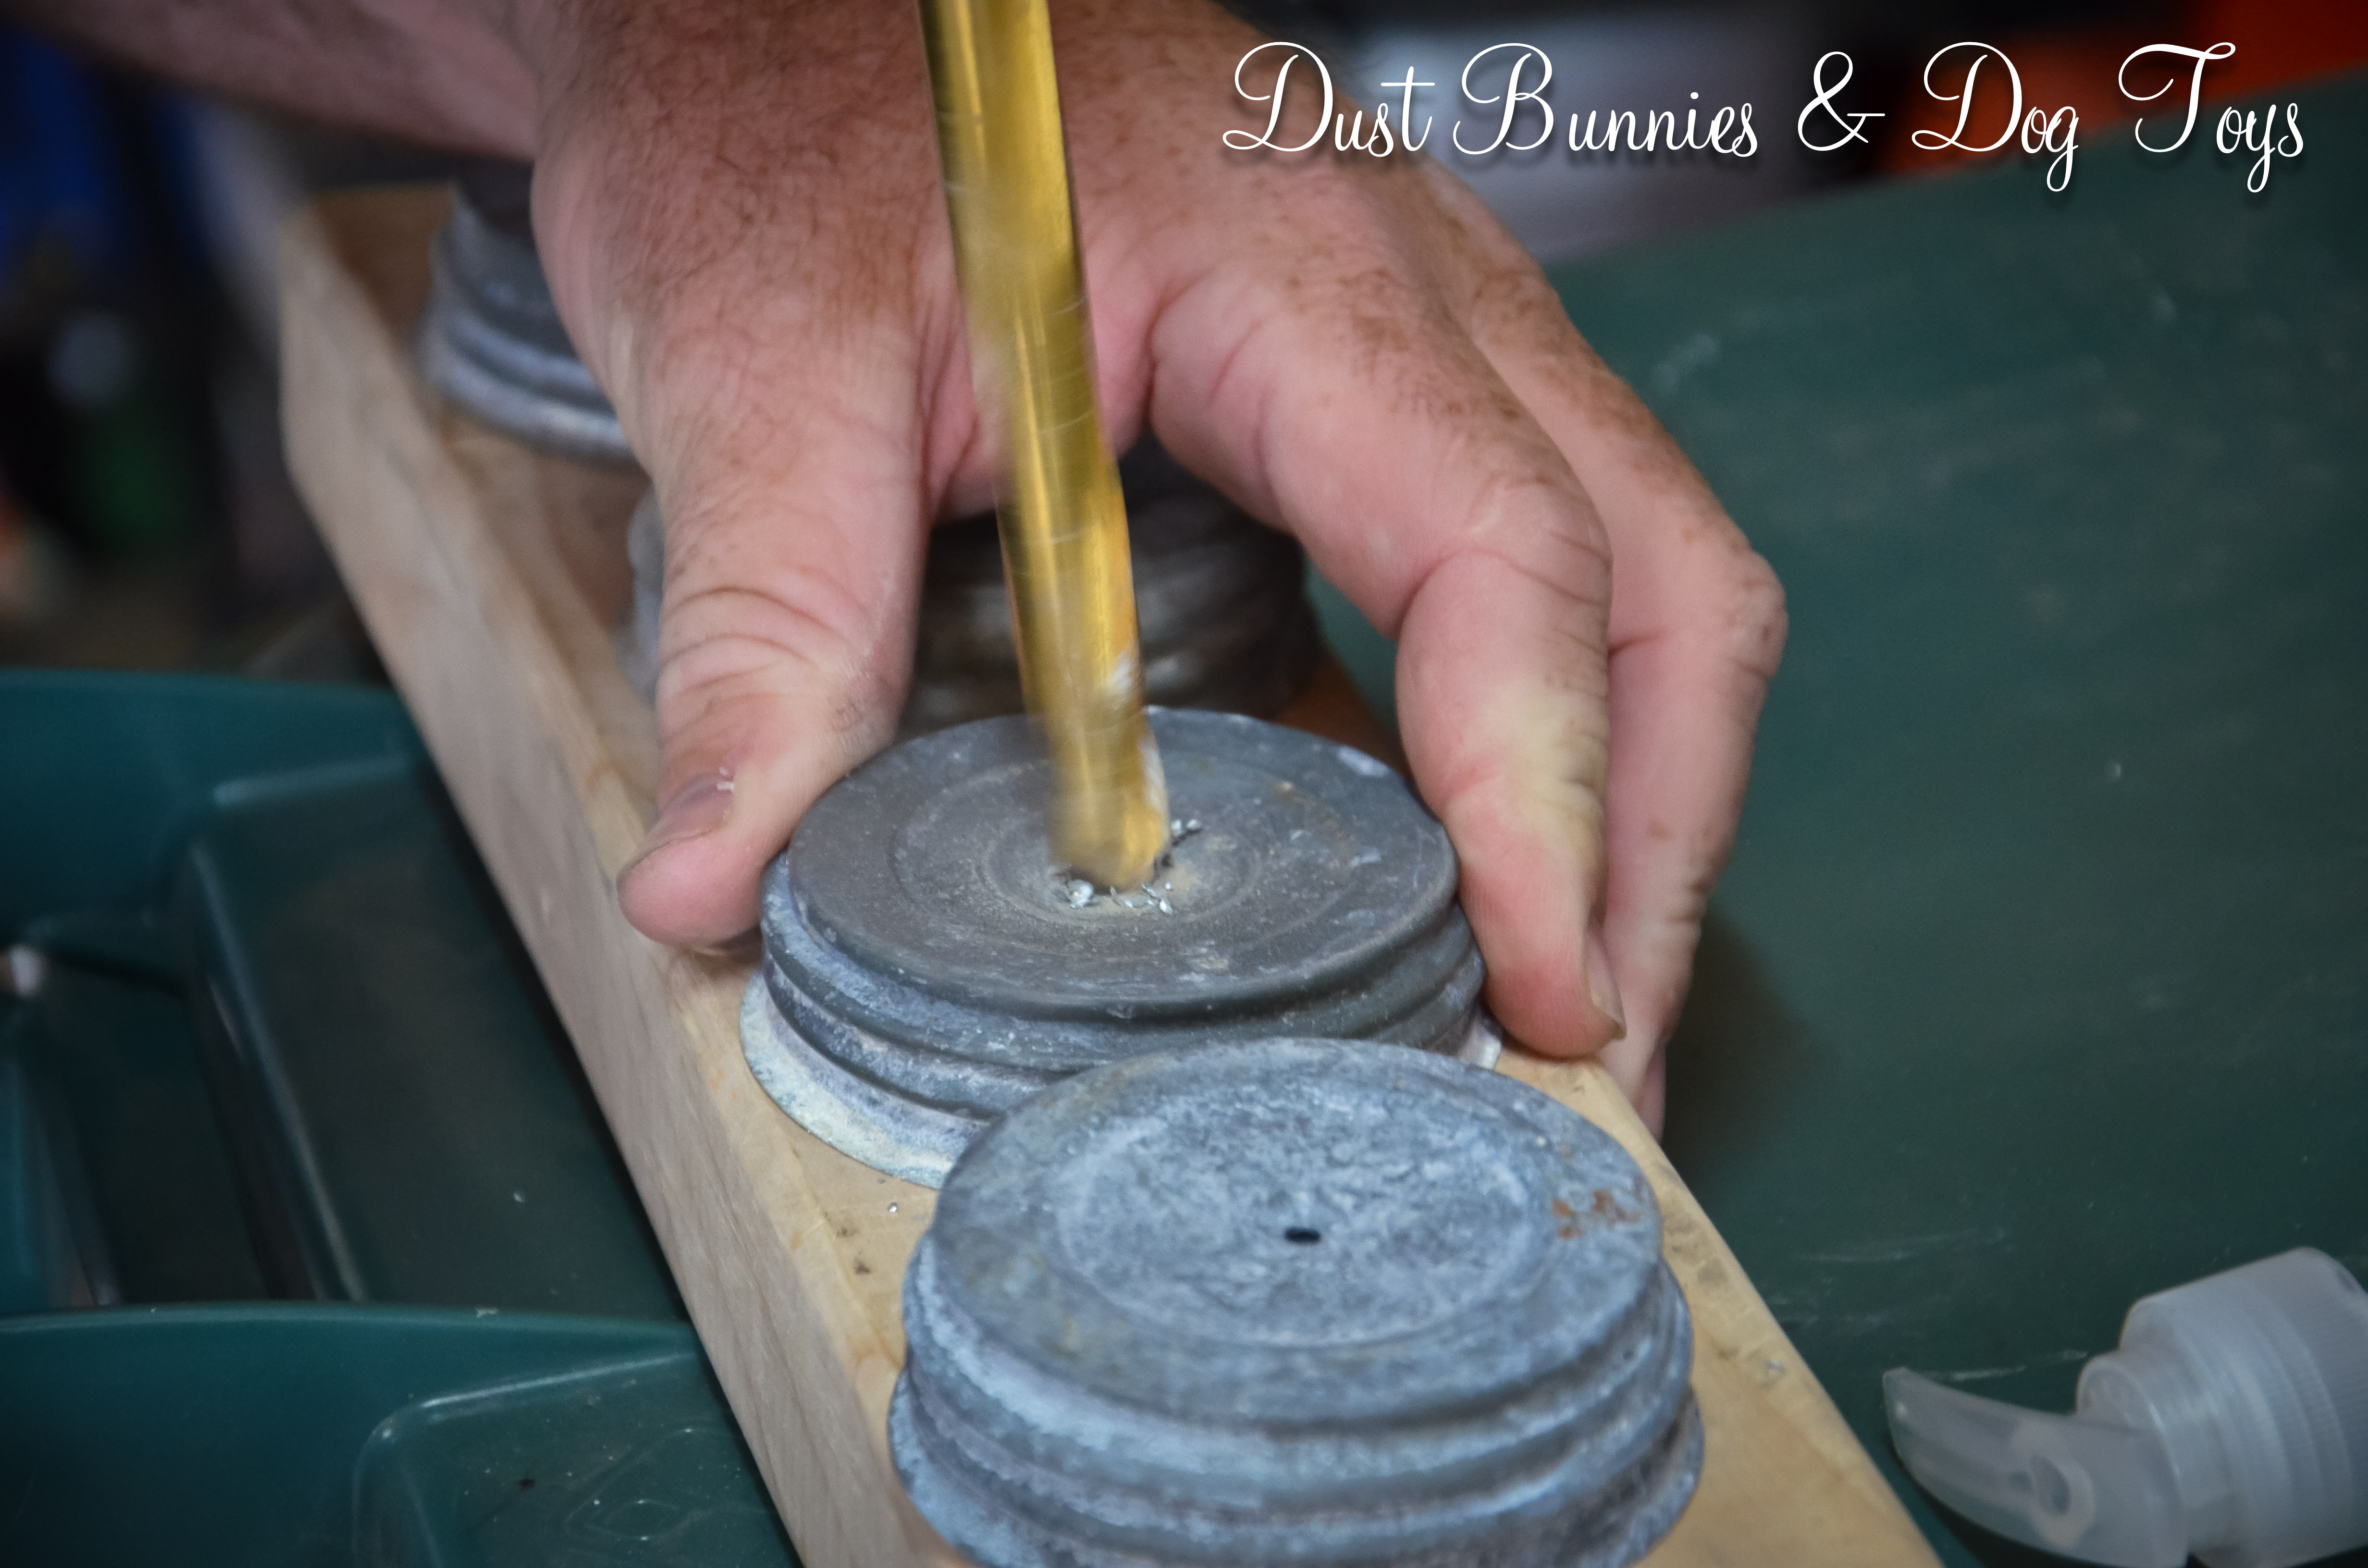
The hubs made use of the wall space next to the door by hanging the cooling racks and fryer scoop.

12

Just like he did in the guest bathroom closet, the hubs added an additional light to the pantry for those items that are on the lower shelves.

11

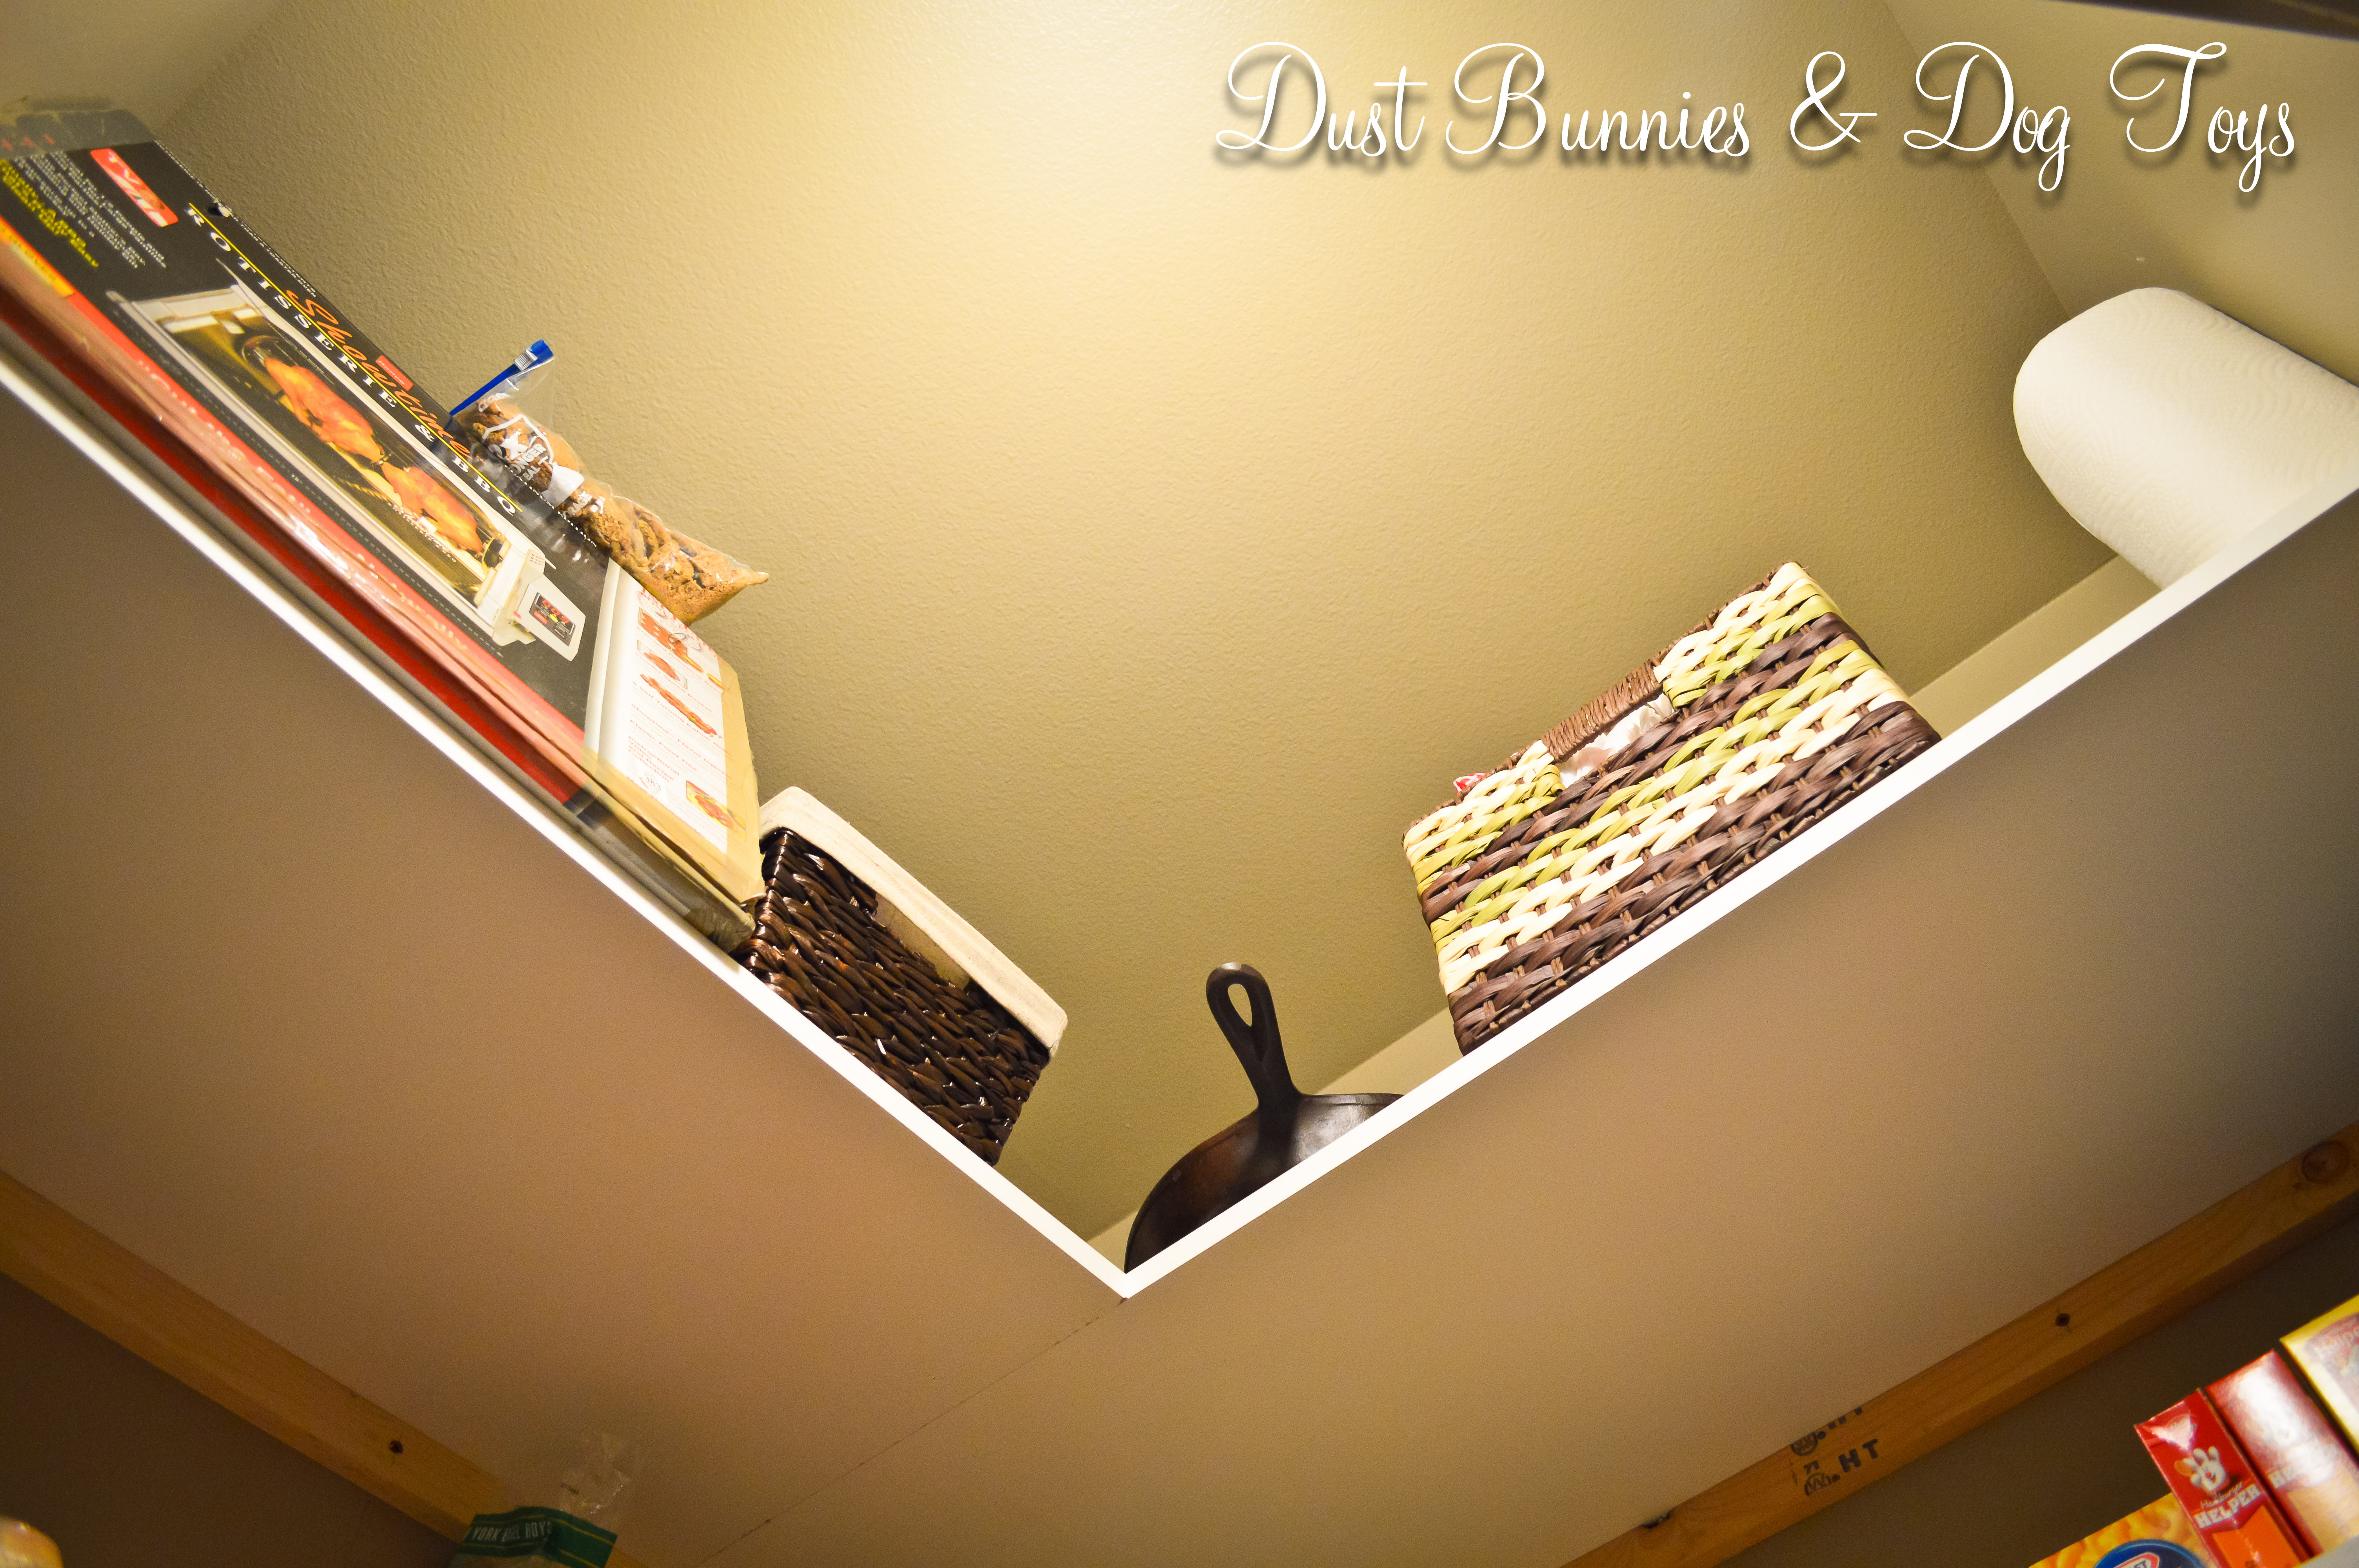
Up above there is room for the rotisserie, a basket with spare grease cans, the hubs’ cast iron pan, paper towels and a basket for storing plastic bags.  I went back to get that big basket after the BOGO sale, and ended up getting a super deal because it rung up on clearance for much less than what I anticipated paying with my 40% off coupon!

14

The bottom of the pantry became home to the dog food and recycle containers, with room left over to store my soda habit.

13

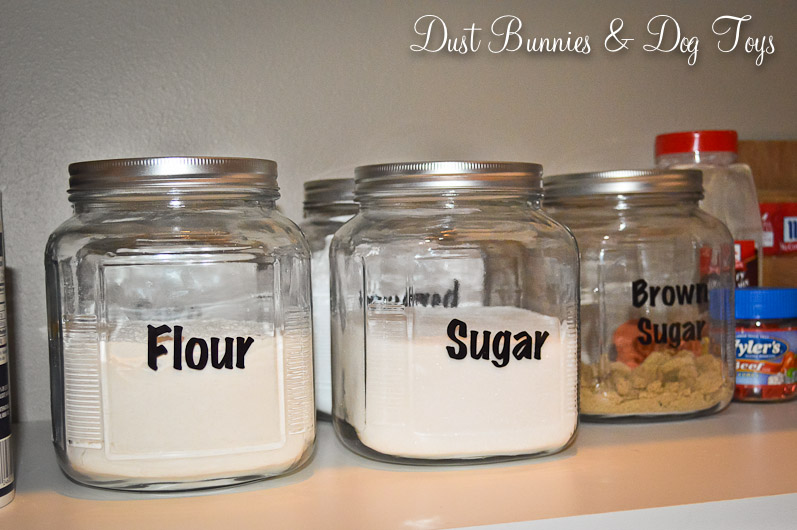
My final pantry project was the jars for our sugar, flour and other staples (seen in the picture above).  It was a fairly simple project.  I picked up several of these screw top jars on sale at Fred Meyers.

1

I put them right to use and had to come up with a quick temporary labeling system until I had time to make something pretty.  So I grabbed my trusty dry erase marker and hand wrote each item.  That of course didn’t last long.

2

Based on that, I knew I didn’t want to do the cute chalkboard labels I see all over Pinterest.  Instead I decided to create vinyl labels for each with my Silhouette.

3

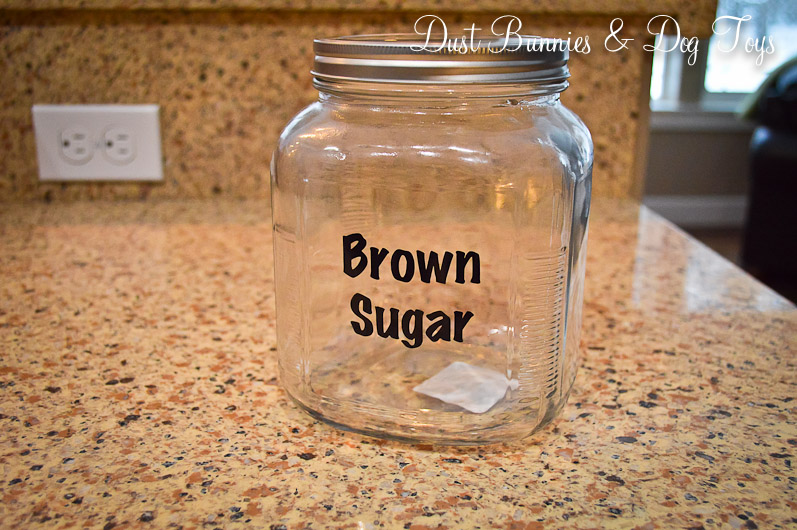
They turned out pretty nice!  I love that they are easy to read and should hold up to repeated use.  Plus they look pretty spiffy all together on the shelf.

4

And that’s our pantry.  It’s the perfect marriage of organization and inventory, which not only makes me giddy, but keeps the happy as well.  I think that’s a sign of a project well done. 🙂


Advertisement

Our First Offical New House DIY Project!

I promised a post about our flooring installation, so here it is.  It’s been a little slow going because we can only go to the house in the evenings after work, but we’ve made pretty darn good progress in just 3 days.  The first night we rented a drum sander from Home Depot and sanded all of the subfloor joints and any spots that had high spots from other portions of construction.  Of course, prep work begets prep work and before we could start sanding we had to cut off the excess plastic sheathing installed on the exterior walls as part of the energy efficiency, which you saw in this post.

1

This stuff was applied with a super sticky and gooey tar-like substance that has been very annoying to clean and work around at the base of the walls.  We could have laid the flooring over top of the portion on the floor, but with all the paint, mud and texture residue on the plastic it just wasn’t a good idea, especially since the flooring warranty could be voided if there is any under layment.

Next up was sweeping all of the dust and debris to be vacuumed with the shop vac.  There was a LOT of dust and a good bit of debris…

2

Once the floor was vacuumed, the hubs started sanding.  At first he did the whole area but we soon realized that wasn’t necessary so he focused on the seams of the subflooring and anything that had a high spot.

3

We started installing the next evening. Each piece has a tongue and groove edge so that it locks into the piece next it on either side without use of any adhesive.  And without need for an underlayment, it can be installed right over the subfloor, as we did.

4

It took us a while to find a ‘system’ with the material, but once we did it went fairly smoothly.  The hardest part was getting those first few rows down so there was something locking the other pieces into place.  There’s been a slight learning curve and a few ‘dang it’ moments, over all we’ve not had any major hang ups. Here’s what things looked like near the end of the first night of installation.

5

We had the dogs with us while on site and were pleased that they stayed out of the way for the most part.  Granted that’s likely because they’d been to Doggie Day Camp and the groomer that day, and were just plain tuckered out.  Sangria decided she’d hide out in the pantry since it was the one area we weren’t walking through.

Sangria

A nearby lot was recently purchased and they have begun clearing for construction.  As we left that evening, I was stunned to see that they not only burned the trees cleared rather than grinding them back into the dirt like our builder did, but they left the smouldering pile glowing unattended!  I have a sneaking suspicion I’m not going to be crazy about this neighboring project, but I’m trying to reserve judgment until I meet actual people…

Fire

The hubs had a light schedule at work today, so he left early to go work on the flooring without me and spent most of the day there.  He made pretty good progress, including some difficult ‘tight spot’ pieces that took extra time to cut.  Here’s what it looks like now (sorry for the phone pics, but it’s all he had with him, since the ‘photographer’ wasn’t around).

T2
Dining room done into the laundry room and the edge of the kitchen.
Heading into the kitchen.
Laundry room, almost complete.
Great room fireplace wall done.

Unfortunately we got a call from the flooring store saying there was some ‘mix up in Seattle’ and the other half of our flooring wasn’t shipped until TODAY!  It was supposed to already be here, so this is quite a set back.  It’s now supposed to arrive Monday or Tuesday and then has to sit on site for at least 1 day before it can be installed.  We’re not sure yet how the will impact the overall completion schedule, but we’ll continue working with what we do have until we run out in an effort to keep things as on time as possible.

The Easiest Project Yet

DSPumpsI spotted these pretty mason jar soap pumps on DecorSteals.com and immediately ordered two.  Unfortunately during the checkout process I was informed that they would not ship to Alaska.  UGH!  Guess that was fate telling me they really were as overpriced as I thought they were – $29 a pair, plus shipping!  I knew I’d pinned a DIY tutorial on how to make the same thing so I figured I’d keep my eyes peeled for pretty mason jars and pumps locally and give it a try.

About a week later my hubby took me to a deviously wonderful antique store he’d spotted while out and about.  Where I found these lovlies for just $10 each.

Jars

I was twitterpaited.  And then like I always do, I got distracted and they sat for weeks, until the day I needed a few items to fill the dishwasher before running a load.  Now all clean and pretty and sitting on my counter, they were back on my radar.  Luckily, a few days later I made a trip to Pier 1 to use the gift card my mom had gotten me for my birthday and found clear pumps for just a $1 each!  Of all the things I might find at Pier 1, that certainly wasn’t one I thought I would, but I’m sure glad I did!

Pump&Lid

I was in the midst of getting lots of crafts done for an upcoming display so I wasn’t planning on working on this little project until later, but my hubby decided to make it happen and started pulling out tools.  I quickly looked up the tutorial I’d saved to show him what the steps were and then followed him out to the garage to get action shots.

Drill

StagesFirst he marked the center of each lid with a dot.  Then he drilled a hole slightly smaller than the circumference – I love how that word makes me sound smart! – of the pump.  He then took a little more off the edges of the hole until the pump would fit into the opening. Here’s the line up of each stage from far to near.

Yes, that is our garbage can being used as a work bench.  I’m not the only one who longs for the day we move into our NEW home and start setting things up the way that works best for our needs – including a study work table with tool storage nearby!

At this point I returned to whatever craft I was currently working on and the hubs applied epoxy to each pump and lid to create a seal.  We let them dry a day or two to make sure everything cured completely.  Then he measured how long each stem should be and trimmed them down to fit.

I filled each with a healthy dose of soft soap from the bulk container I’d purchased some time ago for filling the small single hand pumps we’d had previously and then placed each in their new ‘home’. I love that each is different and has it’s own character.

Group

1    2
4    3

All together we made four dispensers for $44.  That’s less than I was going to spend online without shipping, which makes me like them even better.  I think they turned out pretty darn cute and the hubs declared them “the easiest project yet!”  He then noted how he was surprised I hadn’t done more for things like lotion, etc.  I took that as a clue that he really does enjoy doing these little projects with me and told him I’d be sure to watch for more jars so we could make those daily use items ‘pretty’ enough to display in our new home and then promptly showed him one of my many DIY plans for the master bathroom… 🙂

Bathroom

DIY Drop Cloth Curtains


BeforeThe family room of our rental is like a greenhouse.  A massive southern facing window and then a glass door leading out to a small balcony flood the space with light. You can see this wall of windows in this picture from the day we moved in.  Mind you I love how bright it is, but even with temps hovering around freezing outside we’d be roasting in this room by mid-afternoon.  Plus being in a cul-de-sac means all of my neighbors can see in just as much as I can see out!  But most importantly my husband was concerned with how the sun would interfere with watching TV in the space! Of course a man would find that the most important reason to need curtains.

I didn’t want to spend a lot because I’m sure I’ll want to do something different in our new house so I went straight for my “Window Treatments” board on Pinterest.  And of course I found a perfect solution.  Drop cloth curtains.

I hit Home Depot and picked up three 16′ x 9′ clothes for about $15 each.  While browsing the size options a young man in the infamous orange apron asked if he could help me find anything.  He probably thought I was lost looking at my phone and then back at the shelf.  When I said I was just trying to decide what size I’d need to make curtains based on a tutorial I’d pinned he immediately asked to see what it would look like!  I was stunned.  But he was genuinely interested and seemed excited for my little project.  He wished me well and moved on to assist another customer.  I almost wanted to ask if he wanted me to bring in a picture of how mine turned out!

Layout
Most of the tutorials I found involved cutting and hemming, which I was hesitant to do not knowing what the dimensions of our new home will be or which room I’ll use these in when we move.  So I did what any DIY frugalista would do.  I laid them out on the floor folded them to the length I wanted and pinned them! (See what I mean about how bright it would get in there?!)

PinSideA couple of pins down the sides of the folded section and then across the top and I was ready to hang.  I dug out some curtain rings I had from window treatments at our old house and just clipped a cloth up on either side of the window.  I didn’t measure the spacing for the clips I just guesstimated by finding the center and then the 1/4 mark after clipping both ends.

I did wash each of the drop clothes before hand.  I probably should have ironed them too, but I don’t iron.  Seriously.  I don’t iron.  If something in our house needs ironing my husband does it.  It’s like my cryptonite.  So the end product is a little wrinkled, but I figure that will fade the longer they hang.FinishedAnd here’s the finished product.  I didn’t plan it but the folded excess hits right at the window ledge, creating the illusion that the darker color at the bottom is from the lack of light from behind at that point.  Wish I could claim that was sheer genius planning.  But it wasn’t.  I’m sure the dogs appreciate that they don’t prevent them from continuing their daily neighborhood watch.  And my husband appreciates being able to pull them closed to watch a movie!  I plan to make them a little more fancy at our next house with a stencil of some type once they are really hemmed! 🙂