

One of the must do projects for this season was installing a gutter on the back of our house. When we installed the garden box last year I thought having the rain water come off the roof into it would be a good thing, but it ended up flooding the box thanks to several back to back storms. As you can imagine that didn’t bode well for my plants.
Since the span across the back of the house is a straight shot we considered doing the project ourselves, but then the Hubs discovered Lowes has gutter installation services which qualified for their special financing offers. To sweeten the deal the install comes with a 1-year warranty and would only take a few hours opposed to us spending a weekend on the project ourselves. We were sold.
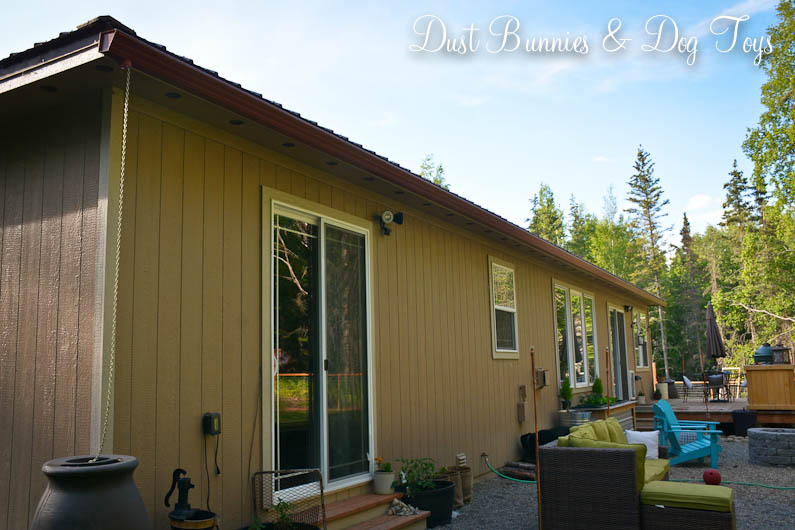
The vendor came out earlier this week and created the 60 some foot seamless gutter right on site and installed it within a few hours. I don’t have any photos of the install since it happened while I was at work, but it was pretty simple according to the Hubs who was on-site to supervise.
It’s not a perfect color match for the house or roof, but it coordinates well enough so you don’t really notice it (just like I hope you’ll pretend not to notice my DIY junk puppy defense screens for my tomato plants next to the door there – we’re still in training when it comes to the garden!).

Now the garden box won’t have a permanent divot where the water runs off the roof and I can decide how much to water each plant. Granted that means watering has become a manual process but luckily, the hose is nearby the box and the rain barrels will be available for watering on each end of the house.
We opted not to have down spouts so we could install rain chains that go to rain barrels at each end. The hubs installed this simple chain from the opening in the gutter down to the rain barrel.

We’re thinking it might not be substantial enough to really direct the water if we get a good downpour but we’ll wait and see. If not I’ll pick out a different chain or DIY a decorative one. I’ve seen several tutorials on Pinterest using everything from copper tubing to spoons and even driftwood so there’s plenty of options to explore if I need to.

We still need to do final positioning on the barrels, but the estimated spots we chose are pretty close. We also need to replace the cheapo plastic plugs and spigots they came with that broke off soon after purchase so they are ready to hold water, but for now it’s good to check one more thing off the list and add a bit of efficient function to the yard. 🙂


