A Quick Revamp

Aloha!  It’s been quiet around the blog the last few weeks because the hubs and I had a little get away to Hawaii!  It was an amazing trip and I’ll be sharing information on all that we did while there in the next few days once I get a chance to sort through the masses of photos I took.  Until then here’s a quick little upcycle project I did a while back and never shared (hence the lack of snow in the before photo!).

I bought this wooden wall art at a furniture store when we first moved to the mainland about three years ago.  I was drawn to the details of the carved wood and always liked it but it blended in with the wall color at the new house too much for my liking so it languished in the “not sure where to put this pile”.Before

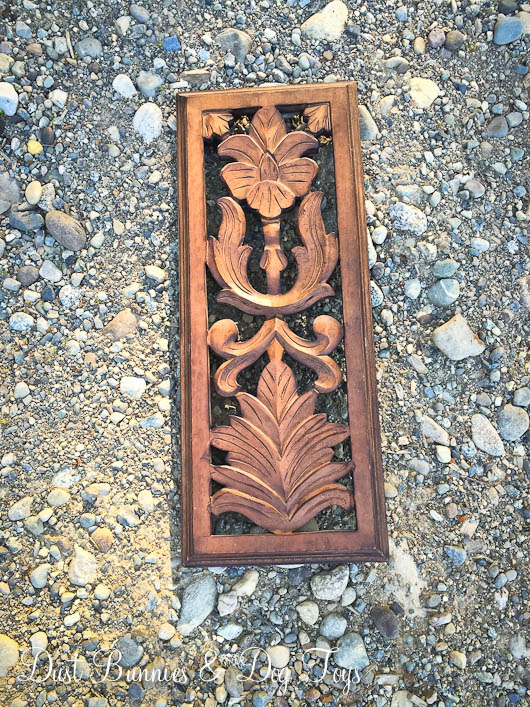
A quick coat of chalk spray paint from Michaels and a little distressing took it from pretty basic to awesome rustic!

After

Now it looks like something you’d see on HGTV’s Fixer Upper!  Although I really love the new look, I don’t have a spot for it in the house any more so I’ve got it set aside for the next bazaar and will post it on the local décor buy/sell page in the meantime.  Hopefully someone else will have the perfect home for it and snag it up.

Advertisement

DIY Rustic Fall Centerpiece

As promised, today I’m sharing how I created the DIY chalk paint fall tray centerpiece on our dining room table. I picked up this wooden tray on a local buy/sell page for $15 from the Rusty B (love her stuff!). It had a metal handle that had come a bit loose so I popped that off and gave it a quick coat of cream chalk spray paint left over from painting the pumpkins I used around the house this year. I’m really loving this stuff and it comes in lots of colors! Anywho, I forgot to take a picture before taking the handle off but here’s the before – like literally seconds before the spray paint started flying thanks to my hubby who snapped the picture with my phone as I shook the can in between sprays! (In fact, you can see a little peek of the pumpkins I’d started painting in the top corner.)
FallTrayBefore

After two coats it was looking pretty good.  Much brighter and prettier than before.  The chalk paint gave it just a bit of texture, but it looked a little flat.   So I decided to distress it a bit to get some of the black to show through.

FallTray2

A quick hand sanding later it had dimension again with a worn, lived with look. Then I reattached the metal handle and it was ready for some fall filler.

FallTrayAfter

I filled the bottom with white beans, then topped it with a variety of pumpkins and gourds in similar colors. A few pieces of leftover berry spray from the entryway and a couple filler pieces I found on a recent trip to Michaels and it was done.
FallTable

And that’s the story of my DIY fall centerpiece. I’ll be back tomorrow with the quick makeover I did on a little faux pumpkin!

Shared on Knick of Time’s Vintage Inspiration Party #209!