Our New Garden!

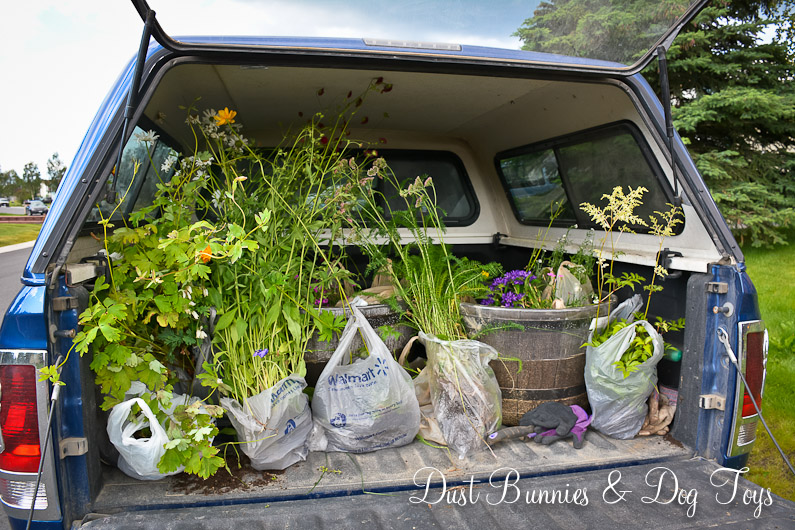
I spent most of the recent long weekend gardening, starting with planting a patch of raspberry bushes given to me by a co-worker who is rearranging her yard.  They look a little scraggly after being transplanted, but I’m hoping they bounce back quickly and possibly even bear fruit this season. The one in the front there has several branches so I left them secured with the paper bag we used for transport to give it a chance to establish new roots before supporting the weight of hanging branches.  I’ll keep you posted on their progress throughout the summer.

1Raspberries

While I was planting raspberries, the hubs was building my long anticipated garden box!  I decided on a design with removable tubs so when we have a greenhouse I can start planting earlier inside and then move the tubs out when spring arrives.  It will also let me extend the growing season into the fall by moving tubs indoors as the weather cools.  The hubs designed this fancy subframe to support the weight of the tubs and then added the base on the bottom so that it would be waist high as I requested.  There was a bit of miscommunication on the final design plan because we had discussed several options and the inspiration I showed him was only a foot tall, but he was still able to make my vision a reality. 🙂

Planter1Frame

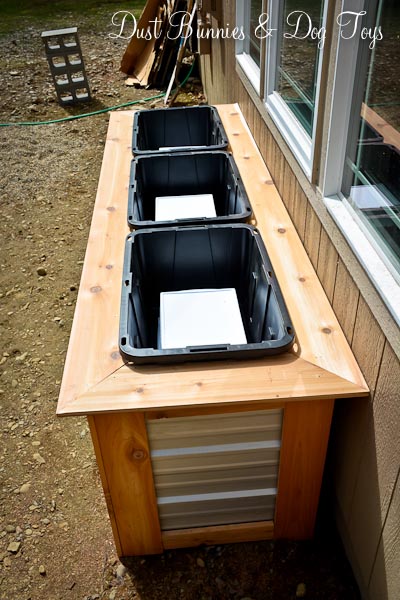
Once the frame was done we moved it into the back yard and finished it off with metal side panels and cedar trim.  It went together pretty quickly, thanks to the hubs’ detailed plan.  I helped by holding pieces in place until he got each section secured and showing my approval with a very wide grin as I watched it all come together.

Planter2Panel

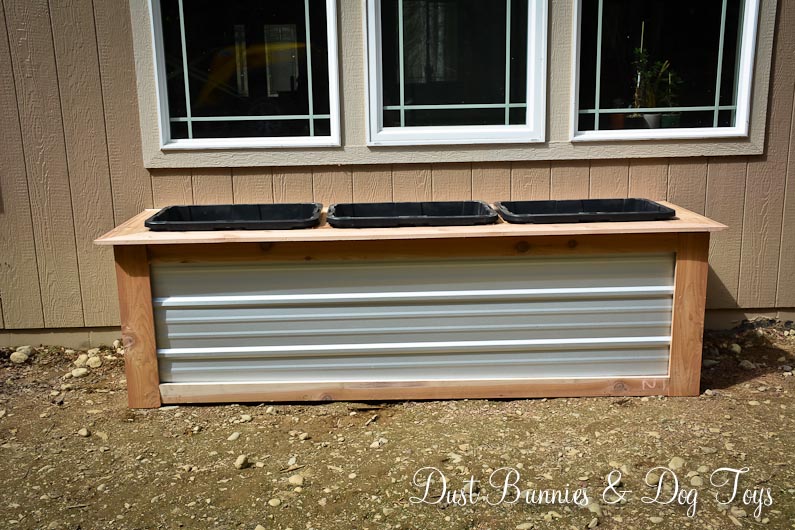
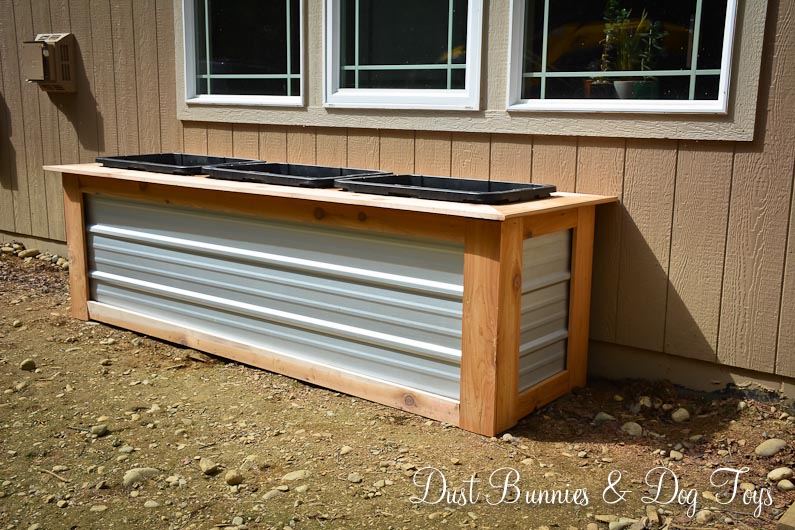
Here’s how it looked once the sides and trim were installed.  I would have done a happy dance if I hadn’t been so tired, but the hubs knew I was super happy with the results.

PlanterBuilt

Next came the removable tubs, which rest on the cedar lip and are supported by the subframe below.  I love the look of the metal next to the wood.  It totally works for my modern farmhouse style.  Clean and simple, yet rustic at the same time.

PlanterBuiltTubs

PlanterBuiltTubsSide

Now it was time for planting!  I wanted to use a water reservoir system to encourage the plants to root deep and seek out water, so I added smaller tubs with holes on the sides to the bottom of each tub, and then had the hubs drill a hole for a PVC watering pipe.  Now when I water it will leech out into the surrounding soil and water the plants from within.  The idea is that this will require less frequent watering, which is perfect for my busy schedule.  And if it doesn’t work, it’s not permanent so I can just take it out next year.

PlanterBuiltTubsTop

PlanterBuiltTubsTopPipe

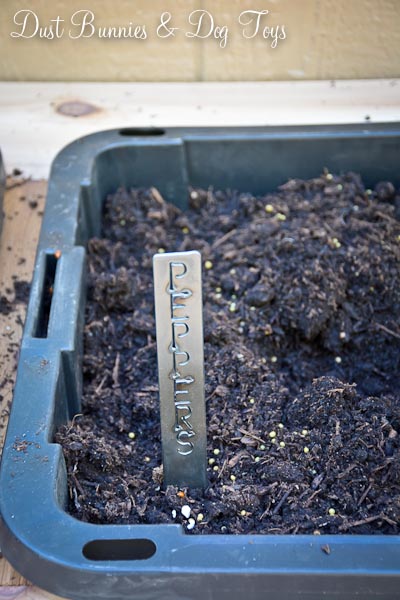
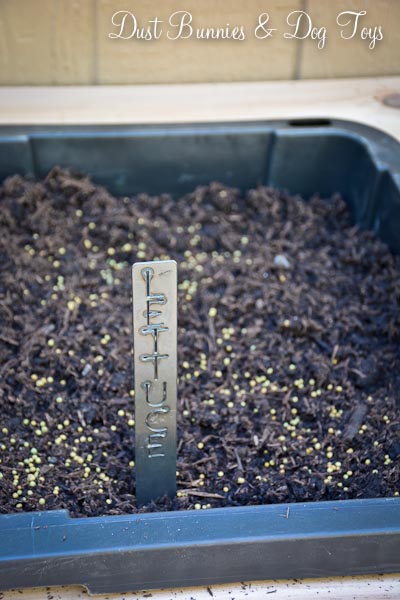
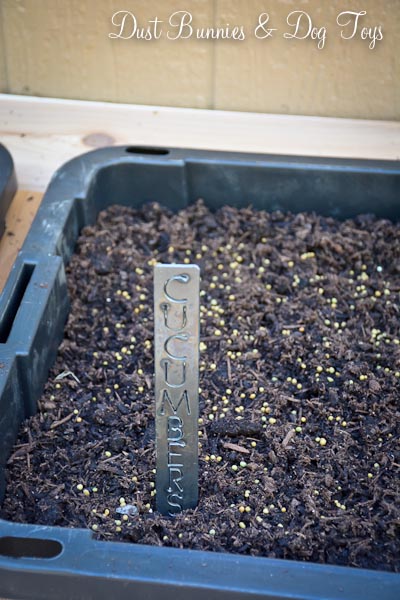
We filled around the tubs with soil and I got to planting.  This year we’re having herbs, lettuce, possibly spinach, cucumbers, peppers and tomatoes.  I already had the tomato and herbs on hand, but was waiting to purchase the others until the garden was ready for them.  I’ll pick those up over the weekend.  The pepper will go next to the tomato plant and the center tub will hold the lettuce and cucumbers.

PlanterPlanted

I selected a variety of herbs including cilantro, chives, parsley, oregano, dill and mint.  The cilantro will come in handy for summer salsa recipes and I’m excited to start using dill in ranch and other mixes.  We use dried parsley and oregano fairly often so it should be fun to experiment using it fresh. We don’t often use mint or chive, but this will give us the opportunity to experiment with them and I believe both deter pests, so that’s an added benefit.

PlanterPlantedHerbs

To finish things off, I dug out the fancy metal garden signs I’d bought over the winter to mark what’s what.  They tie in the metal siding of the box and look totally cool!  I wish I had one for herbs, but it’s ok.  I do have signs for peas, carrots, onions, potatoes and pumpkin, so those are the other likely possibilities I’d try first.

PlanterPlantedMarkerTomatoes

PlanterPlantedMarkerPeppers

PlanterPlantedMarkerLettuce

PlanterPlantedMarkerCukesAnd since the garden is located just off the deck and right outside the back door it’s more convenient to snip a few things for cooking, which was the plan all along!  This spot gets full sun from morning until early afternoon, so it should also be pretty productive.

PlanterPlantedFrontI’ll try to do an update later in the season when things have grown in and are producing!  Until then, feel free to share any gardening tips you think might help that day come sooner! 🙂

The Grand Backyard Plan

Spring in Alaska is fickle.  It’s been warmer than usual which has me thinking about planting, and then we had snow again yesterday!  Apparently I’ll have to give it a bit more time, but I’m bound and determined that we are going to get the back yard set up this summer! Last year, we were still getting settled and the priority was getting the fence in so the dogs would have room to run. We did get the yard hydroseeded late last summer, although I’m not sure how well it will come back this year after the dogs have been abusing it all winter. Hopefully the additional seed we put down last week will help get things going this season.

In the meantime I’m fine tuning my vision for the entire space. It’s gone through a few revisions, as I talk things through with the hubs and watch exposure, but I think I’ve created a plan to get the basics established this summer so we can build on them each year.

First up is the deck, which I cleaned last weekend to get the juices flowing. We pretty much ignored this space all winter while we focused on indoor projects, so I cleared the space and gave it a good sweeping. I dug out the outdoor rug I bought on the buy/sell page at the end of last summer for $10 and placed the Adirondack chairs and garden stools to create a seating area. I added the lovely lanterns on the hooks and a couple of throw pillows for a little style. It still needs a good pressure wash, but it’s a nice place to sit for a few minutes for now.  Here’s a quick before and after.

DeckBefore

DeckAfter

The plan starts with building a sectional seating unit like this with storage underneath where the cushions can be kept during the winter. I’m envisioning an L-shape along the wall and out from the corner made of a few pieces which could be rearranged for other set ups. I might also do a few ottoman pieces like this to store the propane bottles for the heater and fryer. A table like this would provide a spot to stash little things like candles and bug spray when not in use, but I might just leave the space open since I could also store such things inside the L shape during the season.

The hub’s green egg table will occupy the corner of the deck where the egg currently sits with our new oil-less fryer next to it. I’m excited to finally see the table all finished, set up and ready to use.

DeckLabels

The displaced Adirondack chairs will move to the firepit area that will be created along the edge of a pea gravel patio next to the deck. The pit itself will be created by stacking landscape stones around the freebie washing machine bin we snagged during construction. I love the idea of creating a cover that would make it also function as a table, especially with a little game board for fun!

Behind that, underneath the family room windows we’ll install a raised garden bed made of cinderblock like this, but with removable tubs like this which can one day be transferred to and from the greenhouse I’ll have one day as the seasons shift. I’d like to try a hanging strawberry planter like this, so that might hang from the eave between the windows or over top of the raised bed or maybe I’ll try something like this on the back of the shed.

The massive hot tub we scored on Craigslist has yet to be used because it’s just so huge and costly to run, so we’re passing it on to the family cabin down on the Kenai, where it should be much more utilized and appreciated during fishing season.  We’ve got our eye on a few 2-person tubs and might invest in that later this year or next season.

AlcoveLabels

I’ve realized this alcove along the side of the house where I originally planned to do a full garden just doesn’t get enough sun to be productive, so instead we’ll put the chicken coop here. I’d like something similar to this which should have a small footprint next to the house. Locating them just off the deck will make taking care of the chickens easier and the house should provide extra radiant heat during the winter to keep them cozy.

Beyond the coop I’m considering installing a potting bench with a simple design like this. I’m not convinced that I’ll use it enough to warrant the construction, so I might hold off on this idea until next year when I see how much need there really is. My other idea for the space is to build a smoke house – which I’m sure would get lots of use or a small tool shed to house things like rakes, shovels, etc. so they don’t take up space in the garage or the hub’s storage shed. If we go that route I could always add the potting bench or smoke house along the back wall of the garage, where I could see it from the laundry room.

tentAlthough we bought a canvas gazebo canopy on the buy/sell page last year, I decided it wasn’t the right fit for the deck so we resold it. Eventually I want to add a pergola to the deck with some sort of shade cloth, but that might be a few years down the road still. In the interim I plan to create a simple shade like this by attaching poles to the sides of the deck with a few simple brackets. We may have to install an eye bolt on the back of the house to complete the set-up but it should be much easier to take down quickly if there are winds in the forecast.

And no deck is complete without some sort of pest deterrent, especially in Alaska. Ours will come from the wine bottle tiki torches we had in Kodiak, but this time around rather than hang from a railing or post they will sit in holders like this around the perimeter of the deck. The poles for the bottles can be attached just like the shade poles mentioned above and I plan to fill the bottles half full with pebbles so they don’t require as much tiki fuel.

WheelLabels

Finally, I’ll add some landscape around deck in the form of flower beds filled with perennials similar to the ones out front and along the far side of the house.   I also plan to add a clematis in front of the big wheel the hubs found me, which is now tied to the fence near the deck. I may disguise the low area around it with a bit of a retaining wall to create a small bed in front of the wheel as well. We’ll see how far I get this year.

If I get all of this accomplished by fall and still have some decent weather to work with I may attempt to create a walkway like this from the patio to the back gate.  So that’s the master plan.  Watch for posts as we attempt each portion!

Feathered friends

Ptarmagain2
We’ve had some pretty feathered guests in our yard recently, including this beautiful spruce grouse who I originally thought was a ptarmigan.  I’ve seen him several times, but wasn’t able to get close enough for a picture thanks to my rambunctious children.  So this time I left them in the house and slowly made my way down the driveway where he was foraging on the seeds and cast off by the trees during fall.  He didn’t seem concerned that I was getting closer and when I sat on the bench by the garden he actually moved even closer.

Ptarmagain
Eventually he moved into the woods and flew up into a tree where I couldn’t see him anymore. But while looking for him, I spotted this guy pecking away at our birch trees.
Pecker
I think this is a downy woodpecker, the same species of bird I saw in the back yard of our rental in Anchorage last year but can’t be certain.  Whatever he is, he was pretty darn cute and very industrious.  He worked his way up to the top of one tree and then flitted to the next to repeat his peckish ways.
 Pecker2
Eventually he did visit my nearby suet feeder, which I was glad to see getting some use.  I think offering a few feeding stations encourages the birds to visit and eat those pesky insects who are almost the same size as they are!  Which is why I’ll be keeping the feeders stocked all winter, because if they know there is a reliable food source they will hang around and nest here, creating another generation of eaters to battle the insect population that is bound to return after winter.
 Pecker3

Hydroseed Update

Grass

It’s been roughly 4 weeks since we had the back yard hydroseeded and things are starting to look a little green out there – although still somewhat sparse.  It’s a slow process, especially since we had several days without rain and didn’t have time to keep the seed damp like the company said to. However, what is growing seems pretty hardy on close inspection.

GrassCloseup

But it’s still not ready for our heathens, er, furballs to be introduced. Hopefully, the current stalks will reseed and fill in the barren areas before winter hits, but if not it should at least give us a good start for next season.  And it’s still more cost effective than sod given the square footage we’re covering, even if it isn’t as instant.

At Last!

Remember forever ago when I told you about our plan to install a rain garden? Well it’s finally done! After months of delays waiting for the ground to thaw, our lot to be graded and uncooperative work schedules we put in the last of the plants and mulch this past weekend. Here’s a recap of the process from the beginning.

The free tires we had delivered while the house was still under construction last fall were already covered over with snow when we moved in back in December, so they remained where they had been dropped until spring.   Luna enjoyed them as a lookout spot during this time.

Luna

Once the ground thawed, I arranged them into a semi-circle shape to act as the retaining wall at the back of the garden. We placed large rocks from around the property into the center of tires to keep the wall from shifting.

Start

StartWall

As the garden started to take shape, I quickly realized that using individual bags of soil and compost I’d purchased wasn’t going to be efficient, so I decided to order a delivery of top soil mix. Unfortunately, I had to wait for the builder to do our final grade, which was rescheduled several times and finally happened a few days before our road trip. This provided the required ‘dip’ to the area between the driveway and the garden so that water runoff will be directed toward the garden and pool there to be absorbed.

1

The top soil was delivered soon after we returned home, but conflicting schedules didn’t allow me to get back to the garden until several weeks later, when the hubs and I mixed in the sand and compost before spreading everything out to fill the space. There were a few spots where the tires didn’t line up just right, so we filled those with large rocks to keep the dirt and subsequent water from escaping.

2

3

Bacardi and her siblings ‘helped’ throughout this process… BHelping

We decided this was an appropriate opportunity to spread Sangria’s ashes, so we scattered her throughout the soil before planting. I also gathered a variety of rocks to create stone cairns in memory of other special pets either of us had lost. In addition to one for Sangria there is one for the hub’s dog Kenai, our previous cat Kitty Meow and my goats Daisy, Rosy and Quincy.

Stones

Stones2

Stones3

Stones4

Stones5

Stones6

Next I laid out all the plants I’d purchased and collected over the last few months to decide what should go where. Once I was happy with the arrangement I set to planting, filling in the empty areas with spring bulbs.  I had also purchased mulch to top the garden, but ran out and couldn’t find more of the same kind so late in the season.

4

5

Another few weeks passed and I found cedar mulch at the hardware store, so I purchased enough to finish the empty spaces and sprinkle over top of the other mulch so they’d blend together. Most of the annuals I’d planted had already died off, so I replaced them with perennials I’d purchased at a Master Gardener plant sale.  I also added a clemantis on either side of the garden against the retaining wall so it will attach to the tires and cover them as it grows.  Then I planted Aleutian Speedwell along the front edge of the garden. In time it should spread and act as a ground cover for the slope into the garden – part of my agreement with the hubs that the backyard will be the only landscaping that requires mowing.

Mower

As I planted, the hubs and kiddos watched from the lawn mower parked nearby. We rescued both the mower and that cool trailer attached to it from someone who planned to take it to the landfill! Both needed a little work, but it’s been super handy to have them for projects around the yard.

MowerRide

Once I was finished, the hubs loaded the dogs up in the utility trailer and drove them back up to the house so I could get some kiddo free shots of the finished garden. We placed our bargain bench off to the side so there’s a spot to sit and reminisce next to what I’m now calling our Memorial Rain Garden. Eventually I’ll create a paver pad for the bench along with a pathway down the hillside to it, since I plan to fill the rest of the area around the garden with local ground covers that will spread.

6

Here’s the view from the house, where you can see how it is situated in the low spot to collect the run off from the driveway. View

And I’m happy to see that we’ve had an increase in “good insects” like this butterfly since we’ve started planting!

Butterfly

My Gifted Garden

No, I don’t have a magical super smart garden. I’m just lucky enough to be gifted an entire flower bed of plants, which I’m now calling “my gifted garden.”  Since we purchased a new construction house, we have a LOT of blank space to fill in our yard. I was chatting about this with a co-worker one day a few weeks ago and she asked if I was looking for any perennials to fill my yard. Free plants that will come back bigger and better each year?! You bet I was game! She told me to let her know when I was ready and we’d set a time for me to come to her house and help her “prune” her garden.

I was finally ready to take her up on the offer last week, so we picked an evening after work for me to come by and I showed up with a couple buckets, a shovel and gloves. I was so excited I actually beat her there, but I knew I was at the right house when I drove up and saw this amazing assortment of flowers.

1

Just to make sure I rang the doorbell and her husband answered. He was mighty confused when I said I was there for plants! She arrived a few minutes later, changed into yard garb and we set to work with shovels and a stash of plastic bags she brought out to hold the roots.   We chatted about what types of plants grew well and which liked particular exposures as we worked our way up one side of the bed and down the other. She’d ask if I wanted this or that, and I repeated that I’d take whatever she was willing to part with and give it a home to grow.

2

By the time we were done the back of my truck was a wall of plants. Both tubs I’d brought were full of bags and I had other bags tucked in between the tubs and on a small tray I had thrown in the truck just in case! And you couldn’t even tell we’d touched her garden!

1

Ok, so this IS the same picture as above, but it literally did look exactly the same from the road. It was only if you came in for a closer inspection that you’d see the areas we dug into.

3

Once I got everything home, I placed the bags around the flower bed so I could decide final placement for all of them and make sure that I spread things out. I watered everything in the bags since it was getting late and headed for bed. I wasn’t able to get them in the ground for a few more days but I kept watering the roots in the bags and most of the plants seem like they did ok.

Finished

A little fertilizer and some mulch and its done! It will look even better when the hydroseed is done next week and we finally have a lawn too.  I still need to add a line of pea gravel at the back along the house, just like we did out front and add some garden art, but I’m plenty pleased with my gifted garden. I’m anxious to see how it all comes back in next year. I’m hoping most will go to seed, spread a bit and come back even bigger next season. And hopefully, in a few years my gardens will be as established as my co-workers is now and I can ‘gift’ plants to others to continue the chain. 🙂  Here’s a few close ups of the flowers that survived transplant.

Purple

Yarrow

Campanula

Phlox

Daisy

Knock-Off Designer Garden Art

While touring my Mother-in-law’s neighborhood on our recent trip I spotted a beautiful craftsman style home that I adore. In addition to beautiful timber columns on the porch they had a large rustic metal sphere in their landscape that I fell in love with even though I it was likely a designer piece that was light years outside my budget.

I thought about that metal sphere on the drive home and decided to look for a way to DIY my own. I’d seen several similar projects for light fixtures so I knew it was doable. I just had to find a material that could stand up to the elements.

I pinned a couple of ideas, but put the project on hold since I had several others already in the works. Then I happened to spot these beauties on a Target clearance rack! They weren’t the color I wanted, but I knew a coat of spray paint could fix that. I got all three for about $21. I all but danced out of the store!

Spheres

They lived as is in the flower bed for a while since I was busy with those other projects I mentioned, but when I started spray painting my cache pot from yesterday’s post I decided to knock these out as well.

Spheres

I love the copper color on the small one, but because it was a metal flake paint it was a little difficult to work with and required several small coats to get all the angles. The ORB color on the other two is a dead ringer for the original designer inspiration and only took two coats. The third sphere has found a home in the new rain garden, which isn’t finished just yet.  A few more steps and I’ll be ready to share that project too! 🙂

Sphere

A Little Extra Support

Apparently the little tropical plant I have on my desk at work is very happy in it’s home, because it has grown like wildfire.  It had spread so much that I’d started using nearby picture frames and awards to support the new growth!  It was getting a bit out of hand and the drooping stems weren’t growing strong enough to support the new growth.

PlantBefore

So I decided to give my little purple plant some extra support with a trellis of sorts.  I picked up some copper tubing used for plumbing at the big box hardware store.  I planned to make an upward spiral, but realized I didn’t have a lot of height to work with in this spot and that plan would require tools to cut the tubing, which I didn’t have at my disposal while at the office.  So instead I curled the tube around and then arched it over so I could push the ends back into the pot.

PlantTwist

I added the new twisty trellis to over the plant and started fishing the stems up and threw it.  No rhyme or reason, just gently pulling each through the loops until it seemed to sit well.

PlantStart

A few minutes later my little plant looked like this.

PlantAfter

I showed off my handiwork to my co-workers who were pretty darn impressed and then placed my newly supported greenery back in it’s usual spot.

PlantFinished

Not bad for a few dollars of tubing and a break spent creating something. 🙂

Hanging the Hose

For some unknown reason our builder decided to install our front hose spigot in the middle of the space between our garage and front porch, under a window. I’m guessing the plumber chose that spot because it was an easy location to run the pipe to. Unfortunately, it didn’t quite jive with my landscaping plans, which had a flowerbed going in from the porch to the garage and back to the window.

Life would have been much simpler if he’d just put it next to the front porch where I’d envisioned it, but if you know me you know simple rarely happens in my life. So rather than traipse through my flower bed every time I want to turn on the water, and then have a hose trapped amongst plants, I altered my plan and put in a divided flowerbed with a walkway to the spigot.

Hose3

But that made the hose the center of attention, so it has to look good. Problem was that I didn’t want to attach anything to the house unless absolutely necessary since we had brand new siding. About the time we were installing the flowerbeds I found this fabulous idea on one of my favorite blogs and knew it would work for our hose.   I like the idea of the metal post holder, but I didn’t think it would work well without support around it like she had, so I opted to do it the old fashioned way with the post in the ground.  The hubs cut down a 4×4 and we dug a hole with the post-hole digger next to the spigot.  We just backfilled the hole around the pole and then screwed on a pretty metal bracket so there was a spot to coil and hang the hose.

Hose2

Since I have a fancy watering wand I just lean that against the pole, which allows it to drain if I don’t get everything out before coiling the hose. This is the first time I’ve used an expandable hose, but I love it because it’s light weight and easy to move. Plus it hangs on the bracket very easily without a lot of weight.

Hose

So that’s it: a pole in a hole, a bracket, some screws and a hose.


Berries in a Bucket

Strawberries

Strawberries are my favorite part of summer, so when the coordinator of the Farmer’s Market I frequent offered me an entire flat of starts for free because they weren’t top stock I was elated. Since we don’t have the vegetable garden set up yet, I had to figure out another spot for my personal berry patch.

I’d seen tiered planters on Pinterest and knew I could rig something similar that would work using a large metal tub I already had. The hubs found me a freebie metal bucket to create the second level and it fit perfectly.

I didn’t take pictures of the process since it was so simple. He drilled a few drainage holes in the bottom of the bucket and I just placed it on top of the soil in the larger tub, filled it with dirt and planted my new berry babies. Easy peasy, berry squeezey.