Updates to the Chicken Coop

Today I’m sharing a few quick updates I did in the chicken yard recently.  Last summer the cluckers kept creating holes along the wood of their run to take their dirt baths.  I’d seen the idea of creating a dirt bath spot with a tire and figured we’d give it a shot.  I pulled a small tire from the top of the rain garden wall since I plan to revamp that next season anyway and added it underneath their hen house.  I filled it with sand so it’s easy for them to flick up on their wings.  I haven’t seen anyone using it yet, but it’s obviously gotten traffic based on the foot prints and feathers so I guess it’s a hit.

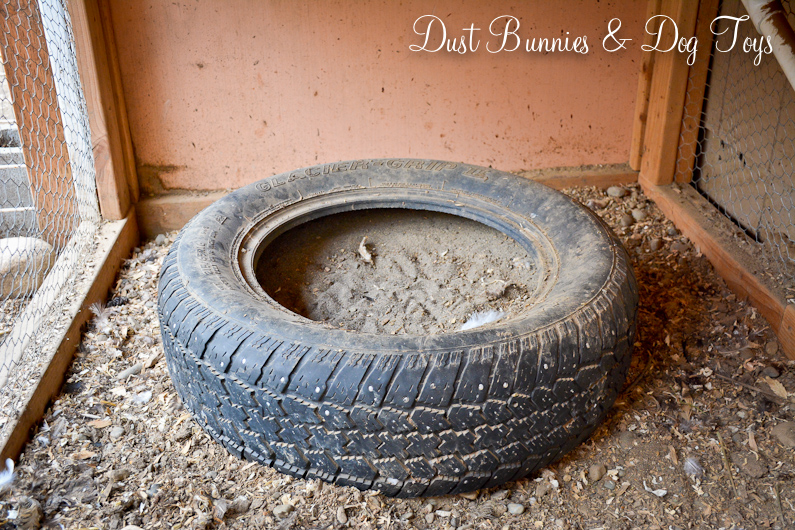
I kind of wish I’d painted the outside of the tire so it looks a little nicer, but perhaps I’ll pull it out when I get to painting the rest of the coop later this season, then refill it.  I’ve still got more sand to spread inside the coop run so I can use the sand already in it to get that started.

The second project was finishing a small paver area in front of the coop door.  This area gets super muddy during the spring due to the run off from the roof and the dirt splashes up onto the door and other wood.  I figured pavers would reduce some of that and luckily I had a stack of pavers left over from another project just sitting around.

The pavers didn’t fit the space exactly, so I just filled the gap with rocks from around the chicken yard that needed to be gathered anyway.  It seems to be working well to provide a bit of drainage when it rains and it’s easy to sweep off or scrape when mud gets tracked across the pavers and gathers.

I’ve also tilled the run a couple of times this season trying to improve the drainage but we’ve discovered that the dirt under the coop is mixed with large chunks of wood and rocks from when the builder cleared the lot to build.  Eventually we may have to dig the whole area out a couple of feet down and replace it all with a mix of fresh top soil and sand, but that’s a project for another summer.

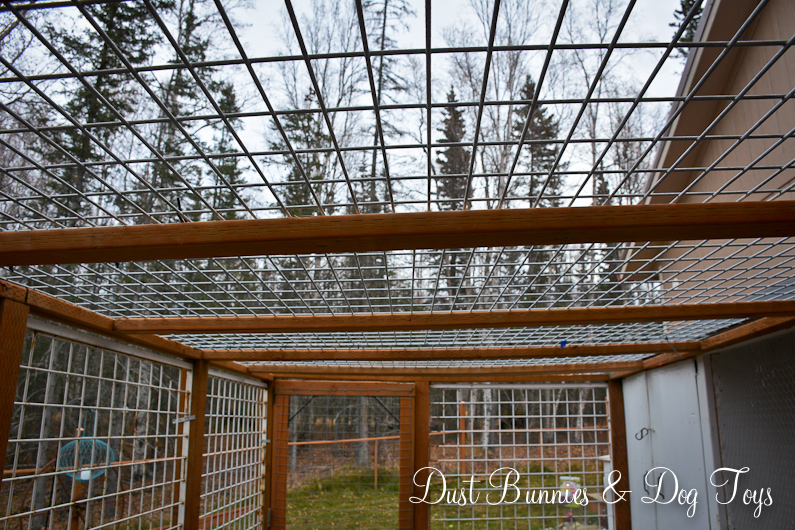
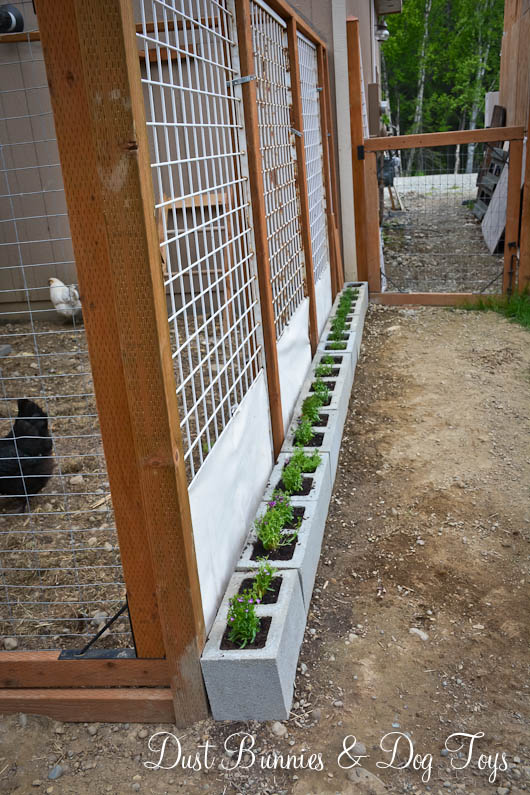
I’ve considered adding growing frames in their yard where I could plant grass under chicken wire for them, but since we shovel the run in the winter I’m thinking they would be more of a hassle than they are worth during the growing season.  I have a large metal pallet that I may add to the yard against the wall with small potted plants they could enjoy pecking instead.  I imagine I could rotate the pots higher when they need a break from constant pecking to regrow.  I may get that project going this season if I find pots and hooks to hold them on sale, but if not we’ll try it next season with seeds I save from this year’s crops.

Hopefully the weather and schedules will be more cooperative this fall so I can pressure wash the whole coop and get a fresh coat of paint on it in a single day.  Then it will be ready for another winter of snow and ice.  Luckily the cluckers aren’t too concerned with how their space looks so long as there’s plenty of things to peck at. 😉

New Dresser for the Guest Room

Although I’d recently picked up an antique sewing table for a nightstand in the guest room it just wasn’t working there for me, so I continued the hunt for a small dresser.  I spotted this sweet little piece on the local buy/sell page and jumped on it quickly.  It came with a large mirror that sat on top.  It was pretty but not the look I was curating in this space, so I sold the mirror and kept the dresser.

It’s got lots of pretty little details, from the key hole trim to unique handles on the drawers and it’s solid wood so it’s super sturdy.

It’s the perfect size for the spot and the height works well as a nightstand while providing a bit of space for guests to unpack and stash things away if they need.

I plan to eventually refinish it similar to the other nightstand which was originally a sewing table, but it’s not a high priority right now since that’s something that can be done indoors during the cold winter months when we don’t have outdoor projects.

Although I like the current layout of the room because it gives guests room to come in and access the closet, I’m considering swapping the dresser with the smaller nightstand on the other side so the larger dresser is in the corner.  I might give it a try after our guests leave and live with it for a bit to see how I feel about it.

I also have a plan for something new above the bed but have to change up another area of the house to pull the materials and I’m not quite ready to do that yet, so it will remain blank for now.  Our guests don’t seem to mind as they are more interested in the Alaskan scenery and wildlife than what their room looks like anyway! 🙂

Revamping the Deck

One of the biggest projects we tackled during May and June was updating our deck with a new Trex top.  The pressure treated boards the builder had used to top our deck were already starting to look very worn and since we are building a second new deck on the other end of the house this summer we wanted them both to match.  The Hubs researched quite a few materials and decided on Trex both for the ability to be shipped to Alaska in the quantities we needed and it’s reviews.

He started at the outside of the deck, removing the old boards and replacing them with the new Trex, section by section.  It was slow going getting the 20′ boards up and making sure all the nails and screws were out so the Trex had a flat surface to attach to.

The dogs were quite intrigued by this process and kept coming outside to check on the progress.  That is until we got to the last section next to the house, which made using the doggy door a bit more difficult than usual.

Tequila wasn’t sure what to do when she realized there wasn’t a solid surface outside the door other than the single board we had to pry out from the trim.  She kept looking out the door and considering the options.

Eventually she decided to give it a try and gingerly worked her way out onto the ledge before jumping between the deck joists and scurrying under the deck frame to get to the yard.

The Trex boards have the special little fasteners that also act as spacers to keep the deck uniform and allow for a gap for water to drain out.  They slide into a little groove on the side of the boards and are then screwed into place on the joists.

Here’s a look at the spacer/fastener from the side so you can see the little track they slide into.

We ran into a bit of a snafu when he got closer to the house and realized the frame of the deck wasn’t square, so the boards weren’t lining up on either side of the deck.  Rather than re-do the whole deck we opted to work with the frame as is lining up one side and trimming the boards that hung over too much on the other end to match the others.  It worked out pretty good and I doubt anyone will ever even notice the difference unless they are really looking for it.  Here’s the finished deck before I added all the potted plants and other yard decor.  It looks so great and is a perfect extension of the colors of our floors inside.

The darker color provides a nice backdrop for the new deck rugs I got this season!  I’ve got a matching one for the new deck which is under construction right now.  I plan to paint the sides of the frame white for contrast once the other deck is done so I can do them at the same time.

I have a plan to reuse some of the old deck boards for another project and the Hubs may use some for a bit of the framing on the new deck so they won’t be going to waste. I’ll share those projects once they are completed. The vision we had for the yard when we moved in 4 years ago is starting to become more and more a reality and I couldn’t be more excited to get it all done and enjoy it!

Growing Strawberries Vertically with Strawberry Straws

Yesterday I shared the progress our crops have made in the green house during it’s debut season.  You may have spotted a unique strawberry planter in the background of several of those shots.  Today, I’m giving you a closer look at how those went together and are performing.

We started with a simple 4″ black pipe that the Hubs added a cap fitting to one end and drilled holes in on one side.  He then fastened them in the two corners of the green house where we don’t have the hydroponic shelves using simple clamp bands.

Here’s how they looked after they were put together and installed in the green house.  He kept the bands loose enough that I could still pull the tube back out to plant it, which sure made planting them much easier!

I love that they don’t take up any floor space in the green house.  Their placement on the wall in the corners make great use of an awkward space that wouldn’t work for other crops.  And it keeps the berries from sitting on soil where they could spoil as they ripen.

Once they were planted I realized I needed a way to water each hole of the planter without washing away the dirt each time.  I’d seen several versions of these planters on Pinterest where they placed a second smaller pipe with drain holes along it’s entire length inside the large tube so water would seep out along the path of gravity.  I’ve tried this system before with other set-ups and not had great luck so I decided not to go that route.  Instead the Hubs helped me create what I dubbed ‘strawberry straws’ – simple PVC pieces tucked into each hole near the roots of the plant.

They were super noticeable at first when the plants were small, but as they’ve grown the white ‘straws’ start to blend in with the flowers on the plants themselves.  And as you can see they are working great!

We’ve now got two of these vertical planters in the corners filled with strawberries and are starting to see blooms which give way to the developing fruit.  Hopefully we’ll have an edible crop to enjoy very soon!

And if they produce a decent harvest this year I may have the Hubs figure out how we can fit two tubes into each corner next season!  I’ll let you know when we get the opportunity to enjoy the fruits of our labor. 🙂

Save

Save

Save

A Green House Update

I’ll be sharing updates on the projects that have been going on while we were offline for the next several weeks.  So let’s jump right in with an update in the green house!  Temps were staying above freezing by mid-May so I went ahead and planted everything I could but kept it all in the green house as a safeguard against overnight frost.

During that time I tested out a DIY hack for heating the green house I got from a local gardening club – a crock pot of water!  It not only provided a bit of heat inside the structure it helped increase the humidity for the plants once I got things started.  It worked really well so I plan to do the same thing again next year, although we also picked up a small heater for next season at a garage sale recently.  I also ran a humidifier in the green house for several weeks to help the plants get off to a strong start.  That’s another little DIY I plan to do again next season.

Here’s how things looked at the end of May.  My much planned layout was working well – getting the food crops started and providing a bit of room for my flower pots to wait out the slow to arrive summer weather, including hanging baskets I put together myself with geraniums and lobelia.  I snagged the baskets at Lowes for just $5 each and they came with the coconut liner, so even with the cost of the plants and dirt they were a far better deal than the crazy expensive ones the stores and nurseries put together – most of which have color or flower combos I’m not keen on anyway.

The freebie metal bed frames I scored last season fit perfectly behind the tubs to serve as a trellis for the peas and green beans.  Since I could only get a couple of the plants along the back side of the tub I put a couple along the front as well and the Hubs cut me a couple extra pieces of heavy gauge fencing from some scrap we had sitting around to create a mini trellis for the other side.

I didn’t  realize just how much I had packed into this space until I started moving the flowers out to the deck and yard and suddenly had a lot more room – that is until the food crops really got going!  The Hubs installed a water barrel in the corner for easy watering and started putting together a hydroponic system for the tomatoes but got sidelined with our trip, so we’re just now finishing that project up.  I’ll share the details of that set-up soon.

Although not everything made it through the transplant and adjustment period, a good majority did and things are growing well now.  Here’s how things are looking now!

Not bad for our first season with the green house and learning the ropes.  We’ve already enjoyed peas and lettuce from our efforts several times and look forward to plenty more before the summer is over.  Tomorrow I’ll share a closeup look at the vertical space-saving strawberry planters we’re using and the DIY solution we came up with to water them, so be sure to check back.

Save

Getting Back on Track & Putting Old Glory Back Together

It’s been quiet here on the blog for several weeks because life decided to jump the rails and train wreck my schedule.  A HUGE project at work went sideways the first week of May, requiring me to help out in another department plus do my regular tasks to coordinate several events, including our largest customer event of the year. The Hubs and I have been working on several projects around the house and then we were out of town to visit family over the Memorial Day weekend, which required a bit of prep and catch up afterwards.

In the mix of all that I had a full line-up of photography clients and then attended a photography workshop the first week of June, which gave me a whole new set of goals to work on as well. We also lost a close family friend and a family member to cancer over the Memorial Day weekend, which shifted our perspective to enjoying the days we are given rather than the to-do list.

July is set to be full of opportunities for just that, with my sister and brother-in-law visiting for the 4th, us visiting with the Hub’s cousins in Kenai mid-month, the Palmer Garden Art Faire and a vintage market on the calendar. We are also planning a trip to Iceland and possibly Scotland to tie in with our trip to D.C. for my nephew’s wedding this fall!

1As we celebrate Independence Day, I thought it was a perfect time to share this quick little project I did with a rustic flag decor piece.  I’ve had this metal flag wind chime for years and the original metal fasteners had worn out causing the stripes to fall off the main support rod.

3Since the pieces themselves were still in good shape, I knew I could put it back together fairly easily.  I originally planned to use twine for a rustic look, but the holes were too small, so I pulled out some thin gauge metal cording from my crafting cart and replaced all of the joints.  It only took a few minutes to re-do all the connecting points and the hardest part was not poking myself with the end of the wire.

2And here she is, all updated and ready for several more years on display.  I don’t currently  have a spot for her so she may end up in the sale pile, but I’m sure someone else would appreciate her rusty glory as much as I do.

I hope you all had a safe and happy holiday.  We spent the day watching our fellow Alaskans launch cars of a cliff in Glacier View with my sister and brother-in-law in tow on the first day of their Alaskan vacation.  It was a great way to celebrate our independence and create unique memories that will last a lifetime. 🙂

Save

Save

A Revamped Freebie Planter

Anyone else amazed that it’s already May?  We’re just flying through this year, but at least it’s almost time to start planting and getting our yard ready for the summer season.  Here in Alaska the temps are still pretty chilly overnight so I don’t dare plant anything outside just yet, but that doesn’t mean I have to sit around and wait.  I’ve been cleaning up the flower beds, looking for signs  of life from my perennials and getting my plan for where things will go together.  That plan includes a few new pieces like this freebie planter I got from someone I bought another item from.  They were moving out of state and were purging items so she said just take all the pots and planters on the porch too!  I was all too happy to help!

The other pots in the freebie group didn’t really suit my style so I grouped them with other pots I no longer needed and traded them on the buy/sell page as part of a deal for another item I’ll share on the blog soon.  But I had a plan for this little gem.  While the bright orange was cheerful it needed a new coat of paint and I knew it would have a classic farmhouse style if I painted it ORB.  So the first sunny day I had time I drug her out in to the driveway and sprayed away.  Here’s how she looked after!

Luckily I’d been hoarding saving a large planter liner for quite some time and it was a perfect fit!  Since I already had the spray paint and liner the only cost I had for this project was the plants I’ll be putting in it!

Now she’s all ready for summer in the front flower bed.  I’ve got two Bacopa set aside just for her.  She also hides the cord that comes out of the garage wall in this corner – which will all but disappear once the plants start to grow and trail over her edges.   One planter down, and a few more to go before the weather cooperates and it’s time to plant! 🙂

Shared on Savvy Southern Style’s Wow Us Wednesdays and Knick of Time’s Talk of the Town.

Save

Getting the Green House Ready

As I promised last week I’m sharing a little update on the progress we’ve made in getting the green house ready for the season.  But before we get to the progress, let’s take a look at how things looked when we started.  Since the Hubs finished the structure as fall arrived last year we used the space for storage of all my pots and planters, along with some of the patio furniture and accessories.  We’ll call it organized chaos.

Luna decided to join me in the greenhouse as I started clearing it out.  She seemed to appreciate the warm cozy temps inside and made herself quite comfortable.

While Luna took in the warmth I harvested the dried blooms from the lavender I’d stashed away in the fall.  It was a decent little harvest, which I used to give the chicken’s nesting boxes a bit of freshness.

After that I made Luna move off the table so I could drag it out to the deck.  When I returned she had found a new favorite spot in one of the planter boxes.  I let her be as I sorted and dug out everything else to make room for the new set-up.

We purchased large plastic totes to serve as our planters in the greenhouse.  I filled the bottoms of each with plastic containers from our recycle bin – plus a few from the coffee shop at work – to help fill some of the space to reduce the amount of soil I had to use and provide space at the bottom of the containers where moisture could settle and then be wicked back up.  There are no drainage holes in the bottoms of the totes as that would become quite messy on the floor of the green house so I’ll have to water carefully.

And here’s where things are now.  We’ve got four totes down each side which sit on plant dollies so they can be moved easily, allowing me to work on the plants from all sides – a feature that might come in handy during harvest.  On the left side I brought in the two rusty bed frames I’d used as trellises in the wheel bed last season.  They worked well for the peas in the wheel bed, but this time one will be for green beans and the other will support cucumbers.  The tote in the back corner will be for dill and the one in the front corner will be for peppers.  The Hubs plans to secure them to the wall just to be on the safe side.  This side of the green house will also get vertical strawberry planters in each corner to maximize the space.

The right side has a shelf where the Hubs will be setting up a hyponic system for the buckets you see there.  Those will hold 4 varieties of tomatoes and a squash.  Below them will be yellow and red onions, asparagus and peas, which will get a smaller DIY trellis to climb.

In the back I added a large galvanized trash can under the window to hold extra dirt and the Hubs installed a wire shelf above it to serve as a potting bench.  That way when I’m preparing pots for the deck and porch if I spill it can fall right back into the dirt bin.  Plus the way he installed it I can lift it up against the window if I want it out of the way for any reason.  The ledge created by the wall framing was the perfect spot to store all my garden decor over the winter.  Once the yard finishes thawing out I’ll be moving those items out to their ‘summer homes’ and that space can hold any extra pots awaiting occupants.  My hand tools will be kept in the small tub you see on the shelf, which will be filled with sand to keep everything sharp – an idea I found on Pinterest of course.

It’s still getting pretty cold overnight so I haven’t put any plants out in the green house just yet, but I have purchased the first round of veggies and a couple of flowers which are pretty happy in the laundry room sink and on the kitchen counter for now.  I’ll be going to the big annual season kick-off sale at my favorite nursery this weekend to buy the rest of my stock and will test out a DIY trick I learned on the local garden club page to heat the green house up a bit at night to make sure it’s ready for planting.

I’ve also got a few things planned for just outside the green house, including moving the gutters I used last year for strawberries and potato towers, but I’ll share those once we get things set up a bit more.  It’s going to be a lot of work but if it all goes well we’ll have a great crop of fresh food because of it!  I’m so excited to see what works and what we can improve for next year.  If you have ideas, tips or suggestions on what might be an improvement please share them below and I’ll try to test them out this year.

Shared on Savvy Southern Style’s Wow Us Wednesdays and Knick of Time’s Talk of the Town.

Big Plans for the Coop!

Hi there!  It’s been a busy couple of weeks around the DBDT household.  I had to travel around the state last week for my day job and have been playing catch up ever since.  Luckily the weather is finally turning warmer and the snow is melting, so the Hubs and I have been working on cleaning out the greenhouse and getting it set up for it’s first season!  I’ll share an update on that project soon.  The other big project on my radar at the moment is the chicken coop.

The Hubs added the roof to the chicken yard in the fall, which was a great improvement over the thin netting we had originally.  The new metal paneling has held up well over the winter.   Because it’s open panels allow the snow to fall through we had to shovel out their yard a couple of times during the snowy season and now that things are melting it’s getting pretty soggy in there.  Unfortunately there’s not much drainage in this spot so I’m planning to till up the ground and add in some gravel or sand to help with that for future seasons.

Last summer I added the cinder blocks along the edge of the yard as planters.  The canvas curtains I made to keep the cluckers from demolishing the plants didn’t work as well as I hoped, so I’ve tossed them and will be getting some clear acrylic panels that can slide into the space between the blocks and the metal fence panels.

That will keep the sight lines open for both the chickens and the dogs, but they can be easily removed when I want to give the cluckers access to the greens I’ll be growing in the blocks for them.  I gave up on having flowers here and late last season planted grass seed in the blocks along the side of the yard instead.  I’ll plant lavender and mint along the front blocks since those are more protected by the hen house wall.  Hopefully those aromas will help keep things smelling fresh on this side of the yard and provide herbs to freshen their bedding too.

I’d like to make some kind of hanging pocket planters for each of the posts down the side of the yard where I could have some trailing flowers.  The cluckers won’t be able to get to the plants that high up and it would help make things a little prettier.  I’m also thinking about making some kind of hanging planter for the wall at the back of the run since it’s a big open space there.

Of course the big to-do with the chicken yard is installing a gravel walkway from the deck steps to the coop and then over to the gate on the side of the house.  I’ve got lawn edging that we picked up last year that should be enough to do this distance, but I’ll have to wait for the ground to dry out so we can get the wheelbarrows of gravel back here.

Another functional improvement is to level out the area in front of the run’s door and add pavers in that corner to help with the mud that develops there.  Luckily I have pavers I picked up last season to get that project started as soon as the ground allows.

I also plan to do a few simple updates like adding a tire under the hen house with sand for the cluckers to use for dirt baths.  That should keep them from making holes in their yard for that purpose.  I’ll add a few stumps in the yard and some branches across the back corner for them to roost on and have a spot to get up a bit higher and see the surrounding area.  I’d like to dress up the storage cabinet and side of the hen house a bit with some trim to give it a more finished farmhouse style look and am considering adding metal to the cabinet roof so it matches the run and helps the cabinet last a bit longer.  And if I get time to get really fancy this might be the season I get a sign made for the coop!

I considered adding a compost area in the yard so the ladies can help break down the materials, but I can’t seem to find a plan that works in the space we have so I’m currently planning to have a compost tumbler behind the green house instead so it’s convenient to dump kitchen scraps the chickens won’t eat and their coop bedding.

I’m hoping to start some of these tasks this weekend if the weather continues to cooperate so stay tuned for an update post!

DIY Product Packaging

As a small business owner, I’m always looking for ways to give my customers a great end product without added expense to my bottom line.  I know many other small business owners have a similar need so I thought I’d share update I recently made to my packaging.

I’ve always provided my photography customers with digital images rather than prints.  When I first started out the media of choice was CDs, so I found a free template online and altered it to fit my needs so I could print covers for the jewel cases I put the CDs in.  My customers really liked this packaging and it was fairly low cost for me, especially when I shopped sales or used coupons for the CDs and cases since I could print the cover on my home printer.

Soon CD’s gave way to USBs as the preferred media.  I would have loved to order custom USBs with my logo on them, but that would have required me to raise my rates to cover the huge expense.  Since I like to work with DIY clients who need an affordable photography option that didn’t fit my business model.  So instead, I came up with a simple option using materials I already had on hand – a bulk lot of kraft favor bags and Thank You stickers.

Using items I already had meant this new option was free for me (except the cost of the USB), but I knew my stash of materials would eventually run out and I wanted to have my brand represented like I did with the CD covers.  So I picked up some circular labels and designed a “Thank You” message with my logo that I can still print at home.

My customers who have received the new packaging have all really liked it.  The pack of labels only cost me $10 and will provide about 100 labels so with the kraft bags I bought in bulk, it only cost me about $0.25/packaging.

I originally purchased the bulk lot of kraft bags in three patterns a few years ago on one of the daily bargain sites I follow.  I’ve used some for other projects before this so my inventory is limited but should still last a while.  In the meantime, I’m on the hunt for another bulk offer so I can replenish my inventory.

I’m pretty proud of the end result as it shows off my new branding and keeps cost down so I can continue to offer the rates my customers need.  I’d love to hear what you think of my low-cost DIY packaging option, so leave me a comment below!