Our New Deck Seating!

Patio3Our back deck is finally starting to look how I envisioned it before we began construction and I couldn’t be happier!  I had originally planned for the hubs to build a sectional for this space, but when I found a super duper sale at Pier 1 on their Echo Beach collection I decided to save him a project.  And because the final price with my coupon brought the total to less than what the materials would cost to build it I saved a few pennies too!

Patio2The purchase also earned me $70 in rewards points, which I used to buy the umbrella stand you see off to the right (thrifted umbrella coming soon once the hubs fixes a damaged arm) and a few décor pieces.

All the pillows I’d been hoarding collecting now have a home and coordinate fairly well with the rug, which I picked up on the local buy/sell page for $10 at the end of last summer. Because the tones of blue and green on each are a bit different, I am likely going to make some no-sew covers similar to these – perhaps with black stripes, a number and “Relax” or “Home” for some variety. The tan and black would be more cohesive and tie in to the umbrella which is also a dark tan.

The spool is a temporary coffee table until I decide what I want there.  I’m considering either a round table made with a galvanized tub and a wooden top for storage of candles and other little items when not in use or an industrial pallet cart style table.  It might depend on which supplies I can find locally first.

Patio1We’d like to add another two-cushion piece along the wall, but I’m holding out in the hopes that they will have an even bigger sale on outdoor furniture just before fall. Eventually this set will move to the deck we plan to install off the Master Bedroom (hopefully next year) and we’ll put a big farmhouse dining table under a pergola here. I’m fairly confident that we’ll do the same arrangement when that happens, but having the ability to move the pieces into different configurations gives us flexibility to see what works best. Until then, I’ll be enjoying them here every chance I get!

The Gravel Patio

GravelClose

Once the fire pit went in the next step was installing a gravel patio around it.  The hubs added small side-walls on our big flatbed trailer to pick up a load of pea gravel, which only cost around $80 since we didn’t need delivery.  It took him most of the day to dump and spread it, but it was totally worth the effort.

GravelCombined with the new garden, our Adirondack chairs and one of my pretty little garden stools it’s starting to look like the backyard I’ve been envisioning all along!

Our DIY Fire Pit

FirePitFinished2

One of the projects I really wanted to tackle this summer was a fire pit. Luckily, the hubs was totally on board.  We started with the freebie washing machine tub I scored last year, which we set on two cinder blocks to keep the heat off the ground.

FirePit

We stacked landscape stones around the tub, off setting the seams.  But after the second row we ran into a little problem, the ridge at the back of each stone required the next row to be a smidg bigger.  After a quick Pinterest search we learned that others using the same stones removed the ridge when building their fire pit, so we chose to do the same.
FirePit2Layers

The hubs attacked them with his fancy power tools, but it wasn’t working as well as we hoped.  I suggested going old-school and use a hammer.FirePitGrind

This time old-school worked better, so we stuck with it row by tedious and muscle building row.  Eventually we upgraded to a larger hammer which was a bit more efficient, although still time consuming.FirePitHammerFirePitHalf

Apparently all the noise we were making didn’t bother the dogs who napped on the deck nearby.  It truly is a rough life they live…
FirePitNapA puppy nap and several more rows of stones and we were almost done.  That’s when we ran out of stones.  Go figure.

FirePit90The hubs picked up some more stones the next day so we could finish off the top row, where we left the little ridge in case it’s helpful for a future table top I want to build to cover the pit when it’s not in use.

FirePitFinishedTopIt’s taller than most fire pits but it feels more impressive and should be safer for when we have little ones around.  The top row sits just above the top edge of the metal tub so the fire stays contained and the smoke rises a bit, keeping it out of our eyes when sitting around it.  We’re pretty pleased with how it turned out.

FirePitFinishedWe only got to test it out once before Alaska’s burn ban took effect.  Hopefully, the conditions will improve soon and we can enjoy it again before the summer is over because next time I’m planning to create some backyard s’mores!

FirepitFire

A Little Update Out Front

FrontFullView

Now that summer is here it was time to get the front porch and flower beds in order.  I started with the porch, which just needed a little cleanup and a few accessories.  A citronella candle and a cute little cast iron frog I’ve had for years were a great fit for the milkcan table by the rocker.

FrontPorchTable

As one of very few shady spots in the yard, the porch was the perfect place for some inpatients.  I used an old ceramic crock that fit in the small spot next to the front door.

FrontPorchImpatients

Since the crock didn’t have any drainage I placed a small disposable pot inside before adding soil.

FrontImpatientPotFill

I did something similar in the large whiskey barrel planters just off the porch.  The hubs drilled a couple drainage holes in both, but I wanted to reduce how much soil it would take to to fill them so I filled the bottoms with plastic containers from our recycle bin.

FrontWhiskeyBarrelFill

FrontWhiskeyBarrelFill2
You’d never know all of that is in there looking at them all planted.

FrontWhiskeyBarrelFinished And they do a great job of attracting butterflies!

FrontButterflyI filled two metal buckets on the steps with dusty miller and lobelia for a little contrast.

FrontBucketI did the same combination for planters in front of the garage, which were used on the porch last season.

FrontSmallPotFinishedI searched for several weeks to find a third green planter to match the ones we already had but could only find a larger version which I placed between the two garage doors.

FrontBigPotFinished

Since it was so large I placed an empty bucket in the bottom to conserve soil once again.

FrontBigPotFill

I also added some pieces of sponge in the top layer of soil to help the plants retain moisture between waterings.

FrontBigPotSpongesI just tucked them down in the soil as I planted.

FrontBigPotSponges2

The perennials in the front beds were the slowest to return this year and I’m convinced that the landscape fabric we used was the reason, so I tore it all out.  While doing so, I found a couple of plants  that did get trapped under the fabric as they started to grow so hopefully now that they’ve been freed they will come in properly.

FrontFlowerbedSmallAnd to finish it all off I added a few patriotic pieces like this garden flag and fun door hanging.

FrontFlagPot
FrontDoorBanner

There’s still a bit I’d like to do out here, but for now it’s ready for summer!

The Finished Egg Table

EggFinished

Remember the custom Green Egg table I had built for the hubs for Christmas?  Well it’s finally sealed and in use!  Hubby decided not to stain it and just do a couple coats of Thompsons water seal.  I think it turned out great. Here it is with the egg inserted.

EggFilled

The cabinet and drawer provide great storage.  The drawer holds a wholes bag of charcoal with room to spare, which apparently Luna thinks is for her.
EggCharcoal

The cabinet has enough room to hold a stool, propane bottle and the oil-less fryer I snagged for him at a charity auction.

EggCabinet

We may still add some hooks on the side to hang the tongs and other utensils but for now it’s ready to grill all summer!EggDONE

TDC Before and After

A Garden Update

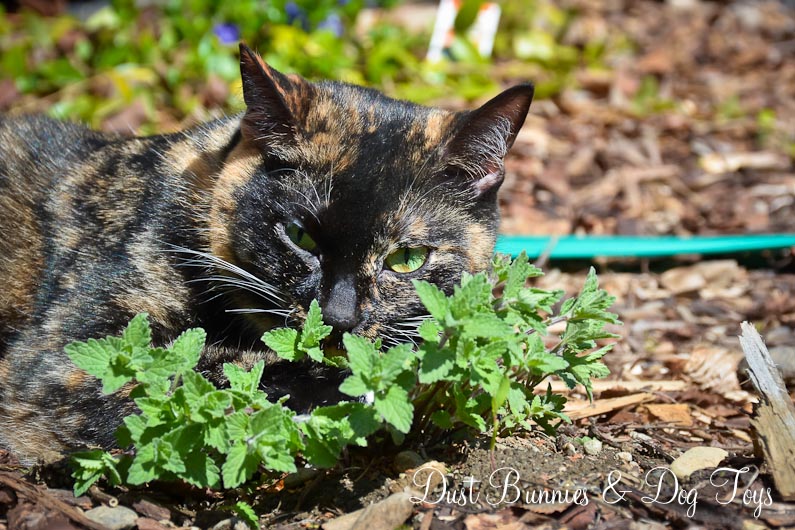
I’ve been planning to share a little update on my Gifted Garden and Rain Garden for a week or so now, but by the time I edited the photos I took to share things had changed some more.  So before that can happen again, let’s get to it.  First up is the Rain Garden, which looked pretty dismal for weeks even when the warmer temps arrived.  Then one day I was driving up the driveway and noticed a good amount of green had suddenly appeared.  Upon closer inspection I saw that 90% of what I’d planted last season is coming back in, which makes me pretty darn happy.  And now that the cat mint has returned Luna is quite happy as well!

GardenCatmint2

I mean like seriously happy.  As in she won’t leave the poor plant alone!  She’s in love with the darn thing!

GardenCatmint

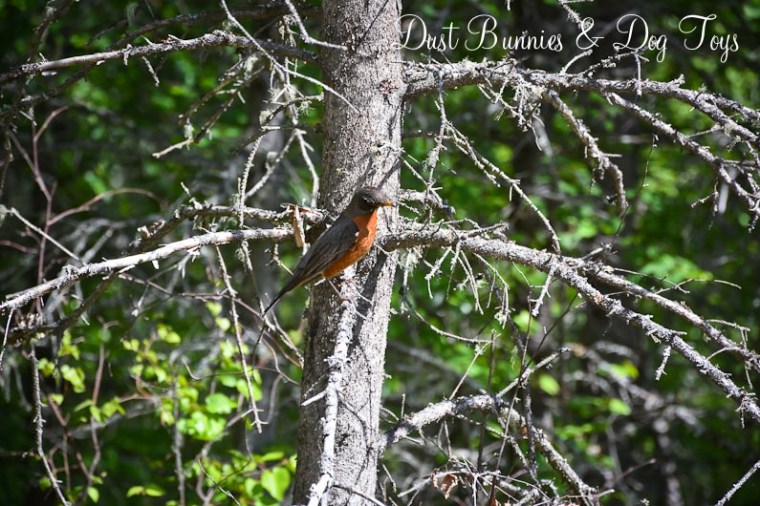
Even a robin on the branch above the garden can’t tear her attention away for more than a glance through the leaves!

GardenRobin

GardenCatmint3

But I digress…. Elsewhere in the garden, the iris that I rid my friend’s lawn of are growing tall and strong.  I haven’t seen any buds yet, but they didn’t have any last year either since they spent most of the season sitting in clumps in a pot waiting for a permanent home.  I’m excited to find out what color they will be.  I’m betting it’s purple like the wild iris around Alaska, but I’d be happy with any color if they just bloom.

GardenIris

Three of the freebie Craigslist lilacs are showing small signs of life with some new leaves, although two are still just bare twigs.  I’ll let them be until the end of the summer before I give up on them.  They have a mystery neighbor that popped up.  I’m thinking it’s yellow yarrow, since the leaves look very similar to the other yellow yarrow I have a few feet away, but we’ll see what it grows up to be when the small yellow bud at it’s top develops.

GardenLilacs

GardenYarrow

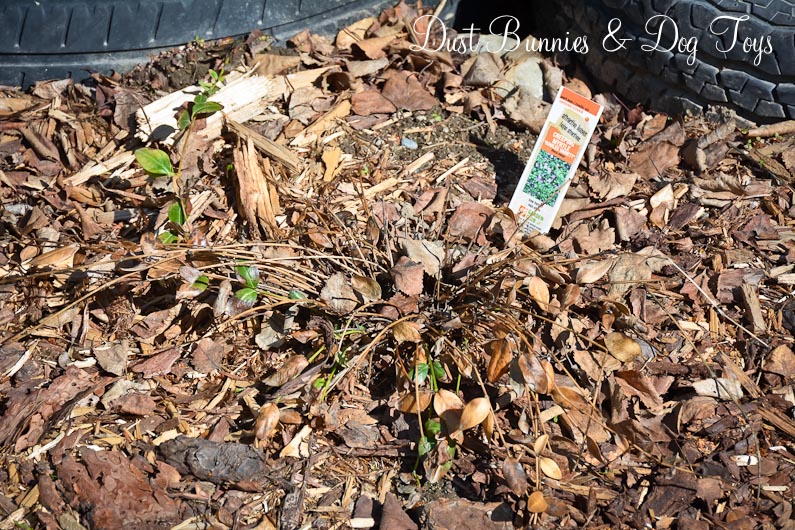
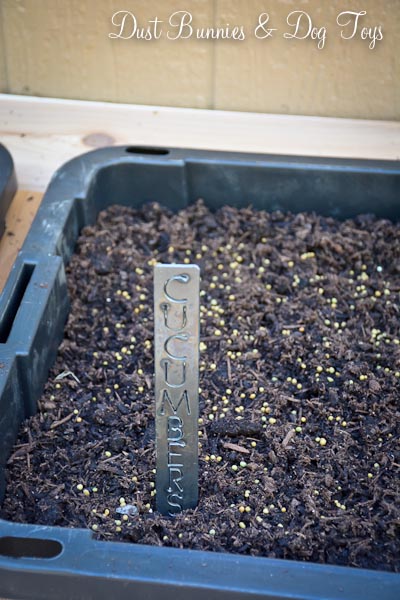
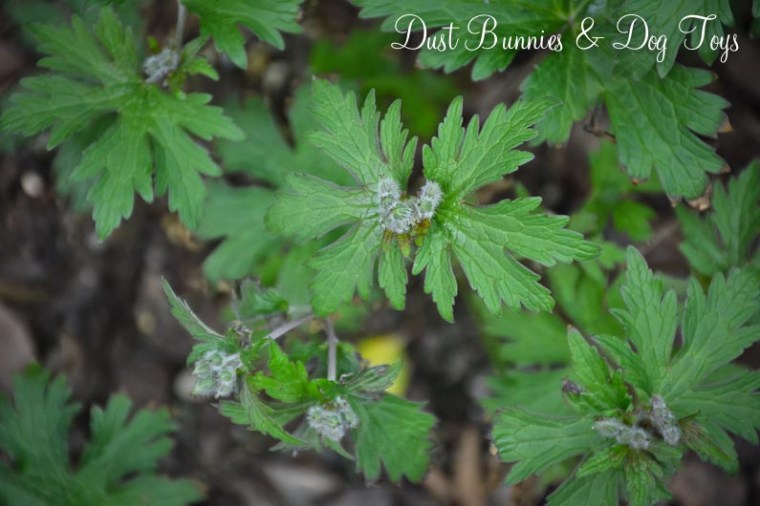
Another mystery arrival is this grouping of spouts.  It’s in the area where I had mint last year and the leaves look about right for that, so I’m guessing that’s what it is.  For now I’m going to leave it alone and see what we get.

GardenMystery

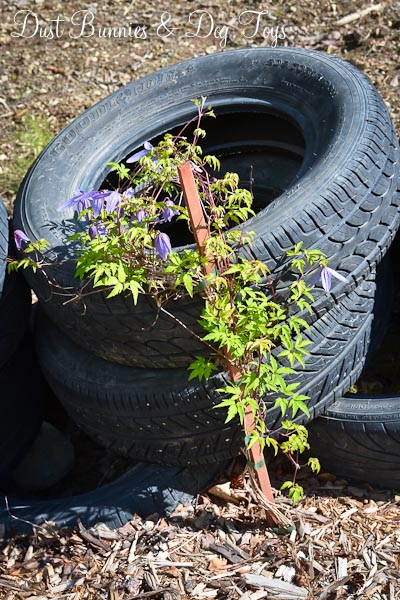
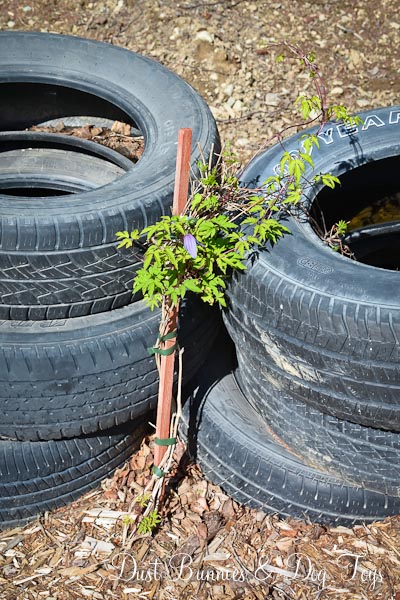
The clematis on either side of the garden are showing momentum after looking dead for months and are even touting a few blooms.  One is certainly bigger than the other, but hopefully they will both take over the tires and provide a lovely natural background for the garden over the next few years.

GardenClemantis

GardenClemantis2

One of the vincas from the box store came back and is even flowering already.  The other didn’t fair so well.  At first I thought the green was new growth, but it’s been the same for a while now so I’m classifying it as a gonner.  I haven’t decided what to replace it with yet, so for now it can hold the space.

GardenVinca

GardenVinca2

The water iris are slower growing than the other iris, but hopefully they’ll provide some pretty yellow blooms this season.

GardenWaterIris

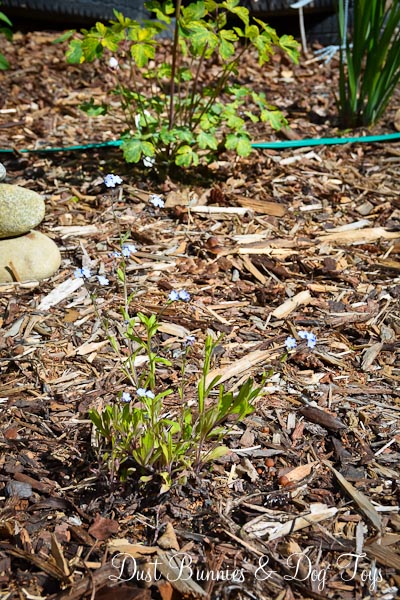
The speedwell in the back of the garden has some dense growth, so I’m thinking it won’t spread much this season.  The Aluetian speedwell I put around the front of the garden has some pretty delicate purple flowers, but is a slow grower. I planned for it to be a ground cover on the hillside leading to the garden but if it doesn’t pick up the pace by mid season I’ll be looking for something else for next season.

GardenSpeedwell

GardenSpeedwell2

The ornamental onion, yellow lily and campanula are all showing good starts.  I’m thinking they will hit their stride when the warm weather returns next week and start to really fill out.

GardenOnion

GardenLily

GardenCampanula

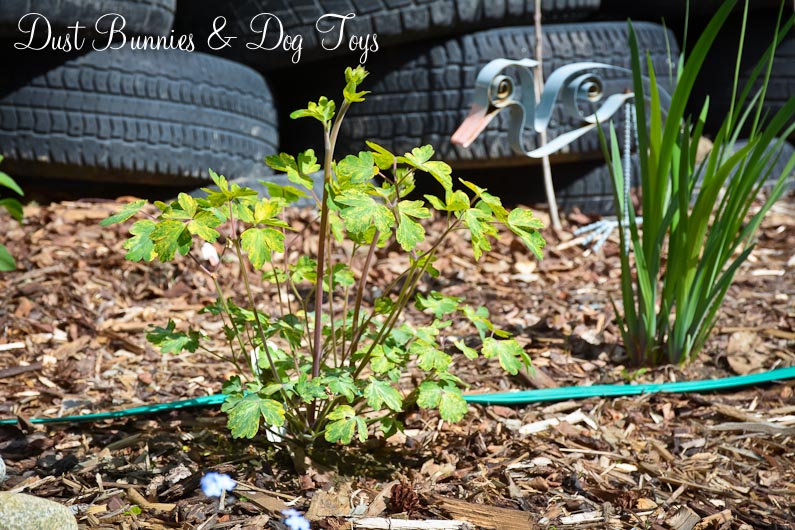
The columbine has a good amount of growth but no signs of flowers yet.  I don’t remember if this one is yellow or purple, but either would be nice.

GardenColumbine

In front of the columbine is a forget-me-knot, that I ironically forgot about.  I think this one came from some seeds I got at one of the holiday weekend giveaways at the box store and let sprout in the little cup they came home in before planting just to give it a shot.  Maybe it will continue to surprise me and spread a bit to come back next season even more.

GardenForgets

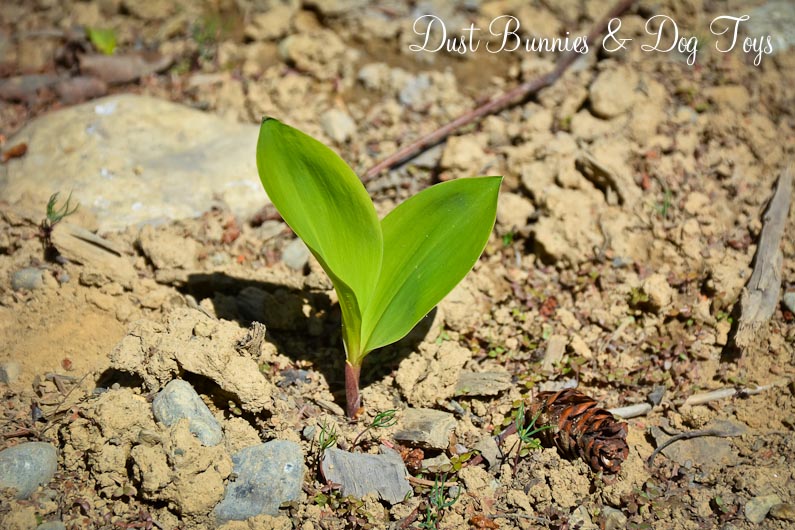
The thing I’m most excited about in this garden is the lady slipper orchid that I acquired on our trip up the Alcan last year.  It seemed to go dormant soon after I got it home, although it had been on the road for several days at that point so I thought it wouldn’t come back.  I’m so glad it proved me wrong and surprised me!

GardenOrchid

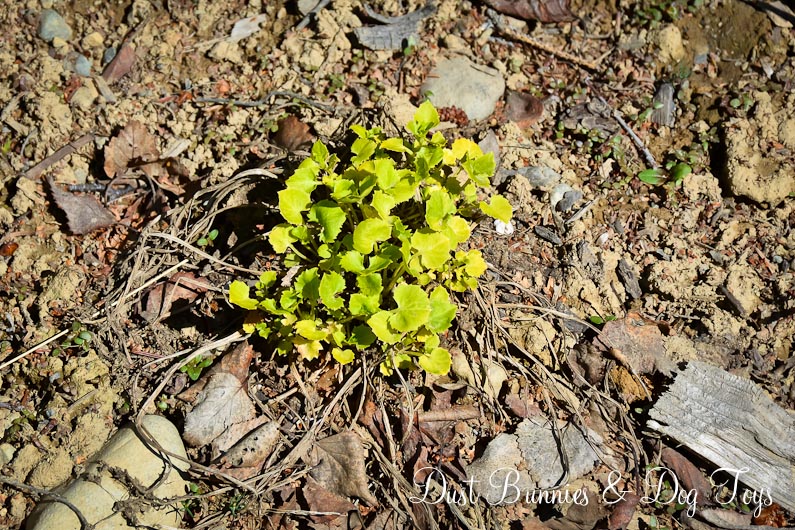
I remember planting things on the hillside above the rain garden, but for the life of me can’t remember what they were.  Some were bought and others were freebies, but I wrote them all off when the builder’s contractor came to do our final grade and bulldozed them even AFTER we’d told him not to go in this area… sigh.  But they’ve poked back up without any water or feed from me so I’m thinking they are my kind of plant. Feel free to leave ideas in the comments below if you think you know what they are! 🙂

GardenHillside

GardenHillside2

Ok Luna, are you ready to leave your cat mint and head over to the other garden?  I’ll take that as a no.  Well, you know where to find me….

GardenCatmint4

Over in the gifted garden there are small signs of life.  In the corner near the back door I replaced something that didn’t come back with a hydrangea and finished off the far corner that never got any plants last year with a lilac.  Both are from local nurseries so I’m pretty confident that they will establish and come back year after year.  This is the first hydrangea I’ve ever had so I’m excited to watch it grow, especially after seeing 5 buds on it the other day!  The lilac had a bud on it when I bought it – hence the reason I picked this one over the others – so we should get some color out of it this year.GardenView

GardenHydrengea

GardenLilac

GardenLilacBud

When I went to plant the lilac I found something strange just under the surface.

GardenBallClose

You guessed it.  That’s one of the dogs’ balls!  Apparently someone decided to bury it here for safekeeping at some point!  Kids….jeesh!

GardenBall

Although some of what I was gifted didn’t return, what has is showing good  signs that it will stick around for the long haul.  GardenYellow

GardenYellowClose

GardenGrowth

GardenEnglishDaisy

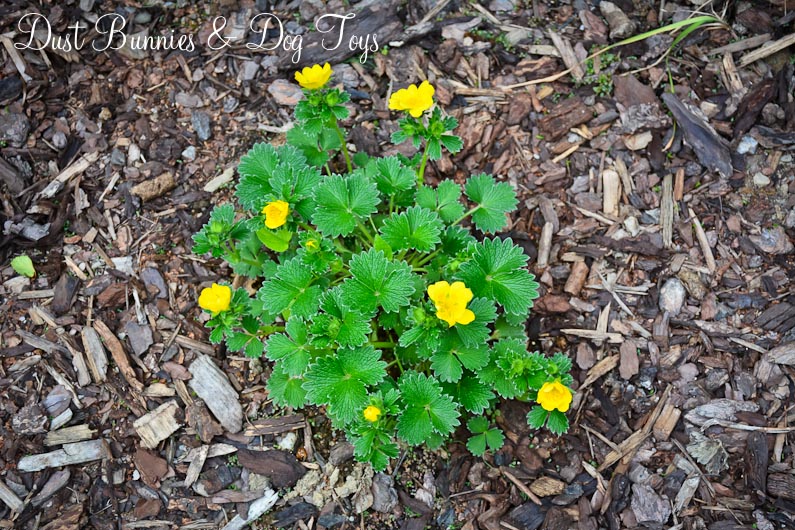
The wild geranium is doing the best out of all the returning gifted plants, and is covered in tiny buds!  Although it’s native cousins in the surrounding woods already have sporadic blooms, it looks like the special attention this one gets will result in multiple blooms!

GardenGeranium

GardenGeraniumClose

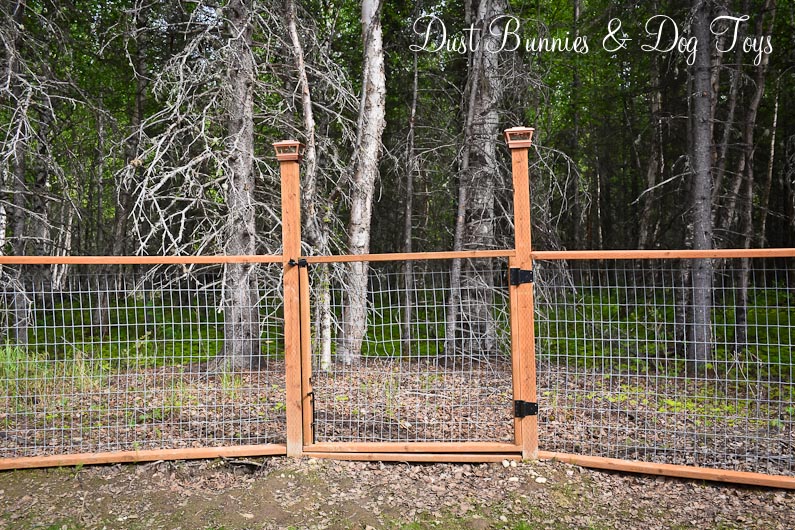
Now if I can just keep the momma moose and her yearling calf who have been frequenting the easement near the back yard away from my unfenced sprouts I stand a chance of having a pretty yard this summer!  For something so big they sure do blend in well!  Luckily, the dogs tend to keep them at a distance, but that’s only so efficient for things outside the fence.  Wish me luck!
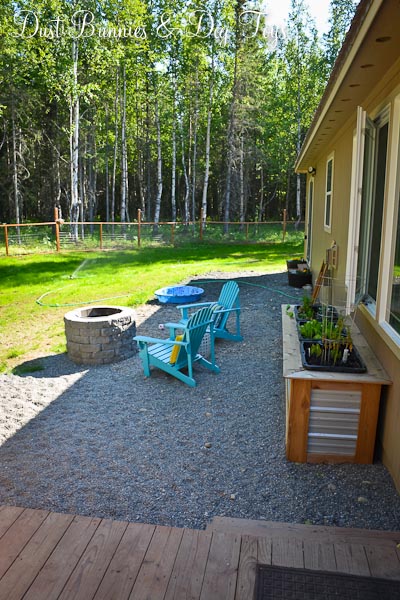
GardenMoose


Copper Topped Posts

When we installed the fence last year we debated cutting the extra length on the posts down, but ultimately decided to leave them so I had a spot to hang bird feeders and other cutesy garden stuff.  It worked out pretty well, but I was never really keen on how the posts looked even with the decorative hooks.  It just felt unfinished.

LunaWait

Although I wasn’t 100% happy with the look it wasn’t a high priority, so I ignored it – until recently when I spotted these copper fence post caps.  I’d considered them last season, but when I researched them online they were much too pricey.  For some reason our local store had them for $4.95/each, so I snagged a few to test out.  I was pretty pleased with the result.

PostCap

And installation was so simple.  You just set the cap on top of the post.  They recommend you use adhesive to permanently attach it, but I’m holding off on that until I decide if I want to leave them up all year or take them down for the winter so they don’t oxidize and patina as quickly.  (Notice the peanut feeder is half empty?  I moved it over a few posts to help the squirrels find it and now that they have, they are emptying it almost daily!)

The local store also had coordinating solar post cap lights, which I thought would look nice on either side of the back gate.  Although they were quite a bit more expensive than the basic caps, I think they were worth it and the hubs agreed.

PostLightsGate

PostLight

They are definitely more decorative than functional as far as light output, but here in the land of midnight sun, that’s not really an issue during the seasons we’d be out using the gate anyway.  The hubs picked up enough caps and lights to finish the rest of the posts during a second trip to a different store, where the caps were on sale for $3.95/each!  Pretty and on sale.  Can’t beat that!

Our New Garden!

I spent most of the recent long weekend gardening, starting with planting a patch of raspberry bushes given to me by a co-worker who is rearranging her yard.  They look a little scraggly after being transplanted, but I’m hoping they bounce back quickly and possibly even bear fruit this season. The one in the front there has several branches so I left them secured with the paper bag we used for transport to give it a chance to establish new roots before supporting the weight of hanging branches.  I’ll keep you posted on their progress throughout the summer.

1Raspberries

While I was planting raspberries, the hubs was building my long anticipated garden box!  I decided on a design with removable tubs so when we have a greenhouse I can start planting earlier inside and then move the tubs out when spring arrives.  It will also let me extend the growing season into the fall by moving tubs indoors as the weather cools.  The hubs designed this fancy subframe to support the weight of the tubs and then added the base on the bottom so that it would be waist high as I requested.  There was a bit of miscommunication on the final design plan because we had discussed several options and the inspiration I showed him was only a foot tall, but he was still able to make my vision a reality. 🙂

Planter1Frame

Once the frame was done we moved it into the back yard and finished it off with metal side panels and cedar trim.  It went together pretty quickly, thanks to the hubs’ detailed plan.  I helped by holding pieces in place until he got each section secured and showing my approval with a very wide grin as I watched it all come together.

Planter2Panel

Here’s how it looked once the sides and trim were installed.  I would have done a happy dance if I hadn’t been so tired, but the hubs knew I was super happy with the results.

PlanterBuilt

Next came the removable tubs, which rest on the cedar lip and are supported by the subframe below.  I love the look of the metal next to the wood.  It totally works for my modern farmhouse style.  Clean and simple, yet rustic at the same time.

PlanterBuiltTubs

PlanterBuiltTubsSide

Now it was time for planting!  I wanted to use a water reservoir system to encourage the plants to root deep and seek out water, so I added smaller tubs with holes on the sides to the bottom of each tub, and then had the hubs drill a hole for a PVC watering pipe.  Now when I water it will leech out into the surrounding soil and water the plants from within.  The idea is that this will require less frequent watering, which is perfect for my busy schedule.  And if it doesn’t work, it’s not permanent so I can just take it out next year.

PlanterBuiltTubsTop

PlanterBuiltTubsTopPipe

We filled around the tubs with soil and I got to planting.  This year we’re having herbs, lettuce, possibly spinach, cucumbers, peppers and tomatoes.  I already had the tomato and herbs on hand, but was waiting to purchase the others until the garden was ready for them.  I’ll pick those up over the weekend.  The pepper will go next to the tomato plant and the center tub will hold the lettuce and cucumbers.

PlanterPlanted

I selected a variety of herbs including cilantro, chives, parsley, oregano, dill and mint.  The cilantro will come in handy for summer salsa recipes and I’m excited to start using dill in ranch and other mixes.  We use dried parsley and oregano fairly often so it should be fun to experiment using it fresh. We don’t often use mint or chive, but this will give us the opportunity to experiment with them and I believe both deter pests, so that’s an added benefit.

PlanterPlantedHerbs

To finish things off, I dug out the fancy metal garden signs I’d bought over the winter to mark what’s what.  They tie in the metal siding of the box and look totally cool!  I wish I had one for herbs, but it’s ok.  I do have signs for peas, carrots, onions, potatoes and pumpkin, so those are the other likely possibilities I’d try first.

PlanterPlantedMarkerTomatoes

PlanterPlantedMarkerPeppers

PlanterPlantedMarkerLettuce

PlanterPlantedMarkerCukesAnd since the garden is located just off the deck and right outside the back door it’s more convenient to snip a few things for cooking, which was the plan all along!  This spot gets full sun from morning until early afternoon, so it should also be pretty productive.

PlanterPlantedFrontI’ll try to do an update later in the season when things have grown in and are producing!  Until then, feel free to share any gardening tips you think might help that day come sooner! 🙂

The Grand Backyard Plan

Spring in Alaska is fickle.  It’s been warmer than usual which has me thinking about planting, and then we had snow again yesterday!  Apparently I’ll have to give it a bit more time, but I’m bound and determined that we are going to get the back yard set up this summer! Last year, we were still getting settled and the priority was getting the fence in so the dogs would have room to run. We did get the yard hydroseeded late last summer, although I’m not sure how well it will come back this year after the dogs have been abusing it all winter. Hopefully the additional seed we put down last week will help get things going this season.

In the meantime I’m fine tuning my vision for the entire space. It’s gone through a few revisions, as I talk things through with the hubs and watch exposure, but I think I’ve created a plan to get the basics established this summer so we can build on them each year.

First up is the deck, which I cleaned last weekend to get the juices flowing. We pretty much ignored this space all winter while we focused on indoor projects, so I cleared the space and gave it a good sweeping. I dug out the outdoor rug I bought on the buy/sell page at the end of last summer for $10 and placed the Adirondack chairs and garden stools to create a seating area. I added the lovely lanterns on the hooks and a couple of throw pillows for a little style. It still needs a good pressure wash, but it’s a nice place to sit for a few minutes for now.  Here’s a quick before and after.

DeckBefore

DeckAfter

The plan starts with building a sectional seating unit like this with storage underneath where the cushions can be kept during the winter. I’m envisioning an L-shape along the wall and out from the corner made of a few pieces which could be rearranged for other set ups. I might also do a few ottoman pieces like this to store the propane bottles for the heater and fryer. A table like this would provide a spot to stash little things like candles and bug spray when not in use, but I might just leave the space open since I could also store such things inside the L shape during the season.

The hub’s green egg table will occupy the corner of the deck where the egg currently sits with our new oil-less fryer next to it. I’m excited to finally see the table all finished, set up and ready to use.

DeckLabels

The displaced Adirondack chairs will move to the firepit area that will be created along the edge of a pea gravel patio next to the deck. The pit itself will be created by stacking landscape stones around the freebie washing machine bin we snagged during construction. I love the idea of creating a cover that would make it also function as a table, especially with a little game board for fun!

Behind that, underneath the family room windows we’ll install a raised garden bed made of cinderblock like this, but with removable tubs like this which can one day be transferred to and from the greenhouse I’ll have one day as the seasons shift. I’d like to try a hanging strawberry planter like this, so that might hang from the eave between the windows or over top of the raised bed or maybe I’ll try something like this on the back of the shed.

The massive hot tub we scored on Craigslist has yet to be used because it’s just so huge and costly to run, so we’re passing it on to the family cabin down on the Kenai, where it should be much more utilized and appreciated during fishing season.  We’ve got our eye on a few 2-person tubs and might invest in that later this year or next season.

AlcoveLabels

I’ve realized this alcove along the side of the house where I originally planned to do a full garden just doesn’t get enough sun to be productive, so instead we’ll put the chicken coop here. I’d like something similar to this which should have a small footprint next to the house. Locating them just off the deck will make taking care of the chickens easier and the house should provide extra radiant heat during the winter to keep them cozy.

Beyond the coop I’m considering installing a potting bench with a simple design like this. I’m not convinced that I’ll use it enough to warrant the construction, so I might hold off on this idea until next year when I see how much need there really is. My other idea for the space is to build a smoke house – which I’m sure would get lots of use or a small tool shed to house things like rakes, shovels, etc. so they don’t take up space in the garage or the hub’s storage shed. If we go that route I could always add the potting bench or smoke house along the back wall of the garage, where I could see it from the laundry room.

tentAlthough we bought a canvas gazebo canopy on the buy/sell page last year, I decided it wasn’t the right fit for the deck so we resold it. Eventually I want to add a pergola to the deck with some sort of shade cloth, but that might be a few years down the road still. In the interim I plan to create a simple shade like this by attaching poles to the sides of the deck with a few simple brackets. We may have to install an eye bolt on the back of the house to complete the set-up but it should be much easier to take down quickly if there are winds in the forecast.

And no deck is complete without some sort of pest deterrent, especially in Alaska. Ours will come from the wine bottle tiki torches we had in Kodiak, but this time around rather than hang from a railing or post they will sit in holders like this around the perimeter of the deck. The poles for the bottles can be attached just like the shade poles mentioned above and I plan to fill the bottles half full with pebbles so they don’t require as much tiki fuel.

WheelLabels

Finally, I’ll add some landscape around deck in the form of flower beds filled with perennials similar to the ones out front and along the far side of the house.   I also plan to add a clematis in front of the big wheel the hubs found me, which is now tied to the fence near the deck. I may disguise the low area around it with a bit of a retaining wall to create a small bed in front of the wheel as well. We’ll see how far I get this year.

If I get all of this accomplished by fall and still have some decent weather to work with I may attempt to create a walkway like this from the patio to the back gate.  So that’s the master plan.  Watch for posts as we attempt each portion!

Lantern Love

Can someone please tell me where the heck the week went? We spent a good deal of it dealing with a broken dishwasher, a security breach at our insurance company and damage to one of our couch cushions – all of which required calling various customer service centers, most of whom were not very helpful. I was actually so frustrated with the process I started writing a post about the experience, but felt that it was turning into a rant. Since I’d rather focus on more productive things I decided to share a fun little update I did on our back deck instead.

Spring in Alaska is very different than the rest of the country. There aren’t any flowers blooming here yet, but our occasional days of warmer temps and sunshine have me shifting attention to our outdoor spaces. Last year we installed two hooks on either side of the window on the back of the house for hanging planters. This year, I plan to create sectional seating under that area and worried that hanging baskets would be a ‘head hazard’ for anyone sitting or getting up. Since I didn’t want to take the hooks down, or deal with the holes that would create, I decided to hang lanterns on them instead.

I spotted these at Target during a recent visit and picked up two to try out for just $13 each. I really liked the style and size, but worried that the open top might collect water which could become a mosquito breeding ground if I didn’t take it down when not in use.

Lantern3

The width did fit my new Luminara candles but I wasn’t crazy about how the height worked out. You couldn’t see the flame, which is kinda the point.

Lantern4

Luckily I had a plan B. I also found these at Pier 1 and because I had a reward coupon and a gift card left over from Christmas (thanks sis!) I got them for FREE! I’ve always liked this style and have looked at similar designs many times before. Granted the top isn’t fully covered, but it should reduce the amount of water that might collect if I do leave them up.

Lantern1

Since these are taller than the first option they fit the Luminara candles much better. They also seemed a little sturdier than the first option too.

Lantern2

And who doesn’t love FREE?! I plan to clean the deck and start getting things set up this weekend, so watch for a post about that soon, followed by one on my plans for the yard this season. Until then I hope you get outside and enjoy some spring sunshine! 🙂