Full Speed Ahead!

Sorry for falling off the face of the blogsphere after my last post.  Things around here have been SUPER busy.  There are a million things going on at work, I had five photography clients on Sunday with several more scheduled this week and there are lots of projects in progress around the house.

The hubs has been working hard on the fence for the dogs and the back yard was just hydroseeded so we’ll have a lawn inside the fence. In preparation for winter, we purchased an old plow truck which needs some fixing and arranged for the mechanic neighbor to bring it back to life. We also started installing a closet kit for the guest room that we picked up for a third of the retail cost on a local buy/sell page.

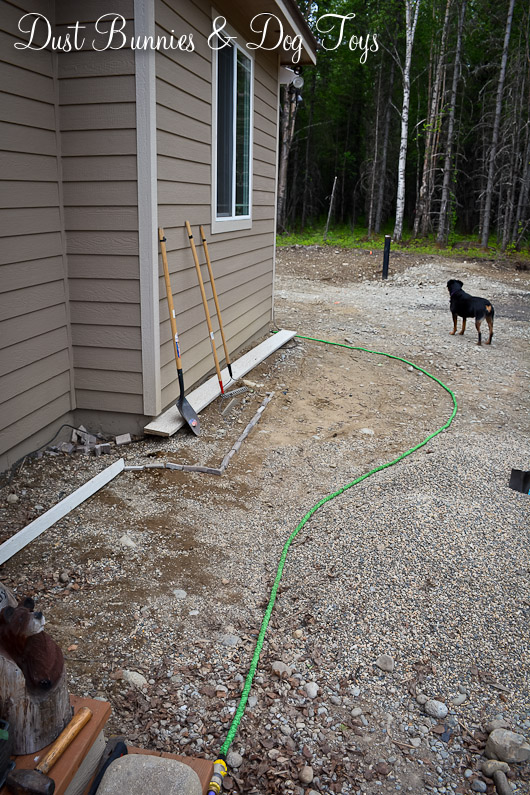
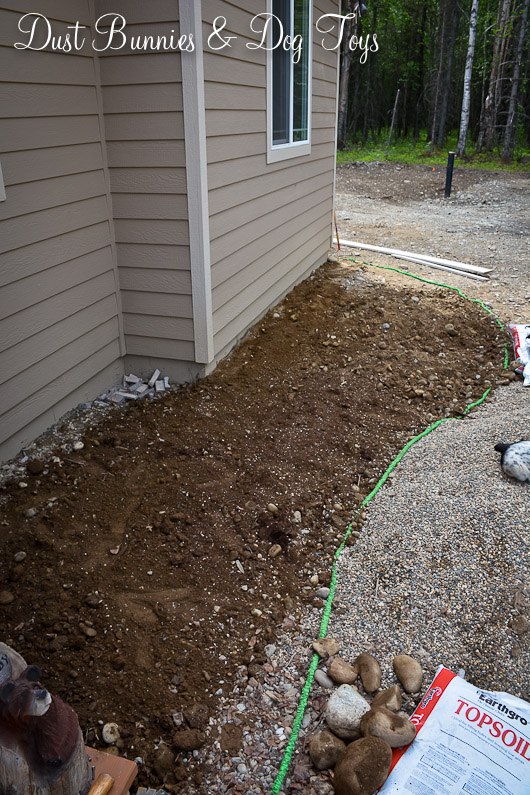
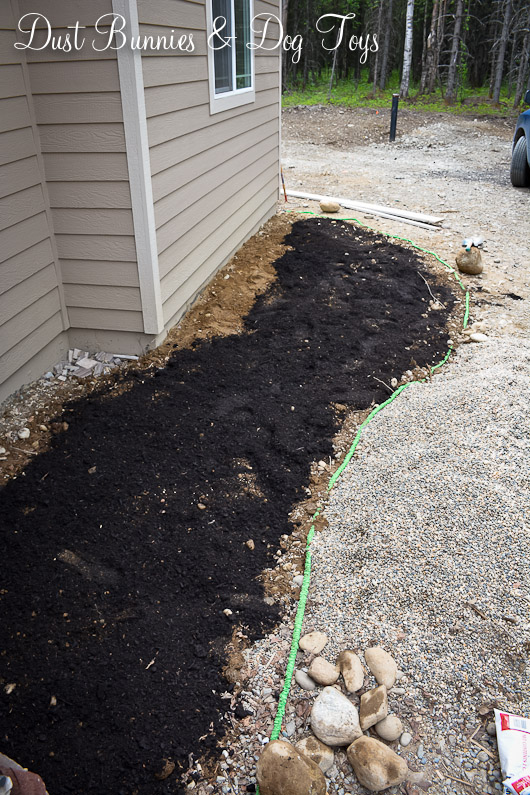
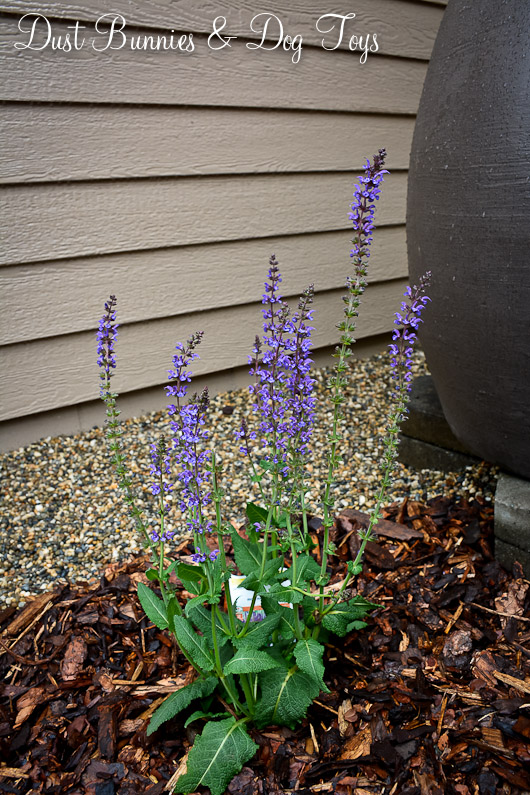
I’ve been trying to wrap up the rain garden installation and get the yard planted so things take root before fall. And we’re sorting all the heirloom china and glassware we brought back on our recent trip. I’m also painting and staining for a couple décor projects that have been on my to-do list for some time. I’ll be sharing pictures of it all soon.

It’s nice to see progress after feeling frustrated recently. It’s definitely gotten me inspired again, even though I have minimal time to make the ideas in my head reality these days. Such is life, right?

The fun part is getting that twinge of pride mixed with happiness when I subconsciously notice those projects that we’ve completed and turned out to be a perfect fit for the space. I have a feeling that there will be many more of those moments in the months to come!

Curbing the Urge to Rush

When we moved into the our new home I told myself that I’d take my time decorating, so that the end product was a natural evolution of us creating a home and learning how we use the space. But recently I’ve been struggling with that process.

We’ve been in the house about 8 months now and I thought we’d have a lot more done than we do. Part of the problem is my over-estimating how much I can get done in a day, or two, or even a week with a full-time job, a photography business, an Etsy shop, managing this blog and a little down time with my hubby and fur babies every now and then. Another obstacle is my hubby’s swing shift that contradicts my day-job schedule, making working on projects together quite difficult. And there are some projects that just take two sets of hands.

I think part of my frustration is that I dreamed about the details of our house for years before it became a reality, so when I can’t use a space how I planned because we haven’t done that project yet, I get irritated. It was a blessing and a curse that I had most of the spaces decorated and organized in my head way before they were even digging footers! Now that we’re actually in, it’s a constant balance between time, budget and energy to make all those plans come to life.

But there is a silver lining to the wait. It’s caused me to tweak some of my plans to better suit our needs, budget and the space. And it’s allowed me to incorporate things I forgot to plan for, like my hope chest and the hubby’s grandfather clock. Plus it’s eliminated a lot of ‘extra’ shopping for things I ended up not needing.

So my lessons in patience continue. It’s definitely not an easy course for me, but it’s what the Lord knows I need. And it will make the finished product that much more rewarding. 🙂

My New Crafty Corner

CraftCab

I’m super excited to share my new craft cart with you!  Although I ordered it back in March with free shipping, the company insisted that offer didn’t apply to Alaska, so we had it shipped to my mother-in-law’s house in Washington, where it sat until we visited a few weeks ago.  It then made the long haul up the AlCan with my classic truck and took shape after several hours of assembly by the hubs.  But it was sooooooo worth it!

I’m still filling some of the drawers, but most are packed with my craft supplies.  I’ve been able to fit everything in this one cabinet, sans fabric – which will soon be organized and stored in a rarely used space, so watch for a post on that too.  The top two drawers have movable dividers which make organizing super easy.

CraftDrawer2

I scored some favor tins at the craft store with a coupon sale to organize the little things like beads and buttons.  The clear tops make it easy to find exactly what I’m looking for and I still have a few empty containers to grow into!

CraftDrawer

I hung my cutting board on the side with a few hooks, so it’s easy to pull out and trim things quickly.  I plan to add a roll of craft paper above the cutting board for gift wrapping and easy cover for messy projects.

CraftCabCutter

On the other side I put a hook for my craft bag, which holds my current craft project.  It’s the best way I’ve found to craft on the go. 🙂

CraftCabWide

I hung a few display boards above the cabinet and set my mannequin bust on one corner with a wire basket to hold prepped inventory.  The little ceramic pot acts as my trash can and a couple metal tubs hold recent projects that are awaiting prepping for their Etsy closeup.  A fellow crafter is making me an adorable owl tool holder, which I’ll be sure to show off when it’s ready.

Eventually, I’ll add some shelves above the display boards to hold some of my other display pieces and finished inventory, but for now it’s just great to have a dedicated space for creating.  Not having to first find the materials needed, then haul them out and set them all up, to craft for a few minutes and then have to gather it all back up to go back into storage again is HEAVEN!  I can be working on something and realize I need another material or tool, roll out a drawer, grab it and keep on crafting.  That alone inspires me to work on projects.

Even better is that we added wheels on the bottom so it can move!  I can pull it out into the middle of the room so I can work on a project from all sides or invite friends over for a craft session.  But the real reason for the wheels is so I can pull it out into the living room and watch TV with the hubs while crafting!  I did just that when I was organizing everything into it and it was perfect.  Now I just need the stool I want to go on sale, so I have a seat at the ready to serve as a crafting post or a photo prop!

Light It Up

A few weeks ago I shared some do’s and don’ts of flag etiquette, which included keeping the flag lit if you choose not to take it down at dusk.  Here in Alaska, that’s not a problem during the summer since the sun never truly goes down.  However come winter, we will have the opposite – more hours of dark than light.  And the darkness will descend long before we make it home to remove the flag each day.  So rather than not fly the flag all winter, the hubs rigged this fancy light for the flag.

FlagLight

It’s powered by a solar panel, which should still get enough sunlight each day to power the LED light through the darkness, even in the winter.  Installation was pretty simple.  He just picked the best location, attached it to the wall with a few screws and angled the light.  Since he picked it out and installed it without me, I don’t know much of the details beyond that.  I don’t even know where he got it or how much it cost.  I’m just pleased to have a light at the ready that didn’t require extensive landscaping to install and isn’t a monstrously obvious contraption!

FlagLight2

Hanging the Hose

For some unknown reason our builder decided to install our front hose spigot in the middle of the space between our garage and front porch, under a window. I’m guessing the plumber chose that spot because it was an easy location to run the pipe to. Unfortunately, it didn’t quite jive with my landscaping plans, which had a flowerbed going in from the porch to the garage and back to the window.

Life would have been much simpler if he’d just put it next to the front porch where I’d envisioned it, but if you know me you know simple rarely happens in my life. So rather than traipse through my flower bed every time I want to turn on the water, and then have a hose trapped amongst plants, I altered my plan and put in a divided flowerbed with a walkway to the spigot.

Hose3

But that made the hose the center of attention, so it has to look good. Problem was that I didn’t want to attach anything to the house unless absolutely necessary since we had brand new siding. About the time we were installing the flowerbeds I found this fabulous idea on one of my favorite blogs and knew it would work for our hose.   I like the idea of the metal post holder, but I didn’t think it would work well without support around it like she had, so I opted to do it the old fashioned way with the post in the ground.  The hubs cut down a 4×4 and we dug a hole with the post-hole digger next to the spigot.  We just backfilled the hole around the pole and then screwed on a pretty metal bracket so there was a spot to coil and hang the hose.

Hose2

Since I have a fancy watering wand I just lean that against the pole, which allows it to drain if I don’t get everything out before coiling the hose. This is the first time I’ve used an expandable hose, but I love it because it’s light weight and easy to move. Plus it hangs on the bracket very easily without a lot of weight.

Hose

So that’s it: a pole in a hole, a bracket, some screws and a hose.


A Little Update Up Top

Although I love the decor I chose for the small section of our kitchen cabinet tops, I wasn’t super crazy about how things were looking on the long portion.  I’d tried a few options and had a plan to update a large tin I purchased, but something still wasn’t just right.  It just seemed a little to sparse compared to the other side, so I knew I wanted to add something.  Maybe a few somethings.

Luckily, while I was in Portland I found several somethings on my pilgrimage to Home Goods and a visit to a large Goodwill.  The new haul included a basket tray, a tall distressed white ceramic container, a fake plant and a green glass jar.  All together, I probably spent around $30 for all four, which brings the current total spent to around $40.  Still within my bargainista budget.

I added a cream ceramic pitcher I already had and the former cache pot – watch for an update on that project soon.  I played around with the items, trying things in different spots and finally settled on this line up.

CabTops

Apparently Luna approves!  In fact, I’m surprised she didn’t knock over the basket so she could lay in IT!  I’m still getting used to the new look, but I’m pretty happy with how it pulls in the colors and textures from around the kitchen and family room.  The fact that the pitcher is a different color than the other ceramic pieces kinda makes me twitchy, but it works for now. 🙂

My Garden Stool Addiction

My name is Jenna and I’m a garden stool addict. Our trip to Portland produced three new garden stools, which now brings me to a total of five. It all started with an online purchase of the first when I needed a table for the chair and ottoman in our family room. Then I picked up a metal stool last summer at the nursery and used that as a side table for the chairs on the balcony of the rental house.

I purchased the third in Portland last fall, but couldn’t bring it home on the plane so we left it there with the ’55 knowing we would be back to get it in the coming months. I plan to use it with the chairs going next to the fire pit.

Stool3

In the meantime, I’d started using the blue metal stool in our master bathroom shower as a spot to prop my foot when shaving my legs. It fulfilled a need, but the blue wasn’t working with the rest of the room’s decor, so I was planning to paint it gold like the accent in our mosaic tile. I purchased spray paint several weeks ago, but hadn’t gotten around to completing that project before leaving on our trip.

So when I spotted a white Moroccan garden stool that I loved at Home Goods during my pilgrimage there I convinced myself that it would coordinate with the white trim in the room and would make an excellent replacement. It was a bit pricey at $80, but I reasoned that if I decided it didn’t work in the shower I could use it elsewhere and go back to my previous stool.

Stool

A few days later we hit Marshalls to use a gift card and I found this. The color was a perfect fit for the bathroom and the pattern would work with the decor as well. And at $39.99 it would only cost me $15 after my gift card! I believe there was a heavenly hymn playing on the overhead speakers. I snapped that baby up and claimed her as mine.

Stool

Then I spotted a wooden stool nearby and debated which would work better in the shower. So I did what I always do, I grabbed both and found the hubs to let him help me decide.

That wonderful man didn’t bat an eye when I walked up to him with not one, but two more stools and asked which he liked better. Oh how I adore that man! A short discussion later the decision was made and the wooden stool left behind as we proceeded to the checkout.

So now I have a diverse collection of stools. But in my defense, they are all useful and #5 is perfect for the shower! So I guess this is one addiction I’ll maintain. 🙂

Shower

And here we go…

Sorry for “going dark” recently, but we’ve been traveling the AlCan to Portland and back to visit family and bring home my prized 1955 F-100 pick-up. I’ll be posting about the trip soon, but for now I’ll get you caught up on a few projects I didn’t have time to share before our trip.

The biggest was the installation of our first landscaping, two flowerbeds out front! After waiting weeks for the builder to grade our lot without resolution, the plants that had been sitting on my porch in anticipation were in desperate need of a permanent home. So we purchased top soil, mulch and weed fabric and set to work.

Flowerbed1

I marked out the shape I wanted with the hose as a guide. Then the hubs helped me till and level the area.

Flowerbed2

We added a layer of top soil on top of the tilled ground in the area where we planned to plant.

Flowerbed3

Next, we put down the weed fabric and used some large metal staples that came home in a bucket the hubs found for me as pins.

FlowerbedPin

Then we put a section of pea gravel on top of the fabric along the house so when the rain water runs off the roof it doesn’t pool in the bed. Luckily, the hubs was able to get a free supply of gravel that worked out to be just the right amount for this project!

Flowerbed4

We also placed large rocks from around the yard along the border.

FlowerbedPrepped

After that, I laid out the plants to decide exactly where I wanted everything. It took a little rearranging to get everything just right, but it was fun trying out different groupings.

FlowerbedFlowers

Once I was happy with the layout, I cut holes in the weed fabric to plant each. The hubs filled in mulch around each plant as I moved on to the next plant.

FlowerbedFinished

We also did a small bed between the porch and the garage, which included a walkway to the hose spigot on the wall. The pavers were a bargain find on a local buy/sell page for just $2/each, so we picked all we could and have a healthy stash for other projects.

FlowerbedSmall

We followed the same process as the larger bed, but included spots for a rain barrel, hose rack and fountain.

FlowerbedSmallFinished

The rain barrel and fountain still need some work, but at least they are in place and prepped. Watch for posts about those and the hose holder soon.

The entire process took about two days – much longer than I estimated, but it was well worth the effort and looks great!  Although the kids played most of the time we were working, they did take a few breaks for naps on the pea gravel which they apparently found quite comfy.

FlowerbedNap

FlowerbedNap2

In retrospect, I probably should have skipped the weed fabric since everything we planted are perennials – hosta, iris, lilies, phlox, dianthus, peony, pincushion flower, lavender and salvia – which will spread with each season, requiring I cut a bigger opening to allow that process. I’ll leave it in place for now and see how it goes. For now, I’m just giddy to have our first plants in the ground.

Iris

Lilly

Lavender

Pincushion

Salvia

Peony

Now I just need to get the rain garden, lawn and veggie garden going! Let the madness of planting begin!

Honoring Old Glory

The problem with short work weeks is that, well they’re short and therefore seem to go by that much faster! Dealing with our builder and having my truck in the shop or 3 days didn’t help either. I’ve had several items to write about this week and just haven’t had time to get them out of my head and on the screen! Now its Friday and I’m just getting around to sharing those ideas with you, so here we go.

Although we did a quick overnight visit to some friends in Seward, we spent the rest of our Memorial Day weekend working on things around the house, including installing a flag pole for the flag my Mother-In-Law got the hubs for his birthday… back in March.  Yeah, we’ve been a little busy…

We’d tried to by a bracket and pole at several retailers over the last few weeks only to find that you had to buy everything as a kit with the flag. Or you could buy just the bracket without the pole or flag. WTH?! So the hubs got creative and purchased a wooden broom handle, which he shaved down on one end to fit the bracket.

Pole

And Wa-La! We have a flag on our front porch, just in time to remember those who gave the ultimate sacrifice for our freedoms.

Flag

Not respecting the flag is one of my top pet-peeves, so it’s no surprise that I grit my teeth every day when I drive past the flag that our neighbor put out and obviously forgot about some time ago. It’s faded, frayed and stuck around the pole it’s on. Plus there is no light on it at night. It disgusts me so much I couldn’t even bring myself to take a picture of it to show you how horrible it looks.

Unfortunately, there are people in our country who have never been taught how to respect the flag – like a previous co-worker who had no clue why it was would a bad thing to let the flag touch the ground when we were setting up for an event! Let’s just say I didn’t show extreme patience when correcting her. And now that we’ve entered the season of patriotic holidays I thought it would be helpful to share a few dos and don’ts on handling Old Glory.

Federal law stipulates many aspects of flag etiquette and the section of law that deals with the American Flag etiquette is referred to as the “Flag Code”. The basics of this code include the following guidelines:

  • The flag should be lighted at all times, either by sunlight or by an appropriate light source.
  • The flag should be flown in fair weather, unless the flag is designed for inclement weather use.
  • The flag should never be dipped to any person or thing. It is flown upside down only as a distress signal.
  • The flag should not be used for any decoration in general. Bunting of blue, white and red stripes is available for these purposes. The blue stripe of the bunting should be on the top.
  • The flag should never be used for any advertising purpose. It should not be embroidered, printed or otherwise impressed on such articles as cushions, handkerchiefs, napkins, boxes, or anything intended to be discarded after temporary use. Advertising signs should not be attached to the staff or halyard.
  • The flag should not be used as part of a costume or athletic uniform, except that a flag patch may be used on the uniform of military personnel, fireman, policeman and members of patriotic organizations.
  • The flag should never have any mark, insignia, letter, word, number, figure, or drawing of any kind placed on it, or attached to it.
  • The flag should never be used for receiving, holding, carrying, or delivering anything. (This is super hard to abide by as a photographer, but I do!)
  • When the flag is lowered, no part of it should touch the ground or any other object; it should be received by waiting hands and arms. To store the flag it should be folded neatly and ceremoniously.
  • The flag should be cleaned and mended when necessary.
  • When a flag is so worn it is no longer fit to serve as a symbol of our country, it should be destroyed by burning in a dignified manner.

For a more comprehensive set of flag etiquette rules, click here. Please make sure you honor the flag – and those who serve it – when using it in your decorations. And if you know someone who needs an introduction to the rules, or even a refresher, I hope you’ll share this post with them.

2 Step Bench Update

Remember my $25 bench? This is what it looked like when we first got it. It was pretty enough, but it was definitely worn and in need of some TLC.

Porch

This weekend the sun was shining and I just couldn’t resist doing projects outside. Since my yard is still on hold while waiting for the builder to clean and grade our lot, I focused my energy on other outdoor tasks like updating the bench. While the fur babies played in the yard, I moved the bench out to the driveway and did a quick sanding by hand to even out a few rough spots.

BenchB

Next, I applied a dark stain we had on hand and about 30 minutes later, this was the result! It looks a meeeelllion times better and I didn’t spend a dime! It just doesn’t get better than that!

BenchA

Since it’s just a tad big for the corner of the porch, I plan to put it down by the rain garden so I have a spot to sit and appreciate the blooms. That means I’m now on the hunt for some outdoor chairs in need of a touch up to fill my empty porch! 🙂