More Gallery Wall Additions

GalleryWallFull

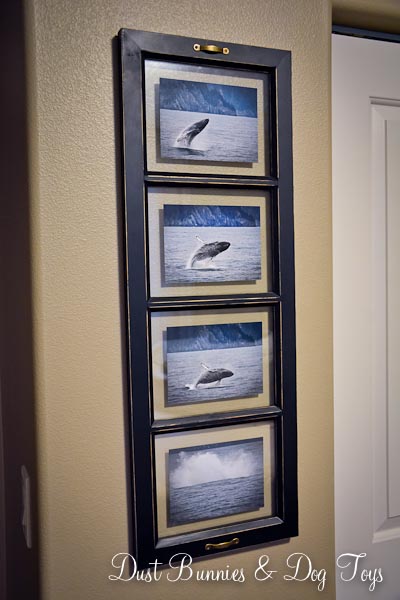
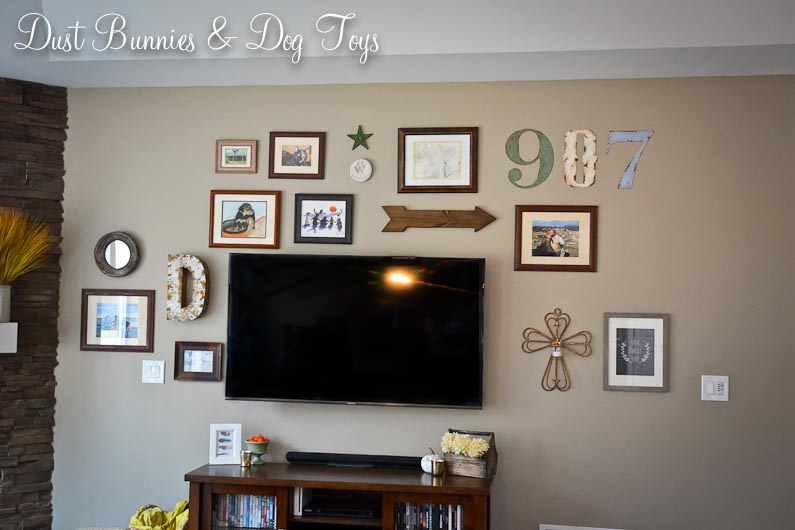
If you’ve been around the blog for a little while you know I’m slowly curating our gallery wall around the TV in the Family Room.  Today I’m sharing a few recent additions I added over the weekend.  The first is a rustic mirror I got from Michaels for free thanks to a great BOGO sale when I purchased the frame for my whale breach collage.  It originally came with a rope hanger attached to the sides, which I liked but not in this grouping.  So I removed it and will re-use it on another project I hope to wrap up this weekend.

MirrorClose

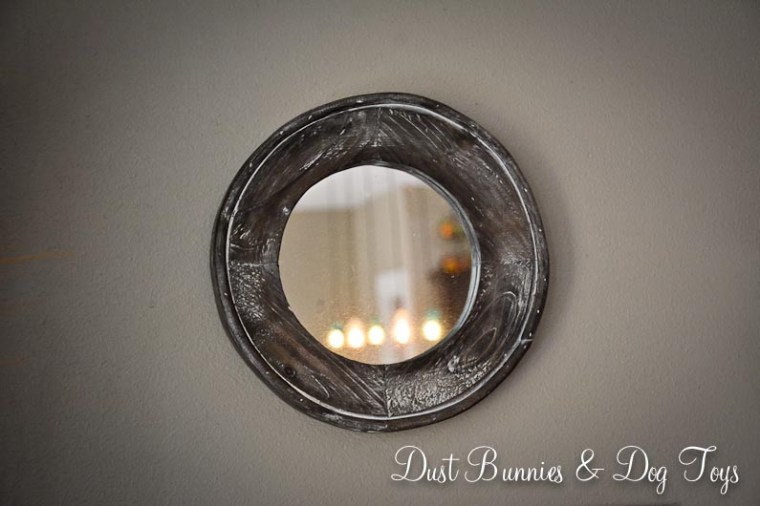
The whitewash creates a weathered patina that immediately drew me to the piece.   I placed the mirror on the side near the fireplace where it can reflect natural light from the windows. I think it also helps balance some of the bigger items in the whole collection and I love that the round shape breaks up all the square corners.

Mirror

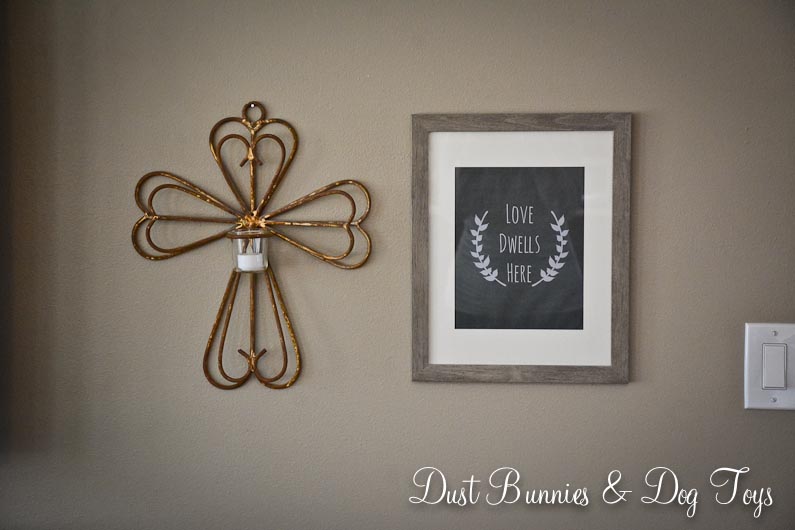
I also added this lovely rusty cross votive holder I scored on the local buy/sell page for $15. I had planned to use it on the deck, but didn’t want to constantly be emptying the votive holder when it rains, so I decided to find it a spot inside and am in love with it here. Next to it I added a freebie frame I got on the same Michaels BOGO order. I filled it with a free chalkboard printable I found online. I might change the chalkboard print seasonally, but I like that this one can transition from season to season if I opt not to.  Plus I love the simplicity and thought behind the quote. 🙂

GalleryWallCross

I plan to DIY a long narrow Alaskan themed sign to fill the space just above the cross and chalkboard print and a shorter narrow piece to fill the space between the fireplace switch and the stone, but it might be a while before those happen.  I also have a piece of family history on the hub’s side that I want to add under the metal 7, but need to figure out how to make sure it’s secure because it’s pretty darn heavy.  Stay tuned to see how this space continues to evolve!

GalleryWallFull

Shared on Knick of Time’s Vintage Inspiration Party #209!

A Whale of an Update

7

Although it’s quiet here on the blog, we’ve been slowly completing little projects in-between work, a rush of photography clients and daily life.  One of those projects was creating a collage of a whale breach sequence I shot several years ago while my family was visiting Alaska.  I recently had a client request a framed print showing the sequence of the breach and I liked it so much I decided I needed one for our home.  I found the frame at Michaels and ordered it online for a better price, but it arrived very damaged due to poor packing so I had to wait a few days until I could do an exchange at the local store.

6

Once it was all complete I hung it in the guest room so visitors can enjoy it while staying at our home.  It fit perfectly on the small wall next to the closet, complimenting the fox fur my hubby got long before I came around.  Another item that’s new in this room is the large crock you see in the corner there.  We picked that up as a set of three at an estate sale this summer.  This was the largest of the three.

8

I’ve ‘interviewed’ it in a few spots around the house since buying it but I think I like it here best.  I plan to fill it a large fern – probably a faux version because I’ll never remember to water it in this room!  I still need to figure out a night stand for this side of the bed.  I have a project table in the garage I had planned to use here, but I think it might need more repair than revamp so I’m watching the buy/sell pages for an already finished option instead.

9

Now that we’re starting to get the spare room set up as a foster-child room, I moved Roomba’s dock into the guest room.  He fits perfectly beneath the sewing table nightstand, yet still has room to leave and return to the dock for charging on his own.  Although he’s very visible from this angle you can’t see him from the door, which keeps things looking clean and simple.  You can tell Luna is sooo impressed with my mad skills right? 🙂

10

There are changes coming to the dining room as well, so the lamps that used to live on the buffet needed a new home and I think they look great in here.  I added a little wooden tray I picked up for a few dollars while thrifting earlier this year so guests can keep track of the little items that often get lost when traveling.  I love how it plays off the colors in the lamp and contrasts with the cherry top of the table.

The room is definitely still a work in progress, but it’s starting to look a bit finished now.  I’ve got a few other small projects lined up to share soon, so stay tuned!

Gallery Wall Additions

Gallery

Howdy strangers!  It’s been pretty busy around here lately, which doesn’t leave much time for projects or posting, but I did manage to get a few more items added to our on-going gallery wall in the family room.  This collection is definitely a work in progress and will evolve over time as we add to it, but it means I’m always on the hunt for special pieces to add.

Gallery2

I finally put up the metal numbers we got at the Great Junk Hunt and love them.  I chose 907 because that’s Alaska’s area code and is representative of the lifestyle here.  I wasn’t sure about the different colors and fonts at first, but overall it works and if I ever want to change it up I can paint them all to match.

Gallery3

I also added one of our favorite photos of Tequila and Sangria listening to the ice in the bay.  It was previously in the gallery wall in the dining room so it was ready to hang once I chose a spot for it.  It fills the spot between the metal D and the fireplace perfectly and because it’s level with the TV we see it daily. 🙂  Below the D I added a little Alaskan art, in the form of a framed postcard I picked up at the Seward Sealife Center when the hubs and I went there with our friends.  This piece was in the guest room as a table top frame, but I’m changing a few things up in there so I had the hubs pull off the support piece and hung it here instead.  It’s just the right size to fill the awkward spot between the fireplace switch and the TV and I like that there are a few smaller frames to balance out the larger items.

Even with these additions, there’s still plenty of room on the wall to fill.  I’m considering a couple of favorite quotes to create a simple text canvas piece and plan to add a frame where I can rotate seasonal chalkboard prints.  I’d also like to add a few circular and odd shaped items like antique bread boards, wood slice art and maybe even a driftwood cross to keep a balance with all the rectangular frames.  I’ve got a couple of options in my project pile so we’ll see what makes the cut!

Master Bench – Industrial Style this time

ZRemember our pretty upholstered DIY bench that sat at the foot of our bed?  It suffered a fatal injury while we were on vacation and had a house sitter.  I’m not sure if the dogs jumped on it or if something else happened, but this is how we found it when we returned from our trip.

Broken

Both legs on one end had lost connection with the base of the cushion.  We probably could have fixed it but we knew it wouldn’t be as sturdy as it had been and if it couldn’t withstand life in our house at it’s strongest then it wasn’t going to work for us.  So we came up with a plan to replace it a bit of industrial style and plenty of support so we don’t have to go through this again.  The hubs drew up a plan to use pipe for the base and wood for the top based on pictures I found on Pinterest.  Once it was assembled and put in the room we realized our scale was a bit off.

2

1If we needed a coffee table it would have been perfect, but it just didn’t work as a foot board bench.  Not only was it too high, it was too wide and took up too much of the walkway.  So the hubs took things apart, cut a few pieces and reassembled everything.  This time it was a much better fit. (Excuse my ‘naked’ bed – it was sheet washing day!)

3

Now we only needed one of the boards from the first version for the top.  And presto – a perfectly proportioned foot board bench!

4

5

Since the board is a little hard and the stain we used will likely seep for a while added a faux fur skin on top as a cushion and stain guard.

6I really love how it turned out and the rustic/industrial look it gives to the room, especially since I just changed up the décor in here to go more that direction.  I’ll be sharing those details soon.  I’m planning to work up a new base for the old bench cushion top and sell it in my booth at the upcoming holiday bazaars.  I’ve got a couple of ideas on what it will look like already, but if you have a suggestion I’d love to hear it!

We Robot!

We are now the proud owners of a robot, thanks to a fantastic trade I made recently – a photo session and some cash for a like new Roomba!  We had been considering purchasing one for some time but just couldn’t pull the trigger due to the hefty price tag, so when I saw one on a local buy/sell page I offered a trade and the woman selling agreed.  Luckily, the model she was selling is designed for pet hair and she still had all the accessories and manual for it.  RoombaBathroom

It’s been interesting to see how we’ve all adjusted to having a robot in the house.  The hubs and I often catch ourselves welcoming Roomba when it enters the room we are in or complimenting it for docking itself when in need of charging even though we know it’s just a machine.  We’re just friendly like that I guess.  I do find it funny that the Hubs refers to Roomba as ‘she’ while I say it’s a ‘he,’ but either way I’m really enjoying not having to vacuum as often.

RoombaAttack

The fur babies were not quite as excited about the new intruder.  Luna wasn’t quite sure what to make of it and would watch from a distance, then run off if Roomba got too close for her comfort.  The dogs on the other hand thought Roomba was a fabulous new toy that they should play with by jumping and barking.  They were pretty frustrated when Roomba ignored them and continued on his cleaning mission.

RoombaPlay

Now that its been a few weeks, they’re no longer excited about it.  In fact, now it’s often the fur babies who ignore Roomba.  He can bump into the furniture where Luna is napping and she barely even opens her eyes!  The dogs have given up trying to get Roomba to play and usually step right over him when he’s in their way.

RoombaLuna

Although he’s a bit louder than I anticipated he does a pretty good job of picking up all the pet hair, which is a big improvement for my allergies and makes me feel like the house is cleaner overall.  Granted he doesn’t get everything so I still vacuum once a week, but I no longer have to cover every square inch of the house.  Instead I focus on the corners and edges where Roomba sometimes misses spots.  Now that we’re back from traveling I just need to program his schedule so he will clean and charge all on his own and I don’t have to remember to turn him on each day.

Do you use a Roomba or similar product?  I’d love to hear any tips or tricks you might have, especially if they make life even easier. 🙂

An Update Underfoot

RugDining

When our old dining room wool rug develed a hole, I began the hunt for a replacement.  I eventually decided to go neutral with a jute fiber rug and found this one at Target.  Although they didn’t sell it at any of our local stores in the right size, I was able to order it online with free shipping and it was delivered right to our door!RugDiningTexture

I’m loving the texture of the new rug and it’s super soft underfoot.  There are little hints of color in the cross fibers, which tie in well with the other colors in our decor.RugDiningSnag

Like any jute rug, it does develop loose ends from time to time, but I just tuck them back into the weave of the fibers.  If that’s not possible, I just trim them down a bit so they aren’t noticeable.
RugLaundry

I also found a matching runner for the laundry room, something I’ve been hunting for – for a very long time!  Luna wasn’t very impressed, since it didn’t involve more food in her dish.

RugFamilyRoom

I also replaced the rug in the Family room with an indoor/outdoor rug I found at Lowes for $70.  Because it has a tighter weave than the rug we had here before, it doesn’t seem to collect as much dirt, which is an improvement for my allergies.  RugFamilyRoomTApparently Tequila approves of this change because she often chooses this spot to nap during the day!  So I guess that means it’s a keeper. 🙂

The Gravel Patio

GravelClose

Once the fire pit went in the next step was installing a gravel patio around it.  The hubs added small side-walls on our big flatbed trailer to pick up a load of pea gravel, which only cost around $80 since we didn’t need delivery.  It took him most of the day to dump and spread it, but it was totally worth the effort.

GravelCombined with the new garden, our Adirondack chairs and one of my pretty little garden stools it’s starting to look like the backyard I’ve been envisioning all along!

Our DIY Fire Pit

FirePitFinished2

One of the projects I really wanted to tackle this summer was a fire pit. Luckily, the hubs was totally on board.  We started with the freebie washing machine tub I scored last year, which we set on two cinder blocks to keep the heat off the ground.

FirePit

We stacked landscape stones around the tub, off setting the seams.  But after the second row we ran into a little problem, the ridge at the back of each stone required the next row to be a smidg bigger.  After a quick Pinterest search we learned that others using the same stones removed the ridge when building their fire pit, so we chose to do the same.
FirePit2Layers

The hubs attacked them with his fancy power tools, but it wasn’t working as well as we hoped.  I suggested going old-school and use a hammer.FirePitGrind

This time old-school worked better, so we stuck with it row by tedious and muscle building row.  Eventually we upgraded to a larger hammer which was a bit more efficient, although still time consuming.FirePitHammerFirePitHalf

Apparently all the noise we were making didn’t bother the dogs who napped on the deck nearby.  It truly is a rough life they live…
FirePitNapA puppy nap and several more rows of stones and we were almost done.  That’s when we ran out of stones.  Go figure.

FirePit90The hubs picked up some more stones the next day so we could finish off the top row, where we left the little ridge in case it’s helpful for a future table top I want to build to cover the pit when it’s not in use.

FirePitFinishedTopIt’s taller than most fire pits but it feels more impressive and should be safer for when we have little ones around.  The top row sits just above the top edge of the metal tub so the fire stays contained and the smoke rises a bit, keeping it out of our eyes when sitting around it.  We’re pretty pleased with how it turned out.

FirePitFinishedWe only got to test it out once before Alaska’s burn ban took effect.  Hopefully, the conditions will improve soon and we can enjoy it again before the summer is over because next time I’m planning to create some backyard s’mores!

FirepitFire

A Little Update Out Front

FrontFullView

Now that summer is here it was time to get the front porch and flower beds in order.  I started with the porch, which just needed a little cleanup and a few accessories.  A citronella candle and a cute little cast iron frog I’ve had for years were a great fit for the milkcan table by the rocker.

FrontPorchTable

As one of very few shady spots in the yard, the porch was the perfect place for some inpatients.  I used an old ceramic crock that fit in the small spot next to the front door.

FrontPorchImpatients

Since the crock didn’t have any drainage I placed a small disposable pot inside before adding soil.

FrontImpatientPotFill

I did something similar in the large whiskey barrel planters just off the porch.  The hubs drilled a couple drainage holes in both, but I wanted to reduce how much soil it would take to to fill them so I filled the bottoms with plastic containers from our recycle bin.

FrontWhiskeyBarrelFill

FrontWhiskeyBarrelFill2
You’d never know all of that is in there looking at them all planted.

FrontWhiskeyBarrelFinished And they do a great job of attracting butterflies!

FrontButterflyI filled two metal buckets on the steps with dusty miller and lobelia for a little contrast.

FrontBucketI did the same combination for planters in front of the garage, which were used on the porch last season.

FrontSmallPotFinishedI searched for several weeks to find a third green planter to match the ones we already had but could only find a larger version which I placed between the two garage doors.

FrontBigPotFinished

Since it was so large I placed an empty bucket in the bottom to conserve soil once again.

FrontBigPotFill

I also added some pieces of sponge in the top layer of soil to help the plants retain moisture between waterings.

FrontBigPotSpongesI just tucked them down in the soil as I planted.

FrontBigPotSponges2

The perennials in the front beds were the slowest to return this year and I’m convinced that the landscape fabric we used was the reason, so I tore it all out.  While doing so, I found a couple of plants  that did get trapped under the fabric as they started to grow so hopefully now that they’ve been freed they will come in properly.

FrontFlowerbedSmallAnd to finish it all off I added a few patriotic pieces like this garden flag and fun door hanging.

FrontFlagPot
FrontDoorBanner

There’s still a bit I’d like to do out here, but for now it’s ready for summer!

The Finished Egg Table

EggFinished

Remember the custom Green Egg table I had built for the hubs for Christmas?  Well it’s finally sealed and in use!  Hubby decided not to stain it and just do a couple coats of Thompsons water seal.  I think it turned out great. Here it is with the egg inserted.

EggFilled

The cabinet and drawer provide great storage.  The drawer holds a wholes bag of charcoal with room to spare, which apparently Luna thinks is for her.
EggCharcoal

The cabinet has enough room to hold a stool, propane bottle and the oil-less fryer I snagged for him at a charity auction.

EggCabinet

We may still add some hooks on the side to hang the tongs and other utensils but for now it’s ready to grill all summer!EggDONE

TDC Before and After