A New Closet Bench

3

Some time ago Luna decided she no longer liked her perch in our closet and proceeded to claw the daylights out of the side of the storage ottoman I had already repaired once.  I guess she knew I’d be switching the style of our Master to more rustic farmhouse and wanted to give me a starting point.  I sold the slightly damaged ottoman and began the hunt for a replacement.  The hunt then drug on for several months and Luna whined that she didn’t have a perch – to which I told her it was her own doing.

I wanted something that she couldn’t damage with her claws so I knew wood was my best option.  I’d considered building a small farmhouse style bench with a plan from Pinterest when I spotted this little distressed piano bench on the local buy/sell page.  It was a little more expensive than I hoped, but the seller offered me a small discount making it cheaper than what she had bought it for so I felt a little better about it.

1

It fits perfectly under the mirror and the additional storage where the top lifts up is just enough to hold my work T-Shirts so I don’t have to pull them down from the high top shelf when I need them every few months.  I thought I could add a bit more storage with a basket underneath and I had one that wasn’t fulfilling a purpose at the moment so I did a quick test fit.

2

You’d think it was made to fit there!  And it coordinates with the colors quite well.  Luna was quick to show her approval of the new bench, which allows her to admire herself in the mirror once again.

4

And more importantly, it provides an optimum ambush location for that crazy younger sister of her’s when she gets a bit too energetic and needs to be reminded of who’s really in charge!

Z

I wasn’t sure how I’d use the basket at first, but I’ve since started putting the “to be altered or mended” items in there which frees up space on the shelf over the bottom rod on my side.  Perhaps being able to see them in the basket will remind me to take them to be done!

I plan to paint the trim and molding around the mirror cabinet this winter when there’s not so much to do outside, which will start to give this space a more finished look.  I’ve made another small update to this space since taking these pictures and will share that soon as well. Until then I’d love to hear what you think about the new bench and the extra storage it provides!

Urban Junktion

2

I recently attended another local pop-up “junk show” and thought I’d share a quick recap.  This one was called Urban Junktion and was held at a sports complex which was much larger than the fairgrounds building where the Alaska Chick’s Vintage Market was hosted.  Several of the same vendors from that event were here, but had different items for the summer season.

Although I wasn’t able to commit a whole weekend to have a booth at the show, Anne-tiques who has done several furniture projects for us did and offered to let me put some of my smaller pieces at her booth to accessorize her furniture.   That arrangement worked out pretty well since I still made more than I spent at the show and I was able to get in before the doors opened to the public to help her set up.  Once we had things pretty set I made a quick lap of the other booths to earmark which items I was interested in checking out since I had limited shopping time due to photographing a wedding that afternoon.

3

There were lots of rustic home decor vendors with a variety of items from furniture, to signs and vintage or re-purposed items.  The host of the show had an amazing booth that I was so busy shopping I didn’t take any photos of the set up, although I did snap a few of the cool display on the backside of her booth with this wonderfully styled mannequin and little soldiers with a great message.

5

67

I also spotted a basket of shoe horns at her booth that look quite similar to the ones I just inherited from my grand father!  I’m not sure what I’ll do with mine just yet but it was cool to see someone else appreciate these types of items.

HORNS

This jerry can bench also caught my interest since we have one jerry can already from my unplanned picking adventure earlier this summer.  I’d considered making mine a lamp but if I could find a matching one this would be a fun option.

BENCH

One of my favorite vendors, The Alaska Picker was there with awesome unique builds and vintage finds.  I love the truck beds they have been making and wanted this awesome cart for my deck so bad, but just couldn’t justify the $200+ price tag on my current budget.

BED

CART

Another piece I was lusting after was this metal John Deere tractor and trailer.  I could just envision it in a garden with flowers hanging over the sides of the little trailer, but at $300 it was out of my “garden art” price range.

1

I almost bought this fun pendant light made from an old funnel neck can.  It was priced right at $35, but I couldn’t think of where I’d use it in our house so I decided to leave it for someone else to treasure.

4

But here’s what I did buy.  A cool wooden wheel, a metal scroll piece and a fun birdhouse garden stake.  I’m still not sure where I’ll use the wheel and scroll piece but the birdhouse has already found a spot in the garden, which I’ll reveal once that area is finished.

BUYS

BIRDHS

It was a great experience for both the shoppers and the vendors, even though it was hard to compete with Alaska’s summer time activities.  It’s definitely a perfect showcase of the talent and creativity in our region and it’s makes you realize it’s a community all it’s own.  Check out the Urban Junktion Facebook page to see more photos of the event and all the cool little details I wasn’t able to capture in my quick visit.  Hopefully, there will be more events like this in our area so I can shop and photograph more great set-ups!

New Bedding in the Master

WideAngleFromDoorI know what you’re thinking, it’s No-Spend April so why is she telling us about new bedding?!  Don’t worry these changes were made back in February and March, I just haven’t had a chance to share them yet.

Just before our vacation in Hawaii we agreed to temporarily take in a friend’s dog when his roommate got deployed suddenly and could no longer watch the dog while our friend was out of state.  The dog stayed with our pups while we were in Hawaii, but apparently had some anxiety about the change and ATE a huge hole in both the coverlet and throw on the bed overnight!  Our poor house sitter was pretty upset to discover the problem.  We confirmed that both pieces were not repairable and had to be replaced so we went shopping for new bedding in Hawaii and brought it home with us.

MasterArt2

Here’s how the room looked the last time I shared it.  Not bad, but not amazing either.  I began changing things up in here last year, starting with selling the art over the bed.  It was pretty but didn’t jive with what we had going on in the rest of the house and I felt it was a tad small for that spot anyway.  I updated the curtains and throw blanket after our trip to last summer, but didn’t share them on the blog because I wanted to wait until it all came together.  You can see peeks of those changes when I shared the bench the hubs built for the foot of the bed.

During that time I also agreed to reduce the number of pillows on the bed.  The hubs is not a fan of multiple pillows and having to move them every night only to put them back the next morning so they often ended up stacked on the tub in our bathroom, which drove me nuts!  Rather than fight the idea I decided to try simplifying and see how I liked it.  Turns out I don’t miss moving the pillows either and I like that making the bed is easier with three pillows opposed to 8!  In fact, I like it so much that I’ve reduced the pillows in the foster room as well!  But even with less of them, the new grain sack pillow in the middle is what really what made this room come together for me.

ColorCloseup

The new coverlet and throw came from TJMaxx in Honolulu and I wasn’t sure about them at first.  It wasn’t a dramatic change from the tan coverlet and blue throw, but it took me a while to get used to the new colors.  Adding the grain sack pillow I ordered at the Vintage Market last month was the key.  The grey stripes coordinated with the grey throw and the black stripe tied into the metal of the bench at the food of the bed.  I moved the magnolia wreath I’d had out in the family room over the bed and suddenly I had a simple but pretty farmhouse style bedroom!

StraightOn

That little bit of green in the wreath and the blues and greens in the curtains pop against the the neutrals but in a classic way.  It feels chic, but simple and very relaxing – just as a master bedroom should be.

AngleFromBathroom

Here’s a shot where you can see the whole combination of the bed, bedding and bench.  There’s a lot of textures going on, but because most are neutrals it’s not overwhelming like the darker bold colors we had before.

Closeup

The grain sack pillow is actually painted rather than authentic fabric.  Although I’d prefer the real deal, it was out of the budget and this option allowed me to support another local artisan who let me customize just what I wanted.  In my excitement about the market I only specified which colors I wanted when I ordered and forgot to mention which direction I wanted the stripe to go, but I think the end result works perfectly.

Ties

The back is closed with simple ties down the length of the pillow, which makes taking it off for cleaning super easy.

DoorAngle

The changes make the space so bright and inviting.  Plus it ties into the modern farmhouse feel in the rest of the house.  Now I just need to find more time to enjoy naps in here! 🙂

TDC Before and After

New Décor in the Laundry Room

4

Is anyone else out there a serial fluffer when it comes to laundry? The hubs knows full well that just about every load that goes in the dryer will be fluffed at least once before I break down and pull it out to fold or put away. I’d seen several signs that said “Wash, Dry, Fold, Repeat” but none that included Fluff in the process so I decided I needed one for our laundry room. I originally planned to DIY this but when I discovered Rustic Champagne at the Alaska Chicks Vintage Market I decided to have her create one for me instead.

1

I originally planned to hang the sign above the door to the garage but while measuring the space for it I noticed it would work better where the metal safety pin art I had previously DIY’ed was, so I opted to sell those and replace them with the sign. Luckily, the sale of the pins and another item paid for the new sign, so I was ok with bending the rules of No-Spend April since it worked out to be trading two things for one better one. Plus I started arranging the order back in March so it doesn’t count *cough*cough*.

It will look even better once we get the countertop installed on the cabinets in here, but that will definitely have to wait until No-Spend April is over and based on the quote I got recently it will probably be a while before we commit to that project.

2

I love the rustic finish and the white background lightens up the space by reflecting the light from the window, which the safety pins never did. Plus the simple design keeps it from feeling too fussy or overwhelming the space.

3

And if you look closely, you’ll notice a little clue about the next project I’ll be sharing just outside the window. It’s been a big one, but definitely brought a vast improvement thanks to a lot of hard work by the hubs!  Check back soon to find out what it is!

A DIY Command Center

Full

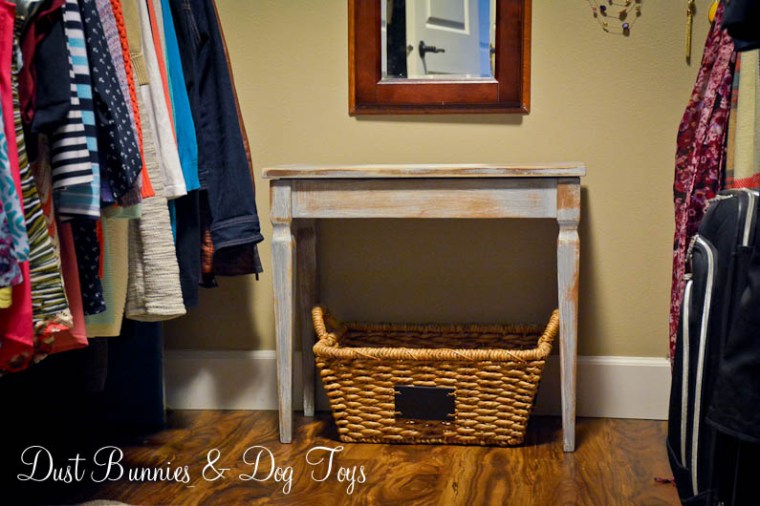
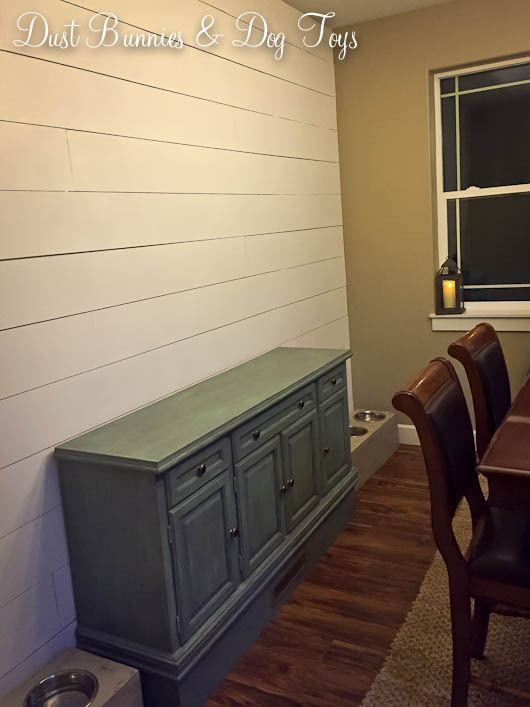
Containing paper clutter is a constant battle in our home, just as I’m sure many can relate.  Because we enter the house from the garage through the laundry room most of the stuff that comes home ends up dumped on the dining room table or kitchen counters so I figured that was a good place to start.  I decided to create a command center in this little corner where we could write notes, stash important papers and organize the hub’s stuff.

f

I started with a small wooden organizer where the hubs can stash his wallet, receipts and notes.  I also found him a small jar with a lid for loose change.  That worked fairly well, but he often had full size papers that he needed handy so I decided to add a wire rack we picked up during one of our trips to Portland.  It had been in the laundry room for a while but never got used there and came down when I did my DIY Ballard Knockoff Décor for that space, so I’m glad it’s found a useful home here.  I used two clear hooks with removable adhesive tape to hang it just under the countertop.  It fits the small nook of space perfectly.

a

Originally I wanted to paint the side of the top cabinet to create a chalkboard but the hubs nixed that idea noting that if I changed my mind later removing the paint would damage the cabinet.  What?!  I never change my mind! Well ok.  He might have a point there. 🙂  So I came up with a better idea.  I’d paint a piece of sheet metal and install that on the side of the cabinet so it was both chalkboard and a magnet board!  Of course they didn’t sell a piece that was just the right size so the hubs cut one down for me.

b

A couple thin coats of chalkboard paint and it was looking pretty good.  The hardest part was waiting for it to dry in between coats.

c

Next I seasoned the chalkboard by rubbing a piece of chalk over the entire surface and then wiping it down.  This helps prevent things from “staying” on the surface after you wipe them down.

d

Since the hubs wanted the piece to be removable I attached it with the same removable adhesive strips I’d used on the hooks for the wire rack.  IF I every change my mind I can start at the bottom and work my way up pulling the tabs to release the adhesive.

e

I stuck it up on the side of the cabinet against the trim on the front and top of the cabinet so the edges weren’t exposed.  And as you can see, it works great as a magnetic board too holding our early bird tickets for Junk Bonanza outside Portland in October!

g

Things were looking pretty good at this point but I wanted to address the uneven edge of the metal along the wall.  The hubs did a great job cutting the sheet metal, but the tool he used had to take a 1/4″ off at a time so he wasn’t able to match the size exactly.  He was pretty frustrated that it wasn’t perfect, so I wanted to find a way to make it work.

gap

I tried a few pieces of trim we had on hand but most were too big or bulky.  I picked up a square dowel at Lowes but that was too narrow and too thick, so I returned that.  A few days later I was at Michaels and figured I’d look at what they had.  I’m glad I did because I found a piece of balsa wood that was the right thickness and width for what we needed. At less than $2 plus a coupon it was the perfect solution. I gave it a couple coats of stain to match the cabinet color.  It fit so well that it actually stayed up without any adhesive but I wanted to make sure it wouldn’t get bumped off so I added a little hot glue on the backside before putting it up.  The glue should be easy to peel off if I ever need to.

trim

trim2

Now I needed somewhere to store my chalk.  I originally planned to use colored chalk pens like the yellow you saw above, but they have to be primed and I didn’t want to deal with delays when I needed to work up a grocery list, so I opted for old-school white chalk instead.  I used more hot glue to attach this pull handle upside down to create a cup where the chalk sits.  I did have to reposition the cup due to installing it unevenly, which caused the chalk paint to peel up a bit which caused the bare spot under the holder, but I touched that up with a thin coat of chalkboard paint and it looks fine now.  I still need to touch up the wall paint, but I’ll get to that at some point.

chalkholder

Since the papers in the rack still looked messy I found these simple poly vinyl folders to clean it up a bit.  I wanted something a little cuter, but apparently mid-March is not prime season for two pocket folders.  Who knew right?!  I’ll keep an eye out when the back to school supplies come out in the fall, but for now these seem like they will hold up pretty well and could be easy enough to add simple decoration to with paint or vinyl designs.  That might just be a future post if I do!

folders

Total cost for the all the materials came in around $50. Because the extra metal and chalkboard paint can be used for other projects that lessens the total a bit too.  I love it and I’m sure it will be super handy once we start fostering and have kiddo’s school papers to manage.   I’m going to keep an eye out for another wire rack that matches this one when we are in Portland this fall in case we need to expand since there’s still room on the bottom cabinet to accommodate another.

I’d love to hear what you think of our new DIY command center or how you created one of your own, so leave me a comment below.

Talk of the Town featured button

TDC Before and After

Alaska Chick’s Vintage Market

pano

Last weekend I visited a fun Vintage Home Market, which I had been eagerly anticipating for months.  I attended the event last year when it was held at a smaller venue which became very crowded, so I was glad they were able to move to this larger space.  I had a wedding booked that afternoon so I went first thing in the morning, despite the late spring snow storm that had rolled into the area.  Tickets went on sale at 8 am and doors opened at 9, so I arrived a little after 8 to pay and get in line.  The picture above is the view as you enter the building.  On the other side of the entry was this beautiful set up.

c

I browsed the front booths from the line, including this double space booth done by the market coordinator, Alaska Chicks.  There were so many great items packed into the space that you had to look several times to see them all.

a

b

They also had this fun photo booth at the front of the line where you could take selfies with the vintage car and model.  It was a great idea to utilize the wait time, which several folks did.

f

The line grew as the opening time got closer and eventually filled the whole staging area, with several groups flowing out the door.  I took this shot just 10 minutes before they opened the market with a vintage air raid siren from Alaska Picker, who we bought our windmill art from!

crowd

I was so busy shopping that I didn’t take any pictures once the market opened, but you can see lots of the vendor’s booths and wares on the event page here.  My favorite set up was this rustic truss with moss.

d

And of course I found a few treasures to bring home.  The first thing I got was a custom order for a grain sack sham for our bed from this amazing vendor.  I made a beeline for her booth as soon as they opened because that was my one MUST get item for the show.  Across from her space was a vendor with repurposed wine barrel furniture and décor where I found these cool barrel band hearts!  I’d seen some on craigslist back in February and messaged the seller but never got a response so I was giddy to find them here.  Plus they were the same price, just $10 each!  They will be going up on the side of the house when we expand the chicken run later this spring.

hearts

I also found several “little” treasures, including a handmade whale and fun Alaska art print for the foster room, a large ampersand that will be added to the gallery wall soon and vintage letter blocks that I plan to make into magnets for the project I’ll be sharing next!

Haul

Home

This show has me so motivated to start making things for the Junktion Market in July where I’ll be sharing a booth with the gal who does our furniture refinishing, where I plan to do a little browsing as well.  I’ll also be shopping the Alaska Picker Day in June, then hit the Junk Bonanza outside of Portland when we visit in October!  I’m sure I’ll find more rusty, vintage goodness to bring home at each and will certainly share my finds with you all right here on the blog. 🙂

A Simple Revamp with Paint & a Knob

1TopToday I’m sharing a quick revamp I did on a side table with a bit of midcentury mod style.  Here’s how it looked when I spotted it on the buy/sell page.

Before

It was a good price for a solid wood piece and I knew I could give it a facelift with a quick coat of paint.  I had grey paint on hand from a previous project so I used that. I was pretty happy with how modern the new color made the piece look, even part way through painting!

during

Once everything was dry I switched out the futuristic drawer pull for a simpler knob.  I originally wanted to do a farmhouse style pull like we have on the drawers in the office, but since that would require drilling new holes I decided to stick with the single attachment option.  I also added a basket for more storage space.  It’s the perfect size for magazines or a throw blanket which makes the piece very functional in a multitude of spaces.

Finished

I originally planned to use this piece as part of a desk in the foster room but changed my mind as the room came together, so for now it’s acting as a nightstand in the guest room.

Z

I paid $30 for the table and around $20 for the basket, so the total cost came in just under $50.  Not bad for a quick little project.  I’m currently on the hunt for a small dresser for the guest room so when I find one this piece may find a new home elsewhere in the house.  I could see it working well as a side table in the family room as well.  But if not it should be an easy piece to sell.

I’d love to hear what you think of the transformation!  Leave me a comment below about how you’d use it in your home if you had the chance.

The New Dining Room Sideboard

3

Today I’m super excited to share our new sideboard buffet for the dining room, but first you might notice the blog got a little update since my last post.  Hopefully you like the new design as much as I do and the added features make things easier to find.  Now, on to the buffet.  I’m absolutely in love with how this piece turned out!  Here’s how it looked when I spotted it on the local buy/sell page.

Before

Before2

It wasn’t as tall as the one we had before but it was wider and had more storage cabinets which is what I had been looking for.  I was way down the line for dibs and thought for sure it would never make it to me, but a few days later the seller message me to say that I was up next and see if I still wanted it!  We were still in Hawaii so I contacted Anne-Tiques who refinished our hope chest and arranged for her to go pick it up for us even though it was located a ways out of town.  Have I mentioned how much I LOVE working with her?!  She’s one of the best small businesses I’ve dealt with in a long, long time.

When we returned from Hawaii we went over to see it in person and worked out the game plan for what the final product would be.  To fix the height problem we decided to create a riser platform that the whole piece would sit on and since it would be enclosed we added an air vent to the front so we could still use the floor vent that is located under where the piece would sit.  Here’s the hubs inserting the vent in the riser before we arranged everything.

1

Here’s the finished piece against our new shiplap wall!  The colors are fun yet neutral at the same time and it compliments the grey of the dog bowl stands perfectly.

2Luna thought this was a great new hiding spot for her while I was getting it stocked.  She was not too pleased when I informed her that this was not for her, but for storage.

L

L2

The hubs made me this handy shelf for the middle section so I can store a variety of items all within easy reach.

S3

The cabinet on the left holds our china, antique juice glasses from the hub’s family and the toasting flutes from our wedding.  The other side was perfect for a large platter, chip & dip set, salad bowl, bread basket, condiment server and covered baker.

S1

S2The drawers above hold our fancy serving utensils, salt & pepper shakers, gravy boat, butter dish and other small dishes we use periodically. Now we just need to get the windmill hung above it! 🙂

It’s Curtains for the Foster Room

Before we left for Hawaii, we checked one final project off the list – installing a curtain rod in the Foster Room.  You may remember these green curtains from our Master some time ago, but when we replaced them with something new (seen in the background here) I stashed these away thinking they might somewhere else.  Looks like I was right.  To be honest they aren’t really curtains – they are actually table cloths, as are the new curtains in our room.  I prefer to use table cloths because they are less expensive, typically dirt & moisture resistant and come in long lengths to fit our high ceilings.  Plus they are washer friendly so I can take them down and run them on the sanitary cycle to help combat my severe allergies.

RoomFull

The curtain rod is more industrial pipe just like what we used on the bed and other projects such as this, this and this.   We’ve found that this is best option for window treatments in our house since the dogs and cat like to play in the fabric occasionally and kept ripping the screw mounted brackets of traditional curtain rods out of the wall.

Curtains

The hubs put the pipe pieces together with a 90* elbow on each end to give a bit of depth and made sure to put the curtain rings on before mounting – that’s a key step in this style of rod since it’s more permanent.  Luckily the ring clips add a little extra length to the overall effect and making taking the curtain down or switching them out super easy.  Here’s a closer view of the pipe and ring clips.

CurtainsClose

Now we just need to install a closet system and finish up this side of the room.  I’m on the hunt for a small dresser for the left side of the bed since the side table I picked up and revamped isn’t working out the way I planned it.  I’ll share that project soon as well.  The closet is next to that space on the right of the bed where the stools currently are.  I’m planning a fold down desk in that spot, which can also be a chalkboard!  Someone gave us a second twin mattress for the trundle under the industrial cart bed, which was a little thicker than we planned for so we’ll have to adapt the trundle frame to fit a bit more clearance.

Bed

The fabric you see at the bottom is the thin blanket currently protecting the sheets from the bed frame.  Although it works, the color isn’t right for this space so I’ll swap it out for something else when it’s all finished.  I think we already have a blanket that will work, but I’ve got to test it out before I commit it to this purpose.  Luckily having a blanket on the trundle eliminates the need for a bed skirt so it serves two purposes, and you know how much I love things that pull double duty!  The two standard pillows against the wall work for the main bed and trundle while the king pillow in front is an extra in case there are friends who stay over with a sleeping bag.  I plan to let the children who stay with us pick out throw pillows to add to the bed so they can show off their personality and interests a bit, then have something they can take with them when they leave our home.

I’m loving how this room is coming together and the fun industrial vibe it’s developing.  I’m hoping to have it wrapped up in the next month so we can start the final preparations to become foster parents.  It’s going to be a big change but I’m sure it will also bring big rewards for both us and those who’s lives we’re about to be a part of.

Storage in the Foster Room

CratesFront

As promised, today I’m sharing what’s underneath the art display boards in the Foster Room that I showed you yesterday.  I created a fun storage cubby system with simple wooden crates which can hold books and toys.  I got the idea from one of my favorite blogs and originally planned to mount the crates on the wall like she did, but wanted the option to use them occasionally as props for photo sessions occasionally so instead I opted to just stack them on the floor.

Crates

I was a little worried that the baseboard would make the bottom row stick out more than the top row and leaving a small gap behind the crates would make them unsteady which could be a safety issue around children but when I set them up they felt pretty sturdy. I figured only going two rows high keeps things at kiddo level so there’s no need to reach or lean on them and keeps the center of gravity on he whole group low so I’m not worried about it.

Wall

It coordinates with the art display boards well and is just as flexible since we can change up what’s in each cubby to fit each child’s interests.  There is also a digital frame in the lower left crate where we can load pictures of things that they like, which should be a fun project to do together when they arrive to get to know them and serve a dual purpose as a nightlight.   The wide openings are perfect for storing books and the toys I’ve started collecting such as the adorable elephant a co-worker knitted and one I found on Etsy years ago.

CratesPhants

I also ordered this peg doll set which should be interesting for a wide range of ages.  Since we don’t know who will be placed with us I got both the boy and girl sets which can be played with separately or paired up.  The cute purple crab in the back is something from my days working at the YMCA that I’ve kept.  I thought it was something fun a child might like and since it’s made of Styrofoam it shouldn’t be dangerous for them to play with.

CratesPeg

Next to the crates I put some mega blocks in a basket for easy access and clean-up.  I found a large bag of them on the local buy/sell page for a few dollars and likes that they are larger so they won’t be a choking hazard for smaller children.  Next to that is a bean bag I used to use for newborn sessions before I got my professional poser pillow.  I think it makes a fun little reading spot right next to the book storage.

WallFull

Since I bought the crates on sale and with coupons good for a percentage off a single item, gathering enough to make the cubbies required several trips to Michaels but it was worth the savings – especially since I go there often for my day job and can make a separate personal purchase while there! I used stain I had left over from the Moose Mount Board in the guest room for both the display boards and the crates so that was an additional savings.  Next up are the window treatments, which I’ll share tomorrow!