Happy Fall Y’all

Fall
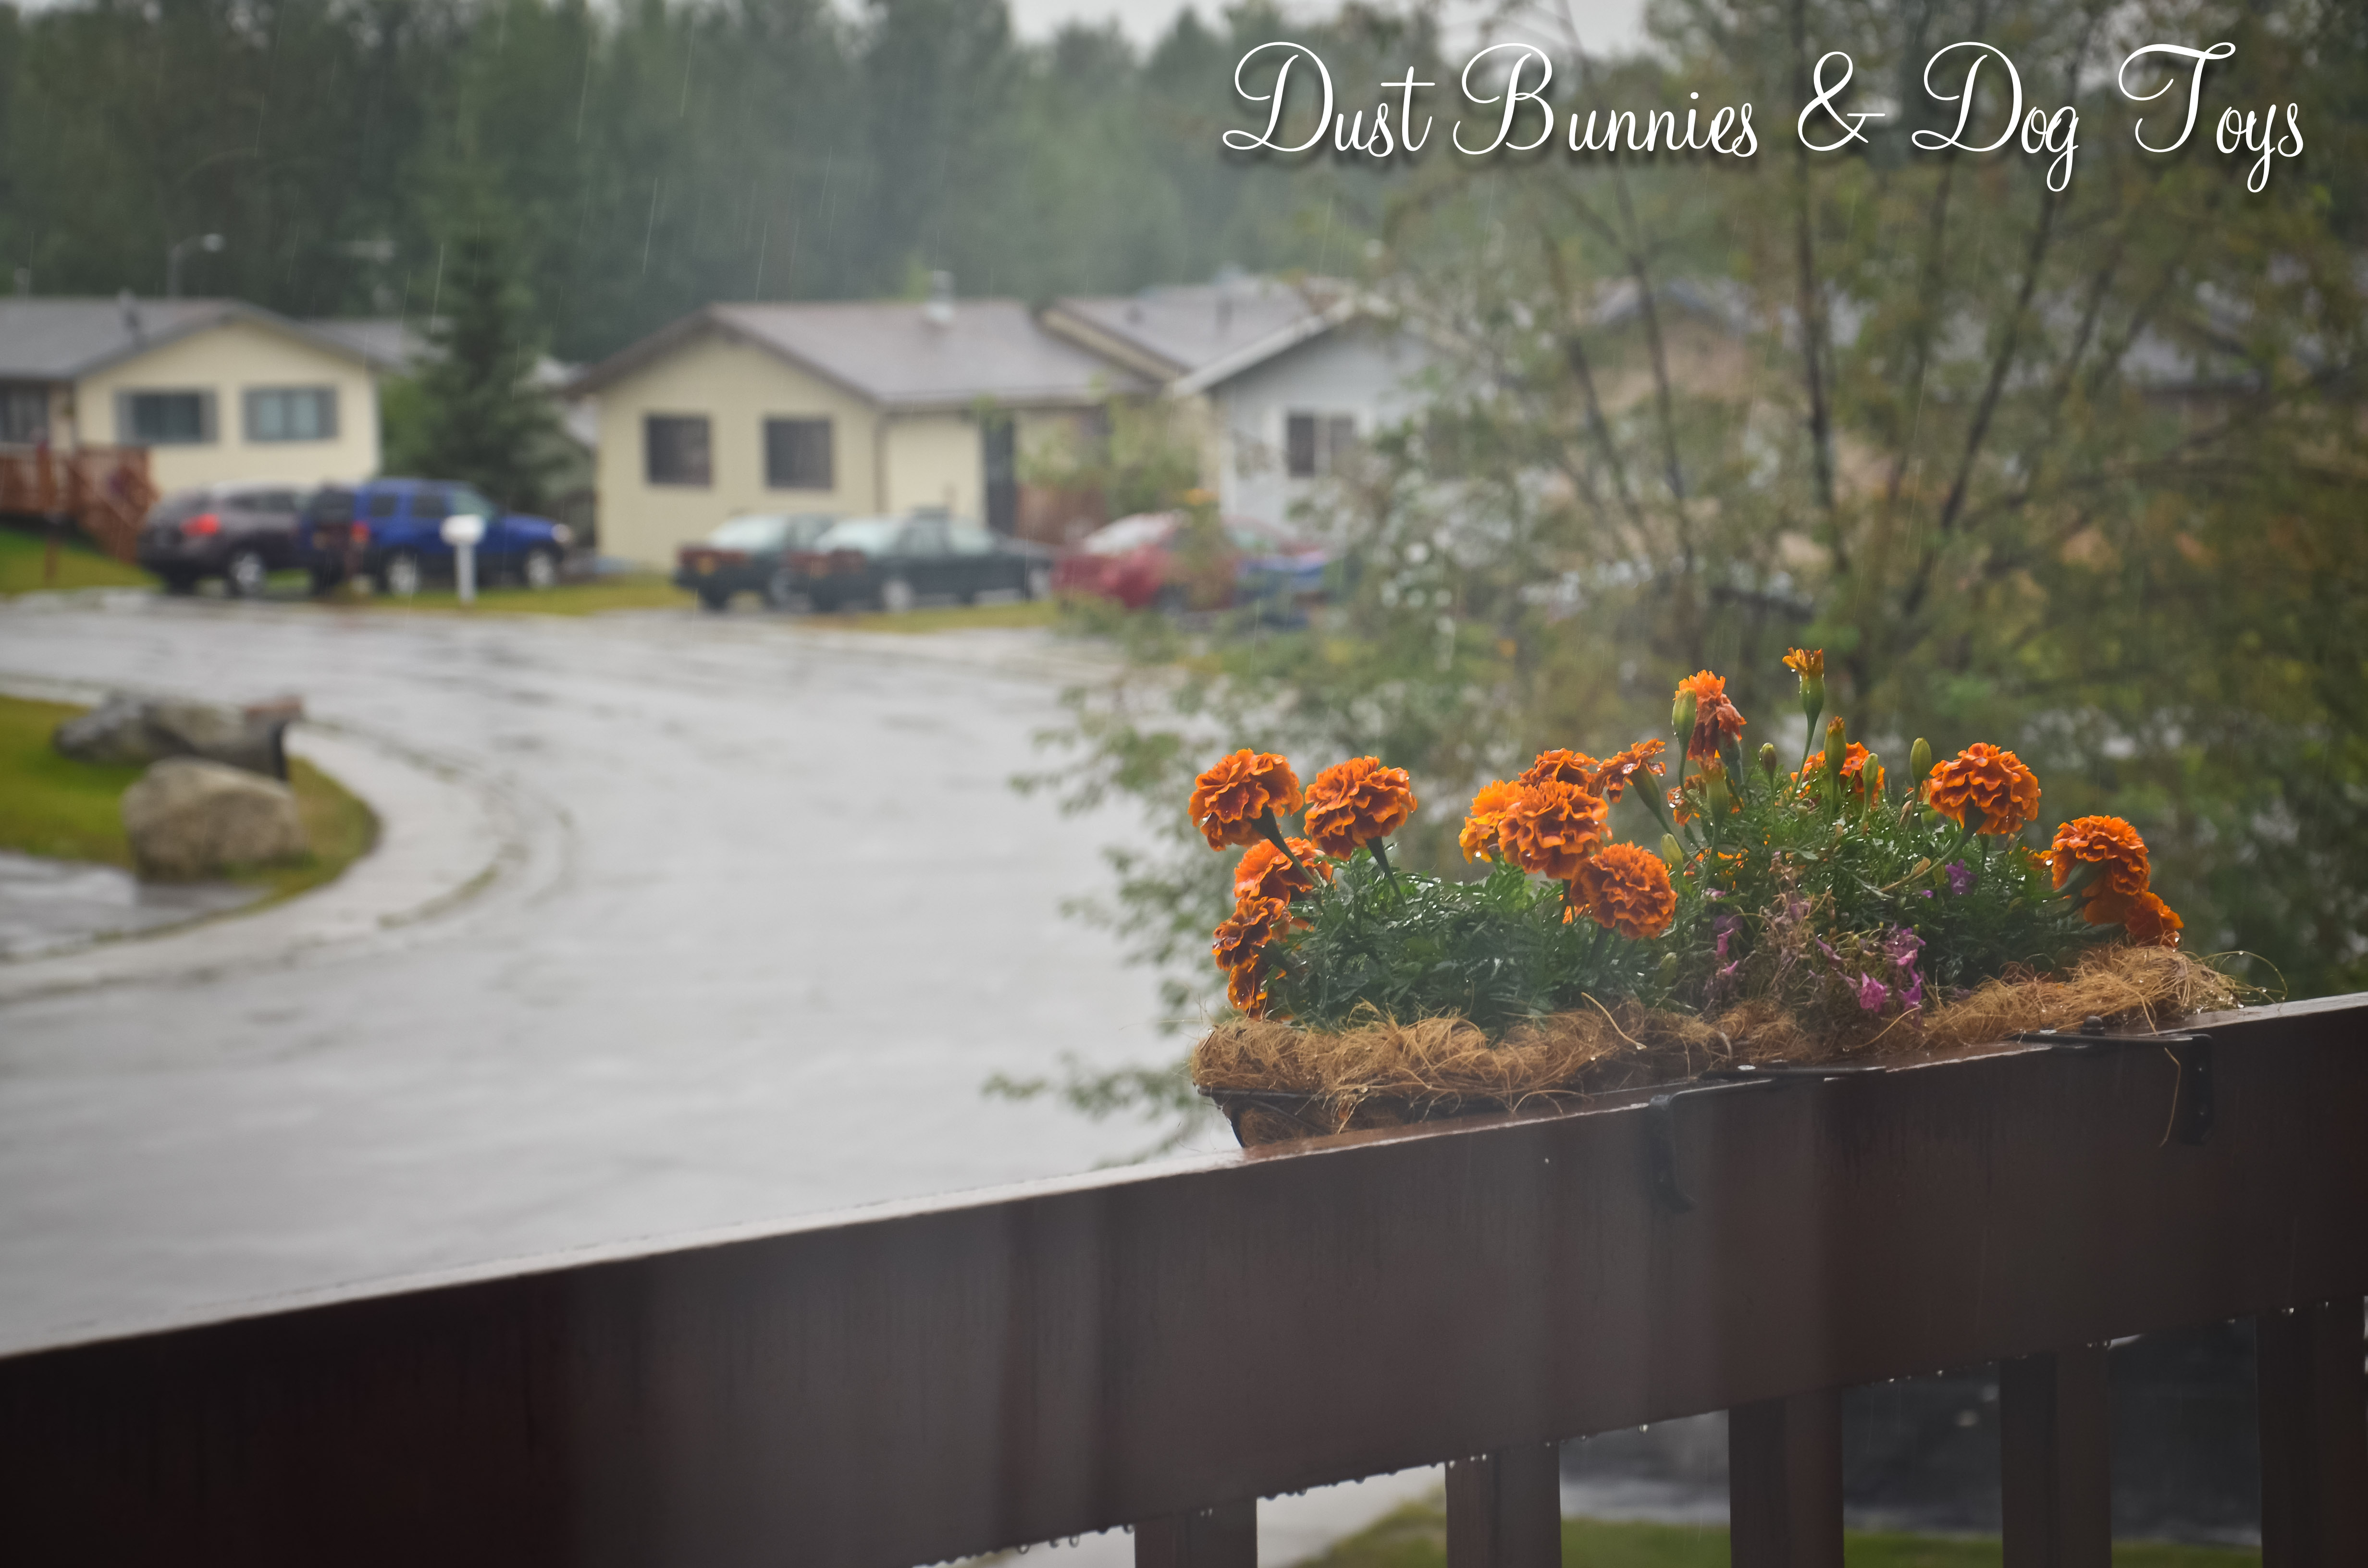
Although I’ve been traveling in the lower 48 (as we Alaskans call it!) the last few days, where there are NO signs of autumn, I was very happy to see the colors start to change before leaving the 49th state. I’m probably part of a vast minority there who feels that way. Regardless, I’m ready for sweaters, stews and the crunch of leaves under foot.

5

4

I’ve always loved the changing of seasons, especially after living in the desert for the later part of my childhood where there’s only two seasons – HOT and less hot. There’s just something about the change that revives my creativity. And while I love the long carefree days of summer, I’m always glad to see the blazing colors of fall arrive and wow me with their splendor.

3

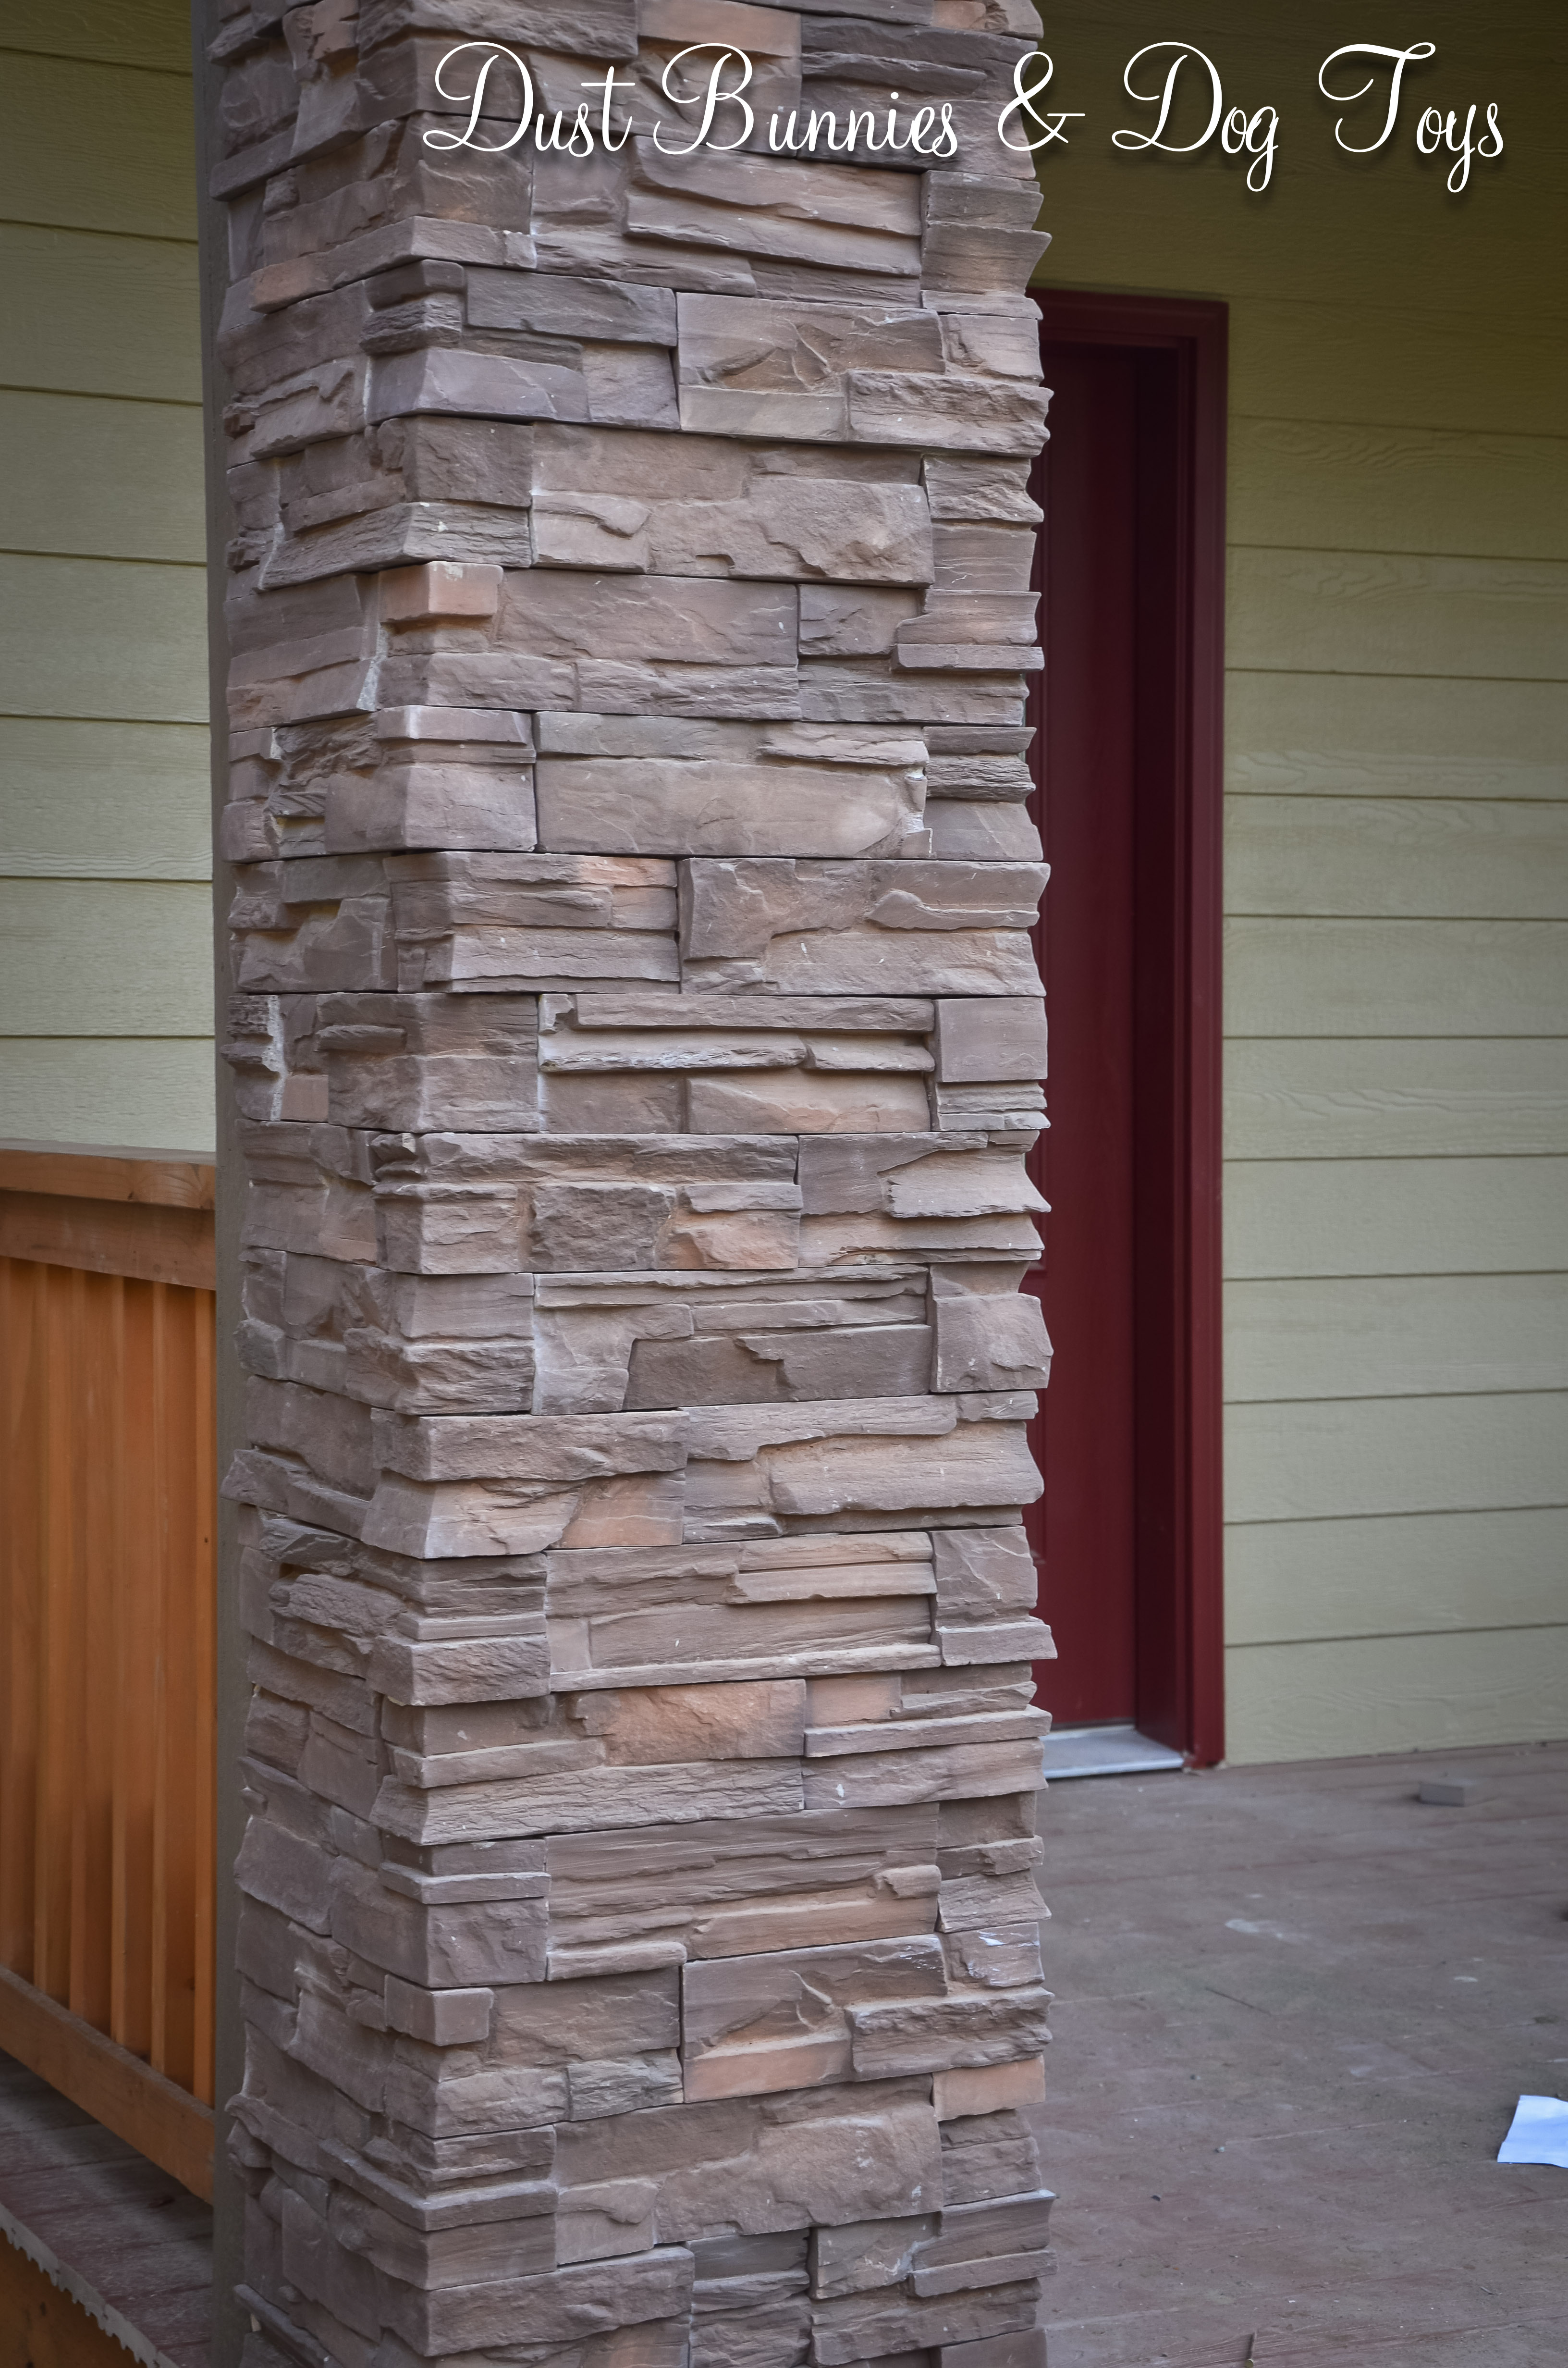
Maybe it’s because fall heralds the beginning of the holiday season – which you all know I love decorating for – or maybe it’s just the thrill of something new. Whatever the reason, this year that feeling is definitely intense with the “nesting” desire spurred by the construction of our new home. I’m itching to move in and watch all of our plans come to reality. It will be the “harvest”of a lot of effort for the hubs and I.

1

So as my favorite scripture, Ecclesiastes 3:1 says:

To every thing there is a season, and a time to every purpose under the heaven:
A time to be born, and a time to die; a time to plant, a time to reap that which is planted;
A time to kill, and a time to heal; a time to break down, and a time to build up;
A time to weep, and a time to laugh; a time to mourn, and a time to dance;
A time to cast away stones, and a time to gather stones together; a time to embrace, and a time to refrain from embracing;
A time to get, and a time to lose; a time to keep, and a time to cast away;
A time to rend, and a time to sow; a time to keep silence, and a time to speak;
A time to love, and a time to hate; a time of war, and a time of peace.

2

Quick Update

FallDrive

I made a final stop by the house today to see if there was any progress since last week before heading out of town for our cross country road trip.  Unfortunately, although the fall leaves down the driveway were sure pretty, there wasn’t much progress to report.  The roofing and electrical are still MIA, but the gas line had been installed on the side of the garage, the siding on the front of the house was almost complete, the man door had been installed in the garage, the front porch columns are taking shape and the siding patch for the dining room windows had been fixed.

House

Back

I think we are officially a month behind schedule now, although the foreman is still thinking they will be done by November.  I guess he plans to go gang-busters once they get the roof done and can start work inside.

In addition to the foreman, I met with our realtor and the new electrician (the previous one apparently quit) to go over the plan for everything.  The new electrician says he will start tomorrow and have everything done by the inspection on Friday.  The roofing material is supposed to be delivered so the roofer can start that this week too.  We’ll see.  I might just be sending some friends over next weekend to check.


A Studio of My Very Own!

The studio/office is my most anticipated and daydreamed about room in our new home for obvious reasons.  Although the main colors will be the same neutrals found in other rooms of our home, there will be a healthy dose of purple accents throughout the space, including my pretty purple chair I’ve blogged about before.  The plans for this space include a wall-length desk down one side of the room with shelves overhead for storage.  Something like this.

I want enough room for both the hubs and I to have a spot to sit with the printer and Silhouette  in between.  I’d like the printer to live in a cabinet under the desk where we can store paper too.  I plan for the Silhouette to be on the desk top where there will be room to feed material into it.  Here’s the basic concept, made with two wood file cabinets we got on Craigslist right after moving to the mainland for $25 each and a cabinet we will build to house the printer and support the middle of the desk.

Picture 2Because we have more files than the two cabinets can hold as it is, I might add a file storage bench like this one.  It would provide a little bit of extra seating if I have a group of clients and can be moved around as needed or even used as a prop.

Luckily hubby uses a laptop that won’t always be on the desk, so that leaves room for me to spread out with craft projects.  I’m toying with the idea of adding peg board – likely painted purple – on the wall above the desk but below the shelves for storing things up off the desk, keeping the desktop clear.

The other wall will remain mostly bare to accommodate my backdrops for photography sessions.  I may eventually add studio lights to my photography arsenal, but for now the natural light from the window will work just fine. I may finish that wall in pallet wood like this, but that would likely be a project much later down the road.

I’m on the hunt for a large armoire or hutch for the other corner by the door to house my craft supplies like this.  That keeps things behind closed doors, both out of sight and out of reach of any clients’ little hands.  I might add something like this to the side of the armoire for a little extra work space when crafting so I’m not always spread out on the desktop.  The other option is to create something with storage underneath and above a workspace in the center like this.

Large sliding barn doors like these will added at some point to allow us to close off the space when have guests over or I need a little privacy for a boudoir session.  They’d double as a nice backdrop if needed too!  We will have to figure out a way for the doors to fit past the desk and shelves when open, but that should be simple as leaving a gap between the desk and the wall.

So that’s the grand plan to fit a photo studio, craft room and office for two into one room.  Good thing it’s a fairly large one!  🙂

Don’t Fence Me In

We knew we’d  install some type of fence at the new house to keep the dogs contained on days when they stay home and we are at work, we just weren’t sure what type we’d use.  It needs to be solid enough to keep our hooligans in and the wildlife out, but not so much that it impedes the rural setting and views.

My first round of research led me to this post and metal bar style.  I like it, but it’s a little too contemporary for our taste and it felt a little heavy.

Fence
Source

Then we spotted this chain link and wood style in a neighborhood where our builder has other homes under construction.  I’m not a fan of chain link, but because it was colored and paired with wood it looked ok.  It still seemed a bit much though.

Fence

The next option I found during a wedding photography gig at a garden.  The owners had installed his post and cable system after fighting the local moose population for years and loosing.  They told me they had fenced approximately 10 acres for about $7,000 by purchasing used cable from a contact who worked with the seismic monitoring station.  Apparently the seismic equipment requires new cable after a certain amount of use so they sell off the used wire in 1,000′ spools!

Fence2

Even better than the price was the fact that it blended in with the vegetation so well, you had to purposely look for it in some areas of the property.  Plus they said that they hadn’t had a single moose in the garden since the fence had been installed.

I showed the hubs this idea and he was impressed.  We may have to put the lower strands closer together to keep the dogs from going through, but that’s not a costly or difficult change to include.

Now lets just hope we get into the house before winter hits so we can install enough to let the dogs enjoy the backyard during the day!

Dye Job

I had a couple of white shirts with pit stains I just couldn’t seem to get out, despite trying all of my pinned tips.  I really liked both tops, so rather than throw them away I decided to dye them and disguise the issue.

2

I picked out purple and lime dye at Micheals, which then sat around for several weeks due to a super busy schedule.  Then one day it rained and I thought, “What better project for a dreary day than infusing some color into my wardrobe!”

1

I dug out a tub I use to do my foot detox soaks and gathered the other supplies needed.

3

The directions were fairly simple to follow.  Step one: Add salt to hot water and stir.

4

Step two: Add dye and stir (after watching the cool color swirls created first!).

5

6

Step three: Add item to be dyed. The directions said to stir continuously for 15 minutes, then let sit for 45 minutes, stirring occasionally. I wanted a dip dye or ombré effect, so I decided to divide the 15 minutes into thirds, one for each section of the shirt, then let the whole item sit for 45 minutes.

7

8

That theory didn’t work exactly how I envisioned on the first shirt.  Instead the entire shirt looked about the same color.  It could be because the material was synthetic and not cotton like they recommend, but I didn’t think that would make much of a difference.

The second shirt was, cotton so this time I only stirred occasionally during each 5 minute portion and removed the entire item after 15 minutes.    That seemed to create the ombré effect I wanted much better. I rinsed both tops and then washed them before hanging them to dry.

Throughout this process my assistant did nothing to help other than supervising from her favorite spot on the couch!

9

I think both turned out ok and I’m glad I decided to add more color to my closet.

10   11

I’ve worn the purple top a few times now and think its a nice casual piece.  I haven’t worn the green top yet, but plan to pair it with slacks and a cardigan for a casual work outfit.  What do you think?  Improvement or just a cover up?

How Will My Garden Grow?

As I mentioned last week I plan to install our garden in the alcove created by the side of the house and the back of the third garage bay.  The space measures 12′ wide by 22′ long, which is a great space for a garden.  Here is the space as it sits.

GardenI knew I wanted the garden fenced off from the rest of the yard so the dogs wouldn’t be in there when we’re not home, but I hadn’t really decided what kind of fencing to use until I saw this community garden here in Anchorage!  Can you say AH-MAZE-ING?!

CIHAGarden

CIHAPostAnd the construction seemed simple enough – hog panels stapled (with heavy duty staples) onto posts and trim supports. While I love the arbor around the top, that might come in “Phase 2” but it would provide a great spot for plants such as strawberries or even tomatoes to trail!  I also plan for the pergola over the gate to come later.  It’s more important to get the garden going and producing than making it super pretty right?

Granted, my garden won’t be this big, (and if it was I might have to quit my day-job just to maintain it!), but the overall layout and design is a perfect example of what I want.  I took the hubs by to make sure it was doable on a smaller scale and he liked it.  He even mentioned how their raised beds were probably the exact design he’d suggest for our garden!

RaisedBeds

Although I’d love to have a green house right away, I know that likely won’t happen until next summer.  But when it does happen, I plan to use these Ana-White.com plans!  I’m thinking the green house will end up somewhere to the right of the garden where it will get sunlight all day.  Until then I will use hoops over the raised beds to extend the growing season on either end.

Right now I plan to grow chard, celery, cucumbers, tomatoes (regular and cherry), bell peppers (different colors for salsa!), carrots, green and yellow onions, potatoes, jalapenos (not sure how they will fare in this climate, so I might have to wait until we have a green house), garlic, snow peas, green beans and broccoli.  I also recently inherited a purple cauliflower plant which will find a home in my garden if it survives the move.  I also plan to have stacked planters like these on the back deck in which I’ll transplant my current salad bowl and create an herb garden with basil, oregano, rosemary, thyme, sage, dill and cilantro, which can be moved during the winter.

BarrelI recently found this plastic barrel for free on Craigslist and plan to create something like this with it to plant my strawberries in.  A planter and compost all in one?  Sounds great!  Made with a freebie barrel – even better!

RainBarrelWe will also be installing rain barrels with rain chains around the house like this.  Luckily, I have a previous photography client who used wine and whiskey barrels as their wedding decor and no longer needs them, so I’ve got some earmarked for me at a discounted rate! 🙂  I also found this super simple and inexpensive tutorial for a copper rain chain that I plan to make.  And because we are working with the rain garden program, any money spent on these rain catchments counts toward our overall budget, of which half will will be reimbursed!

Now we just need to fast forward to move in day and put all these plans into action!

Just a Little Update

There wasn’t much progress this week, so today’s update will be rather brief.  The wood roof has been covered with a protective paper material to keep the rain out of the house until the metal roofing, which has been ordered, is installed – hopefully this week.

1

For now, all the windows and doors are open to let the interior wood dry out after the week-long rain we had.  The electrical should be done by mid-week and then insulation and drywall will begin.  We met with the builder on-site Thursday, and went over a few details.  He confirmed the siding where the nook window size was changed will be replaced by the framers, as it was their error.  He also confirmed they will add a header over the entry to the studio, which will give us a place to hang sliding tracks for doors later (watch for a post in the coming weeks about my plans for the office!).

The interior gas lines have been plumbed, but Enstar still has to run the line into the property from the street.  I’m not sure when this will happen, but it looks like they’ve already been on site doing some preparations.

2

While the crew was waiting on the sub-contractors they began installing the siding on the front of the house , which makes it seem so much more solid.

3

They also built the front porch, which will eventually have partial stone columns on either side where the posts currently are.  I can’t wait to decorate this space for holidays!  And I plan to add a pretty little rocking chair to that corner to enjoy the view!

4

5It’s not grand, but it’s our own little slice of the mountain, and I love it!

So that’s it for this week’s update.  Like I said, not much.  Hopefully this week will be more productive so I can share another milestone or two before the hubs and I head off to the lower 48 for a short trip. 🙂

Big Plans for the Back Yard

Although the house is still under construction and we won’t move in until late fall, we’ve already been thinking about what we want the back yard to look like.  The builder will install a 20′ x 12′ deck off the family room – where the three ‘pink’ footers are in the picture below.  We specifically requested an additional slider door be included in our Master Bedroom rather than just a window so we can have back yard access on that side too.  The builder will provide basic ‘steps’ at that door for now, but next season we plan to build a deck to match the one on the other side.

Back

We had originally planned to continue the deck out the entire length of the house, but we decided it would be easier and more cost effective to have the two decks with a ground-level patio in between so that the hot tub could sit lower than the deck which eliminates the need to ‘climb’ into it.  Plus I won’t fret about the deck being stable enough to support a full hot tub!

I also like the idea of breaking the space up into different areas for different purposes.  I’m envisioning something like this on our ‘private’ Master Bedroom deck for lounging and a dining set on the deck off the family room.  On the patio below I would like to make something like this where guests could sit and relax near a fire pit which will be made from this free washing machine tub we snagged on Craigslist last week!

Pit

The plan is to use pavers like this or stamped concrete like this on the patio, then use landscaping stones to create a spot that the drum will slide into.  Eventually we’d like to have one or both decks screened in or at least covered by a pergola with some sort of rain protection to extend the usability in our short summer season.  But that of course is a year or five down the road.

Beyond the decks and patio we plan to have grass for the dogs.  Depending on when we get into the house, we might buy some of the ‘end of season clearance seed’ to put out and see what we get, but most likely we will have the yard hydroseeded next spring.  I was stunned to find out that they charge just $395 if the area to be seeded is less than 3,000 sq. ft.  Um, yeah!  Sounds good to me!  Definitely better than the Craigslist ad I saw for free sod if you come cut up and haul off some guy’s yard!  I might be thrifty, but I know my time is valuable and I’d spend a whole lot more digging up, hauling and replanting his old “who knows what’s in it” grass than paying the out call to have fresh, weed free grass growing within 2 weeks!  Knowing us we’ll measure out everything before we schedule and make sure we’re just under that figure. We should be able to do an L-shape around the back and side of the house well within that figure.  🙂

I don’t have much landscaping beyond the deck-patio-deck and lawn planned for the back yard, but I will probably put a small flower bed along the bedroom side of the house for perennials like bulbs and hostas.  Our garden will be to the right of the deck off the family room in the alcove created between the side o the house and 3rd bay of the garage, which you can see on the right edge of the photo above.  Watch for a post about that plan next week!

Kitchen and Bath Colors

We recently picked out tile for the Master Bathroom shower and jacuzzi tub, so we brought along a sample when we met with the foreman to see the cabinets and counter tops that the builder had shipped up from the lower 48.  Here’s the quartz that they picked out.  It’s a little darker than I’d hoped, but it works well with all the other colors so I think it will turn out fine.  And it’s better than the white quartz they used in another model!  I couldn’t imagine trying to keep that clean with my hubby’s cooking habits!

Quartz

Here’s a sneak peek of the cabinet color and shaker style.

Cabinets

Here’s the combo of the flooring, cabinets and counter tops.

FloorQuartzCab

The bathrooms will have the same counter tops and cabinets, so we chose a neutral ‘spa’ style tile and accent for the Master Bathroom.

FloorQuartzBathTile

To save the budget, the hall bath has this single piece shower/tub instead of a tile surround – san’s shower doors.

HallShower

Our sinks will all be under-mounted squares like this one, except the cut out won’t be rounded in the front as much as this one is.

SinkShape

While we were there we also confirmed that our front porch columns and fireplace will have this stone, which should also coordinate well.

ExteriorStone

As you can tell, our colors are ‘earthy’ yet neutral.  I plan to add pops of color with accessories that can be easily changed out when the mood strikes.  We plan to have oil rubbed bronze fixtures on all the sinks and showers to continue the craftsman and spa style.  It’s hard to envision what it will all look like together and I think I’ll silently stress about it  until I see the finished product.  But it’s all part of the process and I’m sure it will turn out just fine.

Another Little Update

I realized it’s been two weeks since I’ve done an update on the progress of the house, so here’s the latest.  Almost all of the exterior doors and windows are in and the natural gas lines are done.

GreatRmNotice how the windows in the nook are shorter than the family room and the extra framing they had to add to correct the hole size they originally framed?  Well this is what it looks like on the outside.  I’m not super keen on this little change and will certainly be watching to make sure it looks better than this when we do our walk through!  I’ve also questioned why one window opens and the other doesn’t.  Seems they should both be one or the other.

ExteriorPatch

Laundry   Studio
Laundry room and Studio

HallBath Master
Hall Bathroom and Master Bedroom

MasterBathMaster Bathroom

GarageThe little window in the garage.  I’m not sure of it’s purpose, since it doesn’t let in much light…escape hatch perhaps? LOL

The highlight of the recent progress is our front door being installed!  In the design we liked and asked for!  Here it is from inside with the framed entry way and outside where the covered front porch will be.  Below is a wide shot of the front entry from outside.  Can’t wait to see this bad boy painted purple!

FrontDoorInside   FrontDoorOutsideCloseup

FrontDoorOutside

Apparently, there was a delay with the roofing contractor and electrician because we were told those items would happen this week, but there was no sign of either being started yet.  Instead there was limited progress on the vented soffets and trim around the windows and corners on the front of the house.

Soffett

WindowTrim

There was also a pile of materials to begin the lap board siding on the front of the house and our back deck!  We’ve got big plans for the back yard so watch for a post about that later this week!

Materials