Expanding the Egg Table

The Hubs picked up a fancy new smoker a few months back and has been using it pretty regularly, so he decided to incorporate it into his existing egg table.  He had originally sealed the whole table with Thompsons water seal but that didn’t seem to be holding up too well to Alaska’s winters so he knew he was going to have to sand it down and refinish it this season anyway.

He built a new section to wrap around the smoker that matched the style of the original table and attached it with his Kreg tool.  I was working on other projects while he was doing this stage so I didn’t get any pictures of it but you can figure out the setup from the finished images in this post. He cut a small hole in the side to access the wood chip drawer on the smoker.

We decided to go with outdoor deck paint for the refinish and chose a dark grey that should hide dirt and any minor damage it might get outside.  The Hubs said it went on like tar so it should provide a pretty good barrier to the elements.

The new extended size is a perfect fit for the smaller rug we had from last season and makes stepping out from the house to grill a bit comfier.  The new expanded top gives him plenty of room to prep things before they go into either the grill or the smoker and is the perfect spot for my big cast iron lantern and piggy planter.

Once it was all painted, he added the bottle opener we picked up forever ago to the side, which is conveniently located right next to our new dining set.   And with the herbs growing nearby he can pluck some to add to his culinary masterpieces.

I’ve also found that it works well as an impromptu potting bench when I’m prepping pots for the deck.  Good thing he’s ok with sharing every now and then! 🙂

Advertisement

Catching Up

My lady slipper orchids are blooming in the rain garden!

It’s been a while since my last post because we’ve been pretty darn busy around here the past several weeks.  So here’s a quick run-down of what’s been going on.

The yard is in bloom finally, after a long wet spring.

At the beginning of the year I moved into a new position at work, which requires learning several new software platforms and skills.  It took a while for my old position to be filled so for a while I was basically doing both jobs.  The gal who filled my previous position has been with the company for a few years and worked in our department, but she too had a lot of learning to do in her new role.  When she needed to be out for a bit due to emergency surgery over the spring, I had to help out by stepping back into that role while also continuing to do my new job.  It was a bit chaotic and didn’t leave much time or energy for other things.  Luckily it was only for a few weeks and now she’s recovered and back without restriction so we can both settle into our usual duties.

The new pillows we picked up on our trip look great around the fire pit!

We took a quick trip to visit my Mother-In-Law in Portland, where we did some shopping for the house, attended a beekeeping class (something we’re planning to try next year) and I organized a styled photo shoot.  The Hubs and I also took care of a couple small projects around Mom’s house while we were there.  Since we still had snow on the ground when we left and returned to a snow storm – it was a nice break to enjoy some spring weather and blooms!

The new chicks have traded fluff for feathers and recently moved out to the big yard with the older chickens.  It seems like everyone is adjusting well.

When we returned from our trip we added to our chicken flock with two batches of baby chicks!  These little fluff balls have been living in the garage in a large brooder we made from a stock tank planter I had.  In addition to multiple feedings a day we worked hard to make sure they were handled often as well so they will be friendly when they are adults.  To make room for them outside, the Hubs made a massive addition to the coop, doubling their indoor space and tripling the number of nest boxes.  We’re still putting the finishing touches on that project but I’ll share it soon.

Still buried in snow, this is how the green house looked when we got back from our trip.

I spent many hours getting the green house cleared out and prepped for the season after our trip.  I attended the annual VIP plant sale at my favorite nursery toward the end of April, but the blooms had to hide out in the green house for a few more weeks before it was safe for them to be outside.  While I waited on the weather, the edible crops were all started in the green house and the Hubs revamped the hydroponic system for the tomatoes with bigger tubing so it’s more efficient.  Now everything is growing and we’re already enjoying some of the bounty from our lettuce, spinach and dill plants!

And here’s how it looked after the plant sale – at least until I could plant everything in the yard.
The yard is coming together – here’s a sneak peek at the updates the Hubs made to the egg table and another project I’ll share soon.

We did several projects around the yard as we prepared for the summer season.  I revamped a serving cart for the deck, upcycled an old milk can into a planter and created planters out of old conveyor belt scoops for the new chicken coop expansion.  The Hubs extended his egg table with a spot to store his new smoker and built me potato crates which will double our crop this year.  We sold the old patio furniture to make way for a new dining table and a set of loungers for the deck we installed last summer.  We also started installing a gazebo style covering over the hot tub on that deck.  We hope to have that completed soon – but need to arrange some extra helpers to get the roof on.  Out front, I styled the vintage cart on the front porch for spring and then for summer with patriotic colors.

The new table is a perfect fit for our deck and it expands if we have a big group over.
The firepit is cleaned out and ready for use.
The new lounge chairs (with a hiding kitty) and partially installed gazebo on the big deck.  I’ll be landscaping around this deck later this summer and plan to mirror the rock bed around the other deck.
I updated the wood storage for the fire pit with some cinder blocks that we took out when the Hubs expanded the chicken coop. It was an easy, and free upgrade that also hides the electrical conduit for the hot tub.
I white washed terra-cotta pots to decorate the whiskey barrel tables and filled them with marigolds to ward off the bugs. I also placed small tiki torches on each table as a backup.
I’ve had this thermometer since last summer and we finally found a spot for it right next to the door.

Inside, I changed up a few things, including curtains in all the bedrooms, the rugs in our master bath, swapping Brinley’s kennel for a new entry bench.  Last weekend we took advantage of the neighborhood traffic for a neighbor’s estate sale and had a yard sale to clear out some extra clutter that accumulated around the house over the winter.  We were mildly successful in that goal, but there’s still lots to purge, which is why I only picked up a few small décor items when I attended the spring Alaska Chicks Vintage Market.

I picked up these vintage bells at the market and think they pair well with my wreath on the front door.

Whew – seeing it all written out makes me realize just how much we crammed into a few weeks!  As my Mother-in-Law says “No grass grows under our feet!”  And now that summer is in full swing we’ve got a whole new round of projects and activities planned.  Stay tuned over the next few weeks to see the projects I mentioned plus others that are still in the works!  Hopefully I’ll be able to keep you updated more regularly now.  In the meantime I’ll leave you with more pictures of those silly chicks, who just moved out to the big yard.  🙂

Snack time at the feeder with the fluffy butt club.
We have several Novogens in this batch that will be great egg layers.
And there are a couple Dominiques for some variety.
My favorites are the Easter eggers who will lay greenish blue eggs and have fun little feather beards!
The dogs act as constant security for the cluckers.
They are quite used to us and often come running to meet us at the gate, or investigate our feet to see if they are edible. 🙂
Our flock is now up to 20 chickens so it’s a good thing the Hubs got that expansion completed!

The Shed Bed

It’s been a while since I’ve had time to write for the blog, but I found a few minutes today to share one of the last projects of the season before the snow started to fly.  I added a whole new flower bed along the side of the shed!  This space used to be a dumping ground for pallets and scrap wood we were saving for future projects, but its one of the first things you see as you pull up to the house and now that the green house was over her I wanted the area to have a more structured look.  So the Hubs helped clear out all the wood at the beginning of the season and I started planning out the layout once I confirmed the exposure this space gets is mostly shade.

Here’s how it was looking as fall started to arrive.  I’d used left over edging stones to create a border and placed a few pieces of garden art to start establishing the structure of the layout.  I stopped at an end of season plant sale near my office and got several options that should do well in the shade.  I planned to fill in with other plants from another bed that will be eliminated next summer.  Since this whole area is rocky back fill I put down a layer of top soil to create the base of the bed.

Once the top soil was in and the plants were in the ground I covered the areas around each plant with newspaper to prevent weed growth next season. It was an interesting process since the wind decided to kick up about the same time so I had to quickly put mulch down over the paper to hold it in place.

While I alternated between piecing newspaper sections around plants and chasing them across the yard as they blew in the wind, my assistant was quite busy catching up on her dirt baths…

I used wood chip mulch because it was inexpensive and I had several large areas to cover between this bed and some other projects.  The Hubs got me a full truck load of wood chips for around $20 the same day he got me the load of top soil and gravel to go around the green house.

Since I’m using perennials, I left plenty of room for things to spread over the coming years.  I used lambs ear around the rusty metal tank to create a batch of low visual interest along the front of the center of the bed.

These two hostas were transplants from the shade bed at the corner of the fenced yard which will be eliminated next season when we build a new outbuilding.  I call it “The Barn” but the Hubs thinks it’s a garage.  We’ll see who wins that debate. 🙂

Another transplant is this little astible.   This is the third placement it’s had since coming to our house.  He started in the gifted garden but was getting too much sun so I moved him to the shade bed where he did much better.  Hopefully the third time is a charm holds true for him and he continues to grow even fuller in this spot.

I also used a few new catmint plants since Luna loves the ones we have in other beds already and it’s an easy keeper that fills in areas nicely.  These will give her a couple to choose from so she alternates which she rolls in each day so they all get a break to recuperate!

I also transplanted a Seal of Solomon that surprised me in the gifted garden.  I’d brought him back from my Mother-In-Law’s garden in Washington and hadn’t seen him in the spring so I thought he hadn’t survived the winter.  This spot should be a much better exposure for him and he looks quite cozy behind the little quail family who are now safer from my active four-legged children!

Here’s how things looked once everything was in.  I’m excited to see how it all comes back next spring and watch it fill in the space.

There’s still some finishing touches needed, but this is a much better first impression as you come up the driveway.  It will look even better when I get that gravel the Hubs got me spread in front of it! Fingers crossed the weather will cooperate to let me do that next week when I have some time available so we don’t have piles of material at the corner of the driveway all winter!  And while I’m doing that the Hubs can get the last of the shed’s gutter completed so we have a ready supply of water when spring returns. 🙂

Picker Day Finds!

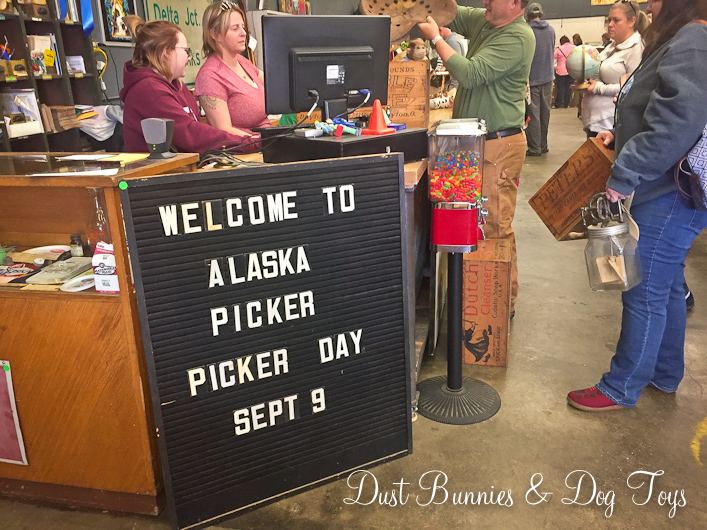
This past weekend I went to the fall Alaska Picker Day and as always had a great time.  The crowd that attends these events is always so courteous and there’s great finds that we can’t usually get here in Alaska at reasonable prices.

This was the first time they’ve held the event at their new location in downtown Palmer.  I love that they sit directly below the historic water tower which just adds to the charm.  I arrived 15 minutes before the sale opened and there was already a good sized crowd on-site, but everyone was respectful of the “gate” which was just an extension cord pulled across the driveway.  I ran into our friends Larry & Anne, who run Anne-Tiques and chatted with them about some projects I’m brainstorming while we waited for the sale to open.

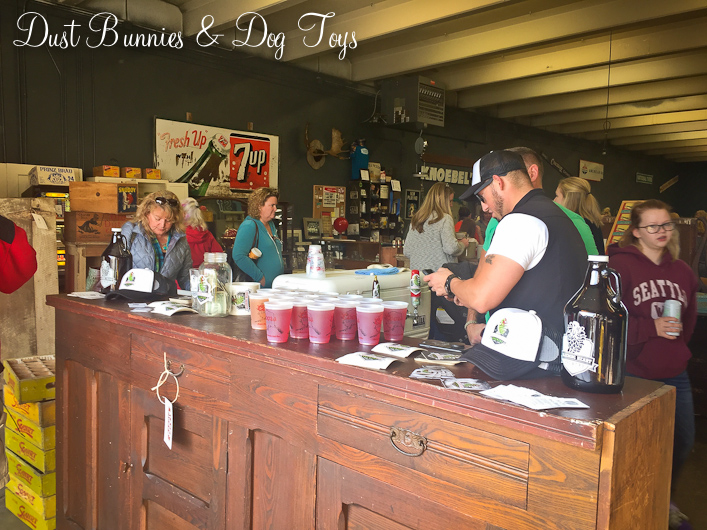
Once the bell rang everyone flooded in to the shop through the large bay door, right to this massive back bar piece they brought back from the midwest.  A local brewing company had samples available for a donation, but since I was driving solo I didn’t partake, but heard them receive good feedback from several patrons.

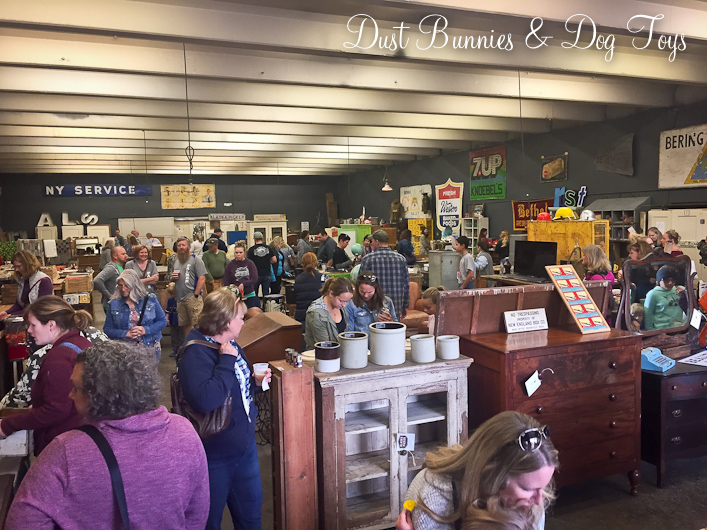
This was the scene inside behind the makeshift bar.  Oodles of awesome junk.  I wasn’t on the hunt for anything in particular so I decided to step back outside and look at things there now that the crowd had migrated inside.  I spotted these awesome metal headboards and knew they’d make great trellises for the garden but didn’t have an exact spot for them so I hesitated.  I was most interested in the larger more ornate piece, since they were just $30 each.

I decided to ponder them some more and browse for other items so I headed back inside to look around.  I spotted these cool carriage wheels, one set wood and the other metal.  The wooden ones were already spoken (tag pulled) for so I don’t know how much they were priced at.

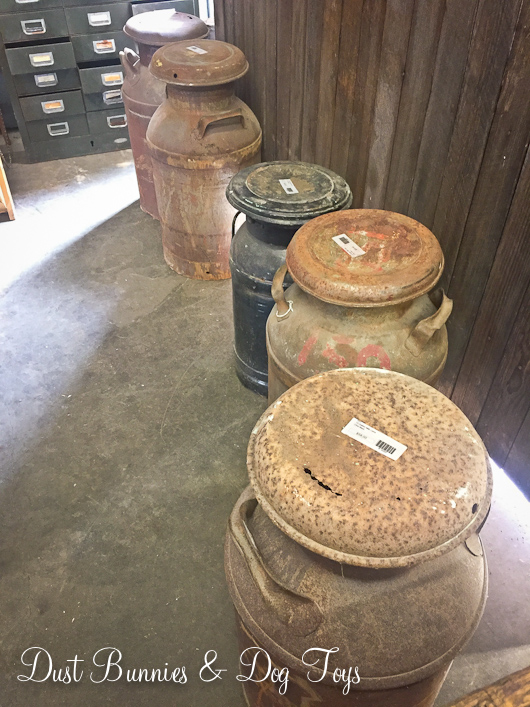
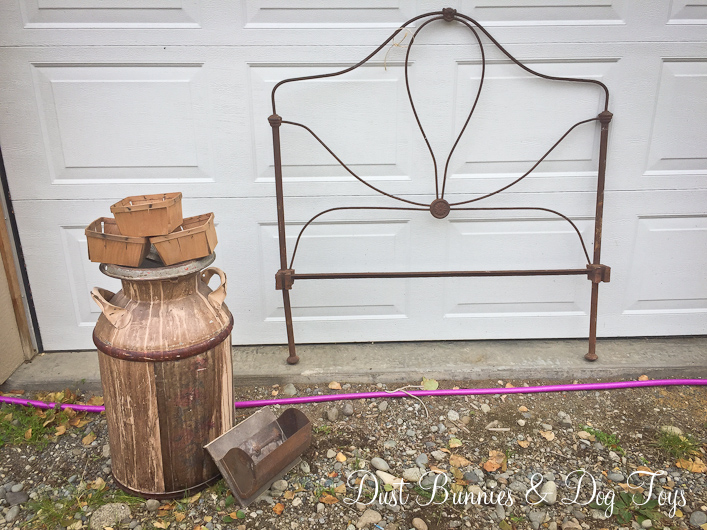
Near the wheels was this line of milk cans.  Priced at $58 each they were a good buy but I’d had the luck of finding one at a garage sale I stumbled upon that morning for just $20!  It doesn’t have the patina these ones do, but a coat of paint will have it ready for a new home on my deck or porch next year.

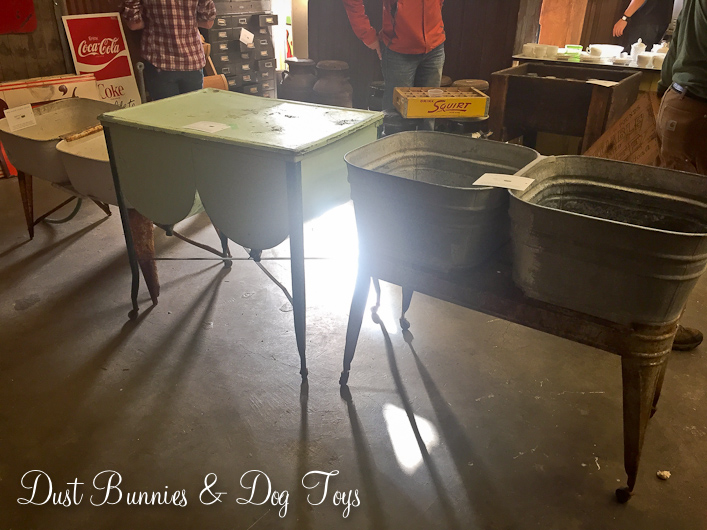
I’m always drawn to these wash tub stands because they make great raised planters, but I don’t have a spot for one right now and their $225+ price tag wasn’t really in the budget right now.  I’m sure they will find happy homes quickly.

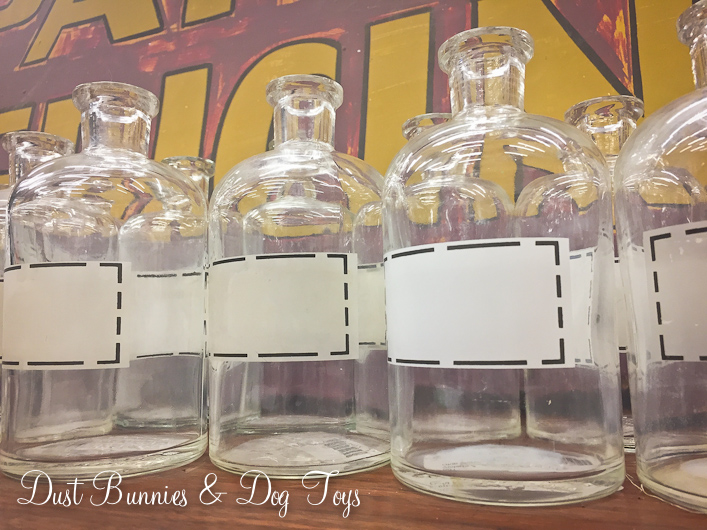
These fun apothecary jars caught my eye as well.  At $12 each they were a little pricey, but still a good buy.  I didn’t have a specific use for them so I left them for someone else to enjoy.

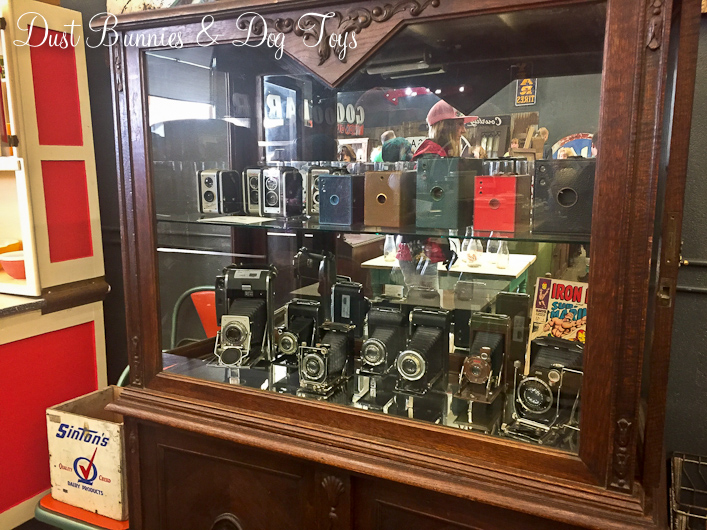
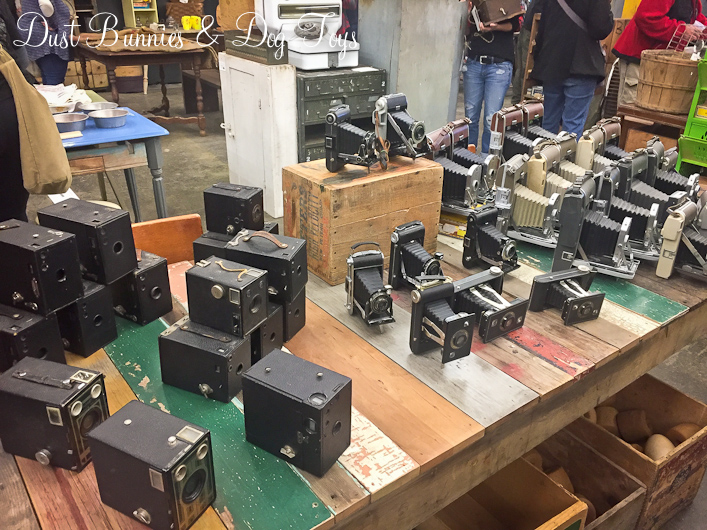
There were also several displays of vintage cameras.  As a photographer I love seeing them and the history the document, but I’m trying to simplify our spaces and reduce things that just collect dust so I passed on these, even though were well priced from $25-50 each.

This old photo viewer was another interesting photography find.  I didn’t get to ask about the history of the piece but it just looked cool – and the photo in the holder made me giggle thinking it was likely considered very risque when it was taken.

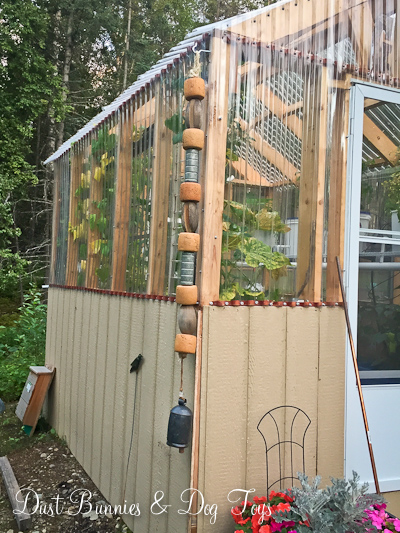
So here’s my final haul from the sale.  I ultimately decided to get one of the headboards, but when I went back out to grab the tag on the biggest one it was already gone, so I opted for the smallest one thinking it will give me more options on spots to put it.  I’ll store it in the green house for the winter and find it a home in the gardens next spring.  I also picked up a couple of wooden berry baskets for just $1.50 each.  I plan to use them in my seasonal decorating, starting with fall.  I’ve got a couple of pumpkins that are going to look adorable in them!  I also found this fun conveyor belt bin for $10 that I think will make a fun wall planter on the back deck next year.  I wanted to find a few more, but my friend Anne and the friends she brought beat me to them.  I told them if they don’t find a use for them I’d be happy to take them off their hands.  And lastly here’s the milk can I found at the garage sale.  Like I said, it needs some TLC, but it’s solid. 🙂

It wasn’t a big haul, but I’m pretty happy with the items and projects they will fuel – all for just under $65!  I’d love to hear what you think about my finds and ways you think I could use them in a comment!
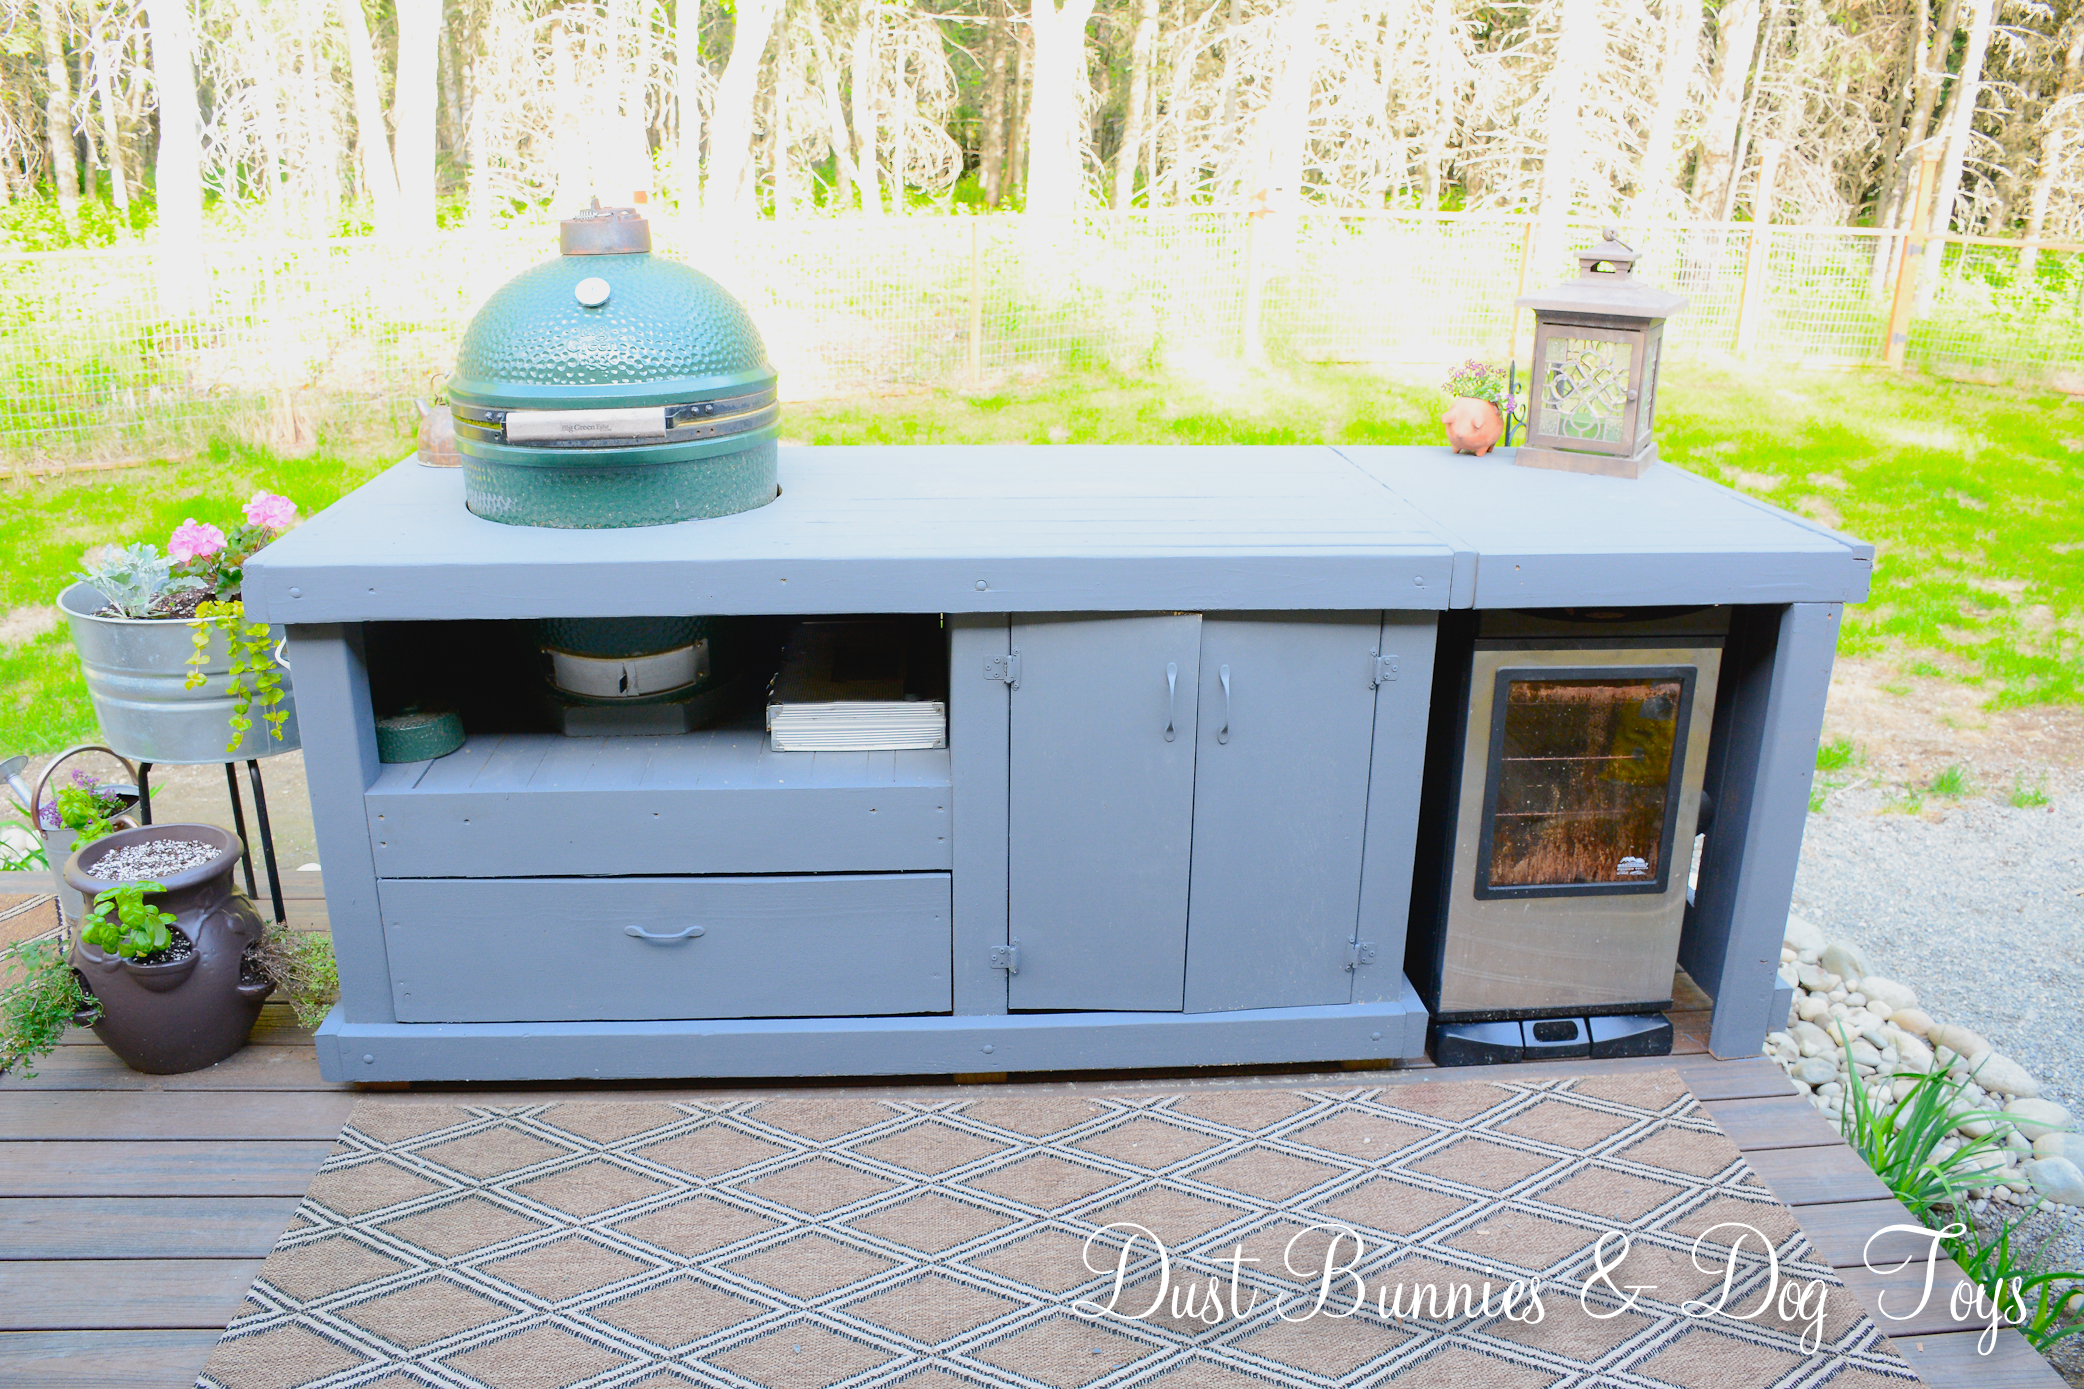
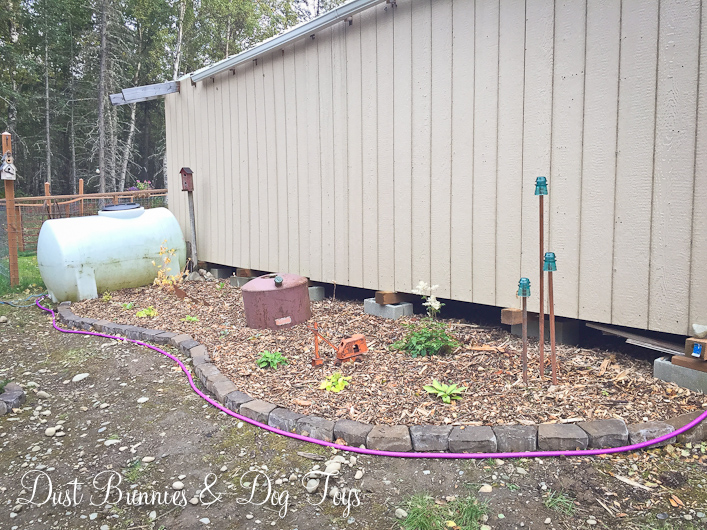
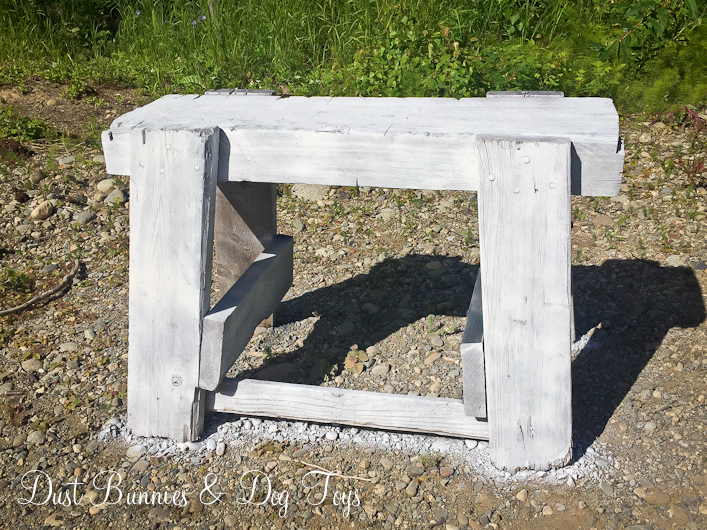
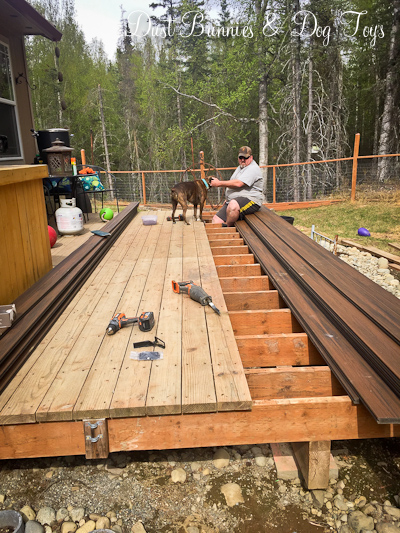
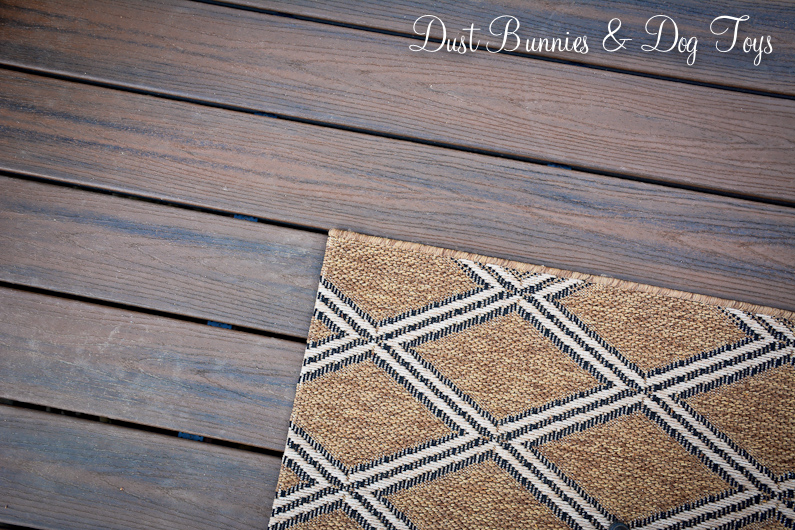
Adding a Porch to the Greenhouse

Since we got the green house set up this summer I’ve been wanting to add a little porch to the front to reduce the step in at the door.  I had planned to build one myself from pallet wood, but the Hubs offered up a few piece of damaged Trex boards that were scrap from our deck projects.  (I’ll be sharing the new deck & hot tub the Hubs has been working on all summer once I get a chance to style it a bit and get some photos!)

I certainly wasn’t going to turn down his help or an option that required less prep work – especially as we enter the last few weeks to get outdoor projects done before winter arrives in Alaska.  He built a simple frame from some some left over pressure treated boards left over from building the new deck and attached it to the frame of the green house on the front.  Because the ground slopes here we used paver bricks to support the frame so we could get it level.  Once we had it attached we pulled out the pavers and the Hubs added a support post using a scrap piece of 4×4, also from the deck construction.

I was busy getting a new flower bed installed next to the shed (I’ll be sharing that update next week) so I didn’t get a picture of that step but you can see it in the edge of the finished photo.  I plan to add fill dirt around the front, side and back of the green house to level things out a bit more before we spread gravel over the whole area around the green house.

Here’s a quick little before and after:

It’s amazing how much that little change elevates the look of the whole green house!  I absolutely love it and can’t wait to see it finished off with the gravel around it.  Now I just need to find a metal R at Alaska Picker Day tomorrow so I can complete the “GROW” sign I plan to add to the top of the front.  🙂  If I find some good treasures I’ll be sharing those next week as well!

Green House Sitting Area

Now that I spend a lot of time at the green house I decided to make a little spot to sit and take a break when I’m tending the garden.  It will also be the perfect spot to enjoy the new flower bed I’m putting in along the shed.

The spot is between the green house and the berry patch, just at the crest of the hillside as it starts to go down.  It’s a simple set-up that came together easily, starting with the chairs, which I found on the buy/sell page for $20.  When I got them they didn’t match – one was red and the other was tan.  If they had both been tan I probably would have left them as is, but since I wanted them to match I picked up a couple cans of spray paint for plastic to make them teal instead.

Apparently I was in such a hurry to get the project rolling that I forgot to take a before picture of the red chair, but here’s the tan one prior to it’s makeover.

And here it is while drying.  The paint went on easily and because it has a built in primer there was no prep work other than a light cleaning to remove any built up dirt.  It’s been about a month since I painted them and they seem to be holding up quite well.

I had a curbside freebie wooden stand I’d snagged while getting some other freebies off Craigslist and thought it would make a fun little table between the chairs.   You can check out a before picture of this little thing on Instagram.  I first tried to paint it white but the wood soaked up the paint inconsistently making it look splotchy.

I dug through the paint cabinet in the garage for an alternative and found two cans of grey spray paint.  The darker color seemed more uniform, although still not perfect.  I figured it would weather anyway so it just adds a bit of character and you can’t beat free paint!

To pull it all together, I added a couple of pillows from my stash for the backyard, along with some planters I’d filled earlier in the season and a citronella candle to keep the bugs at bay.  Not a bad little spot to relax for around $30 (chairs & paint)!  I may add a little shelf on the bottom of the table next season, but for now it works just fine.

We plan to cover the whole open area around the green house with landscape fabric and gravel over the labor day weekend, which will really finish off this space.  Now I just need some extra time to go out and enjoy it! 🙂


Well Float My Rope and Ring My Bell

Yesterday I mentioned making driftwood garlands, like the ones I saw in Homer, but today I’m sharing a similar project I did recently that also has a bit of a nautical flair.  This little project has been in the works for years.  It started when I picked up a batch of wooden floats used for fishing more than 2 years ago.  I only had six and every project I thought up required more so they sat, waiting for more to be found.  Then I happened upon these cool vintage metal floats at Junk Bonanza and decided to pair them together but still didn’t have quite enough to complete the project.

I spotted a pair of metal garden bells in a catalog for $20 and knew they’d be perfect at the end of a line of floats.  Unfortunately the company wouldn’t ship to Alaska so I had them shipped to my Mother-In-Law and picked them up when we visited earlier this summer.  To fill out the rest of the rope I picked up several cork floats from Alaska Picker for a few bucks each.

I used some woven rope I already had in my stash from another project and started with a loop tied with a knot.  I fed the floats onto the rope in a set pattern and tucked the loose end of the rope from the knot at the loop into the center of the first float.  At the bottom I just made a knot and then tied the rope that came with the bell into the knot, again tucking loose ends into the last float.  It was so easy, I did both ropes while watching a movie with the Hubs and it took less than 20 minutes.

The Hubs added hooks we had left over from another project on the front corners of the green house so I could hang the ropes easily and take them down for the season quickly.

Here’s the rope on the other side, where I’ll have a large metal horse trough planter next season.  Right now it’s serving as a brooder for the baby chickens we picked up yesterday!  Get a peek at them on Instagram or Facebook.

The bell on this side is a little smaller than the other, but has the same style and finish.  They don’t get much movement in this spot so they stay pretty quiet, but when they do chime it’s a pretty soft sound that’s soothing and just right for a garden.

I’ve still got several projects to tackle out around the green house before we close up the yard for the winter and I’m already putting together the plan for what we’ll plant and do next year.  Until then these float ropes add a little bit of Alaska style whimsy to the garden and make me smile every time I see them.  One more project checked off the list. 🙂

Purdy-ing Up the Chicken Yard – Again

Remember when I decided to make the chicken yard pretty last year?  Well I’m at it again.  This time I went with planters that are up high and out of ‘chicken reach’ so they should be pretty safe.

I didn’t want to spend a lot for this little project since it is just a chicken yard and I am a self-proclaimed bargainista, but I still wanted it to be cute.  I’d seen wall planters made of various materials and realized they were just simple pockets of fabric.  I’m not a sewer so I brainstormed what might provide an inexpensive, already sewn fabric pocket.  Then the light bulb went off – a fabric shoe organizer!

I snagged this one at Fred Meyer for around $10.  I only needed 4 pockets but I figured it the idea panned out I could always make more for other spots too.  It was an added bonus that it was a cool grey fabric rather than the typical canvas ones I’ve seen that would show dirt immediately.

Luckily each row was exactly 4 pockets!  I cut off one row, leaving the seam and trim at the bottom.  From there I cut down the center of the stitching on the trim between each pocket to create 4 individual pockets.

I filled each with dirt and a plant while on skype with my mom on a sunny afternoon and then recruited the Hubs to help me hang them.  We folded over the top section of fabric for a bit more strength and just screwed them into the post using deck screws.

Although the screws are noticeable from the side angle, they blend in when you look at the planters from the front of the yard which is the typical way they will be seen.  Plus as the plants grow they should help hide them even more.  Hopefully they will have enough time to really fill in and start to trail over before the season wraps.

I also decided to give the block planters at the bottom of the posts another try.  The canvas curtains I made last summer didn’t survive well so this time we used scrap clear panels left over from building the green house.  It keeps the sight lines open for both the cluckers and the dogs, but prevents the chickens from decimating the plants.

The chickens were not to pleased with this innovation and kept trying to  peck at the leaves through the plastic!  They eventually gave up and went on about their clucking business elsewhere in the yard.  This time around I filled the blocks with mint, transplanted from the rain garden where it ended up after being in the herb container 2 summers ago.  Those who have grown mint, know it is super hardy so it can take some tough love, will return year after year and should spread to fill in a bit more.  I will have to watch that it doesn’t spread out from the blocks but it’s easy enough to remove if I catch it early so I’m not to worried.  Plus it will help keep things smelling pretty – because this is a chicken yard and there is always a constant supply of “fertilizer”!

Because we used scrap panels each is a bit different size so the panels don’t all line up with each other.  It doesn’t really bother me in person but looking at this image I really notice it.  If it still bugs me in a few weeks I’ll have the hubs cut the two larger ones down to match.

I put another clear panel on the front of the yard and added marigolds there for a bit of color.  Now if I could just get that darn walkway covered with gravel like I’ve been planning this space might start to really look complete.  Hopefully that will happen before the end of the season, but if not it will be on the list again next summer. 🙂

Garden Art Refresh with Spray Paint

My sister and I hit the Palmer Garden & Art Faire while she was here visiting and got in a bit of browsing (and shopping) before the rain let loose.  I’ll share some of those finds soon but today I wanted to show you some quick updates I did to other pieces of garden art.

The first is Mr. Froggy.  I’ve had him for ages and adore him to pieces but he was looking pretty worn from his many seasons in the garden.  While I loved his coloring I knew I wouldn’t be able to recreate something similar with my painting skills and honestly didn’t have a lot of extra time to give him a makeover.  So I picked up some textured spray paint to give him a simple neutral stone look.

It took a couple coats and he’s still not perfect, but he’s looking much better.  He looks rather handsome in my flower bed this year next to a big piece of driftwood as the flowers slowly encroach around him.

The second piece is this artichoke shaped finial I snagged at the thrift store over the winter for a couple bucks.  It’s SUPER heavy so at least it will hold up to the dogs on the deck, but the color was pretty blah.  I dug through our paint cabinet and found some simple grey, which gave it a nice updated look.

I’m still not super crazy about it so it may still see another paint job for a different look – perhaps a little ORB to make it look cast iron, but for now it looks pretty nice next to the pots on the deck.  I’d love to hear what you think about both make-overs!

Revamping the Deck

One of the biggest projects we tackled during May and June was updating our deck with a new Trex top.  The pressure treated boards the builder had used to top our deck were already starting to look very worn and since we are building a second new deck on the other end of the house this summer we wanted them both to match.  The Hubs researched quite a few materials and decided on Trex both for the ability to be shipped to Alaska in the quantities we needed and it’s reviews.

He started at the outside of the deck, removing the old boards and replacing them with the new Trex, section by section.  It was slow going getting the 20′ boards up and making sure all the nails and screws were out so the Trex had a flat surface to attach to.

The dogs were quite intrigued by this process and kept coming outside to check on the progress.  That is until we got to the last section next to the house, which made using the doggy door a bit more difficult than usual.

Tequila wasn’t sure what to do when she realized there wasn’t a solid surface outside the door other than the single board we had to pry out from the trim.  She kept looking out the door and considering the options.

Eventually she decided to give it a try and gingerly worked her way out onto the ledge before jumping between the deck joists and scurrying under the deck frame to get to the yard.

The Trex boards have the special little fasteners that also act as spacers to keep the deck uniform and allow for a gap for water to drain out.  They slide into a little groove on the side of the boards and are then screwed into place on the joists.

Here’s a look at the spacer/fastener from the side so you can see the little track they slide into.

We ran into a bit of a snafu when he got closer to the house and realized the frame of the deck wasn’t square, so the boards weren’t lining up on either side of the deck.  Rather than re-do the whole deck we opted to work with the frame as is lining up one side and trimming the boards that hung over too much on the other end to match the others.  It worked out pretty good and I doubt anyone will ever even notice the difference unless they are really looking for it.  Here’s the finished deck before I added all the potted plants and other yard decor.  It looks so great and is a perfect extension of the colors of our floors inside.

The darker color provides a nice backdrop for the new deck rugs I got this season!  I’ve got a matching one for the new deck which is under construction right now.  I plan to paint the sides of the frame white for contrast once the other deck is done so I can do them at the same time.

I have a plan to reuse some of the old deck boards for another project and the Hubs may use some for a bit of the framing on the new deck so they won’t be going to waste. I’ll share those projects once they are completed. The vision we had for the yard when we moved in 4 years ago is starting to become more and more a reality and I couldn’t be more excited to get it all done and enjoy it!