The New Chicken Yard

Z

Today is the 3rd anniversary of the blog!  It’s amazing to think of how far we’ve come since this journey began, but I’m glad you’re here to share it.  To celebrate I’m sharing a big project that the hubs recently did, the new chicken yard!  Although their coop was pretty big we spoil our critters and wanted them to have lots of room to spread their wings and do their little chicky thing.  Plus happy chicks = constant egg production so we’re all about keeping these ladies happy.

1

To get things started the hubs rented this mini excavator to dig a trench around the perimeter of the space.  Although I’m practicing no-spend April he isn’t and since it was his idea and project it doesn’t impact my no-spend goal.  He did have costs for the equipment rental, posts and concrete but the main panels were freebies from Craigslist last fall and we had a gate building kit left over from installing the yard fence so he did save where he could.

2

The dogs were pretty interested in this new contraption and wanted to hop on for a ride.  When they realized that wasn’t going to happen they decided to hop into the side by side which was parked nearby with supplies in the back.  Apparently Stoli thought he was going to drive Tequila and his expression when I told him he couldn’t reach the pedals was priceless!

3CMDR

3CMDR2

Here’s how things looked once the trenches were dug.  Like with any project it always looks worse before it looks better.  The chickens were pretty interested in what was going on and watched from inside the coop run, hoping we’d let them out to investigate.

3

4

Next came installing the posts and panels.  The hubs cut a groove in the sides of each post so the panels would nest in the groove for added stability.  I felt bad that I wasn’t able to help much with the install due to photography sessions but I will say he did an amazing job for putting this together almost 100% on his own.

5

Above is what things looked like when I left for sessions and below is what I saw when I got home that evening!  All of the posts and panels were installed and concreted in which makes the entire thing SUPER sturdy and predator proof.

Concrete

Concrete2

A few days later I helped install this thin bird netting over the top so that eagles and owls can’t attack from above.

Net

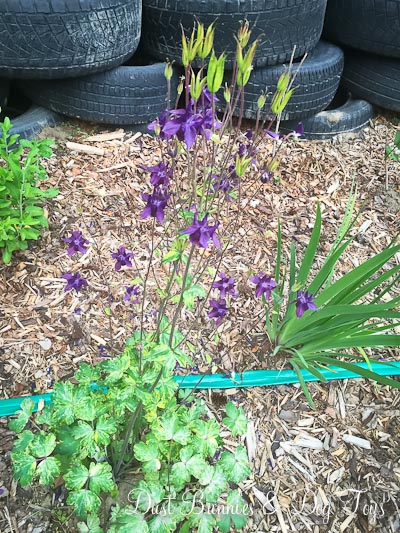
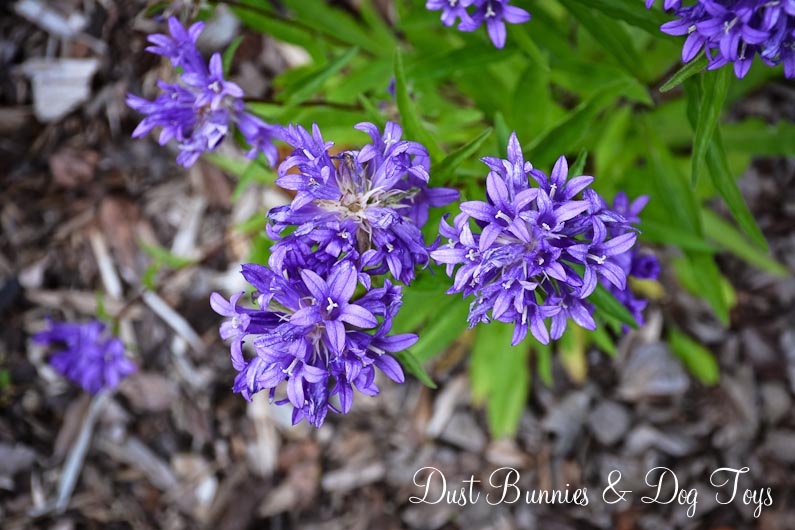
And here’s the finished project with the gate installed.  I’ve started lining both sides of the yard with cinderblocks, which I’ll plant with simple flowers to make things pretty and attract flying insects the chicks might enjoy catching.  It will also help keep the digs a foot back from the fence when they come to visit, which I’m sure the chicks appreciate.

Z

Now that they have more space I moved their outdoor roost and dirt bath tub from the run out into the yard. The hubs also plans to build a new storage area for the chicken supplies to replace the plastic one we currently have and I’m planning a few aesthetic improvements such as a coop sign, pavers next to the coop door and planting a rose bush to help keep the area smelling pretty too.

I don’t think the chicks will notice most of those things but I’ll appreciate them. They are just happy to have more freedom and room to run around but they are still creatures of habit and all gather back in the hen house each evening to roost, which makes this momma happy. 🙂

The Garden Plan

FlowersJust as I was about to start a photography session the other day I spotted these pretty little flowers next to a building and immediately the gardening bug took hold.  I’ve been day dreaming about what I’ll do in the yard this season for weeks as the temps have started to warm early for Alaska standards, but now that I’ve seen sprouts in person I’m narrowing down the plan so I’m ready to get going May 1 as soon as No Spend April is over.  While that might seem a long time to wait in most parts of the country, it’s pretty typical for our zone and the local nurseries won’t have many items available until around that time anyway.  I spent a chunk of the weekend cleaning out the remnants of last year’s annuals from the pots around the yard and spreading marigold seeds from the deadheads I’d pinched and dropped at the roots all last season.  Since the deadheads had enough seeds to cover all of the whiskey barrel planters, I’m hopeful they will produce at least enough to fill those so I can spend a few more dollars on other items when I do head to the nursery.

GravelFirst up on the plan is the garden box we installed just off the deck last season.  I’m planning on having lettuce, cherry tomatoes, peppers and onions (which I’ve got in water growing roots after one sprouted in the pantry!) in this space.  I may put the tomatoes in a separate container – like a cool old wash tub or burlap covered bucket – on the far side of the box so they don’t block the view of the yard from inside but we’ll see how it works out once I have everything ready to be planted.  The box itself will need a little tune up after the beating it took all winter.  When we placed it here I thought the water coming off the roof would be helpful, but too much of it created serious problems including flooding in the box bins which then turned to blocks of ice with winter’s early arrival last year.  Although we didn’t get a lot of snow last season, what we did get came off the roof in batches and formed a small mountain range of snow across the top of the tubs which added to the weight of frozen water inside.  To solve those issues this year we’ll be installing a gutter across the back of the house which will empty into the rain barrels relocated from the front flower beds at either end.  That will make it easier to water the gifted garden on one side and should provide a constant water supply for the chickens during the summer on the other!

The big metal wheel the hubs brought home for me is still against the fence in the low spot across from the corner of the deck where I put it at the beginning of last season.   I’ve decided to add a small retaining wall in a semi-circle around it and plant cucumbers there so I can train them to use the wheel as a trellis.

Of course I’ll have strawberries again this year, but I’m going to try the hanging gutter system I’ve seen all over Pinterest.  There is a good spot between the fence posts behind the shed, where I think the moose wouldn’t be able to reach them easily and if they did the dogs would soon chase them off.  I signed up for a “Do It Herself” (DIH) workshop at Home Depot later this month where I’ll make the gutter planters with the assistance of an instructor, so that should be ready in advance of my nursery shopping trip.  I may also do potatoes in a pallet planter below them, if I have enough budget left.

The herbs will go in a bucket tower like I’ve done for strawberries in the past.  I’ll put that right next to the Big Green Egg table so the hubs can snip things he wants to use while cooking quickly and easily.  I plan to have oregano, basil, parsley, cilantro, garlic and possibly dill depending on space and budget.

DeckBushes

One of the bushes I planted on the side of the deck *mysteriously* came unrooted back in the fall, which I’m sure the dogs had a paw in.  Ultimately that works out because the rain barrel will need to sit right on the corner of the house and would have crowded the bush anyway. The remaining bush took the brunt of the snow shoveled off the deck during the winter so I’m not sure how well it will bounce back, but I’m hopeful it will at least add some greenery if not bloom.  I have two more spirea bushes I picked up at the end of the season and never planted that have been sheltered next to the house, so I’ll plant those along the deck as well if they show signs of growth.  I also have a large purple ceramic pot that will become a recycling fountain and will find a spot in this bed.  I originally planned to have it out front but we don’t spend as much time on the front porch as we do on the deck so I think it will be enjoyed more here, plus it will help fill in some space since this is a large area to cover.  The pretty blue planter that was on the deck last year will also move down into the bed around the deck, to create a bit of height and plant variety with an annual or two.

I’m considering adding a rose bush next to the house in the area that will become the expanded chicken run once we get that done. I did a bit of research on what plants can survive a chicken flock and roses seem to be the top choice – likely because of their built in defense system of thorns.  Although I love their fragrance, I usually find them too fancy for my style, so this is a good opportunity to give them a try, where my usual choices would be torn to shreds.  And it might just provide cuttings that can be added to summer bouquets. 🙂

LillyOrange LillyPink

I’ll be moving things around in the flower beds a bit too.  The lilies out front will be moved to the gifted garden to fill in some holes there and make room for several new plants including salvia, lavender, delphiniums and daisies to fill in around the iris and hostas that are already in the front beds.  My plan is to fill the entire space with perennials that come back each year bigger and bigger so it creates something like my co-worker’s bed which provided the beginnings of my gifted garden.

1

Although I planted the freebie lilacs in the rain garden when we first set it up, I knew they would eventually be moved elsewhere. That was just a convenient spot for me because I could tend and water them as part of the rain garden.  They struggled a bit last year, and rather than wait for them to develop and shock them again with a move I’m going to go ahead and relocate them now.  I figure if they don’t survive this move it’s not a huge loss since they were freebies anyway and haven’t shown much in potential yet.  They will be moved to the hillside next to the garden where hopefully they will take root and establish themselves with plenty of room to grow and spread. Their departure will make room for a third clematis along the tire wall in the rain garden.  That will put it in the center of the curve along the back portion, so when it grows in it should help fill the space between the two existing clematis on either end of the tire wall.

Raspberries

Finally, the hubs plans to install a gutter on the side of the shed which will feed the freebie water tank we picked up last year.  That will be the water supply for the raspberry patch near the shed and the rain garden if needed.

Apparently no spending equals lots of planning!  It seems pretty intense when it’s all written out, but I think I’ve got my list ready so I’ll have a plan when I go plant shopping which should keep the budget in check and fill the yard with plenty of pretty!

A Cluck Club Update

1

Happy New Year!  I hope you had a fun and safe celebration.  Here at the DB&DT house we welcomed two new members to the cluck club on New Year’s day.  Although we started with 4 chickens we lost one when some of them decided to jump the fence of the expanded yard off their run back in the fall.  We’re not sure exactly what happened, but believe the younger dogs saw them out and attempted to ‘play’ with them which led to one chicken having a heart attack as there were no obvious wounds or blood when she was discovered.

Since then the three remaining hens have been kept in their contained run and have been doing well, even with the below 0* temps we had for a stint.   Since there was room for a few more we decided to add two.  Luckily the same friend we got the original group from was still downsizing his flock so we didn’t have to worry about bringing in hens from a different batch.

6

The new ladies are settling in and learning the routine of our roost pretty quickly. We give them scraps to scratch and peck through every evening so the original group come running when we open the door, but the newer hens weren’t too sure about coming down the ramp with us and the dogs around.

3

Eventually they figured it out and joined in the exploring for special treats.  We’ve named them Chicken Patty and Chicken Dumpling, continuing our “chicken foods” theme.

2

Patty is the black hen looking up in the center of the picture above and dumpling is the mostly white hen also looking over her flock mate’s fluffy rear.  Everyone seems to get along, but I’m sure there was some adjustment in the pecking order when we weren’t looking.

4

Since our original group started laying we’ve been getting eggs about every other day.  Some are white and some are brown, but they’ve all been tasty.  One day I discovered this massive egg in the nest box!  It was twice the size of the eggs we had been getting and had a wavy shell.

Egg2

It was so big that we couldn’t even close the egg carton!  The two eggs in the foreground are store bought, the slightly smaller one on the right in the background is the egg that is seen next to the giant above.  Although both the hubs and I have raised chickens before, neither of us had ever seen anything like it before.

Egg

Eventually we did crack it open just to see what the heck was going on with this monster egg.  Inside we found a second egg, shell and all!  We asked our vet about it and she explained that this can happen when an egg forms but the hen doesn’t lay the egg and a second egg forms around the first egg!

Egg3Apparently our hens are super fertile because in addition to this unique egg, most of theirs have also been double yokes.  We don’t plan to increase the flock via hatching (hence no rooster), so as long as that fertility means they continue to produce eggs regularly we’re happy.  But I’m curious if any other backyard flock owners have had similar discoveries.  I’d love to hear about them if you have!

DIY Bird Feeders

3

While I had a few days off around Christmas I finally tackled a little project I’d been wanting to do for a while, creating a few more bird feeders for the yard.  I had seen spiral copper feeders online and loved the simple design, so I did a quick search on Pinterest to find a tutorial and gave it a try.  I used small copper tubing, which is typically used for the water line on newer refrigerators.  It’s a soft metal so it bends very easily.  The tutorials I found suggested using a rolling pin to get the circular shape, but we don’t have one so I used a soda can instead.

I wasn’t able to get pictures during the process due to needing both hands and the hubs being busy with another project, but it’s really as simple as placing the beginning of the tubing against the can and pressing gently as you turn the can toward the tubing.  Once I had a spiral tall enough I snipped the tubing with wire cutters to make a clean end and wrapped that around the can as well to complete the final loop.  After I removed the can from the spiral I pulled the top loop up so it was perpendicular to the rest of the spirals so I’d have somewhere to hang the feeder from.  I stretched the spiral out a bit to make spaces between the loops and once I was happy with how that was looking, I curled the bottom loop a bit tighter so it could act as a stopper at the end.  I had enough tubing left over to make a second as well.  Here’s they arebefore I filled them.

B

A

I filled them with apples and hung them outside on the hooks where my hanging baskets go during the summer.  I haven’t seen any of the wildlife visit them yet, but it might take them a while to investigate and learn this new food source.  I’m considering making more of these for my Etsy shop, but am not sure if they would be big sellers or I they would ship well so I might post them on a few of the local buy/sell pages and see if they get any traction there first.

1

I continued my DIY feeder making roll with this simple S hook orange feeder. The hubs drilled a hole in a piece of drift wood from my stash and I positioned it where I thought it would work best as a perch then added a bit of hot glue to keep it in place. We could have just made the hole smaller to begin with so the perch would fit snuggly but I didn’t want to risk breaking it when maneuvering it on the hook.  I cut an orange in half and just stabbed it onto the end of the hook.  The hubs enjoyed cleaning up the other half of the orange so it didn’t go to waste.

2

This one hasn’t had any visitors either from what I’ve seen, but I’ll leave it up for a while to see if the birds and squirrels find it just like it did for the peanut ring feeder which I filled while I was at it.  This continues to be a huge draw for both squirrels and birds so I might just let it run empty to encourage them to explore the other new feeders.  If I still don’t see any traffic at them in a few weeks I might switch to using homemade suet balls or blocks instead of fruit and see if that’s more appealing to our neighborhood’s critters.

5

I picked up this store bought feeder several weeks ago and placed it farther down the fence from the peanut feeder so the smaller birds would have somewhere to eat when the squirrel is devouring the peanuts. The perch is on a spring that can be adjusted to different tensions for different sized birds and pulls down over the openings if there is too much weight, such as a squirrel, which was the main selling point for me.  Plus I like the bright red, barn style too!  I’m still playing with the different spring settings to see which works best for our area’s flock since it didn’t come with instructions or info other than the price tag, but I have seen groups of chickadees sitting on the ledge and pecking at seeds so it must be appropriately set for them.  And because it has such a large reservoir, it hasn’t needed filling since I put it up so it’s perfect for the far area of the yard where we don’t often go.

4

Hopefully all of these options will make the birds stick around come spring, so they can keep the mosquito population in check allowing us to enjoy the deck more.  If you have any tips on how to attract birds to new feeders or suggestions for feeder styles that work best I’d love to hear them!

Don’t Mess with Momma Moose!

Hi there,  remember me – that crazy gal who writes this blog?  I’m still here, I’ve just been held hostage by real life recently and haven’t had a chance to share much the last few weeks. So here’s a quick recap. The hubs got pretty sick with a nasty head cold and cough that he still has yet to totally kick. I had to fly to the tiny town of Ketchikan, AK for a grand opening of a new branch last week and the day before I left I developed pink eye due to excessive congestion (similar to the hubs) that seeped into my tear ducts! This week it’s started snowing and I’m in the midst of a huge online and live charity auction at work and am finally – hopefully – kicking the congestion that’s been plaguing our house for the past three weeks. Somewhere in there we still managed to get several projects done and a couple more lined up, I just haven’t had time to edit photos and sit down to put words with them. But that will be coming soon. I promise. 🙂

In the meantime, today I thought I’d share a little encounter we had with the neighborhood moose recently. The hubs was off and had been home all day, but I had just gotten home from work.  He told me that a momma moose and yearling had been hanging out around the back yard on and off during the afternoon and as I looked outside I saw they had returned so I grabbed my camera and stepped out on the back deck to get a few shots.

1

Now that I was outside, the dogs became fairly determined to let the moose know they were on guard duty. She wasn’t impressed and stood her ground on the back side of the fence.

2

When Stoli attempted to show some dominance by jumping and barking, she gave him a big snort and stomp as a warning, which he obviously ignored.  Seeing that momma moose was agitated we commanded him to leave the fence and come back inside, which took several attempts because he wasn’t happy about leaving a threat near his turf unattended.

3

That was when Bacardi decided it was her turn on guard duty and started to patrol the perimeter.

4

Momma moose took one step and Bacardi quickly realized she was no match, and she came running back inside before we even had a chance to give her a command.  Smart girl!

5

Momma moose continued to stand her ground for quite a while with occasional snorts in our direction, but eventually wandered off into the woods to find a quieter location to forage.

6

Typically the dogs barks keep the moose at a distance and we don’t have close encounters like this, but fall is their breeding season so I can understand why this momma was more defensive. Luckily we were home and able to monitor the situation so there was no physical contact between them.  Now that the dogs have learned not all moose run off with a few barks, hopefully they’ve learned to keep their distance from the fence when they come in close like this – especially when we’re not home!   It’s always a delicate balance of respecting the wildlife, knowing that we’ve claimed land they used to wander for our home and maintaining safety for both us and our pets as well as the wildlife that surround us, but it’s a balance we value highly and plan to continue. 🙂

A Weed by Any Other Name

Jewel2

Although weeds are usually something you don’t want in your garden, sometimes waiting to see how they turn out is worth the risk.  Case in point is this lovely Jewel Weed (aka Touch Me Not) I found blooming in my gifted garden.  I’m not sure where it came from, but I love the delicate yellow flowers that bloomed late this summer.  After a bit of online research, I’ve learned that it’s actually a very useful plant, being both edible and a natural remedy for skin irritations because it contains both an anti-inflammatory and fungicide.
Jewel

I’ve decided to leave it alone and see what it does next year, which I hope is return bigger and fuller.  I’m certainly game for a 0 maintenance plant that not only fills my garden with lovely flowers but has a host of beneficial uses!

Impatients2

The other ‘weed’ in my garden this season were some pretty German Impatiens our neighbor gave us.  I didn’t know anything about them other than her instruction that they needed to be planted very soon. I had some empty holes in my front flowerbed at the time so that’s where I put them.

They started out as 4″ tall sprouts, but within a few weeks they were chest high without an ounce of effort on my part!  Once again I turned to the internet for information, where I learned they can be invasive – not surprising given their super-fast growth rate. They are also another variety of Jewelweed (Himalayan Balsam) so they have similar skin irritant remedy properties and are edible.

Impatients

I knew they wouldn’t work in the space where I had planted them, so I moved them to the hillside near the rain garden where they have plenty of unused space they can fill. Now that we have these helpful plants I’m thinking there’s a good possibility that raspberry sangria, with basalm and fireweed garnish will be the signature drink on our deck next summer!  Do you have common weeds in your garden that you love?  Tell me about them with a comment below!

A Sweet Harvest

Raspberries2

Although they haven’t been around long, the freebie raspberry plants we added to the yard earlier this summer have been cranking out a pretty bountiful and sweet harvest recently!  We noticed a large batch of berries form on several of the plants about a month ago and patiently waited for them to fully ripen.

Raspberries

The first harvest (seen below) was fairly small, but within a few days another batch was ready (seen above).  While a few were still a little tart, the majority were sweet and juicy – perfect for a yummy, easy to eat breakfast during my morning commute the next day.

Raspberries1During the holiday weekend I picked a third batch that was twice the size of the first two!  Those were also promptly eaten for breakfast on my morning drive to work yesterday.  And there’s still more berries waiting to ripen on the bushes.  Hopefully the cold weather stays away long enough for them all to come in fully so we can enjoy a 4th or maybe even 5th harvest.

What’s even more impressive is that all of these came from just a handful of bushes.  Most of the bushes are still establishing themselves and focusing on lush leaf growth rather than berry production, so next year we should have a plethora of berries when those start adding to the harvest.  Guess I better start saving raspberry everything recipes now!

The Cluck Club

Chicks2

Over the holiday weekend we added some new members to our family!  Welcome (from back to front) Biscuit, Nugget, Fil-a and Curry.  And they have some fancy new digs courtesy of the hubs handi-man skills!  Here’s a quick photo tutorial of how it went together.

1

He started with two side panels of framed wire, to form the main area which serves as a run for the chickens to move around in.  He added more framing for what would become the hen house floor at the rear of the coop.

2   3

Next he added sides to the hen house, followed by foam insulation.  He also extended the floor of the hen house past the framing to make an area for nesting boxes.

4After insulation was added to the floor, the nesting boxes starting to take shape at the back of the hen house.

5

Then he added dividers to make three separate boxes so the ladies have a bit of privacy when laying.

6

Next he added a roof to the nesting boxes that can be lifted for collecting eggs.

9This puppy is well insulated so the chickens will stay nice and warm when the weather dips below 0 during the winter.  With insulation foam sandwiched between layers of wood on all of the walls and floor it should be pretty cozy.

7

And if you’re wondering if it’s sturdy, Stoli and his 70 some pounds of muscle can guarantee that it is!

10

Once the main parts of the walls were in, he added the roof panels.

12

13And from the side it was really starting to look like a coop!  If you notice, we moved the coop forward a bit so there’s more room at the back because the clean out access for our septic line is right next to the house and should we ever need to use it we wanted some room to work.

11

At my request, he added a covering of linoleum material on the entire hen house floor to make cleaning the coop out easier.

8And here’s the finished project – after several weeks of work!  Unfortunately, it rained here for most of the holiday weekend so I wasn’t able to paint it before we brought the chickens home, but once the weather improves for a few days all of the wood will get a coat of bright white, which should give it a true farm house feel!

FinishedCoop

The nesting box roof got a metal covering to match the rest of the coop and keep the elements at bay.

NestBoxCover

You can see most of the inside of the hen house when the small roof is lifted – a feature I’m sure I’ll appreciate immensely when checking on them during the winter.

NestBoxViewIn addition to the nesting boxes, the hubs installed an inside roost for the hens to use when the weather gets colder.

FinishedNestBoxesThe two side doors open wide to give full access to the inside of the hen house which has a light to provide both warmth and stimulation to continue laying throughout our dark winter.

FinishedHenHouseHe also installed a feeder made of PVC pipe and a water bottle with a nipple at the bottom so both stay as clean as possible with minimal waste.

FeederNWaterI’d never used poultry water nipples before, but they operate on the same mechanics as a rabbit water bottle and the chickens had some at their previous home so they already know how to use them.

FinishedWaterA ramp to access the hen house from the run and a large branch for an outdoor roost made it chicken ready.

RunEveryone was very excited to meet the chickens.  Even Luna came out to welcome them, although she stayed out of the dogs way by perching herself on the nearby ladder.  To give the chickens some breathing room from their four-legged siblings we fenced off the main part of the coop with some large metal grates we got for free on Craigslist a while back.  We’ll leave these up for a while until everyone is used to each other.  Until then they are under almost constant surveillance, but they don’t seem to mind too much.

ChickenWatchers   ChicksWatchFinalEventually I’ll add pea gravel around the coop so it doesn’t get super muddy, but for now we’re just happy to have the coop mostly finished (sans painting) and chickens inside it.

ChicksAlthough they aren’t free range like they were at their last home, I have been giving them yard cuttings and table scraps to dig through which they seem to enjoy.  And we all enjoy watching them settle into their new home. 🙂

Goodwill Patio Umbrella Rehab

Umbrella4

Way back when we made our road trip on the Alcan, we hauled back an outdoor umbrella we found at a Portland Goodwill for $12.99.  One of the arms was broken, but the hubs assured me he could fix it, so I couldn’t pass it up at that price.  It hid out in the shed for a while, but now that the deck furniture is in place we were ready for a little shade.

Umbrella3

The hubs used a left over piece of molding we had laying around to make it operational again.  I plan to eventually paint it to match the rest of the framework, but it’s not super noticeable so it’s not a high priority.

Umbrella2

I picked up a weighted base at Pier 1 with reward points so it was free as well.  It took a few tries to find the right size pipe to join the umbrella and base, but the winner ended up being just $12 and the one that didn’t work out will be used for another project, so it’s not a loss.  I plan to paint the pipe to match the base, but again, not a huge priority since it’s the end of the season.

Umbrella

So the grand total for the umbrella and base was just $24.99.  That’s pretty minimal compared to $70+ for umbrellas in the retail catalogs plus another $70-150 for a weighted base.  Now we’re living the “fancy” life for a bargain price! 🙂

Junkin’ Up the Yard!

Welcome back for part two of how we’re using the cool ‘junk’ we picked up on our recent vacation. Here’s where things ended up outside along with a little garden update while we’re at it.

Star

The big rusty metal star the hubs picked out at the junk show for $18 had to be hand carried on the plane. We were sure it would be considered a weapon thanks to the top point sticking out of the only bag we could find that kind of fit it, but TSA said as long as it went through the scanner it was ok. I’m very glad it made it through because it looks fantastic on the front porch!

Excavator

Nearby, the cool metal excavator I found for $20 found a home in the front flower bed where it appears to be digging up spots for more plants. It’s definitely something you won’t see in everyone’s garden and that’s just what I like about it!

Trellis

Several items ended up in the gifted garden including the cool trellis the hubs surprised me with. It works perfectly for the troilus that started blooming soon after we got home. I still can’t believe this piece was only $23!

Pulleys1

The trio of rusty pulleys we got for $10, $20 and $30 are the perfect “dog proof” garden art. They have since been knocked over by those energetic fur balls, but ‘eh – it makes it look more authentic so oh well.

Pulleys2

Pulley

We also picked up this massive pulley at an estate sale last weekend for just $25.  I love the little number tag on the side!  It’s found a home down in the rain garden.

PullyHook

Back in the gifted garden, I adore how these metal quail figures we found at the junk show look in the garden too. I’ve wanted some ever since I saw some just like them in a family friend’s amazing garden so I made sure to snag a few when I spotted them at the show. They remind me of living in the desert and watching the little quail families dart between the tumbleweeds. 🙂

Quail

My last find of the day at the junk show, a cast iron campfire cook pot now holds Johnny Jump Ups the neighbor brought over.  I admit this picture is a week or two old because those plants behind the pot are now massive!  They were also gifted to us by the neighbor but I have no idea what they are.  They sure seem to like this spot though, because they are 5 times this size now!

JumpUps

This little stained glass lady bug – an appropriation from my sister’s garden – now adorns my marigolds in the front yard.  He’s so cute I might have to make a few more, and possibly do some dragon flies and butter flies while I’m at it!

LadyBug

Beyond the junk things are still blooming.  We got home just in time to see the iris, which I was so happy about.  I have a few varieties including water iris, wild iris and arctic iris.  They each have slightly different colors and leaves but they’re all beautiful to me.

Iris2

Iris

We also have a few poppies blooming.  These were another gift from the neighbor – have I mentioned how much I love having a gardening neighbor?! 🙂  The fact that I’ve done nothing to them and yet they seem to be doing quite well makes me even happier.

PoppyWhite

Poppy

The hydrangea I planted this season is also blooming!  I’m so excited to have this one establish itself and grow bigger and bigger each year.  The blooms started out pretty small but now they are  almost full.  I’m torn between cutting some to bring inside and letting them continue to grow.  Thus far I’ve just let them grow, but as the season wraps up I might go ahead and snip a few.

Hydrengea

Hydrengea2

I do need to add a little support for it though since the back side seems a bit heavy for the thin stalks.  I’m thinking one of those large rings might work well since it’s not very tall yet.

HydrengeaBush

My lilies are also making an appearance after teasing with tightly sealed buds for weeks.  I have several varieties of these as well including pink, orange and yellow.  I made sure to get a few shots of them to enjoy right away since I know they won’t last long. LillyPink

I love how the orange lily compliments the little excavator in the background. 🙂

LillyOrange

YellowLillyThe lambs ear I brought back from my mother-in-law’s yard is doing well in the rain garden.  It’s certainly not going gang-busters, but it’s green and healthy after an overnight trip in a ziplock baggie on a plane, so I’m not going to be too critical.

LambsEar

I added some bushes I got for $20 on the buy/sell page to the side of the deck to get that landscape started.  I don’t remember the names of these right now so I’ll have to dig the tags out of the gardening cabinet, but I believe they are both varieties of spirea.  The one on the left gets pretty purple flowers and the one on the right has small white flowers.

DeckBushes

My Columbines are doing well, both in the rain garden and the gifted garden.

ColumbineAnd after some pretty lush leaf growth all season the campanula is finally blooming.

Speedwell

My freebie raspberries are slowly getting established, so I’m just letting them be for now.

Raspberries

But there is a potential harvest this year if these little guys come in a bit more and ripen!

RaspberriesHope

That is of course if I can keep this big boy out of them!  He stopped by the other night during a huge downpour and thankfully seemed more interested in the weed patch just in front of the raspberries.  Good thing I haven’t been able to keep a super tidy landscape yet!  Luckily, the raspberries are close enough to the back yard fence that the dogs typically keep the moose at bay.

Moose

So that’s how we junked up the yard.  Do you have ‘junk’ in your gardens?  I’d love to see it, so share a photo or a link below!