Recent Thrifty Finds

1Today I wanted to share my finds from a few recent thrifting expeditions.  I haven’t been out to the thrift stores in a while as I was trying to pare down what was already in our home, but I couldn’t stay away forever.  I love the hunt too much.  My motto when thrifting is always if I don’t have a spot in mind for an item or am absolutely in love with it I don’t bring it home.  This motto is only amplified by my desire to simply this year so this is all that made it home from three different trips!  I’d say that’s pretty good will power.

My three trips were to Goodwill, the Salvation Army shop near my office and a local home decor consignment shop.  The Salvation Army used to be a great source for cheap home decor items, but since the massive Goodwill opened a few miles away the inventory at Salvation Army has suffered.  I think they are also loosing some of their volunteers to the competition or the changing economy because the store seemed very disorganized this visit.  The Goodwill was well organized but I notice their pricing is often higher and not always consistent as it depends on which volunteer handles each item.  But I was still able to find some good bargains, so without further ado – here’s my latest thrifting haul!

2First up is this sweater I found at Salvation Army.  I’ve been wanting to make some sweater pumpkins the last couple of fall seasons but can’t ever find good textured sweaters at the thrift stores that time of year so I decided to start looking for them all year and preparing a stock pile.  I think I can make two medium to large pumpkins and a few smaller ones out of this sweater and it was half off clothing day so I only paid $4!

3There were several pumpkins at Goodwill that day, but this one caught my attention with it’s unique stem and pretty colors.  I may eventually paint it to be a bit more neutral, but we’ll see how I feel about it closer to fall.  I think I paid around $5, which is much less than I’d pay in a department store.

7

I found this cloche tucked away on a bottom self at the Goodwill and was immediately smitten with it.  I’ve got a few cloches already but I like using them in different vignettes and knew if I tired of it after I give it an update I could easily sell it so it was a no brainer.  It was a bit pricey but these types of pieces don’t come around often at my thrift stores and the dome was real glass not plastic so I could see the value.  Plus I had a coupon for 20% off which made it a bit more acceptable.

6I also snagged this wooden candlestick as soon as I saw it at Goodwill – although I have to admit I walked past it and didn’t notice it the first time because it was tucked behind an assortment of other decor items.  It’s solid and chunky, which is just what I’ve been wanting.  Nice big candlesticks like this don’t come up often around my stores so at $5 I didn’t hesitate.  I plan to give it a white wash paint and distressing to match two other similar candle sticks I got on the buy/sell page for $20 to create a coordinating trio for my spring mantel.

8This little Princess House glass container caught my attention at the Salvation Army where I found the white sweater.  I’m not sure where I’ll use it exactly but could think of several possible scenarios which fit my requirement for purchase and at $3 it was a reasonable option.

45Lastly was this cool copper pot I spotted at the consignment shop.  It came as part of a fire starter kit, although I really was just interested in the container as decor or a planter.  My mother-in-law has several similar – albeit larger – pieces that I’ve always adored so I couldn’t pass this one up.  It was $15 which was a bit pricey, but I figured that there was a bit of value in the fire starter pieces as well and because this was consignment rather than a thrift store I wasn’t expecting bargain basement prices.

I set the fire starter pieces aside for when the fire pit is back in use this summer and have been thinking up options for my new little pot to decide which I like the best.  Current ideas are as a decor vase, a planter, or a small fire pit for our patio table come summer using a citronella candle or table top tiki torch.  Which idea do you like the best?

Linking up at Thrifty Decor Chick’s Before & After Party!

TDC Before and After

Save

Easy Faux Planters

5As I promised earlier in the week, I’m sharing how I made some cute little faux plants.  It started with a variety of small containers I had previously had succulents in along with a few new items.  The succulents had met an untimely fate during one of Brinley’s “puppy moments” and had been empty for a while so I wanted to refill them but with Alaska still well in the grips of winter there weren’t many options to choose from.  While browsing Michaels the other day I spotted these little faux succulent stems (ignore my supervisor’s photo bomb – LOL!).

0I knew they’d be perfect to fill several of the small containers so I picked up a few.  As you can tell from the empty spots on the holder above, I’d tested out the stems on a small piece before I decided to write a post about the process.  But since it went well here we go.  We’ll start with this cute glass cup I picked up at IKEA the last time we were in Portland.

1I fill it 2/3 full of moss I already had on hand to create a base for my arrangement.

2I pulled several of the grassy stems from the holder and started bunching them together.  Once I had a grouping I liked I put them down into the center of the moss in the cup.

34I fluffed things around a bit until I liked how everything looked and called it done.  Next up was this cement bowl I found at a local boutique shop.

6Since this one was larger than the glass cup and solid I filled most of it with crumpled up paper from an advertisement that came in the mail.  I was enjoying the pretty spring colors on the paper, which was a nice little inspiration.

7I added moss on top of the paper, leaving a small area in the center open to put the stems.

8After I added the grassy stems I randomly placed some of the small succulent stems around the perimeter.  It was ok, but looked a bit crowded and not really what I was envisioning.  So I kept fussing with it, trying a variety of arrangements.

9Eventually I pared it down to just the grassy stems and some white flowers left over from a project long ago.  Its the perfect look for early spring.

10Here’s a quick shot of the other planters I whipped up using the same method.  This little galvanized container came from a boutique in Portland and looks sweet next to the lamp in the guest room.

11You might have spotted the succulent grouping in the small crock on the sewing table I shared recently.  It was a little too much brown in here until we refinish the table so it’s moved to the laundry room, which I’ll share soon.

aAnd of course the succulent planter you saw earlier this week with my fun little scroll art.

after

I love how real they all look, yet they require zero maintenance, which is perfect for my schedule these days! 🙂  I’ve got a few more of the succulent stems so there might be a few more arrangements in the coming months, but for now I’m enjoying having a bit of green around the house even though it’s deep white outside.

Linking up at: Knik of Time’s Talk of the Town, Tater Tots & Jello’s BFF and Savvy Southern Style’s Wow Us WednesdayStone Gable’s The Scoop and Thrifty Decor Chick’s Before & After Party!

TDC Before and After

Save

Save

DIY Serving Tray

finishThis was a quick project I did as inventory for my holiday bazaar show back in November.  I had wanted to share it back then but life with the crunch of show prep I didn’t get a chance to take step by step photos to share.  Luckily, it’s such a simple project that I can explain it pretty easily and since it didn’t sell I still have it around to photograph!

I started with a plain wooden cutting board I picked up at the thrift store for around $4.  It was looking pretty worn so I gave it a good cleaning and then a light coat of stain to bring it back to life.  Next we added the leather handles.  Can you guess what they were in a former life?

1If you guessed a belt you’re right!  The Hubs had several belts that no longer fit or were worn out in spots.  This one was literally hanging on by a thread at one spot but the rest was still in good shape so I guesstimated how long I wanted the handles and cut two pieces to the same length.  The Hubs attached the edges of the belt pieces to the board with this fancy screws we got at the hardware store after pre-drilling holes for them so they wouldn’t split the wood.

32And that’s it.  See I told you it was simple!  I’m actually pretty glad it didn’t sell as we’ve been using it quite often for snacking on the couch or when I want to work on something but still be comfy.

I’d love to leave it out on the ottoman like this with some cute seasonal decor staged all the time but the Hubs assures me that the dogs would chew the handles and I know they would certainly knock off anything I had sitting on it so it typically lives on top of the media cabinet so it’s nearby whenever I need it.  It’s a good thing I love those heathens. 😉

Linking up at: Knik of Time’s Talk of the Town and Savvy Southern Style’s Wow Us Wednesday and Thrifty Decor Chick’s Before & After Party!

TDC Before and After

Save

A Quick & Easy Makeover

afterHere’s one of the quick little projects I’ve done recently.  I spotted this little scroll decor piece on one of the local buy/sell pages for $1 and just couldn’t pass it up.  Here’s how it looked when I bought it.

beforeAlthough it was cute in it’s original state I thought it would look better with a metal finish rather than the faux stone one it had.  A couple quick coats of ORB spray paint and it’s got a whole new look.

finishI’m not sure where I’ll use it just yet, but for now it looks pretty next to another of my quick projects, this mini faux succulent planter.  I’ll share how I made that later this week!

Linking up at: Knik of Time’s Talk of the Town and Savvy Southern Style’s Wow Us Wednesday and Thrifty Decor Chick’s Before & After Party!

TDC Before and After


Junkin’ in Portland

4booth

Our last trip to Portland was planned around attending a large junk show similar to the one we’d gone to the previous year farther north.  This one was called Junk Bonanza.  Several of the same vendors were at this show so they were on the top of my list to check out first.  We paid a little extra for the early bird tickets so we got in before the general crowd, which means we also had first dibs on items.

The Hubs had told me that if I found something large that I wanted we could store it at my mother-in-law’s house until he could make a trip down the Alcan to pick it up in the spring.  Knowing that I had that option in the near future, I made a bee-line for B’Aase Repurposed‘s booth.  I had missed out on their super cute upcycled planters last time and was hopeful they’d have some more.  Although they didn’t have planters this time they did have this awesome bell made from a gas canister cylinder.  I knew right away it was meant to be in my yard.  We also found some cool metal fishing floats at their booth that will be used on rain chains to the rain barrels this year.

1bell

I took a peek at several other booths as I made my way to the next group on my priority list.  I really liked the large burlap webbing ottoman I spotted at this booth and may attempt to make one or two for the new deck we plan to build this summer.

2booth

Grange Industrial was my next priority stop.  I had researched them online from the vendor list and really liked their style.  They had several large pieces I pondered over, including some adorable repurposed wheelbarrow planters, but I knew I had a budget to work within and not having a spot I knew I’d use each item in I decided to pass on them.

3booth

Although it wasn’t on my priority list because they didn’t have an online site I could research them at beforehand, I just couldn’t pass the JBRO booth without browsing before the crowds arrived.  It was a wise choice because I found a garden trellis, a rake head and velvet pumpkins – just in time for fall decorating.

5booth

By now the general admission had started and things got a little more crowded.  I started browsing the vendors row by row and fell in love with UberChicHome‘s large display.  I was originally drawn to their grain sack pillows but the Hubs pointed out a vintage wooden cart on the corner of their booth.  The vendor said the item was on hold for another 5 minutes for someone who said they would be back for it.  We decided it was worth the wait to hang out and see if we could get it if the other person didn’t show up.  5 minute later, there was no returning customer and it was ours.  And about 2 minutes later someone else was asking to buy it as the vendor swiped my card!  The one we got is very similar to the one in the lower right corner of the photo below but nicer.  You’ll see it in a bit when I share my haul.

6booth

While we were waiting for the no-show customer I poked around the booth right across the aisle.  Rusty Glamour definitely had my vibe – rustic with a touch of industrial and farm house.  She had several cool pieces like those pendant lights made from old theater spot lights you see right out at the front and a vintage wheel chair.

8booth-pillow

What I loved most at her booth were these awesome sea bag pillows.  They were large and I knew they’d be durable based on the material.  When I pointed them out to the hubs he reminded me that we still had his sea bag and his dad’s.  So we decided to make our own using those.  I’m hoping to get to that project in the next few months and will share it here when we do.

7pillow

Once we had the cart paid for I ventured on to other nearby booths, including All My Favorite Things, where I found an awesome rustic bench.  I actually pondered on the bench for a few minutes because it was a great price (based on my Alaska comparisons), but I wasn’t sure if I’d use it on the deck or front porch.  Another lady heard me talking about it with the vendor and told me that if I didn’t buy it she would.  Knowing I had two possible spots to use it off the top of my head I couldn’t pass up the deal.  I also contemplated those rustic stools you see in their booth below but I didn’t have a specific spot in mind for them so I decided to let them find another home.  I found a large stoneware crock at this booth for a great price as well.

10booth

Now that I had several bigger pieces paid and on hold around the show I wandered booth to booth to see what struck my interest.  One of my favorite set-ups was this farmhouse style booth, although didn’t find any treasures that had to come home with me from there.

9booth

To give you an idea of just how big the show was, here’s a panoramic shot I took from one corner of the exhibit hall!  Good thing I wore comfortable sneakers!

0pano

I’ll show my haul from the show in just a moment, but I also wanted to share some of my favorite booths and items I spotted when we visited the Monticello Antique Marketplace in Portland during the same trip.  This was our first visit to the store and it didn’t disappoint.

booth

There was something about this particular booth that drew me in.  It had a perfect blend of rustic, farm house and western.  Another booth had these cool metal coil lights.  We have a couple of these in my materials stash so I may give it a try!

a

We came in through the side entrance where there was a little cafe, so I really enjoyed finding the main entrance with this awesome garden style display.

garden

A little alcove near the entrance was decorated for Halloween – can you tell I’ve been meaning to do this post for a while?! LOL.  I loved the large undertakers sign on the back wall and may just make something similar for our mantel come this October. 😉

halloween

Ok – it’s finally time to share my haul from the Junk Bonanza show.  I didn’t get a shot of the smaller items since it was threatening to rain, here are the big items that await our return in the spring!  I can’t wait to bring them home and put them to use around the house and yard!

11haul

I love that the crock has a Portland stamp.  It will be a fun reminder of our many trips here.  And I find it interesting that it’s also a “6” like some of our others, including the one in our master bedroom.

12crock

Here’s a closer shot of the little wooden cart we scored!  This one is much nicer than the one you saw in the picture before.  It’s got removable panels for the tray of the cart and an old school reflector on the back – which is my favorite detail!  I’ve decided it’s going to live on our front porch where it will be protected from the elements but can be filled with plants or seasonal decor.  It will probably also be used for photo shoots, which should be absolutely adorable.

14cart

13cart

Since the Hubs is already planning to make a trip back with the truck in the coming months, I’m planning to hit several antique shops in downtown Camas, WA while we’re there as I’ve got a few things on my wish list that I’m sure will be better priced in that area.  I’d love to hear what you think of the treasures we found and ideas on how you would use them!

Barn Doors for the Office/Studio/Craft Room

installed

I’m so excited to share this project with you guys now that it’s finally done!  It’s been a long time in the making, but I’m so so so happy with the end result and as it usually goes – the delays that occurred along the way made the end result better than the original idea.

From the moment we found our floor plan and decided the formal dining room would be my office/studio/craft room I knew I wanted barn doors instead of the french doors the builder offered.  But that wasn’t one of the priority projects when we first moved in so it had to wait.  In the meantime I pinned ideas and the Hubs and I drafted out a basic plan for the project so we could start gathering the supplies as we found good deals on them.

We originally purchased barn door hardware at Tractor Supply when we were in VA visiting my family over a year ago and shipped it back to ourselves in AK.  It was nickel, but we planned to paint it black to better fit our style.  Although we had the hardware, we still had other more pressing projects so they sat for several months.  Eventually the Hubs purchased a piece of metal box rail to create the track and then built the barn doors, which I stained.  We now had all the pieces we just needed to install them, so we dug up pictures of the house during the framing stage and quickly realized we didn’t have any of the header over this opening to determine where the studs were!  Thinking back I remembered that because we opted not to have the french doors, the builder didn’t frame in the opening at first.  We noticed this during one of our site visits and made sure he would add framing between the two walls so we’d have a spot to install the track.  Apparently the next time we came back that had been added and drywalled over already.  We could guesstimate where the studs were based on the screws in the drywall, but the Hubs wasn’t sure there was enough support for the heavy track and doors.  I was pretty bummed and started thinking I wouldn’t get the barn doors I’d been envisioning.

A few weeks later we saw a friend’s barn door project they had just installed and as the Hubs discussed the install with his fellow DIY-All-The-Crazy-Things-My-Wife-Thinks-Up husband, a new option was discovered.  Their track and hardware was less bulky and not as heavy, so it didn’t need as much support as the system we had.  They had purchased the kit on Amazon and really liked it so we were pretty confident we would feel the same way.

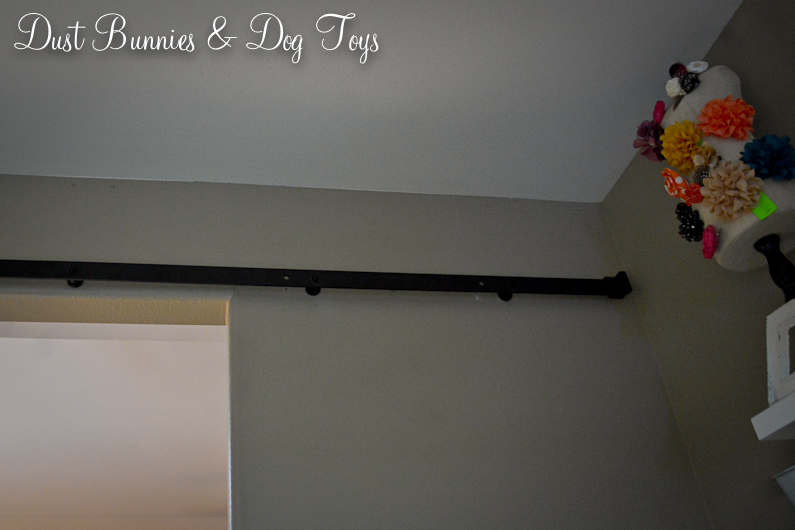
The Hubs drew up a new plan and determined we needed to build new doors that weren’t as heavy as the ones we’d already prepped.  It was a little disappointing, but I was excited to finally have the project back on track and feeling good that it was actually possible.  I posted the track and the hardware we already had on the buy/sell page and the Hubs ordered a similar kit on Amazon.  The kit arrived quickly, but life got crazy again and the project had to wait.  Over the Christmas holiday the Hubs got things rolling again starting with installing the track in the office.

tracktrack2
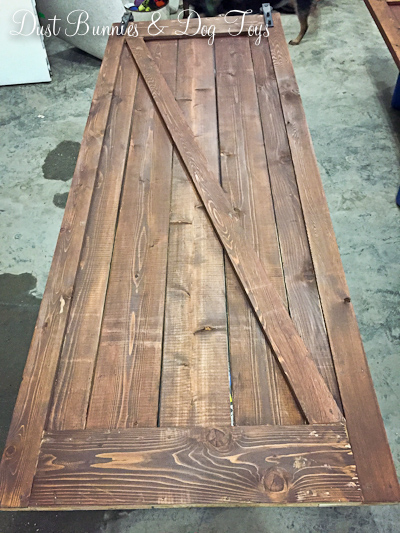
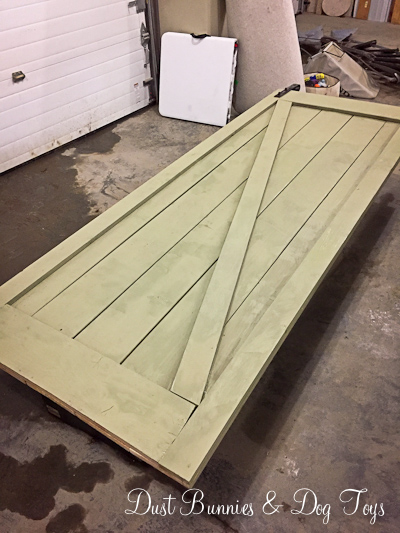
He had to drill a few new holes for the support rods so we’d hit the studs but he made it work.  And then he built two new doors out of cedar planks using the same design as the original doors he’d built (which became backdrops for a recent show display and are now posted for sale).  Although they were pretty in their natural state, the cedar had an orange tone that clashed with the other wood tones in the space.  I’d been envisioning weathered, rustic doors like something Joanna Gaines would salvage and use.  So we decided to stain them and see how I liked that.

doorA coat of stain later, they were looking much more in line with the other elements in the room, but it was still too much wood for me so I decided to paint over the stain and then distress them so the bits of stain and wood would show through.  The Hubs picked up white paint at the store and I planned to paint over the next few days.  But then I saw the perfect color on a dresser one of my favorite bloggers was redoing for a remodel/flip house she’s working on and I knew that was what I needed.  Unfortunately, she was using Maison Blanche’s Printemps chalk paint and there are no retailers for that brand here in Alaska.

doorstain

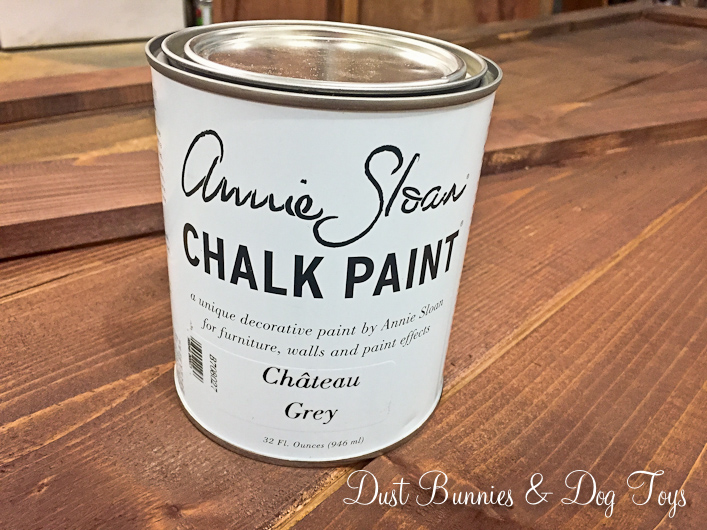
So I did some research and found a similar color in Annie Sloan’s chalk paint line (which said favorite blogger also uses often) that was available locally.  It’s called Chateau Grey, but it’s really a greenish grey color.

paint

paintcolor

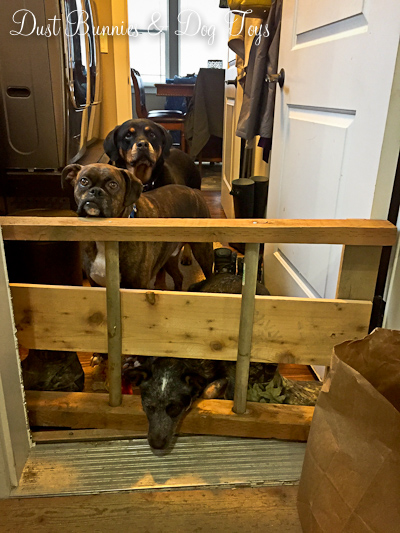
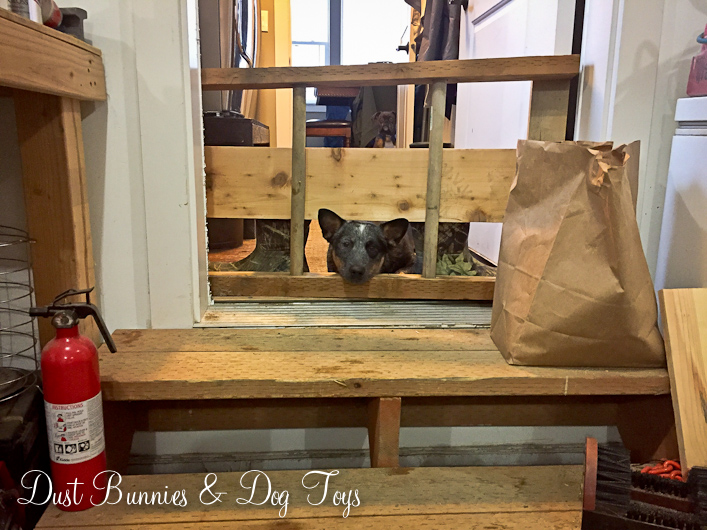
Now that I had my perfect paint color I set to work.  Since the weather has been in the negative temps and the doors were so large I set up shop in the garage with the doors propped up on various plastic totes.  The Hubs joined me in the garage to organize and clean up a bit from several recent projects.  We left the door to the house open so the kiddos could be with us as well, but they weren’t staying out of the way enough so the Hubs rigged up an impromptu baby gate for the doorway.  The ensuing pitiful faces were hysterical.  They whined and paced and made a few attempts to thwart this annoying obstacle.

pitiful

This was the easiest painting ever, because they recommend you brush in all directions for a rustic finish.  Which means paint like no one’s watching.. except those sad little faces behind the gate!  I cranked up the radio and boogied my way around the doors swishing my brush, and my bottom, to-and-fro.   The end result was two very pretty greenish gray doors.  Both the Hubs and I were really liking the color but my heart was set on that distressed look so he dug out the sander for me.

doorpaint

As I got ready to sand I noticed this heart wrenching little face.  While her siblings had given up and wandered off to nap, she sat like this for hours, sighing every so often just to remind me that she wasn’t pleased with being detained.  Unfortunately for her, it was time to sand so we removed the gate and closed the door to keep the dust out of the house.

pitiful2

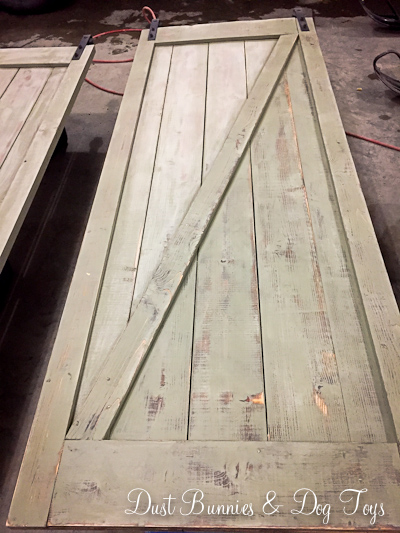
A light sanding brought out so much texture!  Just look at how different the one un-sanded panel on the right looks from the rest of the door.  I had to hand sand in a few of the tighter spots but that went quickly as well.

doorsand

Because I was using a chalk paint the next step was wax to seal everything in and protect the finish from those slobbery children of ours.  Although this wasn’t the first time I’ve used chalk paint it was the first time I’ve used it on a project big enough that required sealing, so this was my first experience with wax.  I used Annie Sloan’s clear wax so it would work well with the paint.

wax

Using the “boogie while you brush in all directions method” it went on very quickly although it was a bit straining on my hands because you ‘push’ the wax into the grain.   A little pain was totally worth it because it really highlighted all of the texture the sanding had created.  Just look at the difference between the waxed half on the bottom right and the un-waxed section on the top left!  And up-close it had so much detail!

doorwax

doorwaxclose

To give you a better sense of how much the wax changed the look, here’s a shot of the difference.  The door on the right has been stained, painted, sanded and waxed while the door on the left has not yet been waxed.

doorsdifference

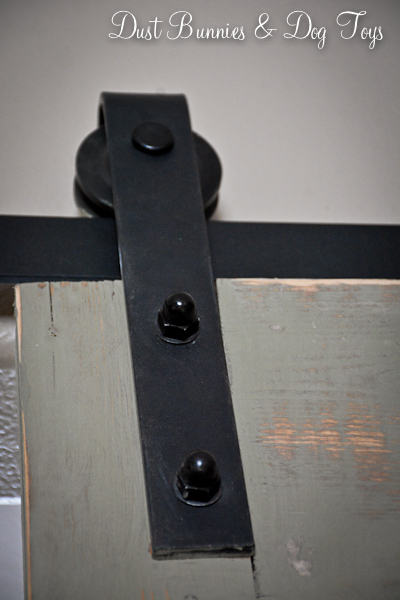
I got the front of both doors waxed and was going to wait a few hours to flip them over and wax the back side (yeah… just think on that for a moment…) but the Hubs made a great suggestion – why not hang them and I could wax the back while they were on the track.  He’s seriously brilliant sometimes – which is one of the reasons I keep him around. 🙂  So up they went.  The rollers on the hardware just sit on the top of the track and are very easy to install – it’s just a matter of lining them up and setting them on the track.

trackinstalledclose

I love how the black hardware looks with the green!  And it’s got an industrial rustic style that fits our home perfectly.

trackhardware

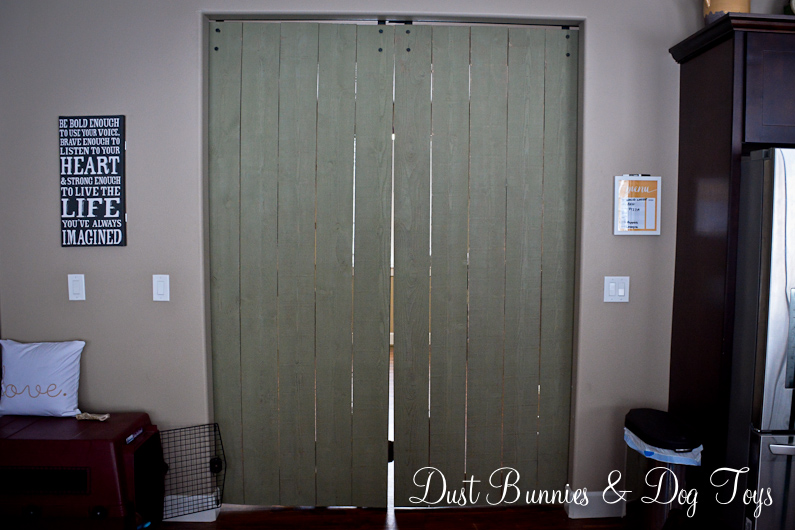
Here’s a few more shots of the doors installed on the track and ready to glide back and forth.

trackinstalled

trackinstalledright

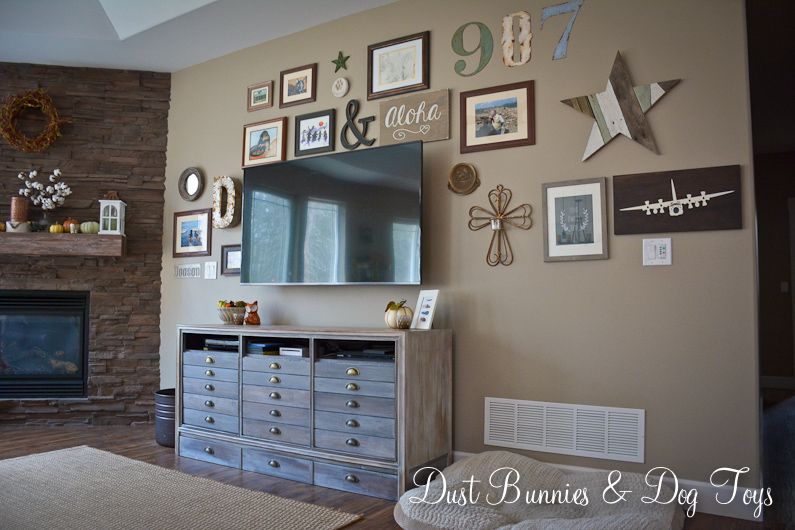
Seeing the green next to the white cabinets makes me so glad I didn’t paint them white.  It would have been too much and this color really makes them look reclaimed rather than new.

installeddesk

installedcraft

I could have stood here and stared at them all day.  They look awesome open.

installedangel

And closed – although the fur babies weren’t fond of this option!  After we had them installed we noticed the door on the right sits at a bit of an angle from the other door creating a small space at the bottom of the seem between the doors.  The Hubs thinks he may have installed the hardware a little crooked which is causing this issue.  We’ll correct that at some point, but since the doors will be open 99% of the time that can wait a bit.

installedclosed

Here’s how the doors look from the other side when closed.  It’s not as dramatic as the office side, but like I said – it will be very rare that these doors are closed.  I’m sure the fur babies are appreciative of that.

installedclosedbackside

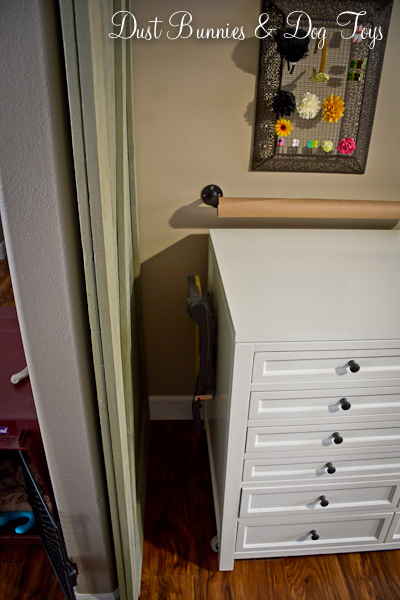
In order to fill the whole opening we did have to make the doors a bit wider than the side walls, so they stick out just a bit.  It’s not really noticeable and it actually works well because it provides just enough room to add handles so the doors are easier to move from this side.  I haven’t picked out hardware for that yet, and since it’s not a priority I’ll take my time to find something I really love.

installedoverlap

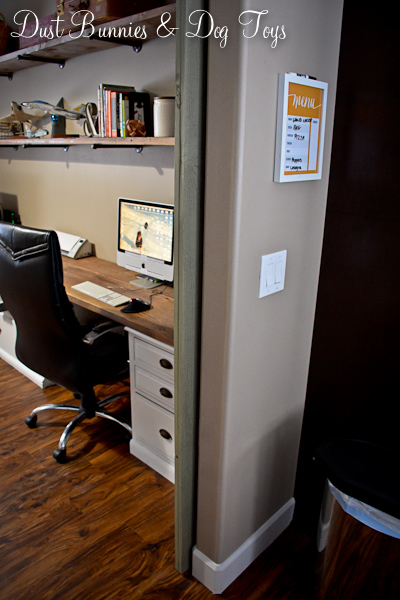
There’s also a bit of extra room between the doors and the cabinets.  We built the desk when we were planning to use the original barn door hardware which would have hung away from the wall a bit further, so we left extra room for that.  Now that we chose a more flush mount system there’s more room.  I think it still works well and it’s just wide enough for me to sneak the broom in there when cleaning.  Plus on the craft cart side it leaves  plenty of room to reach back for my paper cutter without scraping your knuckles on the doors.

installedoverlapdesk

installedoverlapcraft

I’m so happy to have this big project done and I smile every time I look at these beauties.  They really give the space a finished feel and add so much character.  In fact they were looking so good that my craft shelves were feeling a bit “womp, womp” next to them, so I’ve been changing things up over there to create a more cohesive look.  I will share that update soon. 🙂

installed

I’d love to hear what you think of the end result, so leave a comment below.  And if you have questions about anything I didn’t cover send those over too.  Have a wonderful weekend!

Shared on:

Save

Windmill As Wall Art

0Happy New Year everyone!  I hope your holiday weekend was exactly how you wanted it to be, wether that was exciting or relaxed.  We took the relaxed approach.  I stayed home and the Hubs went hunting so no big ball dropping parties here.  Today I wanted to share another piece of wall art that came back on our recent trip to Portland.

This metal reproduction windmill.  If you remember I purchased an authentic windmill from Alaska Picker about a year ago and planned to display it on this faux shiplap wall but it was SUPER heavy and the Hubs just wasn’t sure we’d be able to locate studs in the right spots to mount it securely.  So when I spotted this baby on DecorSteals.com for $90 a few weeks before our trip I snapped one up and had it sent to my Mother-In-Law’s house since they wouldn’t ship to Alaska.

1This one is smaller and much lighter than the authentic one we bought.  Plus it comes apart into three sections so should I ever want to change things up I can use them separately without much effort.  It looked so awesome with our holiday decor and my new farmhouse style sign fit perfectly inside the bottom curve.

I packed up all the Christmas decorations over the weekend and I’m still working on my ‘winter’ decor for January – March, so we’ll see how I decorate around this in the coming days.  I’m considering adding two hanging lanterns or sconces on either side since the wall is so large, but I’ve got something else from our Portland trip going up on the wall where the barn wood angel hung for Christmas, so I want to wait until I get that up before I make a final decision, in case it would make the space too cluttered.

2So you’re probably wondering what we’ll do with the large and expensive authentic windmill right?  Don’t worry it will still get it’s due – I found a local buyer for it who wants to display it on a wall in her home.   And since she’s buying it for what we paid, we’re breaking even on that attempt.  Hopefully, she’s able to figure out a way to secure it well and enjoys it as much as I do this one.

We’ve also been working on another long-time-coming project recently – barn doors for the office!  The Hubs built the doors over the Christmas weekend and sanded them down so now it’s up to me to finish them with stain or paint.  I’m still debating on what the final choice will be but they should be done and installed this weekend so I can share them with you soon. 🙂

Tobacco Baskets in the Laundry Room

basketclose

Today I’m sharing another quick project that came together after our trip to Portland in the fall.  I found these amazing reproduction tobacco baskets on a decor website I frequent and purchased two sets of a large size and a small size.  Unfortunately the distributor wouldn’t ship to Alaska, so I had them sent to the Hub’s Mom’s house in Portland knowing we’d be visiting soon.  I told the Hubs that these were part of the “must come back” pile and he made it happen, even with their fragile construction.  Have I mentioned recently how much I love that man? 🙂

basketswide

I’d been on the hunt for tobacco baskets for some time when I found these and knew exactly where I’d use them when I bought them – in the laundry room above the board & batten we installed earlier this year.  My vision of having one large basket in the middle of the wall flanked by the two smaller ones worked out perfectly.

basketsside

It’s just enough to finish out this wall in farmhouse style without being too heavy and it adds a bit more texture to the space.  Plus the fact that I was able to put them up all by myself with a couple of finishing nails made the whole project even simpler.

basketsview

Here’s how things look from the dining room.  I ended up selling the other large basket so my total cost for this project, including shipping to Portland was around $55.  Not bad for three good sized pieces of art.

We also brought back another large piece of art I had to ship to Portland for pick-up.  That piece ended up in the dining room and I’ll be sharing it here soon, so stay tuned for that!

Fall Decor & Fireside Chats

Happy Thanksgiving!  I hope you’re enjoying the day and giving thanks for the blessings in your life.  Since I plan to switch all the decor over to Christmas today because I don’t have another chance to do so for quite a while, I thought I’d take this last opportunity to share my fall decorations. If you look really closely, you’ll catch a sneak peek of another decor change I’ll be sharing soon.

I’ve found that using pumpkins and autumn elements can carry me from the first signs of fall in September all the way through to Thanksgiving.  This theme starts in the entry way with a collection of pumpkins flanked by lanterns with large pine cones and light strands I found in the dollar zone at Target.

0Next to the dresser I have a pumpkin wax warmer.  It casts a pretty orange glow near the front door and looks like mercury glass which is a favorite of mine.

1Over in the family room I featured a fancy purple velvet pumpkin in the new cloche I got at Home Goods during our recent trip to Portland along with my favorite woodland creatures, Mr. Fox and the thrifted Whooty Owl.

3On the mantel there are, you guessed it, more pumpkins.  The velvet one in the center is a rich burgundy so I gave it a bit of prominence on a birch round.  The new lanterns I got at the end of season clearance sale for outdoor accessories will work well for several seasons thanks to their neutral classic style.  And my favorite little raven is tucked up in front hiding out after he saw Brinley chew his buddy’s beak off after she mistook him for a chew toy and snagged him from the windowsill.  He’ll get some reconstruction soon so he can join his buddy again next season.

2The tray on the end table got a gold votive and a glittery pumpkin.  I thought for sure that little sparkle would make it fall prey to Brinley’s teething chompers but she never showed a bit of interest in it thankfully.

4Over on the curio, my favorite little scarecrow is guarding some gourds.  He also stays up high because his button legs would be too much temptation for our fur babies.

5Over in the office a metal lantern goes autumnal with some mini pine cones and two colorful floral picks.

6In the dining room I filled this large glass lantern with moss stones, mini yarn pumpkins and pine cones.  These antlers fit perfectly around the curve of the glass give the whole arrangement a more rustic style.

7Beyond the centerpiece is this vignette with another velvet pumpkin, my little turkey votive holder and this fun rusty cup I picked up at a new local shop filled with orange mums.

8On the next windowsill I added a fun little dollar store pumpkin I snagged on our recent trip to Portland next to the creeping Jenny I brought inside for the winter.

9On the sideboard a crock with decorative grass takes center stage with my rusty owl.  More velvet pumpkins line the top of the sideboard leading to more lanterns with moss and pine cones.

10Outside there are even more pumpkins, including the only REAL one in the entire collection which is being perfectly preserved by the recent low temps.

outside My wooden pumpkin stakes and the metal spheres from the garden adorn what’s left of the dusty miller in the whiskey barrels out front.  Behind them my DIY 4×4 pumpkins decorate the steps next to the metal and burlap planters.  outside5 outside6outside3

outside4Up on the porch my welcome pumpkin hangs on the front door and a ceramic one joins a metal lantern on the milk can table.  In front of the table is the lovely fairytale pumpkin I bought at the local grocery store.  It was originally inside but Brinley attempted to make her own pumpkin treats with it so it moved outside before she could really do damage to it.

outside7 outsidepI’d never seen a real white pumpkin before so I had to have one when I saw them at the store.  I’ll be saving the stem from this one for DIY projects next year, but the rest of this large beauty will become compost in the garden.

And while we’re still thinking fall, I had to share this pretty set-up one of my networking groups did for our “Fireside Chats” meeting.  This is a group of wedding professionals – event planners, photographers, cake makers, and more so there is usually some sort of decorations but this was the perfect mix of rustic and chic.

1The smores themed cupcakes were quite yummy and those who wanted the real deal had the ingredients ready just steps away from the fire.

24And if you wanted a snack to go, they had that covered too.

3Just shows you don’t have to make things complicated to create something special.   I hope the rest of your Thanksgiving holiday is fun and relaxing.  I’m gearing up for the big bazaar I have a display at this weekend and then more photography clients in need of Holiday portraits. I’ll be back tomorrow to share our quick trip to Denali with friends, so check back for that after you emerge from your turkey coma! 🙂

Save

Save

Our New Media Cabinet

0

Today I’m sharing our fantastic new media cabinet.  This is another piece created by Anne-Tiques who refinished my family heirloom hope chest and did our dining room sideboard.  If you’ve been around the blog a while you know this is what our previous media cabinet looked like.  It was nice, but seeing all those DVDs made it feel cluttered and I was way over constantly cleaning dust bunnies out from underneath it.  Once we’d found a piece to refinish we posted this one for sale and it sold instantly.

before

Unfortunately, the new cabinet wasn’t ready yet so we lived like the Clampits for a few weeks using a Rubbermaid tote as a stand for the cable box.  We’re classy like that… 🙂

between

I knew I wanted a printer cabinet style piece for this spot and had Anne on the lookout for one, when she suggested we consider reworking a piece she’d picked up a while ago but had been buried in her stash.  It originally had drawers so she removed those and made doors with faux drawer fronts and created a panel at the bottom to continue the faux drawers all the way down.  She also closed in the sides so I didn’t have to worry about dust bunnies!  Here’s a great before & after shot she did.

ba

It’s got a completely different look now and works perfectly in the space.  I love how the grey grounds the area without being heavy and the distressed finish is perfect for my crazy household.

1

It was fate that we ended up with this piece and requested it when we did because Anne had just purchased the exact amount of handles we needed and they were the style I requested.  I wasn’t sure about the brassiness at first, but I like a mix of metals and it gives a good contrast to the panels.

4

The top drawer became an open shelf to house the cable box, DVD player and Wii.  Now that they each have their own space we can put them all on risers to help with the heat these types of electronics create.  Inside she created multiple shelves where the drawers used to be so we have plenty of storage room.  And because there’s no dividers inside it frees up extra room that we can utilize.

inside

She also created a secret compartment at the bottom where we can store our Wii Fit board and accessories.  It’s a great spot for all those larger pieces that I want handy but not out in plain sight.

3

And of course it look absolutely fabulous combined with my favorite show, Fixer Upper!  I think it looks like something Joanna would use in the houses she designs.  It’s gone from an Asian style to farmhouse chic with this revamp.

5

Luna was quite interested in the piece when it arrived, and had to check out every nook & cranny to see if she could fit in any of these new hiding spots.  Luckily they are just a tad too small for her and because they are higher than the last piece it’s too awkward for her to try to squeeze into.  Although that’s what I thought with our last set up and she proved me wrong with this sneaky little move so who knows what she’ll attempt.  So far, she’s content to sit on the top and block the TV.

lunainvestigate

This was the first of a couple changes I have planned for this room.  We’ll be switching to a sectional sofa and that rug will move out to the deck we’ll be building next summer so I’ll be replacing it with something else.  I’m still on the hunt for the perfect option for both of those changes, but there’s no rush.

2

For now I’ll just enjoy the handiwork of my idea and a great local maker’s skills.  Remember this Saturday is Small Business Saturday, so shop small and support your favorite local shops.  Doing so can have a big impact on your community!