Ballard Knock-Off Laundry Room Decor

http://tatertotsandjello.com/2015/10/link-party-palooza-and-two-project-bag-giveaways.htmlI’ve slowly been re-decorating the laundry room to have more of a rustic/industrial/farm house feel to coordinate with the decor around rest of the house.  I loved these over-sized vintage looking safety pins from Ballard Designs, but I wasn’t liking the price and was pretty sure shipping to Alaska would only make me like it less.  So when I saw some similar pieces on the local buy sell page for $10 each I decided to DIY myself a set.  Here’s what they looked like seconds before their makeover began.

PinsBefore
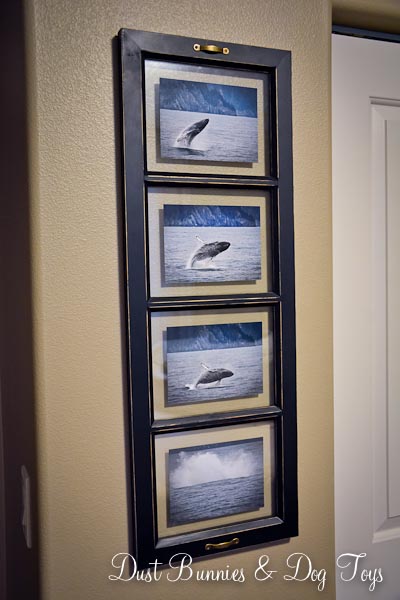
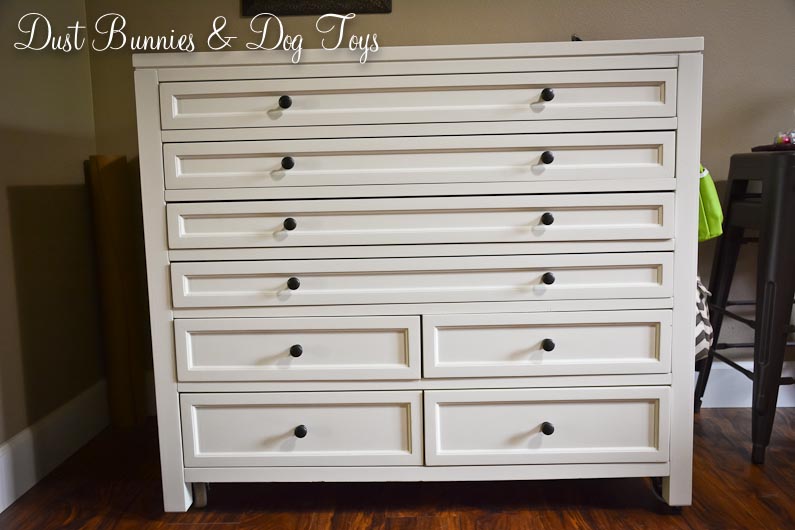
And here’s what they look like now!  I put them on the wall where I’d recently had the metal organizer we got on our recent trip down south.  We hadn’t been using it at all so it didn’t make sense to keep it there.  I’ve stashed it away for now since I really liked it and might find another spot for it later on.

2I like how the black plays off the other elements in the room, but am considering adding a bit of rusty color or grey with some distressing to create more depth, but haven’t decided yet.  When we get the countertop installed on the cabinet the black in the stone should play off the color well, so I’ll probably hold off until then to make a final decision.  What do you think?  Leave them as is, or add a bit of texture with a second color?

Shared on Tatertots & Jello’s Link Party Palooza.

A Whale of an Update

7

Although it’s quiet here on the blog, we’ve been slowly completing little projects in-between work, a rush of photography clients and daily life.  One of those projects was creating a collage of a whale breach sequence I shot several years ago while my family was visiting Alaska.  I recently had a client request a framed print showing the sequence of the breach and I liked it so much I decided I needed one for our home.  I found the frame at Michaels and ordered it online for a better price, but it arrived very damaged due to poor packing so I had to wait a few days until I could do an exchange at the local store.

6

Once it was all complete I hung it in the guest room so visitors can enjoy it while staying at our home.  It fit perfectly on the small wall next to the closet, complimenting the fox fur my hubby got long before I came around.  Another item that’s new in this room is the large crock you see in the corner there.  We picked that up as a set of three at an estate sale this summer.  This was the largest of the three.

8

I’ve ‘interviewed’ it in a few spots around the house since buying it but I think I like it here best.  I plan to fill it a large fern – probably a faux version because I’ll never remember to water it in this room!  I still need to figure out a night stand for this side of the bed.  I have a project table in the garage I had planned to use here, but I think it might need more repair than revamp so I’m watching the buy/sell pages for an already finished option instead.

9

Now that we’re starting to get the spare room set up as a foster-child room, I moved Roomba’s dock into the guest room.  He fits perfectly beneath the sewing table nightstand, yet still has room to leave and return to the dock for charging on his own.  Although he’s very visible from this angle you can’t see him from the door, which keeps things looking clean and simple.  You can tell Luna is sooo impressed with my mad skills right? 🙂

10

There are changes coming to the dining room as well, so the lamps that used to live on the buffet needed a new home and I think they look great in here.  I added a little wooden tray I picked up for a few dollars while thrifting earlier this year so guests can keep track of the little items that often get lost when traveling.  I love how it plays off the colors in the lamp and contrasts with the cherry top of the table.

The room is definitely still a work in progress, but it’s starting to look a bit finished now.  I’ve got a few other small projects lined up to share soon, so stay tuned!

A Sweet Harvest

Raspberries2

Although they haven’t been around long, the freebie raspberry plants we added to the yard earlier this summer have been cranking out a pretty bountiful and sweet harvest recently!  We noticed a large batch of berries form on several of the plants about a month ago and patiently waited for them to fully ripen.

Raspberries

The first harvest (seen below) was fairly small, but within a few days another batch was ready (seen above).  While a few were still a little tart, the majority were sweet and juicy – perfect for a yummy, easy to eat breakfast during my morning commute the next day.

Raspberries1During the holiday weekend I picked a third batch that was twice the size of the first two!  Those were also promptly eaten for breakfast on my morning drive to work yesterday.  And there’s still more berries waiting to ripen on the bushes.  Hopefully the cold weather stays away long enough for them all to come in fully so we can enjoy a 4th or maybe even 5th harvest.

What’s even more impressive is that all of these came from just a handful of bushes.  Most of the bushes are still establishing themselves and focusing on lush leaf growth rather than berry production, so next year we should have a plethora of berries when those start adding to the harvest.  Guess I better start saving raspberry everything recipes now!

The Cluck Club

Chicks2

Over the holiday weekend we added some new members to our family!  Welcome (from back to front) Biscuit, Nugget, Fil-a and Curry.  And they have some fancy new digs courtesy of the hubs handi-man skills!  Here’s a quick photo tutorial of how it went together.

1

He started with two side panels of framed wire, to form the main area which serves as a run for the chickens to move around in.  He added more framing for what would become the hen house floor at the rear of the coop.

2   3

Next he added sides to the hen house, followed by foam insulation.  He also extended the floor of the hen house past the framing to make an area for nesting boxes.

4After insulation was added to the floor, the nesting boxes starting to take shape at the back of the hen house.

5

Then he added dividers to make three separate boxes so the ladies have a bit of privacy when laying.

6

Next he added a roof to the nesting boxes that can be lifted for collecting eggs.

9This puppy is well insulated so the chickens will stay nice and warm when the weather dips below 0 during the winter.  With insulation foam sandwiched between layers of wood on all of the walls and floor it should be pretty cozy.

7

And if you’re wondering if it’s sturdy, Stoli and his 70 some pounds of muscle can guarantee that it is!

10

Once the main parts of the walls were in, he added the roof panels.

12

13And from the side it was really starting to look like a coop!  If you notice, we moved the coop forward a bit so there’s more room at the back because the clean out access for our septic line is right next to the house and should we ever need to use it we wanted some room to work.

11

At my request, he added a covering of linoleum material on the entire hen house floor to make cleaning the coop out easier.

8And here’s the finished project – after several weeks of work!  Unfortunately, it rained here for most of the holiday weekend so I wasn’t able to paint it before we brought the chickens home, but once the weather improves for a few days all of the wood will get a coat of bright white, which should give it a true farm house feel!

FinishedCoop

The nesting box roof got a metal covering to match the rest of the coop and keep the elements at bay.

NestBoxCover

You can see most of the inside of the hen house when the small roof is lifted – a feature I’m sure I’ll appreciate immensely when checking on them during the winter.

NestBoxViewIn addition to the nesting boxes, the hubs installed an inside roost for the hens to use when the weather gets colder.

FinishedNestBoxesThe two side doors open wide to give full access to the inside of the hen house which has a light to provide both warmth and stimulation to continue laying throughout our dark winter.

FinishedHenHouseHe also installed a feeder made of PVC pipe and a water bottle with a nipple at the bottom so both stay as clean as possible with minimal waste.

FeederNWaterI’d never used poultry water nipples before, but they operate on the same mechanics as a rabbit water bottle and the chickens had some at their previous home so they already know how to use them.

FinishedWaterA ramp to access the hen house from the run and a large branch for an outdoor roost made it chicken ready.

RunEveryone was very excited to meet the chickens.  Even Luna came out to welcome them, although she stayed out of the dogs way by perching herself on the nearby ladder.  To give the chickens some breathing room from their four-legged siblings we fenced off the main part of the coop with some large metal grates we got for free on Craigslist a while back.  We’ll leave these up for a while until everyone is used to each other.  Until then they are under almost constant surveillance, but they don’t seem to mind too much.

ChickenWatchers   ChicksWatchFinalEventually I’ll add pea gravel around the coop so it doesn’t get super muddy, but for now we’re just happy to have the coop mostly finished (sans painting) and chickens inside it.

ChicksAlthough they aren’t free range like they were at their last home, I have been giving them yard cuttings and table scraps to dig through which they seem to enjoy.  And we all enjoy watching them settle into their new home. 🙂

Gallery Wall Additions

Gallery

Howdy strangers!  It’s been pretty busy around here lately, which doesn’t leave much time for projects or posting, but I did manage to get a few more items added to our on-going gallery wall in the family room.  This collection is definitely a work in progress and will evolve over time as we add to it, but it means I’m always on the hunt for special pieces to add.

Gallery2

I finally put up the metal numbers we got at the Great Junk Hunt and love them.  I chose 907 because that’s Alaska’s area code and is representative of the lifestyle here.  I wasn’t sure about the different colors and fonts at first, but overall it works and if I ever want to change it up I can paint them all to match.

Gallery3

I also added one of our favorite photos of Tequila and Sangria listening to the ice in the bay.  It was previously in the gallery wall in the dining room so it was ready to hang once I chose a spot for it.  It fills the spot between the metal D and the fireplace perfectly and because it’s level with the TV we see it daily. 🙂  Below the D I added a little Alaskan art, in the form of a framed postcard I picked up at the Seward Sealife Center when the hubs and I went there with our friends.  This piece was in the guest room as a table top frame, but I’m changing a few things up in there so I had the hubs pull off the support piece and hung it here instead.  It’s just the right size to fill the awkward spot between the fireplace switch and the TV and I like that there are a few smaller frames to balance out the larger items.

Even with these additions, there’s still plenty of room on the wall to fill.  I’m considering a couple of favorite quotes to create a simple text canvas piece and plan to add a frame where I can rotate seasonal chalkboard prints.  I’d also like to add a few circular and odd shaped items like antique bread boards, wood slice art and maybe even a driftwood cross to keep a balance with all the rectangular frames.  I’ve got a couple of options in my project pile so we’ll see what makes the cut!

Goodwill Patio Umbrella Rehab

Umbrella4

Way back when we made our road trip on the Alcan, we hauled back an outdoor umbrella we found at a Portland Goodwill for $12.99.  One of the arms was broken, but the hubs assured me he could fix it, so I couldn’t pass it up at that price.  It hid out in the shed for a while, but now that the deck furniture is in place we were ready for a little shade.

Umbrella3

The hubs used a left over piece of molding we had laying around to make it operational again.  I plan to eventually paint it to match the rest of the framework, but it’s not super noticeable so it’s not a high priority.

Umbrella2

I picked up a weighted base at Pier 1 with reward points so it was free as well.  It took a few tries to find the right size pipe to join the umbrella and base, but the winner ended up being just $12 and the one that didn’t work out will be used for another project, so it’s not a loss.  I plan to paint the pipe to match the base, but again, not a huge priority since it’s the end of the season.

Umbrella

So the grand total for the umbrella and base was just $24.99.  That’s pretty minimal compared to $70+ for umbrellas in the retail catalogs plus another $70-150 for a weighted base.  Now we’re living the “fancy” life for a bargain price! 🙂

Master Bench – Industrial Style this time

ZRemember our pretty upholstered DIY bench that sat at the foot of our bed?  It suffered a fatal injury while we were on vacation and had a house sitter.  I’m not sure if the dogs jumped on it or if something else happened, but this is how we found it when we returned from our trip.

Broken

Both legs on one end had lost connection with the base of the cushion.  We probably could have fixed it but we knew it wouldn’t be as sturdy as it had been and if it couldn’t withstand life in our house at it’s strongest then it wasn’t going to work for us.  So we came up with a plan to replace it a bit of industrial style and plenty of support so we don’t have to go through this again.  The hubs drew up a plan to use pipe for the base and wood for the top based on pictures I found on Pinterest.  Once it was assembled and put in the room we realized our scale was a bit off.

2

1If we needed a coffee table it would have been perfect, but it just didn’t work as a foot board bench.  Not only was it too high, it was too wide and took up too much of the walkway.  So the hubs took things apart, cut a few pieces and reassembled everything.  This time it was a much better fit. (Excuse my ‘naked’ bed – it was sheet washing day!)

3

Now we only needed one of the boards from the first version for the top.  And presto – a perfectly proportioned foot board bench!

4

5

Since the board is a little hard and the stain we used will likely seep for a while added a faux fur skin on top as a cushion and stain guard.

6I really love how it turned out and the rustic/industrial look it gives to the room, especially since I just changed up the décor in here to go more that direction.  I’ll be sharing those details soon.  I’m planning to work up a new base for the old bench cushion top and sell it in my booth at the upcoming holiday bazaars.  I’ve got a couple of ideas on what it will look like already, but if you have a suggestion I’d love to hear it!

5 Minute Vintage Crock Succulent Arrangement

6

We have an odd little nook in our Master Bedroom between the dresser and the closet door that just wasn’t living up to its full potential. I‘ve tried a few things in this spot but nothing seemed to fit quite right. Then I noticed several of my favorite blogs using plants in large baskets or vintage crocks. LIGHTBULB! I’d already been on the hunt for a large crock after someone beat me to one on the local buy/sell page so I knew that was the option I’d choose.

After losing out on one on the local buy/sell page, I spotted this beauty at an antique shop for 20% off because of a crack on the back, making the final price around $60. Since no one would see the back once it was in place that didn’t bother me at all.  See you can’t even tell it has a crack can you?!

0

Once I had it home I searched for an indoor plant that would do well with minimal maintenance and low light since the dresser blocks the light from the sliding door in this spot. Unfortunately, everything I liked didn’t fit those criteria so the crock sat empty for a week or so. Then I spotted some large faux succulents at Michaels while browsing the other day and immediately knew they were the perfect option, so I picked out four stems along with one that would cascade down the front of the crock.

1

I dug out a Styrofoam block I’d had forever and started arranging the stems by sticking them down into it. I started with the two larger stems, placing them on alternating corners of the block.

2

Next, I added the other two stems and the cascading piece to create this arrangement.

4

I filled the bottom of the crock with a small box and some packing filler to create a ledge for the Styrofoam block to sit on.

5

Then I just plopped the arrangement on top and turned it this way and that until I liked how everything lined up.

6

I could have left it just like this, but seeing the little bit of extra space on the sides of the arrangement would have eventually driven me crazy so I added a bit of moss I had on hand to finish it off.

7

I’m downright giddy with how it turned out – and the fact that I don’t have to water or prune it and that I know for certain it’s not hazardous for our fur babies just sweetens the feeling.

8

So there you have it.  The easiest 5 minute arrangement ever. I’d love to hear what you think of our new faux greenery, so leave a comment below!

Shared on Knick of Time’s Vintage Inspiration Party #199!

Thrifitng Karma

Thrift

As I was driving past the thrift shop around the corner from my office the other day, something said I should stop in and just take a look.  I’m a firm believer in trusting my gut so I pulled for a quick peek.  I’m glad I did because it yielded a pretty bevy of treasures!  I got all of this for just $46.  Apparently my gut can sense awesome thrifty deals from a mile away. 🙂

I plan to use some of the pieces as is, like the plant in the small crock and the cloche, but I’ve already got a few ideas for DIY makeovers on other pieces such as that blue bunny sign.  I may also update a piece or two for resale at the holiday bazaar I’ve booked just after Thanksgiving, but if they find a ‘spot to belong’ in my home before then I won’t be upset about it.

Have you found any great bargains while thrifting recently?  I’d love to hear about them, so share them in a comment below!

A Simple Change

4

Ever since we finished our farmhouse desk and industrial shelves in the office I noticed that my craft cart wasn’t quite coordinating with the new look so I decided to switch out the knobs for something more vintage or industrial.  I searched online for a while and found some really cool options like these railroad spike heads and these numbered numbered pulls, but the $8-9 a knob price tags were a bit more than I wanted to spend on this project.  So I did what any bargainista would do – I used spray paint!

1

A few quick coats of my trusty ORB spray paint and I had some industrialesque knobs for FREE!  It made quite a difference when I reinstalled them.

2

They add a bit of dimension to the piece now, where before it felt kind of flat.  It makes me fall in love with this great piece of furniture all over again.

CraftDeskB&A

I’m considering tweaking a few other things in this corner to work a bit better and add a bit more industrial style but I’m enjoying how well it coordinates with the rest of the room now – and didn’t cost a dime!

Finished

Linked to The Scoop @ Cedar Hill Farmhouse, The Everyday Home, Confessions of a Plate Addict, and White Lace Cottage.