DIY Plant Stakes

BeeClose

Hey everyone!  I know it’s been quiet around the blog recently.  Life has been a bit more hectic than usual and we had a death in the family last week so I chose to take some time to rest and reflect.  Finding time to prep material for the blog is still a bit challenging and we’re currently working on a couple of projects that aren’t ready to share just yet, including one I didn’t plan on tackling this year, but I’m excited about what it means for my garden next season!  In the meantime here’s a fun, quick DIY I did earlier this summer.

Back when I had a holiday tree in our entryway I collected an assortment of cute ornaments for each season and holiday.  Now that I’ve given up the tree I wanted to reuse the ornaments in a new way so I could continue to enjoy them.  I decided they would make great plant stakes for my potted plants on the deck and couldn’t be happier with how they turned out.

This sweet little rusty bee (which ironically is the name of one of my favorite local makers!) was the first I transformed.  Although I didn’t document the steps of his transformation, it was fairly simple.  I removed the small loop at the top of his head  which was attached on the back by bending it back and forth until it popped off.  Next I dug out my E6000 glue and applied some to both the back of the bee and a small rusty rod I had in my supplies that matched perfectly.  Following the directions on the glue tube I adhered the rod to the bee and let it cure for 24 hours.

Bee

Once cured, I tested him out with a couple forceful shakes and he held tight so I found him a home in my vintage crock planter.  He turned out so cute that I decided to do the same to the other ornaments I had in my stash.  Each had a little different set up as each was unique but they all followed the same process – remove any hanging loops or cords and glue a rod to an appropriate point.  Since I didn’t have enough potted plants to keep them all I set aside my favorites to be used in my garden and put the rest up for sale at the recent Urban Junktion show.  I sold several and still have a good inventory available for other shows next season.  Here’s the current inventory as they were displayed at the show.

Stakes

There’s a little birdhouse with a heart shaped opening.

Birdhouse

Several dragonflies, who may just stay and live in my garden alongside their relatives that I already decided to keep. 🙂

Dragonfly

This little beetle has the same patina as the bee, but I already have a lady bug plant stake so I’m helping this guy find his own home.

Beetle

There’s also a few nautical themed stakes, including these blue and green glittery seahorses.

Seahorse

I had two mermaids but the red head sold at the show, so now this blonde “girl fish” as my nephew used to call them is all alone with the other sea creatures, including this glittery little fish.

Mermaid

Fish

I still have a good inventory of ornaments for other holidays including Easter, St. Patrick’s Day and Thanksgiving.  I may revamp them for this purpose as well, or I might just find another option since those holidays don’t often correlate with having potted plants to decorate here in Alaska.

Stay tuned for more projects.  Posts might be a little few and far between for a while but don’t worry, we’re working on some fun stuff and will share it soon.

Quick & Simple Hanging Lanterns

a

Yesterday I promised to share the second little update I did to the brick pillars, and here it is!  We originally planned to build an arbor over the pillars but the Hubs started to get concerned that the high wind we occasionally get might require additional support with a post behind the brick column.  That didn’t fit with my vision of the original plan so I came up with a simpler option.

c

I’d been eyeing these cool lanterns at Lowes all season and finally had a spot to use them.  I picked up two along with metal Shepard’s hooks and some battery operated outdoor candles, which were on end of season clearance.  I knew I wanted one lantern to hang over each of the pillars so the hook needed to be positioned in the middle of the back of the pillar.  Unfortunately they have a second support stake that sticks out forward from the main post so I couldn’t just push them in and call it done.  I tried turning them sideways so the two support stakes were along the back of the pillar but I couldn’t bend the hook enough to have it hang over the pillar like I wanted.  So I finally conceded that I had to take apart the pillars in order to install the hook with the support stake inside the pillar space.

b

Luckily, I realized I could take off just the back of the pillar by carefully removing the bricks that overlapped every other row.  Once I had the stakes in the ground I put the bricks back together over top the connecting bracket for the two supports.  It was a little extra effort but it works perfectly and ultimately makes the hooks more stable because they are held down by the stack of bricks and sit flush to the back side of the pillar where they shouldn’t get pushed or moved.

I put the two potted plants on the ground next to the pillars so the tops of each can be used like a side table when relaxing in this spot.  I like how they make the columns look more permanent so I might be placing my burlap pots over here next year with some trailing flowers!  As for that faux rock we started this whole project with, it found a use covering the leech field pipe nearby.  If you look closely in the photo above you’ll see it beyond the fence.  From a distance it looks real and keeps the whole area from being cluttered while you’re supposed to be enjoying the view.

d

The Hubs had already purchased materials to build the arbor we originally planned so we’ll re-purpose that idea and supplies to a similar project over the back gate or perhaps for a new special project he’s been talking about recently.  I won’t spill the beans on that just yet, but it will be a big project for sure if it does happen this season and of course I’ll share it here once it’s done.

A Garden Bench

1

Today I’m sharing the new garden bench we added between the brick pillars we recently added to the side yard.  I found a metal bench online that I liked but of course they wouldn’t ship to Alaska and the local store didn’t have any in stock, so I went into the store to see if they had anything similar hoping they’d have a decent option or two on sale for the end of the season.

2

They had this bench which is very similar to the one I saw on the website but it was $30 more!  Luckily I had printed the online option and taken it with me so I sweetly asked the sales guy if he could price match their own website since they didn’t carry the one I really wanted.  He must have wanted to clear out the last one they had because he quickly agreed and offered to carry the big box to the register for me!

3

On the way to the registers I realized that the outdoor pillows I’d been eyeing were on 50% off sale so I snagged a couple of those as well when I noticed that several of the options available tied in the navy, green and aqua I already had going on in the yard.  My favorite is the little bird pillow, which I got two of!  They look pretty great on the fire pit chairs.

4

And they coordinate perfectly with the two over-sized navy pillows I got at Sams club earlier this summer.  I plan to paint an aqua pineapple design on the drop cloth pillow I have on the sectional and will add navy grain sack stripes to the ones on the table chairs over on the deck so there’s a cohesive color scheme throughout the area.

5

Stop back by tomorrow to see how I finished off the brick columns with some more fun aqua accessories!

A New Closet Bench

3

Some time ago Luna decided she no longer liked her perch in our closet and proceeded to claw the daylights out of the side of the storage ottoman I had already repaired once.  I guess she knew I’d be switching the style of our Master to more rustic farmhouse and wanted to give me a starting point.  I sold the slightly damaged ottoman and began the hunt for a replacement.  The hunt then drug on for several months and Luna whined that she didn’t have a perch – to which I told her it was her own doing.

I wanted something that she couldn’t damage with her claws so I knew wood was my best option.  I’d considered building a small farmhouse style bench with a plan from Pinterest when I spotted this little distressed piano bench on the local buy/sell page.  It was a little more expensive than I hoped, but the seller offered me a small discount making it cheaper than what she had bought it for so I felt a little better about it.

1

It fits perfectly under the mirror and the additional storage where the top lifts up is just enough to hold my work T-Shirts so I don’t have to pull them down from the high top shelf when I need them every few months.  I thought I could add a bit more storage with a basket underneath and I had one that wasn’t fulfilling a purpose at the moment so I did a quick test fit.

2

You’d think it was made to fit there!  And it coordinates with the colors quite well.  Luna was quick to show her approval of the new bench, which allows her to admire herself in the mirror once again.

4

And more importantly, it provides an optimum ambush location for that crazy younger sister of her’s when she gets a bit too energetic and needs to be reminded of who’s really in charge!

Z

I wasn’t sure how I’d use the basket at first, but I’ve since started putting the “to be altered or mended” items in there which frees up space on the shelf over the bottom rod on my side.  Perhaps being able to see them in the basket will remind me to take them to be done!

I plan to paint the trim and molding around the mirror cabinet this winter when there’s not so much to do outside, which will start to give this space a more finished look.  I’ve made another small update to this space since taking these pictures and will share that soon as well. Until then I’d love to hear what you think about the new bench and the extra storage it provides!

Brinley Goes for a Ride

5Hi!  My  name is Brinley and I’m taking over the blog today so Momma can catch up on her t0-do list after a busy week!  I wanted to share a little story about my recent ride in the truck when Mom and I got stuck in something she called “construction traffic.”  Because I’m a puppy I don’t like to sit still for very long so being in the truck for a long time isn’t very fun for me.  I tried to be patient and just hang out, but that didn’t last long.

11

So I tried to be helpful by cleaning the crumbs out of mom’s cup holder.  I thought I was doing a pretty good job, but she didn’t seem to appreciate my efforts.

9

So I tried being patient again.  But like I said, that really isn’t my thing.

10

So I tried to take a nap on the center console.  But I’m getting bigger now and don’t fit there very well anymore.  I couldn’t get comfortable so I moved back over to my seat.

17

Next I tried giving mom puppy dog eyes to see if it would get us out of traffic any faster. She said I looked cute but it wouldn’t help with traffic.

1

After a while I was starting to have a serious case of cabin fever, so I really laid on the puppy dog eyes.  Still no luck.

19

So I found a toy and invited Mom to play tug-o-war.

18

But she said she was too busy watching the other cars.  How can you be too busy for tug-o-war?

16

So I tried to help her watch the other cars.  But when they didn’t move I got bored again.

15

This is my impersonation of what Mom and the other drivers on the road felt like sitting in their vehicles on a bright sunny day.

20

I thought maybe if I didn’t look the traffic would go away… but that didn’t work either.

14

Then Mom started to whistle to the song on the radio.

24

I tried to ignore her, but I couldn’t because she was right next to me and I’m trained to listen to whistles!

25

She finally stopped, but then she wanted to take a selfie.  Whatever that is….

26

I moved back over to my seat to relax and I thought she was trying to shade my eyes from the bright sun, but it turns out she was just taking more pictures!

21

Finally the other cars started to move and I was excited to see new scenery out the window.

27

Luckily, I could tell we were almost home by what I saw out the window!

28

But then we stopped AGAIN!  It was so frustrating!

29

I was pretty darn tired from all this crazy traffic, but I tried my best to stay awake and keep Mom company. It was really hard!

22

23

I just wanted to rest my eyes from the bright sun for a moment, but apparently I was more tired than I thought and fell asleep.

13

At least I’m super cute when I sleep!

31

Mom told me later that this is why we stopped again.  We had to wait for this GIGANTIC metal thing to get off the highway in front of us.  It was bigger than Mom’s truck!
30

I woke up just as we pulled in the driveway and told Mom I didn’t want to be in traffic ever again.  She said she couldn’t promise anything but gave me a scratch behind my ear before she let me out of the truck.

12
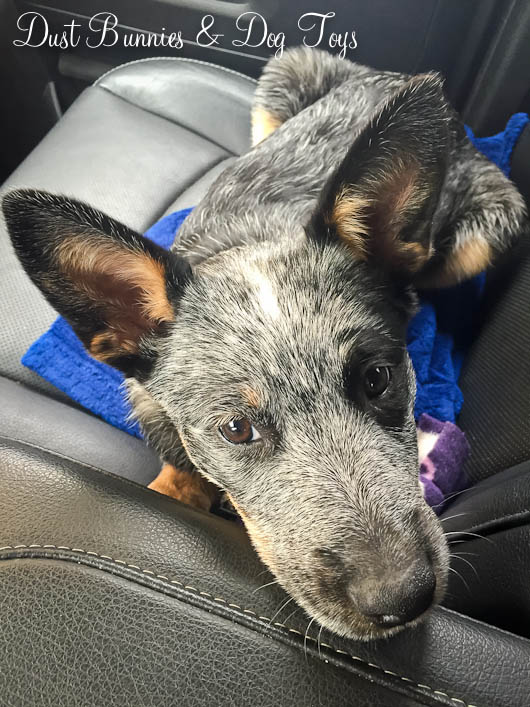
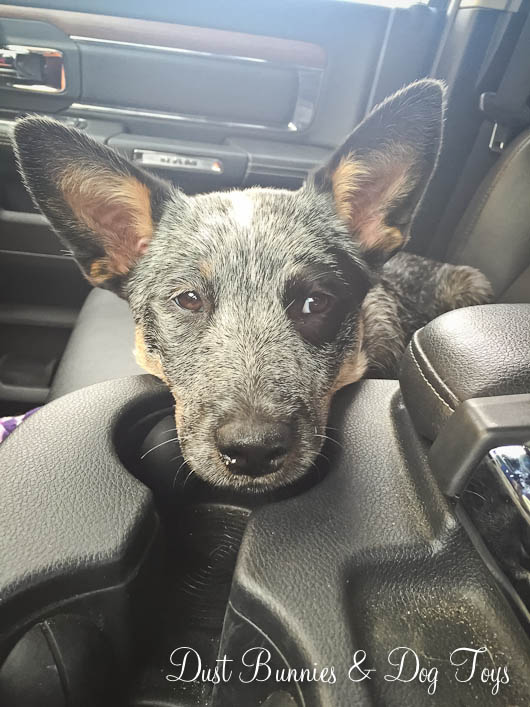
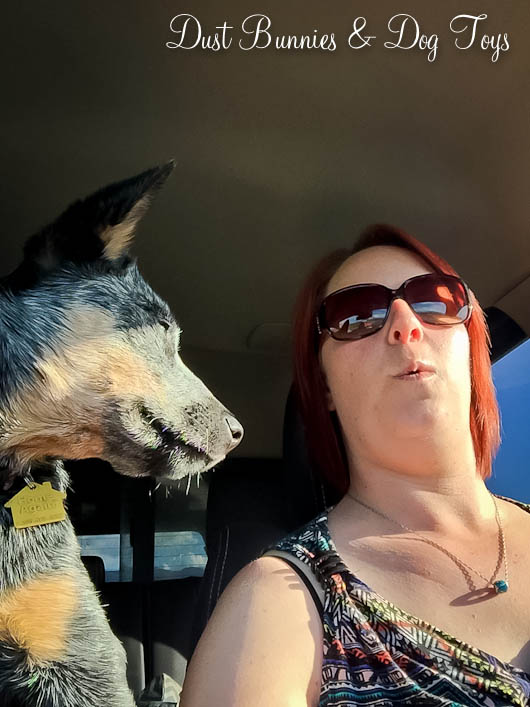
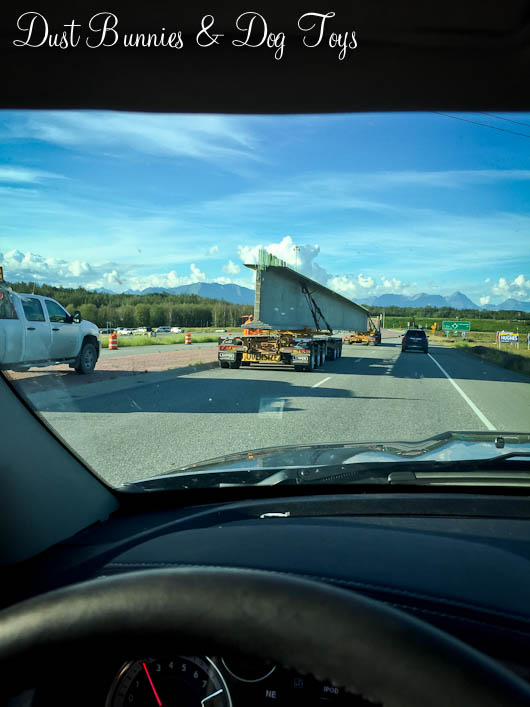
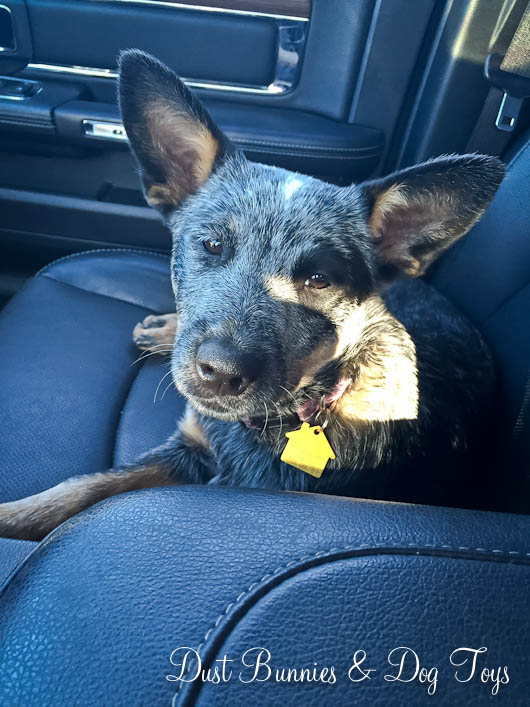
So that’s my story about my ride in the truck with traffic.  I hope you liked it.  Mom will be back later this week with new projects she and Dad have been working on, so watch for those.  You never know when I might pop up in the pictures! 🙂

The Beauty Around Us

TruckLife has been crazy busy recently.  Tequila had knee surgery which required a change in schedules for the Hubs and I.  Summer is the busy season for my photography business with weddings, seniors and families visiting Alaska.  My department at work is about to move offices and I’ve had a couple new projects assigned to me.  The garden is growing like crazy and in constant need of attention for weeding, pruning and training.  And of course we still have a puppy at home who is learning what is and isn’t acceptable behavior.

With so much going on it’s rare that I get more than 5-6 hours of sleep a night during the week and I feel a bit like I’m burning the candle at both ends.  I had grand ideas about enjoying some down time this summer enjoying our yard and hitting the trails in our side-by-side but schedules and injuries haven’t cooperated and with fall just around the corner I’m realizing there’s not much time left to squeeze those things in.  So rather than have a pity party about it, I’m looking for little pockets of adventure and relaxation in between all the day-to-day stuff.

The first came when I was driving home from a wedding last weekend and spotted this old truck in a field just off the road.  I’d seen it before but am not often in this area of town so despite the rain – which had thankfully held off until just after we finished up at the wedding – I turned around, found a spot to pull over and jumped out to snap a few frames.  There’s something about this simple scene that speaks to me.  Maybe it’s the wildflowers, maybe it’s the rusty old truck that’s similar to my own, maybe it’s the vision of rural life it creates.  Whatever it is I like it and I’m glad I have a visual of that ‘feeling’.

The second opportunity came last weekend when I was again returning home from a photography session.  This time we’d been rained out, but I have other sessions in this area coming up so I decided to scout a few spots as I made my way back.  It was rainy and chilly, but the rushing of the river was amazing.

RIVER

This is one of my favorite local areas and luckily it’s just a few minutes drive from our home, but we often get caught up in other plans and don’t make it over here on a regular basis.  Having a little extra time to explore a few corners of the area was just what I needed.  It recharged my creativity and reminded me how blessed I am to have the life I do.

There’s always room for improvement, but for the afternoon I was content to simply enjoy the beauty around me and have a little adventure.  I hope you find inspiration in these two images to take a few moments here and there to enjoy the beauty in your daily life as well.

Urban Junktion

2

I recently attended another local pop-up “junk show” and thought I’d share a quick recap.  This one was called Urban Junktion and was held at a sports complex which was much larger than the fairgrounds building where the Alaska Chick’s Vintage Market was hosted.  Several of the same vendors from that event were here, but had different items for the summer season.

Although I wasn’t able to commit a whole weekend to have a booth at the show, Anne-tiques who has done several furniture projects for us did and offered to let me put some of my smaller pieces at her booth to accessorize her furniture.   That arrangement worked out pretty well since I still made more than I spent at the show and I was able to get in before the doors opened to the public to help her set up.  Once we had things pretty set I made a quick lap of the other booths to earmark which items I was interested in checking out since I had limited shopping time due to photographing a wedding that afternoon.

3

There were lots of rustic home decor vendors with a variety of items from furniture, to signs and vintage or re-purposed items.  The host of the show had an amazing booth that I was so busy shopping I didn’t take any photos of the set up, although I did snap a few of the cool display on the backside of her booth with this wonderfully styled mannequin and little soldiers with a great message.

5

67

I also spotted a basket of shoe horns at her booth that look quite similar to the ones I just inherited from my grand father!  I’m not sure what I’ll do with mine just yet but it was cool to see someone else appreciate these types of items.

HORNS

This jerry can bench also caught my interest since we have one jerry can already from my unplanned picking adventure earlier this summer.  I’d considered making mine a lamp but if I could find a matching one this would be a fun option.

BENCH

One of my favorite vendors, The Alaska Picker was there with awesome unique builds and vintage finds.  I love the truck beds they have been making and wanted this awesome cart for my deck so bad, but just couldn’t justify the $200+ price tag on my current budget.

BED

CART

Another piece I was lusting after was this metal John Deere tractor and trailer.  I could just envision it in a garden with flowers hanging over the sides of the little trailer, but at $300 it was out of my “garden art” price range.

1

I almost bought this fun pendant light made from an old funnel neck can.  It was priced right at $35, but I couldn’t think of where I’d use it in our house so I decided to leave it for someone else to treasure.

4

But here’s what I did buy.  A cool wooden wheel, a metal scroll piece and a fun birdhouse garden stake.  I’m still not sure where I’ll use the wheel and scroll piece but the birdhouse has already found a spot in the garden, which I’ll reveal once that area is finished.

BUYS

BIRDHS

It was a great experience for both the shoppers and the vendors, even though it was hard to compete with Alaska’s summer time activities.  It’s definitely a perfect showcase of the talent and creativity in our region and it’s makes you realize it’s a community all it’s own.  Check out the Urban Junktion Facebook page to see more photos of the event and all the cool little details I wasn’t able to capture in my quick visit.  Hopefully, there will be more events like this in our area so I can shop and photograph more great set-ups!

Garden Art From the Faire

Pig2

Today I’m sharing the fun new pieces of garden art I picked up at the Palmer Midsummer Garden & Art Faire I told you about yesterday.  One of my favorites is this little rusty flying pig stake.  At $10 he wasn’t a bargain, but I couldn’t say no to his cuteness.  He’s a perfect fit for our farmhouse style, but his wings give him just the right amount of whimsy for the garden.  I put him in the watering can planter which provides the perfect launching point for him over the pink lobelia.

Pig

If you were paying close attention last week when I shared our septic pipe disguise project you probably already saw the willow and birch dragon fly I added to the wheelbarrow planter.  I’ve got a few other dragon flies around the garden – including some very large live ones! – so he fits right in.  The vendor making them had larger versions available for $15, but I spotted this guy as part of an arrangement and knew he’d be better sized for where I wanted him.  Luckily, I was able to get the vendor to agree to break up the arrangement and sell him separately for just $5, which I thought was a fantastic price!

DragonFly

This glass crow is probably my favorite find from the faire and was also the first I bought that day.  I absolutely love the iridescent colors on his wing and tail that catch the sunlight.  He was only $20, which I thought was an amazing price, knowing the skill and time glass work take. The vendor also had other designs as yard stakes and wall hangings.  I told him if he makes puffins and salmon as yard stakes in the future I want to add them to my garden.  I may eventually paint Mr. Crow’s stake a dark color so it blends in a bit more, but for now I love how he’s perched over top of the dianthus.  Even the Hubs commented on how he looks good there!

Crow2

Crow

And lastly was this sweet metal wheelbarrow planter I scored for just $16.  It turned out to be a perfect fit for the crock I already had on the deck.  Now that I know it gives the crock good height, I’ll pick something that trails down the sides for this planter next season!

Wheelbarrow

Notice that little rusty bee in the crock?  That’s a bit of garden art I DIY’d.  I did a few others as well which I’ll be sharing soon, so watch for that.  Until then, I’d love to hear what you think of my garden art haul from the faire, so leave a comment below.

The Palmer Garden & Art Faire

1

Today I’m sharing a little recap of the Palmer Midsummer Garden & Art Faire.  Although this was the 6th annual faire, this was the first time I’d attended the event and I had an amazing time!  We had perfect weather, a wonderful variety of vendors and a plethora of workshops, as well as entertainment. The photo above only shows one small section of all that was going on!

The first thing I did was join a workshop on Alpine hypertufa container gardens.  Our instructor was Jamie, a local alpine plant expert who owns the Alpine Nursery in town.  He reviewed his recipe for making hypertufa containers (1 part Portland cement, 1 part perlite, 1 part pete moss and water mixed with latex additive and a tablespoon of fiberglass fibers for strength) and explained the process for forming the container using various common garden or household items as molds.  He showed us how to plug the hole at the bottom of the container with embroidery mesh before he started filling it with dirt to plant.

2

3

He added his own special blend of soil, which includes native top soil, pea gravel and sand.  This provides a consistency similar to what alpine plants are used to growing in in their natural environments.  He added two interesting rocks to create various pockets for the different plants, including a rare specimen he acquired from a fellow nursery owner.

4

5

6

Once he had everything planted how he wanted, he added crushed hypertufa from a mold that cracked while curing on top to replicate the gravel topsoil of the native habitat of these plants.  Here’s how it looked when it was all done.

7

As the class was wrapping up I noticed these ladies at the instructor’s booth.  They were definitely channeling their garden spirit with their outfits!  I’m pretty sure they were part of one the many performances during the faire, but it was fun to see them milling about in the crowd.

8

I also browsed Jaime’s plants before heading out to see the other vendors and spotted the impatients my neighbor had gifted me last summer!

9

Next door to Jaime’s booth was a very talented bonsai gardener.  I admired the creativity and patience it took to create these beautiful container gardens.  Here are two of my favorites, which I was surprised included one crafted from a birch tree!

10

11

A little way down the vendor trail I found this fun photo op booth from one of my favorite local thrift shops, Thrifter’s Rock.  Their booth was just as fun with unique display racks and quirky wares.

12

14

Another nearby vendor had this bright and happy chair planter.  I’ve got an old chair frame that I’ve been holding on to so I can create something similar!

13

I was madly in love with these gorgeous hand made bird houses!  The copper roof was a fantastic compliment to the cedar carved steeples and the rustic branch on the front made it just perfect.  Unfortunately they were out of my budget for now, but I did note the vendor’s business name so I can contact him to get one when I do have some extra funds for garden décor.

21

Speaking of garden décor, you might have noticed this cutie in my last post!  This vendor had several tall willow dragonflies available but I liked this little one.  Although they had planned to sell this as part of the arrangement it was displayed in they agreed to separate them and I got the perfect addition to my wheelbarrow planter for just $5!  They assured me that this little guy will weather the winter fine, but I’ll probably put him up in the shed just to extend his overall lifespan.

15

There was lots to see and do at the faire, including this selfie photo op for the Visitor Center.  These tall mushrooms and hanging blooms were so cute I just had to take a picture, even though it’s not a selfie!

16

The Hubs joined me at the event and we decided to get some lunch from one of the food trailers.  The salmon egg roll we ordered was definitely unique but the caprese sandwich I selected was AWESOME!  And the strawberry rhubarb lemonade I had to go with it was just as wonderful.  It was the perfect lunch on a warm summer day.

19

18

17

While we were enjoying lunch I noticed this unique bike contraption nearby and soon discovered it was part of a demonstration some pretty ingenious youth were doing on how to use human power to make smoothies!

20

20B

After I’d seen all there was to see I headed back to the truck enjoying the fun little displays in front of the downtown Palmer shops.  I really liked this garden box which used fishing gear as part of the display!

C

Before heading home I stopped to check out a possible photo location which turned out to a great spot, although it didn’t have many options beyond this vantage point.

22

The neighbors were sure adorable too!  Look at those big floppy ears and spots!  I wonder if I could sweet talk the property owner in to letting me borrow one or two for a shoot! 🙂

23

It was the perfect end to a fun day.  I’ll definitely be attending the faire again next year and already have the tentative date flagged on my calendar.  Check back tomorrow to see all the fun garden art I found at the faire!

Hiding Those Ugly Septic Pipes

ChickenCornerView

It’s been another crazy busy week here at the DB&DT household.  Tequila went in for surgery on her torn ACL yesterday so we’ve been out of our normal routines to make arrangements for that which hasn’t left much time for editing photos.  So although I planned to share my experience at this weekend’s Palmer Garden & Art Faire today, I haven’t had a chance to prep all the photos.  Don’t worry the Garden Faire recap will still be coming, along with all the fun art I found, so stay tuned for that but today I’m sharing a quick project we did in the yard this weekend!

Remember those two ugly septic tank pipes near the chicken run?  Well, they’re looking much better now.  Check out how we disguised them!

10

We started with some reclaimed bricks that we got for free on a local buy/sell page.  I leveled the ground around the pipe and stacked the bricks to create a column.

Bricks

Here’s how it was looking once I got them stacked all the way to the top.  That huge rock in front of the bricks is one I discovered while leveling the ground and had to take out!

Bricks2

I originally planned to have a stack of bricks around one pipe topped with a large paver stone and a pretty bird house, the place a faux rock shell over the other pipe, but when the plastic rock arrived I didn’t love it.  It works fine from a distance but since this is an area that we are IN daily and is near the deck it wasn’t realistic enough.  That’s when the hubs suggested we stack bricks around the second pipe as well and create an arch from the two bases then place a bench below!

I was definitely on board with that idea, but wanted to make sure we could have something that looked good but was still easy to remove for when we do need to service the tank.  He assures me his plan will work, so I’m now on the hunt for a bench.

2

He removed the existing caps and replaced them with these removable ones.  They tighten on with a metal clamp band.  I placed the bricks on the edge of the pipe so we could get the widest area possible between the two stacks for the bench.

3

The hubs also had the brilliant idea to use a board across the entire space while stacking to make sure we had the two stacks parallel to each other so things will line up when we build the arch.

5

And here’s how the spot is looking today!  Since the bricks and wheelbarrow were all free the only cost so far is the new pipe caps, two top pavers, flowers in the wheelbarrow and my fun new garden art sticking up out of them.   But we’re still less than $50 for everything so far.

6

8

10

I’ll find a new spot for the wheelbarrow once we have a bench, but for now it brings much needed color to this corner of the yard.  I plan to relocate two lilac bushes to the wheel bed next season so when they bloom this will be a fabulous spot to sit and enjoy their fragrance, while visiting the chickens.  Plus it will be just off the gravel pathway we plan to put around the chicken yard next season so it flows nicely too.

Since everything is dry stacked, it’s easy to move out of the way when we need to access the tank pipes and it can then be reassembled quickly when we’re done.  I’ll share how we create the arch over top when we get that part done.  Even if it takes a while I’d be happy to put some pretty lanterns or potted plants on top of the pillars once we get a bench and call it good for this season!

I’d love to hear what you think about our septic tank pipe disguise, so please leave a comment below.

Shared on Knick of Time’s Talk of the Town #29.

Shared on Stone Gable’s Scoop.

TDC Before and After