Storage in the Foster Room

CratesFront

As promised, today I’m sharing what’s underneath the art display boards in the Foster Room that I showed you yesterday.  I created a fun storage cubby system with simple wooden crates which can hold books and toys.  I got the idea from one of my favorite blogs and originally planned to mount the crates on the wall like she did, but wanted the option to use them occasionally as props for photo sessions occasionally so instead I opted to just stack them on the floor.

Crates

I was a little worried that the baseboard would make the bottom row stick out more than the top row and leaving a small gap behind the crates would make them unsteady which could be a safety issue around children but when I set them up they felt pretty sturdy. I figured only going two rows high keeps things at kiddo level so there’s no need to reach or lean on them and keeps the center of gravity on he whole group low so I’m not worried about it.

Wall

It coordinates with the art display boards well and is just as flexible since we can change up what’s in each cubby to fit each child’s interests.  There is also a digital frame in the lower left crate where we can load pictures of things that they like, which should be a fun project to do together when they arrive to get to know them and serve a dual purpose as a nightlight.   The wide openings are perfect for storing books and the toys I’ve started collecting such as the adorable elephant a co-worker knitted and one I found on Etsy years ago.

CratesPhants

I also ordered this peg doll set which should be interesting for a wide range of ages.  Since we don’t know who will be placed with us I got both the boy and girl sets which can be played with separately or paired up.  The cute purple crab in the back is something from my days working at the YMCA that I’ve kept.  I thought it was something fun a child might like and since it’s made of Styrofoam it shouldn’t be dangerous for them to play with.

CratesPeg

Next to the crates I put some mega blocks in a basket for easy access and clean-up.  I found a large bag of them on the local buy/sell page for a few dollars and likes that they are larger so they won’t be a choking hazard for smaller children.  Next to that is a bean bag I used to use for newborn sessions before I got my professional poser pillow.  I think it makes a fun little reading spot right next to the book storage.

WallFull

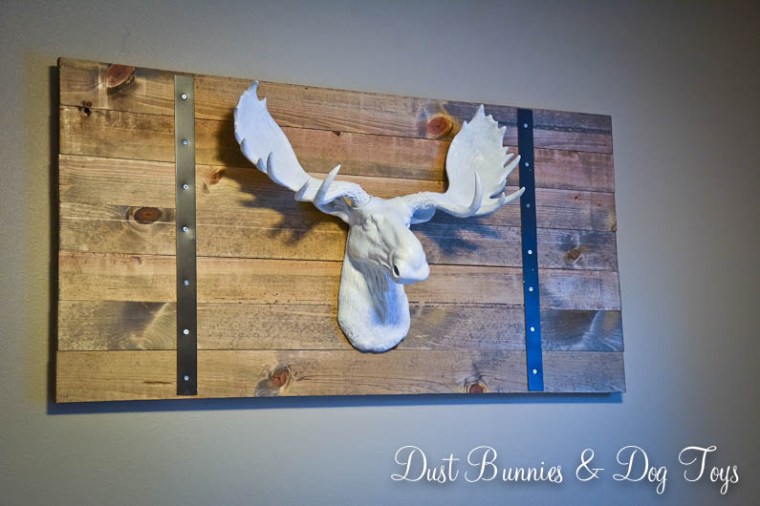
Since I bought the crates on sale and with coupons good for a percentage off a single item, gathering enough to make the cubbies required several trips to Michaels but it was worth the savings – especially since I go there often for my day job and can make a separate personal purchase while there! I used stain I had left over from the Moose Mount Board in the guest room for both the display boards and the crates so that was an additional savings.  Next up are the window treatments, which I’ll share tomorrow!

Foster Room Art Wall

I’m still sorting through Hawaii photos and collecting my thoughts so I can share all the things we did with tips for those who are planning trips which I’ll share in several posts next week.  Until then, I thought I’d give you an update on some of the projects we completed in the Foster Room before our trip.  One I really like are these simple art display boards.

BoardsFront

I needed something to fill the large empty wall, but also wanted it to be changeable with the seasons and each child’s interests without costing a lot so when I saw this idea on one of my favorite blogs I knew it was the perfect answer.  It was such a simple project that I did it all while watching TV and didn’t take any photos of the steps, but here’s the quick run down:

  1. Stain or paint pre-cut boards with favorite color.
  2. Screw in eye bolts at each end of the board.
  3. Loop gauged wire through the eye bolt and twist back on itself a few times.
  4. Pull wire taunt across the board to the other eye bolt and cut to appropriate length.
  5. Loop other end of wire through second eye bolt and twist it back on itself a few times.
  6. Adjust wire and eye bolts as needed to make wire tight. (I used pliers to tilt the eye bolts outward a bit for some extra tension.)
  7. Add small metal clips to the wire for hanging art.

Boards2

It’s the perfect simple solution and it can double as a spot to display little artworks to be oohh’ed and ahhhh’ed over.  For now I put up some simple dog and cat art I found online as placeholders.  I think the total cost came in under $30 and I have a third left over board stained and ready to be used for another project.

Boards

Tomorrow I’ll show you what we set up below these boards for more display and storage space so check back for that!

A Quick Revamp

Aloha!  It’s been quiet around the blog the last few weeks because the hubs and I had a little get away to Hawaii!  It was an amazing trip and I’ll be sharing information on all that we did while there in the next few days once I get a chance to sort through the masses of photos I took.  Until then here’s a quick little upcycle project I did a while back and never shared (hence the lack of snow in the before photo!).

I bought this wooden wall art at a furniture store when we first moved to the mainland about three years ago.  I was drawn to the details of the carved wood and always liked it but it blended in with the wall color at the new house too much for my liking so it languished in the “not sure where to put this pile”.Before

A quick coat of chalk spray paint from Michaels and a little distressing took it from pretty basic to awesome rustic!

After

Now it looks like something you’d see on HGTV’s Fixer Upper!  Although I really love the new look, I don’t have a spot for it in the house any more so I’ve got it set aside for the next bazaar and will post it on the local décor buy/sell page in the meantime.  Hopefully someone else will have the perfect home for it and snag it up.

DIY Bird Feeders

3

While I had a few days off around Christmas I finally tackled a little project I’d been wanting to do for a while, creating a few more bird feeders for the yard.  I had seen spiral copper feeders online and loved the simple design, so I did a quick search on Pinterest to find a tutorial and gave it a try.  I used small copper tubing, which is typically used for the water line on newer refrigerators.  It’s a soft metal so it bends very easily.  The tutorials I found suggested using a rolling pin to get the circular shape, but we don’t have one so I used a soda can instead.

I wasn’t able to get pictures during the process due to needing both hands and the hubs being busy with another project, but it’s really as simple as placing the beginning of the tubing against the can and pressing gently as you turn the can toward the tubing.  Once I had a spiral tall enough I snipped the tubing with wire cutters to make a clean end and wrapped that around the can as well to complete the final loop.  After I removed the can from the spiral I pulled the top loop up so it was perpendicular to the rest of the spirals so I’d have somewhere to hang the feeder from.  I stretched the spiral out a bit to make spaces between the loops and once I was happy with how that was looking, I curled the bottom loop a bit tighter so it could act as a stopper at the end.  I had enough tubing left over to make a second as well.  Here’s they arebefore I filled them.

B

A

I filled them with apples and hung them outside on the hooks where my hanging baskets go during the summer.  I haven’t seen any of the wildlife visit them yet, but it might take them a while to investigate and learn this new food source.  I’m considering making more of these for my Etsy shop, but am not sure if they would be big sellers or I they would ship well so I might post them on a few of the local buy/sell pages and see if they get any traction there first.

1

I continued my DIY feeder making roll with this simple S hook orange feeder. The hubs drilled a hole in a piece of drift wood from my stash and I positioned it where I thought it would work best as a perch then added a bit of hot glue to keep it in place. We could have just made the hole smaller to begin with so the perch would fit snuggly but I didn’t want to risk breaking it when maneuvering it on the hook.  I cut an orange in half and just stabbed it onto the end of the hook.  The hubs enjoyed cleaning up the other half of the orange so it didn’t go to waste.

2

This one hasn’t had any visitors either from what I’ve seen, but I’ll leave it up for a while to see if the birds and squirrels find it just like it did for the peanut ring feeder which I filled while I was at it.  This continues to be a huge draw for both squirrels and birds so I might just let it run empty to encourage them to explore the other new feeders.  If I still don’t see any traffic at them in a few weeks I might switch to using homemade suet balls or blocks instead of fruit and see if that’s more appealing to our neighborhood’s critters.

5

I picked up this store bought feeder several weeks ago and placed it farther down the fence from the peanut feeder so the smaller birds would have somewhere to eat when the squirrel is devouring the peanuts. The perch is on a spring that can be adjusted to different tensions for different sized birds and pulls down over the openings if there is too much weight, such as a squirrel, which was the main selling point for me.  Plus I like the bright red, barn style too!  I’m still playing with the different spring settings to see which works best for our area’s flock since it didn’t come with instructions or info other than the price tag, but I have seen groups of chickadees sitting on the ledge and pecking at seeds so it must be appropriately set for them.  And because it has such a large reservoir, it hasn’t needed filling since I put it up so it’s perfect for the far area of the yard where we don’t often go.

4

Hopefully all of these options will make the birds stick around come spring, so they can keep the mosquito population in check allowing us to enjoy the deck more.  If you have any tips on how to attract birds to new feeders or suggestions for feeder styles that work best I’d love to hear them!

DIY Moose Mount

7
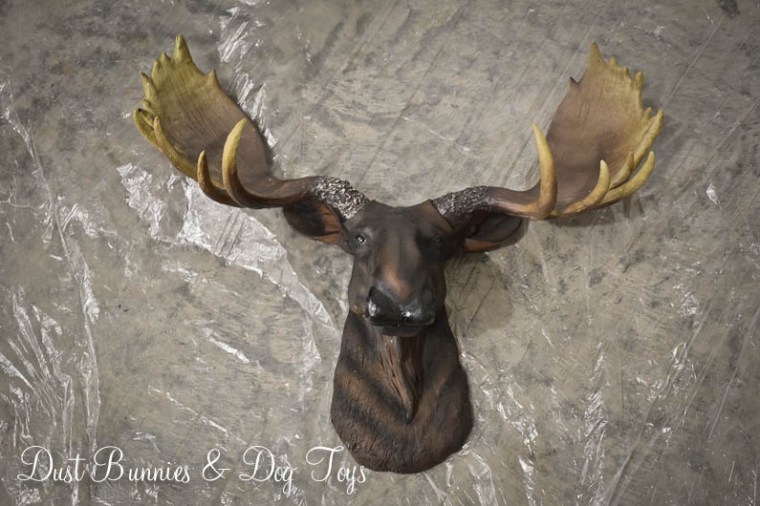
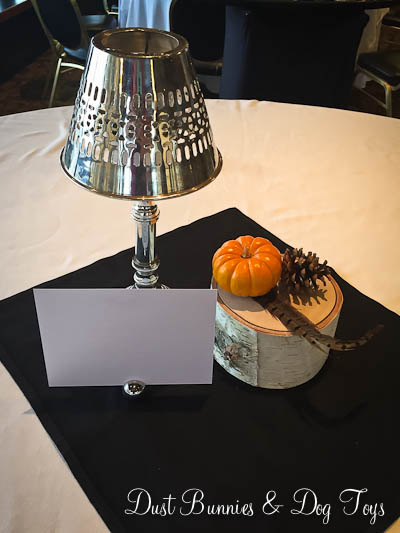
Today I’m sharing a recent DIY project the hubs helped me create as part of the games for my employer’s company holiday party.  The company is celebrating it’s 25th anniversary this year so we had a theme of ‘silver winter.’  We wanted to try having some games that people could do before dinner was served and I came up with the idea of a moose head ring toss.  I found this resin moose head on Amazon, which the company purchased for around $20 after we used some gift certificates from a vendor we work with.

1

Much to the hubs dismay, I spray painted him white.  Sometimes he just can’t see my vision. 😉  Once we had the moose head ready we purchased the wood, screws and metal strips to make the mounting board.  We laid everything out in the garage for a dry run before putting it together.

2

The first step was staining the wood, which was precut whiteboard.  I had planned to use pallet wood but ran out of time to disassemble the pallets I had.  Luckily these were the right size and at around $5/board they didn’t break the bank.

3

Here’s the moose head, sans antlers, on the stained boards.  I love the contrast and rustic feel!

4

The next step was adding the metal brackets on either side to hold the boards together.  The hubs convinced me it was cheaper to buy a long solid piece of metal, so he cut it to size and drilled the holes for the screws.

5

The hubs and Stoli look so thrilled to show off the finished project don’t they?!   At the party we set the board on a table on top of a white fur throw with the back propped up against the wall so players could attempt the ring toss.

6

And now that the party is over and the company has no use for it any longer it’s become a focal point in our guest room!

8

As I was prepping the images for this post I realized that when we hung the board at the house it’s actually upside down, which makes the moose sit a little higher than it did in the “finished” picture.  I might eventually correct that but since it’s not that noticeable that’s pretty low on the priority level.

9

I think I’ll dress him up a bit next holiday season with a scarf or fur wrap, like I’ve seen many other bloggers do since I plan to decorate more throughout the house with small touches.  I’d love to hear what you think of our latest project and how it looks in our rustic Alaskan guest bedroom!

7

Making a Little Faux Tree New Again

Happy Christmas Eve! I have one last Christmas project to share and it’s the revamp of this sad little faux tree.  It used to be my holiday tree in the entry way, but I decided to give up that tradition this year in favor of spending time on more important things like spending time with my hubby and kiddos.

This little skinny tree had definitely seen better days.  It had moved from Virginia to Alaska and then from Kodiak to Anchorage and finally Wasilla, so it was looking pretty tired.  Since it came apart in two pieces I decided to make each portion a smaller mini tree for use around the holidays.

TreeOriginal

The bottom section was glued very securely in the base – trust me I tried to remove it and I’m pretty sure it would survive an explosion intact.  So rather than fight it I just wrapped the container in burlap, tucked the ends over the top of the urn and tied it with some pretty twine from the boots I’d bought at a consignment sale.  One down, one to go.

BurlapFinished

Now I needed a base for the top portion of the tree, which had a metal stump that had once attached into the base of the tree.  I remembered I had this wooden box in my stash and thought it would work perfectly.  This had been the container for a gift basket my office had received last year and originally came as unfinished wood with the sender’s logo carved on one side and this pretty snowflake on the other.

BoxStained

Although the snowflake was cute I didn’t want to see the company’s logo so I needed a way to cover it up.  I considered adding metal pieces with decorative tacks, paint stick shiplap and other methods, but then had a light bulb moment when I realized that the burlap webbing I had a small section of was just tall enough to cover both the logo and snowflake!

BoxWrapped

I filled the box with some Styrofoam from some packaging I was about to discard, shoved the metal stump into that and wrapped the webbing around the box, securing it with a bit of hot glue where the two ends met.  It was looking pretty good, but I wanted to cover up the white sytrofoam so I pulled some crinkle paper stuffing out of my filler stash and tucked it around the base.  I literally had just enough!

BoxWrapped&Filled

And here it is all done!  I think they turned out pretty darn cute for being a totally $0 project!  I paired each with a reindeer and placed them in the guest room and foster room for the season.  I didn’t even decorate them so they can stay put through the winter. 🙂

BoxFinished

And because I just can’t not share one more, here’s a cute little lamp post I revamped.  I bought it at a thrift store for $4 back in the summer and set it aside to redo for my holiday bazaar booth.  I forgot to take before pictures, but envision it as unfinished wood, with some 1980’s Christmas appliques at the top and a beat up garland around the post.  I removed the garland, sanded down the appliques and painted the whole thing in ORB.  Then I distressed the edges of the lantern and added a simple bow with greenery to the lantern base with a screw.  And here’s the finished result.

Post

Although it didn’t sell at this year’s bazaar I’ll store it away as inventory for next year since it never hurts to get a head start and I plan to market pieces earlier next year on my Etsy shop and crafting Facebook page.

I’ll be taking it easy tomorrow, Skyping with family back home while enjoying the day with my fur babies and the hubs, so I wish you a very Merry Christmas and will share more projects next week!

Our Newly Rustic Mantel

Today I’m sharing the revamp we gave our plain white mantel.  Although we wanted a rustic timber mantel when we were building the contractor wanted an absurd amount of money to install one and we weren’t certain what it would look like so we opted to take his basic style and DIY a work around later.  Two years later it’s finally happened.  I considered several methods including faux painting a wood grain and building a wood sleeve box, but I’m not great at painting and it would be nearly impossible to get a wood box to sit flush with the stone we have on the surround.  I also considered doing a wood veneer but had a hard time finding pieces large enough and worried that it wouldn’t fit together right.

While hunting Amazon for wood veneers I found a rustic wood print self-adhesive vinyl for around $10 a roll and figured at that price it was worth giving it a shot.  When it arrived I was worried that the colors were too similar to the rock, but eventually I felt that even if it was it would still be better than the big white block we currently had.  Here’s how the mantel looked until yesterday.

1

And here’s how it looks now!

6

The material was fairly easy to work with, you just use the grid pattern on the back to cut it to size, then peel and stick it down to the surface you’re covering.  Because we wanted the pattern to go up under the rock and wrap around for a continuous pattern it was more difficult than other applications.

2

We had a neighbor visit while we were measuring, who helped herself to the remains of my hanging baskets.  I don’t mind too much since they’re already goners but hopefully she forgets where she found them come spring.

3

I think she eventually realized that I was watching and attempted to hide behind the post while continuing to munch…

4

But back to the project at hand.  Several hours and a few choice words muttered under my breath later the mantel looked like this.  Definitely an improvement from the big white blob!

5

It’s definitely not perfect.  There are a couple of bubbles here and there, and a few cut marks where I had to work out wrinkles when things didn’t line up just right, but you really only see them close up when the light hits them just right, so I’m ok with that – especially for just $20!

7

8

9The birch candles the hubs made and frosted garland compliment the new look perfectly, so it’s a DIY win-win!

6

DIY Birch Candles

1

Thanks to Pinterest inspiration, the hubs recently made several of these amazing birch candles for decor at my recent company holiday party.  We used a couple of trees from our property that had died but hadn’t come down yet.  He cut them at various lengths and used a special drill bit to carve the hole at the top for the candles.  He did burn through several drill bits to get the whole lot done but other than that he said they were relatively simple to make.

2

We grouped them in trios at the party inside of white wicker wreathes as centerpieces on the tables which drew compliments from employees and the venue staff who said they were nicer than anything they ever offer!  Now that the party is over I’m using some of them on our dining room table with a faux evergreen wreath I picked up for a few bucks at the Dollar Zone.

3

It looked pretty good, but a little plain so I added some pine cones and feathers to give it a finished look.  It works with my classic rustic Christmas decor and will transition into the new year afterwards without lifting a finger, which is exactly what I need these days.

4

We’re less than a week from Christmas and I’m finally getting the house decorated, but it’s better late than never.  I’ll share more of my holiday decor next week, including how I used more of these beauties on the mantel, so stay tuned! 🙂

Craft Paper Roll Holder

4

Although it’s been quiet here on the blog it’s been crazy busy around our house recently.  I’ve got multiple events going on at work, we’re preparing for the holidays, everyone wants family photos for their holiday cards and I’ve been crafting up inventory for a holiday bazaar this weekend.  I’ll be sharing some of those projects once I have time to take photos and do some writing, but in the meantime I wanted to share a little project the hubs did for me recently.  I keep a roll of craft paper around for projects and wrapping, so I wanted an efficient way to store it yet have it at the ready when needed.

6

The solution was a simple metal bar mounted just above the craft cart which can hold the roll. It consists of a flange, a short piece of pipe, a 90 degree elbow, a length of pipe and a finishing cap. The hubs put it all together and located a stud to secure it to so it’s super sturdy.  Although I’d envisioned it positioned in the center of the cart, having it off to one side actually works because it provides a spot for my task light.

5

Since the end is open it’s easy to slide the roll on and off if I need to use it elsewhere or refill it.  The industrial pipe ties in with the open shelving above the desk on the other side of the room and wasn’t too expensive to put together, which makes me like it even more.  And it will come in very handy when I start wrapping Christmas presents soon! 🙂

Simple & Elegant Fall Centerpieces

2

Today I thought I’d share a simple centerpiece I created for a recent work event.  I wanted something fall themed for this particular event, but hoped the elements I chose would pull double duty for our upcoming holiday party so it needed to be able to transition into winter.

The venue provided the silver lanterns, so I added a birch round, pinecone, pheasant feather and mini pumpkin to compliment.  Some of the birch pieces were thicker than others so I set the lantern next to the birch for those so they didn’t impede the view of the presentation being given.

1

We also had some small signs on the tables with factoids about the subject matter, which we put in small silver place card holders.  Although I can’t share the factoids, here’s a blank card to give you an idea of how they fit in with the centerpieces.

I was able to do all 7 tables for around $100 which was pretty minimal. They were just enough for this business luncheon event once the rest of the table was set, and next month I’ll reuse the pine cones, birch pieces and feathers for our “silver winter” themed holiday party!  Low cost and multipurpose, that’s my kind of décor! 🙂