Benched

benchI haven’t been having much luck on the local buy/sell pages or Craigslist so I was stunned when I happened upon a post for a wooden bench for $40 and NO ONE had claimed it yet.  I immediately commented that I’d come get it that evening or could send the hubs that afternoon.

Once I commented that gal messaged me and said she had just realized there was a bolt missing on one side so she would reduce the price to $25.  Um, no I don’t have a problem with that!  I texted the hubs the info and let her know that he’d be by soon.

It turned out to be as nice as the photo portrayed it to be, so we’ve placed it on the front porch for the time being.  It does fit there fairly well, although it might be better on a bit of an angle.  I have a sneaking suspicion that once we start getting the yard put together come spring, it might end up elsewhere.  Especially since it would make a wonderful photo prop for clients who want to split their session with indoor and outdoor shots! 😉

Porch

It turns out the missing bolt isn’t too big of a deal.  It is kind of important to make it more stable, but thanks to the return of the snow, we don’t spend a whole lot of time sitting outside.

Bolt

It’s also makes the perfect perch for Luna now that she’s started going outside on her harness when we take the dogs out to play.  She’s not very fond of the cold and wants absolutely noting to do with snow, so she investigates the corners for the porch and then resumes her lofty viewpoint to watch her siblings bound around like crazies in the frozen wilderness.

Luna

And when she’s had enough, she goes to the door and says so! LOL

LunaDoor

She’s used to being on her harness outside at her previous home, so we’ve continued that policy here for now.  Hopefully, she’ll eventually get to a point where she goes out without it, although then she’ll have to have a collar with a bell so she doesn’t get too close to the birdies I plan to entice to our yard this summer!

My Beauty Faves

I thought I’d write a post about the beauty products I use since I was just showing off my organization of them.  If I had to forsake all beauty products but one, I’d keep my chapstick.  I’m typically extremely loyal to Softlips, but the hubs found a multi-pack of these flavored Aquafina lip balms on sale, so that’s what I’ve been using recently.

Chapstick

I’m not much of a lipstick gal, but I do like a little color, so I also use Burts Bees tinted lip balms.  My favorite and most used is Red Dahlia, but I also like the Peony, which I found in a “lip shimmer” that is a little fanicer.

Chapstick2

Lotion is my other MUST have.  Technically, I could use the lotion on my lips if I had to pare down to just one product, but luckily I don’t!  I’ve found that Johnson’s baby lotion works the best for me.  My theory is if it’s good enough for baby’s sensitive skin then it should be just fine for adult skin.  I started using the lavender scented variety after getting a travel size lotion for my desk and liking it.  That’s still my preference, but honestly I buy whatever is on sale or available at the store I happen to be at when I remember I need more. I’ve also used the honey oatmeal variety and liked it as well, although it doesn’t smell quite as “pretty” and well… it’s not purple! LOL

Lotion

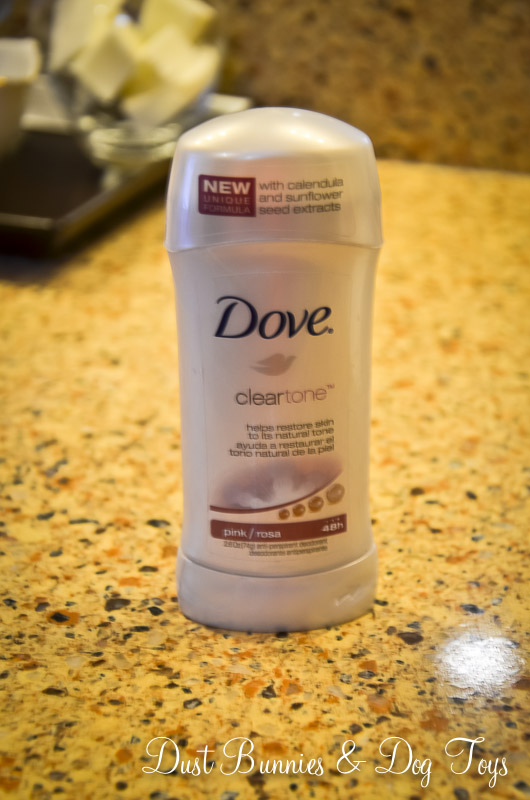
Another essential item in my repertoire is my deodorant.  I’m a sweater.  I sweat.  Even when cold.  I can’t explain it.  After trying many other varieties and brands I finally found Dove Cleartone, which keeps my underarms dry and irritation free.  Hopefully they don’t have plans to change or pull this line anytime soon because if they did I’d be extremely upset.

Dove

I long ago gave up foundation in lieu of a tinted moisturizer.  Living in Alaska you take all the moisturizing you can get!  I like that it doesn’t feel as heavy as foundation but still provides adequate coverage.  I’ve also found that my skin feels and looks healthier using a tinted moisturizer rather than foundation.  I really like Sonia Kashuk’s brand, especially because I can get it at Target with a coupon!  Unfortunately she doesn’t offer a color that fits me perfectly, so I mix these two.  Works well when the seasons change and I do get a bit of color back in my complexion, I just adjust the mixture to match.

Foundation

I recently had a session with a make-up artist about to get her certification and learned a lot of techniques, like stippling my tinted moisturizer rather than applying with a sponge.  I thought her eyes might fall out of her head when I told her I typically put the moisturizer on the sponge and then mix it on my forehead and blend it out from there.  Apparently that’s not the best method.  I explained that the women in my family aren’t the “girly” type who teach each other the best techniques, so I just do whatever habits I’ve picked up over the years – usually those that result in the quickest “ready to go” finish.  She taught me to mix the colors on my  hand and then stipple them on with a special brush.  I picked up this ecotools brush at Walmart after my session for around $5 and am really happy with it.  I also have a Kabuki brush from Bare Minerals, which I use to apply their Clear Radiance as a setting powder – another tip from the expert. 🙂

FoundationBrushes  FoundationPowder

My long nights and early mornings require a concealer.  I discovered Make Up Forever’s Full Cover after my favorite blogger did a review on it.  I still apply this with a sponge, but wet the sponge before hand and mix the concealer with some tinted moisturizer on my hand rather than go directly from sponge to face. My make-up instructor would be proud! This is my one splurge item, as it comes from that beauty wonderland known as Sephora.  I’m running low these days and have been avoiding a trip to replace it because I know I want to check out an eyeshadow pencil reviewed by the same blogger….I’m sensing a pattern here.

FoundationCover

I tend to stick with neutral eye shadows in browns or grey.  I picked up this Sonia Kashuk palette at the drugstore for the the gold color (which I thought might be similar to that eyeshadow pencil), but found that it’s ALL glitter and no color, so I ended up using the other three palettes.  I also subscribe to the white in the corner of the eye to make you look more awake.  I’m not sure if that’s exactly what it does, but it does help detract from the dark circles I usually have, even after concealer.  I have a few Bare Minerals eye shadows I play with from time to time, but I always return to this grey color called celestine because it has just the right amount of sparkle.

Eyeshadow

My eye shadow brush inventory expanded from one to three after my make up session.  I use the white flat brush, which came as a set with my stippling brush, for the white shadow and the other flat brush to create an eyeliner effect with the darkest shadow.  The rest are applied with the regular eyeshadow brush.

EyeshadowBrushes

Another result of having non-girly women in my family means I don’t have a lot of knowledge when it comes to hair styling.  My mom and sister have beautiful naturally curly hair and I somehow got stick straight baby fine hair.  You could always tell which of them did my hair for photos.  Mom would create Farah Faucette ‘wings’, while my sister would leave everything straight and top my forehead with a 4″ high teased bang.  Luckily, we’ve all matured a bit since then but it’s still an education in progress.  I’ve discovered dry shampoo is my secret weapon because it gives my fine hair a little hold and texture so I can actually do things with it besides leave it down.  I tried a couple different ones and found Not Your Mother’s Clean Freak to work best for me.  It’s not overly sticky and it sprays in a nice even amount, rather than the high pressure burst some dispensers give.  And the fact that I can get it at Target for around $5 is the cherry on top!

HairDryShampoo

Along with dry shampoo, I use a fine mist, volumizing hair spray.  I’m a fan of Vavoom and used it for a long time, but it’s not easy to find up here unless I hit the high end salons in the mall, which I tend to avoid.  I picked up this CHI hairspray at TJMaxx during a trip to Portland last year and like it (likely more so because of the purple packaging!).  Unfortunately, I’m running low so I picked up this John Freida voluminous hair spray at the drug store.  I’ve only used it once so far, but it seems ok.  Not quite as great as the Vavoom or CHI, but not bad for a drugstore option.

Hairspray

I’m not a big perfume buff, so I tend to stick with a single simple, clean scent.  I like Clinique Happy because it’s light and fresh, but still a little sweet.  This is my every day scent.  I also have a bottle of Miss Cherie Dior, which I love and break out for special occasions or when I want something a little more intense, although I find it a bit much for my daily office gig.

Perfume

And lastly I need something to take it all off every night, which is why I use make-up wipes.  I usually buy the generic, exfoliating ones at Walmart because I find they work just as well as the other brands, but the hubs found a bulk pack of these Neutrogena wipes at CostCo, so that’s what I’m using right now.

Wipes

So that’s my beauty line-up.  Fairly simple, although it’s gotten a bit more complex over the past few years as I learn new tips and tricks.  And it’s all pretty frugal since everything is available at a drug store with the exception of my concealer.  And let’s face it, if you’re gonna spend big bucks on a makeup product that’s the one to splurge on!  Now I want to hear from you.  What beauty product could you not live without?

An Organized Routine

If you’ve read this blog at all you know I crave organization.  Maybe I’m OCD, maybe I’m just weird, but whatever the reason, I need a routine and having a ‘home’ for everything.  It makes life less stressful when I know where things are and can find them right away.

That’s exactly why my morning routine needed some organizing.  I had all the items I use on a daily basis in the bathroom, but most of them lived under the counter and had to be pulled out one-by-one as needed.  Then I saw this post on one of my favorite blogs and had an epiphany.  I could put all of those items in one container and pull it out each morning!  When I’m done, I just put it back under the counter, out of sight.

1

It took a few shopping trips to various retailers, but I eventually found a three compartment basket made of vinyl.  Not only is it pretty, it’s durable and waterproof.  Perfect for daily use in a bathroom!  I organized everything into groups of how I use each.  First are the things I apply after getting out of the shower – lotion, deodorant, perfume.  All of my hair brushes and products are in the back compartment because they are usually taller.  The center compartment holds my toothpaste, jewelry cleaner and other items that don’t fit into either of the other compartments.

I also brought some organizing to my make-up drawer, by lining all my items up in the order I tend to use them.  Luckily, I keep it pretty minimal when it comes to make-up so I was able to keep it pretty simple.  I have a few items that I only use occasionally, so I keep them in the back of the drawer. This is the same drawer I described in my last post, where I used magnets to hold my bobby pins.

Drawer

Have you organized your morning routine?  Do you have tips on what worked or advice on what not to do?  Share them below!

Fun in the Sun

Three-day weekend are always a treat.  I didn’t get quite as much done as I’d hoped, but I did make time to have some outdoor fun with our doggies.  Although it’s still pretty chilly, the sun was out for most of the weekend and we sure took advantage of it with a little round of ‘ball’ in the backyard.

1

2

3

4

These giant balls were a gift from their Auntie Mere & Uncle Mark almost three years ago and they are still going strong, albeit with new rope.  Once the ground thaws and we landscape the yard I plan to put posts in and tie these up so they can play tether ball.  We had tied it to a tree branch but Tequila kept playing so hard she’d break the branch!  So for now, it’s perfect for tug o’ war.

5

Stoli sure tried his best to win this match.  He tugged, and he pulled and he bounced…

6

7

8

9

But in the end Tequila just had more muscle than him.  And when she trotted off with the ball after he gave up, this was the pouting face I saw.

10

And then three seconds later he was back to playing! LOL.  He’s a happy pup, so he never stays sad for long. 🙂

A Quick Fix

I often need bobby pins to keep my baby fine hair in place when styled up.  But I didn’t want to have bobby pins covering my vanity, so I started keeping them in a little bowl near the sink.  But even that seemed a bit messy to me.  So took to Pinterest to find a solution.  Within minutes I had one.  A magnet strip along the inside of a cabinet door.  I adapted the idea, putting my magnet strip inside the drawer where I keep my makeup, which is usually open and in easy reach while I’m getting ready each morning.

Pins

All it took was a couple of 3M adhesive strips on either side, that way I can move it if I decide I want them somewhere different in the future.  I think it took all of a minute to gather my supplies and install them.  Best of all it’s been working like a dream.  Quick, easy, and functional.  It just doesn’t get any better than that!

Showing a Little Love

With Valentines Day just around the corner I thought I’d share my seasonal decorations.  I kept things pretty simple, using what I already had, including multiple items I use as props for my photography mini sessions – as always, striving for items in my life to be efficient and pull double duty.

In the entry way I dressed up the large mirror with a burlap banner and added some pink, red and gold items to the entry table.

MirrorBanner

And next to the front door is my little holiday tree decked out with both red and clear glass hearts, Valentines themed ornaments and topped with cupids.

Tree

The TV stand got a little attention with flowers and hearts in an apothecary jar, paired with votives.

TVRight   TVLeft

I also used a cute little heart cut out votive holder I found at a thrift store last year on the side table with some pretty purple and pink faux tulips in a mason jar.  Unfortunately, during Stoli’s early days with us he decided that was his primary target of destruction, so the tulips are no more.  I’ve since bought some cheap grocery store live flowers, which have lasted pretty well and still compliment the little votive.  Somehow I didn’t take a picture of that, so maybe I’ll post one on Facebook later.

The mantel was the perfect spot for a heart garland and some pillar candles.  I normally put the heart wreath on the door but I like it here better.

Mantel

The dining room got the left overs.  Some new felt filigree hearts on the lamps, and a rose petal filled basket that holds an XOXO piece I found in the dollar section at Target.  Same as the LOVE piece on the mantel.

DiningRoom

I really love how the heart looks on the lamp when it’s all lit up at night.  And it’s pretty during the day too.

Lamps

Lastly I put my “Love you more” pillow on the bench near the entry, just to give it a little something. 🙂

Bench

So that’s it.  Sweet and simple, just like I said.  What did you do for Valentines Day decor?  Did you DIY something special, or work some bargain finds into a great display?  I want to hear about it!

There’s a New Sherriff in Town

HoneyThe hubs and I had discussed getting a cat again after moving into the new house.  He wanted a Siamese like his mom’s Honey Baby, but I’m partial to calicos since that’s what I’ve always had.  There was no firm plan on when it would happen.  Instead I figured it would happen organically, at the right time.  Apparently that time has come.  Last week we saw a post on a buy/sell page from a lady looking to rehome two cats, one being an adorable calico.  I chatted with her back and forth about the cat confirming she was litter box trained, friendly and not prone to destroy furniture.  The lady seemed to think that she’d do ok with dogs, so we set up a time to meet Luna this weekend.

She wasn’t sure about us ‘strangers’ at first, but once we hung out a bit, she started purring and let us hold her.  We chatted with the lady a bit about her and decided to bring her home.  Unfortunately, it was the hub’s last night shift before he starts his new job next week, so he had to leave and go to work, while I drove everyone home.  Two dogs and a new cat in the same car for an hour…. yeah.. that was.. interesting.  We put the dogs in the bed of the truck, which they were NOT excited about and per the lady’s suggestion left Luna loose in the cab on her harness and leash.  She did ok while we were traveling under 40, but as soon as we picked up speed she voiced her concerns.  I finally got her to come snuggle in my lap or next to me on the console where she seemed to quite down.  Of course the two whining pups in the back window were none to happy to watch some kitty get the attention they normally do!

Once home, I let Luna free in the house to explore.  The dogs immediately wanted to greet her and get to know her.  Let’s just say she wanted NONE of that.  She hissed.  She even growled.  And then she hid behind a large box in the spare room, refusing to come out.  After a few hours I figured she was getting hungry and in need of a litter box, so I picked her out of her hiding spot and took her to the laundry room where I’d set up her litter box and food.  She soon realized she could get on top of the washer and dryer from the window ledge where her food is and has since taken up residence there.  I go in and check on her every so often and the dogs follow me in hopes that their new housemate will be ready to play.

This is the resulting scene.  Two mugs looking up with “please come play with us” faces only to receive the look saying “not in a million years” from above.  LOL

Looking  Staring

She’s super sweet with me, purring and wanting to cuddle whenever I’m near.  It’s just those active doggies she’s not ready to interact with.  I’m sure they will work it out eventually, which means Luna will dictate when she wants them to be near her and when she doesn’t.  And perhaps one day in the not so distant future there will be a kitty at the head of the ‘treat’ attention line. 🙂

Pampered Pooches

I have long been planning to get rid of the large doughnut dog beds we have and replace them with something more “visually appealing” and washable (a huge obstacle for my allergies).  I considered a bean bag style bed since both of our dogs love to snuggle into the corners of the doughnut, but the ones I found online were pretty pricey and I couldn’t find a bean bag the right size in a decent price range locally.  And as I’ve mentioned before I don’t sew, so making my own was out of the question.

Then I stumbled upon this idea on Pinterest and was sold.  I showed it to the hubs, who also liked it and whipped up a ‘trial’ run version to see if our dogs would even use it before we went whole hog and replaced all their beds.  That was about 4 months ago.  We’ve been so busy with work and all the other new house projects that we haven’t finished the idea.  But that hasn’t stopped us from putting it to use in the meantime.  At first I just put the doughnut bed inside the frame, which was built about the same size to make the transition easier.

DogBedTest

Soon after we moved into the new house I spotted some dog bed pads with removable, washable covers on sale at Fred Meyers so I snagged three.  Body pillows were also on a BOGO FREE sale, so I got two of those to act as the back part of the bed.  Although the body pillow fit snugly enough across the back to stay upright the pad was about 2 inches shorter than the width of the frame.  The hubs claimed that was an easy fix, as he’d just take the frame apart and cut it down to size.  That was about two months ago and it hasn’t happened yet.  Like I said, we’ve been a tad bit busy.

I added some extra outdoor pillows I had stashed away.  I’ve found the mildew and stain resistance of outdoor fabrics work best for us since there is always drool, hair or dirt waiting to find our furniture.  And when it does I can just pop it in the washer.  Although the dogs loved the extra pillows and would often ‘arrange’ them to rest their head on, the pattern on them didn’t really work for me – which is why I’d stashed them away to begin with.  Luckily, I snagged some cute chevron fabric on a super sale at Joanns and knew it would look perfect on the dog bed.  Only 1 problem.  I don’t sew.

But then a light bulb went off  over my head and I decided to offer a trade in an online crafting group I had just joined.  You sew me some pillow covers and I’ll make you something from my Etsy shop.  I didn’t have any bites for a couple of days, but then out of the blue someone messaged me and said they could do it.  I made arrangements to meet her and bring the materials to show her what I wanted.  In exchange she wanted a family name platter, so I got all the details I needed to fulfill my end of the bargain.  About a week later we made arrangements to meet again and trade.  Here’s the result!

DogBed

I didn’t take a before pic, but I can promise you they look SOOOO much better than they did before!  We still have to resize the frame, get it painted and finish up the extra foam we plan to put under the dog bed pad, but for now the kiddos seem to appreciate having their pillows back.

DogBedTequila

DogBedStoli

Oh yeah, they’re pampered alright.  Especially when you realize that most of the time they still sleep on the couch with their heads rested on the throw pillows there! But that’s how things roll in this doggie-friendly house!

Finishing Touches in the Pantry

Thanks to a great BOGO Free sale and gift cards from Christmas I recently finished up the pantry.  Because I wanted to add some more baskets now that we had more room, I decided to replace the ones we’d been using since we were in Kodiak – which will be repurposed in the studio and the spare room.

5

I also picked up some tiered racks for things like olive oil, bbq sauce, etc, and added a lazy susan next to it for the spices that didn’t make it into the spice rack.

7

6

Additional turntables in the remaining corners created accessible storage for drink ingredients, sauces and jellys.

8

9

10

The hubs made use of the wall space next to the door by hanging the cooling racks and fryer scoop.

12

Just like he did in the guest bathroom closet, the hubs added an additional light to the pantry for those items that are on the lower shelves.

11

Up above there is room for the rotisserie, a basket with spare grease cans, the hubs’ cast iron pan, paper towels and a basket for storing plastic bags.  I went back to get that big basket after the BOGO sale, and ended up getting a super deal because it rung up on clearance for much less than what I anticipated paying with my 40% off coupon!

14

The bottom of the pantry became home to the dog food and recycle containers, with room left over to store my soda habit.

13

My final pantry project was the jars for our sugar, flour and other staples (seen in the picture above).  It was a fairly simple project.  I picked up several of these screw top jars on sale at Fred Meyers.

1

I put them right to use and had to come up with a quick temporary labeling system until I had time to make something pretty.  So I grabbed my trusty dry erase marker and hand wrote each item.  That of course didn’t last long.

2

Based on that, I knew I didn’t want to do the cute chalkboard labels I see all over Pinterest.  Instead I decided to create vinyl labels for each with my Silhouette.

3

They turned out pretty nice!  I love that they are easy to read and should hold up to repeated use.  Plus they look pretty spiffy all together on the shelf.

4

And that’s our pantry.  It’s the perfect marriage of organization and inventory, which not only makes me giddy, but keeps the happy as well.  I think that’s a sign of a project well done. 🙂


Gettin’ Spicy!

As a hobbiest chef, my husband has LOTS of spices.  We’re talking more than the tiny spinning thing on the counter can hold.  In our old rental, he filled the cabinet above the stove and even had some rows double stacked!

So I knew that our new kitchen needed to have some way to organize this stash of spiciness and of course turned to trusty Pinterest, where I found this DIY pantry door spice rack.  I then promptly had a Gru ‘light bulb’ moment.  I showed it to the hubs, who was definitely game to build something that not only put his spices within easy reach of the stove, but also gave them a dedicated space to stay.

1

Please just ignore that tool pile on the counter behind the door.  With all the on-going projects I’ve lined up for the hubs, I have set aside my twitchy OCD ways and agreed to keep tools in the kitchen for quick access – that is UNTIL the major projects are done, which should be fairly soon!

He followed the building plans with a slight modification.  He used freebie paint stir sticks from the orange box store instead of dowels for the front retaining rungs.  Told ya, he was smart! And he’s becoming quite the thrifty DIYer.. of course not counting the tools he’s recently acquired.  😉

2

I will probably paint it white at some point, but for the time being it works just fine a’ natural.  Now if only our measuring spoons had cutesy little holes to be hung on the side!  Mental note: be on the lookout for clearance heart measuring spoon sets after Valentines Day.