Juneau: Part III (Mount Roberts Tramway)

Sorry for the delay since my last post – that little thing called life threw a few curve balls at me and I was so busy swinging away at them that I didn’t get back to sharing the rest of our Juneau adventures.  But I’m back now and I’m going to wrap up the story of our adventures this weekend.  So without further ado- here’s the next installment!

This was my third trip to Juneau and I was determined to ride the tram up the hillside before leaving.  Although I originally planned this activity for my day off so we could enjoy lunch at the Timberline restaurant at the top of the hill, I discovered they would be closed for a private event that day.  Since visiting the restaurant was a main part of my desire to experience the tram, we decided to go after I finished my work events and have dinner instead.

I’m not sure if it was the foggy/drizzling weather or the fact that it was the end of the tourist season, but there was no crowd and we had the entire tram to ourselves except for one other person.

Once we climbed into the fog bank the view of town was gone, but that made specifically aware that we were at tree top level.  We arrived at the top terminal and made our way down the hallway to the gift shop.  It wasn’t until looked out a window at where we’d come from that I realized just how impressive the structure really was.

TramWindow

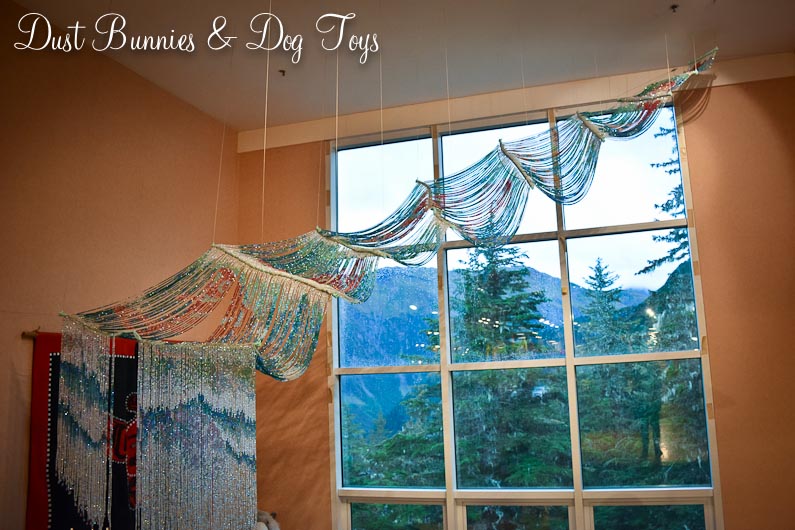
We browsed the gift shop where several pieces of local art were displayed, including this amazing beaded river, which hung from the ceiling!

TramArt

Once we’d finished in the gift shop we headed outside on the trail around the building to catch a few sights before the light faded.  Just outside the terminal was this amazing overlook, which provided a stunning view now that the fog had parted.

TramView

A nearby outbuilding had this massive tree slice on display.  Those rings depict a LOT of history – 168 years worth to be exact.  The sign next to the slice noted major events in Alaska history coordinating with different rings.

TramTree

TramTreeRings

TramTreeSign

The trail was pretty slick and we weren’t dressed for hiking, so we wandered the well traveled areas around the buildings.  Several of the trees had this amazing bend in their trunks, which signs explained was from heavy snowfall when they were young.

TramTrail

We spotted several native carvings in the trees along the path.  There were no descriptions of what they symbolized, but they were still pretty cool.

TramTreeCarve2

TramTreeCarve

We also noticed a cross on the hilltop beyond the trees.  It was interesting to consider the difference in these belief systems and how they’ve finally found a peaceful mix – which has not always been the case in these parts.

TramCross

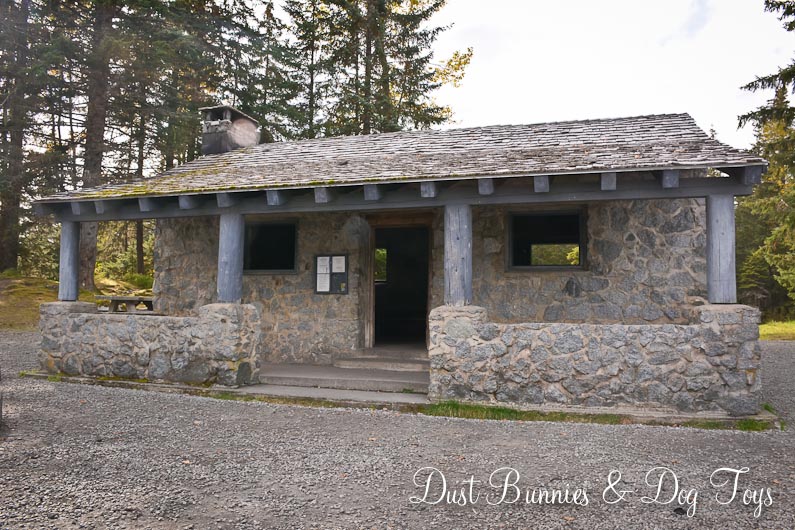
As the light faded we spotted the sign pointing out the trail back to town.  Obviously for those more adventurous and prepared, so we decided to head inside and test out the restaurant.

TramTrailSign

Inside we visited the theater, which shows a short film on the history of the native people of Juneau and the many settlers who came to the region before it became a state.  After that we checked out some of the hunting displays.  The CEO of the company I work for is from Juneau and has many ties to the community, so it wasn’t that surprising to see that several of the trophies were donated by his brother!

TramBearSkull

TramBear

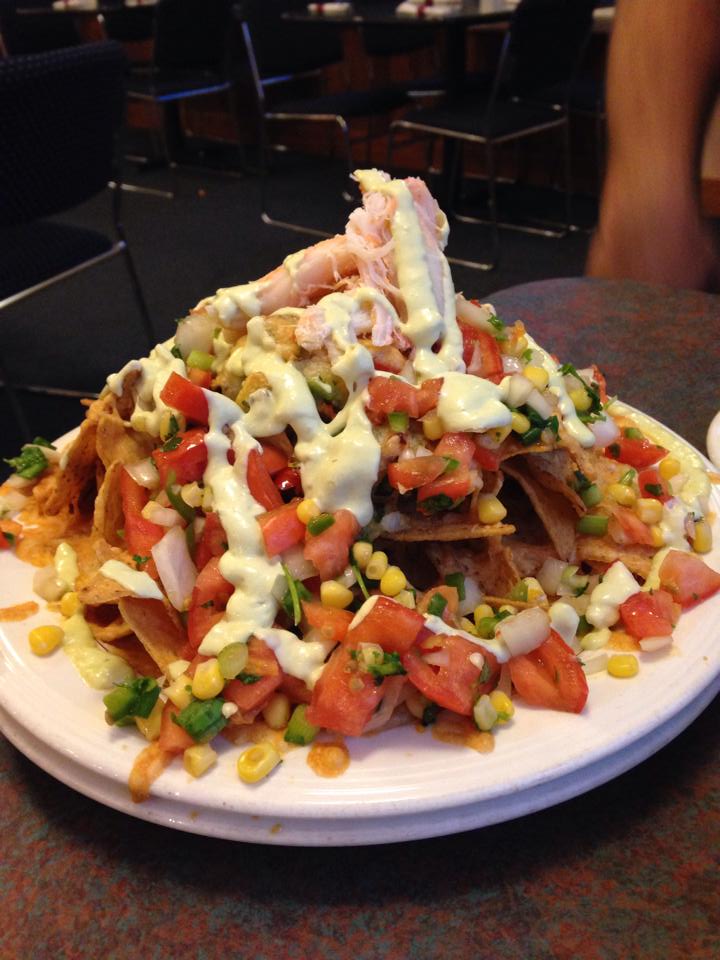
We ordered crab nachos and watched the fog roll back in as we waited for our meal.  I’m sure on a clear day this is one of the best views in town!

TramTown

Although the nachos weren’t the best we’d ever had, they were massive.  Literally, a pile of chips, cheese, tomatoes, and onions topped with crab meat.  Needless to say, we didn’t finish the entire plated.

Nachos

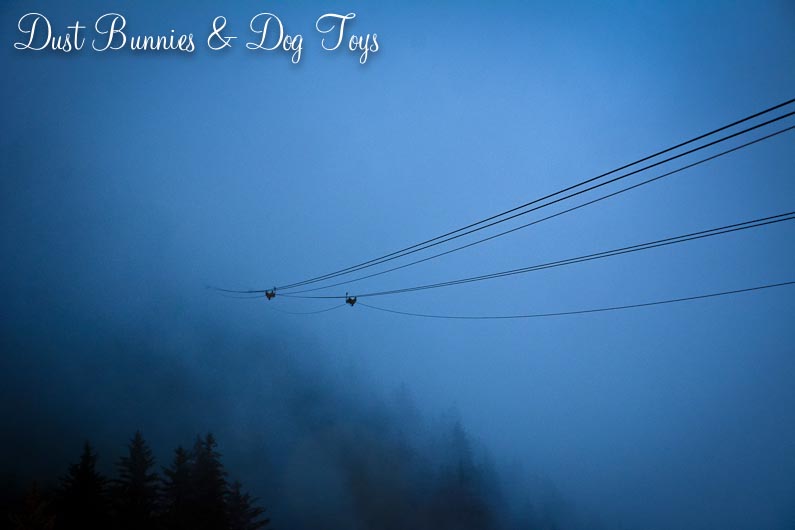
It was almost closing time we we moseyed out to the tram terminal and took the last tram of the night back down.  As we walked back to our hotel through the drizzle I looked back and realized the entire building on the hillside had been cloaked in fog once again, making it appear as if the cables disappeared into the clouds.

TramLines

It certainly wasn’t the experience portrayed in the brochure, but it was still one I’d recommend to those who visit Juneau, even if the weather isn’t perfect.


Juneau: Part II (Mendenhall Glacier)

Our second adventure in Juneau was visiting Mendenhall Glacier.  We first viewed it on a wonderfully partly cloudy day from a picnic area on the far side of the lake that the glacier has formed.  The massive Nugget Falls is just to the right of the glacier, and being able to see it across the massive lake gave me a sense of just how big it really was.  It was an amazing location for a portrait session – trees, stone buildings, glacier, lake and a sandy beach.  Sigh.

GlacierLake

GlacierLakeCabin

GlacierLakeCabinDoor

GlacierLakeBeach

We only had a brief time to sit and enjoy the view before I was needed for work activities, but we agreed that it was worth checking out the trail we’d heard would get us right up next to the glacier when I had my day off during the trip.  So despite a light drizzle, we found the park where the trail head was located.  There was a great view from the pavilion next to the parking lot.  Notice the icebergs in the lake?

GlacierTrail

But I’d heard the trail would take us right to the foot of Nugget Falls and I wasn’t leaving until I’d at least attempted it, so off we went.  The trail was pretty well maintained and fairly level although there were a few puddles we had to avoid.  At one point it looked like the trail led directly to the glacier itself!

GlacierTrail4

Along the way we had a better view of the ice bergs, which turned out to be a perch for a lone eagle – at least for a while.

GlacierTrail3

GlacierTrailBerg

GlacierTrailBlueBergThere was a fork in the trail a little ways in, with one way leading to the falls and the other leading to a photo view point.  We decided to head to the falls first since that was the longer route and we weren’t sure how long the rain would hold off.  Along the way we spotted this plaque dedicated to a local wolf.  I don’t know Romeo’s story, but can take a pretty good guess based on this tribute.

GlacierTrailRomeo

The sound of the falls got louder as we approached and we caught glimpses of it around several bends.  Then we rounded the final bend and saw this!

GlacierTrailWaterfall

I walked out on the little beach to photograph the falls head on.  The falls were so strong it produced a strong breeze, which directed a constant spray of mist right at me.  I could only get in one or two shots before the entire lens was covered.  The people standing next to the falls give you a perspective on size.

Falls

From here I looked back out at the lake and realized just how far away those ice burgs were!  It didn’t seem that far when we saw them from the viewpoint, but the great Alaskan wilderness is always larger than it seems.

GlacierTrailLake

After I took a few pictures the hubs and I sat and took in the wonder of it all for a bit.  The area was pretty much deserted besides the other couple you see in the photo above, but soon groups of people started arriving in a steady stream, signaling the arrival of a tour bus, so we decided to head back up the trail before the crowd became overwhelming.  Back at the fork, the hubs took a break to rest his knee and I proceeded out to the viewpoint, which offered a nice vantage point to see the glacier, falls and ice bergs!

GlacierTrail2

There was also an interesting sign showing just how much the glacier had receded and how the falls used to flow through the glacier.

GlacierTrailView

The viewpoint also gave a different perspective to the size of Nugget Falls, as I could see the crowd of tourists now gathered on the sandy beach where we’d just been.

GlacierTrailWaterfallView

I snapped a few photos for some solo tourists who wanted the scenery in the background and then headed back to the fork to reconnect with the hubs.  By then the clouds had rolled in and we decided to move on to another adventure, which turned out to be the right decision since it started to pour just as we pulled out of the parking lot!  WordPress won’t let me post the video I took at the foot of the falls so check it out on my Facebook page instead!  And if you’re not a fan already go ahead and click “Like” while you’re there! 😉

The To-Do’s

Memorial Day weekend is the unofficial start of the summer DIY season, and what better time than that to review my current project list for the house? This list started about the time we wrote the contract to build the house. We’ve completed a few of the tasks on the first version of the list since moving in, but there’s still lots to do.

WHEW!  That aught to keep me busy for the rest of the year! LOL  Of course I’ll post about each as they happen, so stay tuned to see the progress!

A Little Lace Makes A Big Impact

I thought I’d share the story behind the little lace votives that we’re seen in my recent Easter decor post. I made these as inventory for my recent craft show booth, but they didn’t sell so I decided they were the perfect addition to my holiday decor. They were super simple to make. I started with plain glass votives that I purchased for another project and no longer needed.

Votives

I had a bag of lace I’d been hoarding since someone gave it to me so I picked out a couple of sizes that fit the votives well in spring colors.  I measured out how much I needed to go around and added a little extra for room to glue it down.  A little hit glue and about 10 minutes later I had pretty vintage looking votives!

VotivesAfter

This has to be one of the easiest crafts I’ve done in a very long time!  And because I already had everything on hand it didn’t cost me a dime.  🙂

We’ve Got Mail!

The first necessity at the new house was a mailbox!  Because our home was new construction, we had a brand new address which required a new mailbox.  Out here in the boonies the route carriers call the shots, rather than the main post office and its common practice to have a ‘group row’ of mailboxes at the entrance to the neighborhood rather than individual boxes at each driveway.    Boxes

Our route carrier requested that we either add a new box to the group row or rent a lockable box in the group terminal next to the row.  When we discovered that the rental box was almost $200/year and required an annual contract we opted to go with a personal mailbox.

We picked out one we thought would stand up to the elements and I had grand plans to paint our address on it with the same gold paint I used for my gold dipped wedges.

BoxeBefore

That idea quickly went down in flames when the stencil didn’t fit well and the first letter turned out like this.

BoxD

My next option was to use my Silhouette, which still had to be unpacked and set up. So the next day I found the Silhouette and set it up along with the computer.   I chose a simple font and measured the size I thought would look good, then arranged our name and address for the front flap.

Sorry, not sharing our address just for safety. :)
Sorry, not sharing our address just for safety. 🙂

Once the design was cut, I applied it to the front of the box, pulling off the excess vinyl and leaving behind the necessary text.

BoxArtApplied

BoxArtApplied2

I was quite proud of my handi-work and went to show the hubs who noted that we didn’t have to put our name on the box, just the address.  My response: “Oh.”  I wasn’t about to tear off my hard work, so I just removed the name when I resized the same art or the side of the box.

BoxFinished
The un-distorted address really does look sharp. Wish I could share it with you all, but better safe than sorry.

Once my portion was done, the hubs rigged an extension for the row and added our mailbox at the head of the line.  Come spring, when the ground thaws, we’ll install our own post, since we’re not sure how long the extension will hold up over time.

BoxInstalled

It’s simple, yet functional.  I might jazz it up a little more later or I might forget about it and focus on other projects.  Either way, we now have a spot to receive mail and that’s what really matters.

Quick Update

FallDrive

I made a final stop by the house today to see if there was any progress since last week before heading out of town for our cross country road trip.  Unfortunately, although the fall leaves down the driveway were sure pretty, there wasn’t much progress to report.  The roofing and electrical are still MIA, but the gas line had been installed on the side of the garage, the siding on the front of the house was almost complete, the man door had been installed in the garage, the front porch columns are taking shape and the siding patch for the dining room windows had been fixed.

House

Back

I think we are officially a month behind schedule now, although the foreman is still thinking they will be done by November.  I guess he plans to go gang-busters once they get the roof done and can start work inside.

In addition to the foreman, I met with our realtor and the new electrician (the previous one apparently quit) to go over the plan for everything.  The new electrician says he will start tomorrow and have everything done by the inspection on Friday.  The roofing material is supposed to be delivered so the roofer can start that this week too.  We’ll see.  I might just be sending some friends over next weekend to check.


A Sneak Peek At Our New Kitchen!

We are finally breaking ground on our new home this week!  HALLELUIAH!!! Now that means we’ve been given the green light to get all of our materials chosen, including cabinets and counter tops for the kitchen.  We had these done up at Home Depot and even ended up almost $1,600 BELOW our cabinetry allowance!  Now we’re trying to work that same magic on the counter tops and flooring.

Picture 3Ignore the additional walls in the background.  They were used in the design software to plan out the bathroom vanities but the computer ‘sees’ them and renders them as plotted.

Picture 1 Picture 2
You’ll have to imagine our invisible pantry door on that corner wall, and our fridge will be a 3 door, but it’s close enough for a rendering.  We will also have a more mid-tone variegated flooring and a warm tan/beige wall color, so the contrast won’t be so pronounced.

Picture 4Picture 5

I left these two adjacent to give you a panorama effect of the back and side wall.  What’s scary great is that we’re such planners we already know what each cabinet shall hold!

And all of the drawers and cabinets are quiet close!  *Cue heavenly music*  Depending on when our builder orders them we may also get a free double cutlery divider in one of our drawers and roll-out bins rather than shelves in a few too!  Now we have to sit and count out how many knobs and handles we have to order.  We found some pretty ORB style hardware that run about $2.50 each so that shouldn’t break the bank either.

Lighting.  Check.  Cabinets.  Check. Counter tops.  In Progress.  Flooring.  Still the budget buster, final decision TBD.

Roller Dollies

2

3My hubby is what you’d call the ‘handy’ type.  He knows a little bit about a lot of things and a lot about several things.  So when we needed to fit his retirement gift – a side-by-side UTV and my truck in the same 2 car garage along with everything else stored there he came up with a quick solution – roller dollies!  Seriously, how smart is that?!

I wasn’t around when he made them to get shots of the construction (sorry no step-by-step instructions on this one), but it’s a pretty simple design – four boards and casters.  Yet simple as they are they are amazingly functional.  Those top two boards act as chalks for the tires once they are on the rollers.  See told you he was a smarty pants! Smarter than me because I never would have dreamed up such a great idea! 🙂

To use them, he jacks each tire up just high enough to get the dolly underneath then releases the jack and moves on to the next tire.  For now he’s using a small jack he had on hand, but will soon be adding a floor jack to his tool arsenal, which will make the process not only easier but faster.

4

5

7

8Once all four dollies are in place, a couple quick pushes or pulls (with his muscles because mine are apparently too puny) and the UTV is against the wall with room to spare for my truck and a walkway between the vehicles.  When it’s time to take the UTV back out for some fun we just do the same process in reverse.  Takes a total of about 10 minutes.

I find it adorable that he’s figured out the exact height of the UTV when on the rollers and keeps items ‘stowed’ just so to fit under it when moved back and forth!  I’ve taught him well! LOL

I can’t wait to see what that always thinking brain of his creates once we move to our new home!  Hopefully he doesn’t start to out-pace me in the DIY projects!

9

And so it begins!

DB&DT is now up and running… ok.. more like fumbling.  It took some doing to find a free template I liked, creating a new WordPress account and figuring out that in order to load said “free” template I have to host my site outside of WordPress.  So $36 later GoDaddy is tells me I’m “on the cusp of greatness” as I wait for them to set up my account and domain name.  But that means I’ve taken the leap and decided to really do this!  So stay tuned and we’ll get this thing figured out!