
 One of my no-spend January projects was supposed to be finishing the guest room closet with a closet kit we’d purchased on the local buy/sell page for $100. Unfortunately, we soon realized that the previous owner wasn’t very adept at assembling furniture so the hubs had to do a little reinforcing and correct some minor issues. Although that didn’t take long, we soon realized the top shelves that came with the kit weren’t quite long enough for the closet we were installing them in. They were supposed to sit on cleats on the wall for support, but ours were just shy of touching the cleat.
 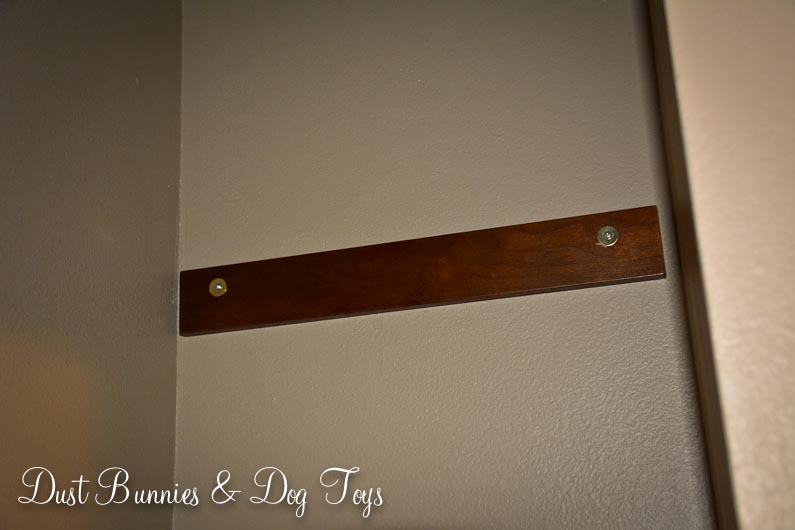 We tried adding L-brackets to the edge of the shelves to secure them into the cleat with screws through the bracket, but that didn’t work so we needed a new plan. Frustrated, we took a break from the project and the closet sat like this for a while.
 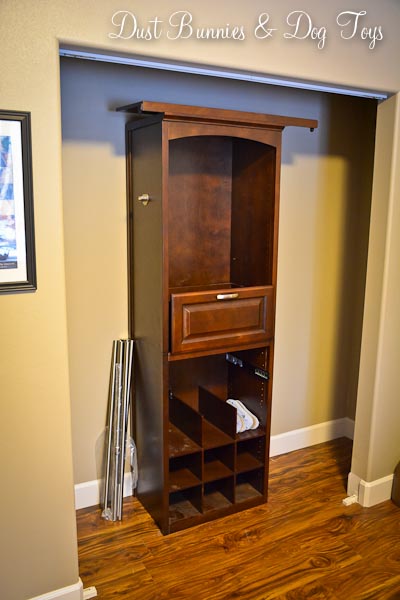 After a few days, the hubs suggested we buy a full length piece of wood and stain it to match. That made sense to me and since no-spend January was over by this point, we purchased a board and used some stain we already had to make it match. Once we had the shelf in we added the hanging rods, adjustable shelf inside the cubby and the drawer. I thought about using the unusable top shelves for additional shelves inside the cubby, but we’d cut them down to be narrower so we could still access the space above from the door of the closet so they no longer fit the peg spacing. I’m toying with another idea that they might work for in another room, so I’ve just set them to the side for now. Finally the hubs reinstalled the closet doors, which had been removed to make room for us to work during the project.
  Now that everything was done, I did a little organizing on the top shelf. I arranged some finished craft projects in one corner and a couple bags of batting that were too big to store elsewhere in the other corner. I love that they are out of sight, yet easily accessible when needed.
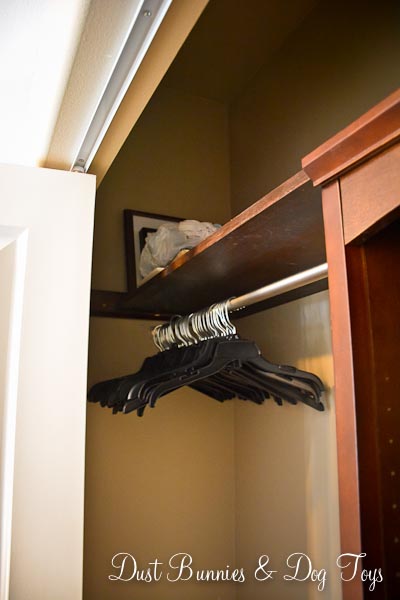
 I also kept a stash of hangers left over from my recent consignment sale (post coming soon) and a few pairs of slippers so future guests can keep their tootsies cozy and their clothes in order. Hooray for one more project crossed off the ever-growing list!
Category: Our Home
Cabinet Top Décor – The Final Lineup

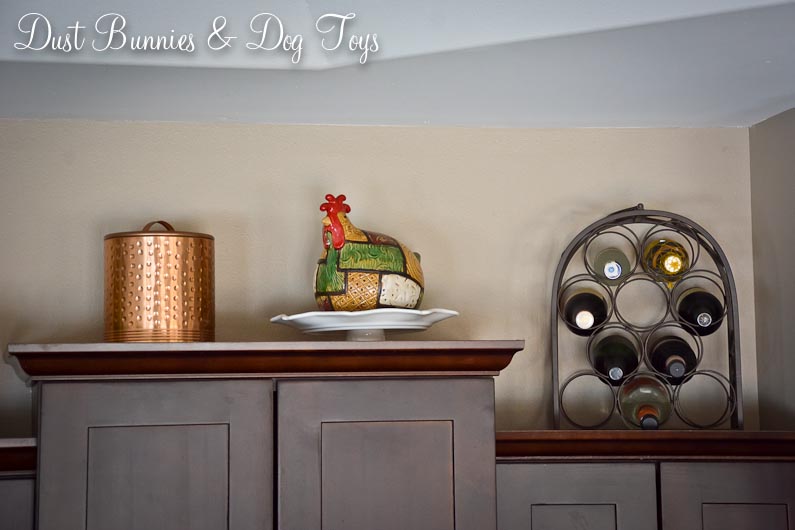
Some time back I shared a little update on my cabinet top décor and mentioned I still wasn’t crazy about it as a whole so I’d live with it for a while. I did just that and have finally found the perfect lineup. The previous arrangement seemed a bit crowded, so I removed the green glass jar, which now holds a candle in my holiday décor arrangements.
Next I swapped out the pitcher for a smaller wooden basket, which better fits the plant and gives more variety in height.

Then I rearranged the area above the fridge to add my bargain yellow vase, which gives just enough color to that end of the space. I did leave a spot for Luna to sit if she chooses (I figured that was a better option than her trying to rearrange and possibly breaking something), but I haven’t seen her up there since I changed things up.

The shorter space on the other cabinets remained the same, but here’s an updated picture showing the glass peppers I added last time.

So there’s the final lineup – at least for the foreseeable future. 🙂 What do you think?
Driveway Monitor
With a driveway that is over 300’ feet long it’s a little difficult to hear someone pulling up to our house until they are literally at our door. Even in the boonies we sometimes get unexpected visits, so it’s nice to know when someone is on our property for safety reasons.
To solve this problem, the hubs purchased a wireless battery operated system with a range of 300-400 feet. He attached the sensor to a tree along the driveway. Unless you’re looking for it, you don’t even notice it when you drive by.

The base unit sits in the office window, where it gets a good signal from the sensor and can be heard throughout the house.

Now that we’ve had the system for a while, the dogs have figured out that when they hear the chime it means someone is coming, which prompts them to either stand guard at the front door or dash out the doggie door to investigate from the fence line. Needless to say, if someone ever planned to sneak up to our house and break in they’ve got a crowd of fur expecting them by the time they get to the porch!
The one downside to the system is that it just senses movement, but can’t distinguish what kind of movement it is. So when the neighborhood moose wander through the yard they sometimes come close enough to trip the sensor. Guess that’s just life in Alaska.
A Master Bench

This is my final No-Spend January Project recap and it’s one of my favorites! Yes I know it’s now March, but life happened and I’m just getting to sit down and write this up. I’d had this project in mind for a while and had gathered all of the supplies we’d need over several months. It was just a matter of actually spending the time to put it all together.
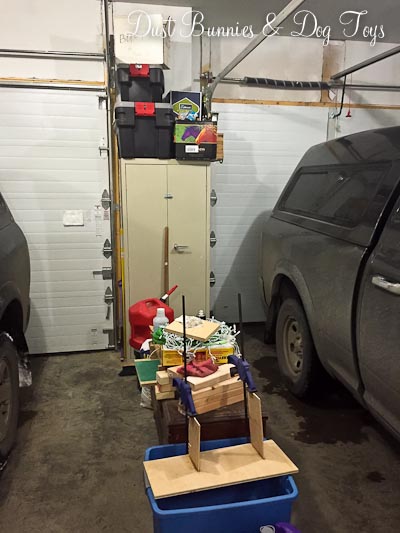
We started with the legs, which we picked up unfinished at the hardware store for around $7 each. I decided to stain them with an oak color we had on hand and then did a light coat of rose gold paint to give it a little sparkle and depth. The hubs created this genius holder so I could do the whole leg at once and leave it to dry! It’s just a piece of scrap lumber with holes to hold the threads on the tops of the legs. (Notice my last no-spend project there in the background? You’ll see the pedestals mid-painting in the background in one of the upcoming pictures too!)

Next we attached the legs to a simple box structure the hubs built based on the dimensions we’d taken to fit the foot of our bed. He used scrap 2×4’s for the frame and a piece of plywood for the top.

I’d found a huge section of foam for just $3 at a rummage sale, which was a much better bargain than the pre-cut pieces that sell for $25 or more and weren’t the right size. We cut a piece of the foam to fit and used spray adhesive to attach it to the top of the box frame. And as you can see behind the bench, there’s still plenty of foam left over for future projects!

Since I planned to upholster around the sides of the box, I wanted it to have a bit of cushion too. A layer of batting accomplished that and made the edges of the foam less square. We realized the next few steps would work better without the legs so we removed them and stapled the batting down on the underside of the frame, pulling it tight as we went. It took us a few tries to figure out exactly how we wanted to wrap the ends, but we finally figured out the method that involved the least amount of bunching.

Next came the outer fabric, which had been a shower curtain I picked up at good will for around $4. I chose this material because it seemed to have a bit more tear resistance, which was important with three dogs and a cat! We stapled down either side of the fabric avoiding the staples from the under layer of batting.

Just like the batting, we tried several methods of folding the ends before deciding on one that kept the lines of the fabric straight. We had to cut a bit of excess fabric from the folds to keep things smooth, but the end result turned out pretty good.

Finally we reattached the legs by cutting holes where the threads attached to the frame and screwing them back on. (Notice that antique table we’re using as a work bench? I snagged that just before Christmas for $20 and plan to refinish it as a nightstand for our guest room!)

Now we have a custom bench along the foot of our bed, which is the perfect place to hold all those extra pillows each night! Which also keeps the fur babies from using it as a launching pad onto the bed! 🙂

The Great De-Crapification of 2015
Well howdy strangers! I bet you’ve been wondering where I’ve been the last two weeks. I’ve been on a mission – the Great De-Crapification of 2015! It began at work with the announcement that my department would be moving to a new suite. Because our new space didn’t have as much storage for all of our materials we had to downsize, which led to me purging years of accumulated stuff that pre-dated my time at the company ranging from tools and promotional items to costumes and party décor.
Once I’d sorted everything and packed what the movers needed to take I was left with a mountain of ‘un-needed stuff’ which was offered to the employees of other departments and promptly disappeared in what can only be described as a cloud of human locusts.
Although I admit that a few items came home with me rather than go in the freebie bin (it is still no-spend January after all and I’m an employee too!), I was still in decrapification mode, so the purging continued at home. The spare room – AKA “I don’t know what to do with that yet, so put it in there and close the door so I don’t have to look at it in a pile” room – became my next target.
Here’s how the room looked before the great decrapification. Seriously, that’s a lot of stuff!

And here’s how it looked after. I think I hear angels singing!

Granted, a good portion of the stuff went elsewhere for storage (i.e. the crawlspace and the shed), but at least it found an appropriate home. There are still several items in the space including a box of military stuff belonging to the hubs that I refuse to go through because I’m sure to throw out something important from his career, things that won’t have a home until other projects are completed around the house and the two extra chairs for our dining room table. Amazingly all that fits in the closet or along the far wall, making the main area of the room a perfect open spot for an elliptical the hubs scored on a local buy/sell page for $50 to help him lose weight. At least it’s not in the living room and since I have a list of projects to do before I work on this room it’s the logical place for it. For now.
Luckily for me, the hubs caught the decrapification bug too and started cleaning in the garage! It went from this:

To this in just a few short days!


It still has quite a ways to go, but being able pull in without calculating how far I can open my door is so much less stressful.
During the Great Decrapification I also completed a couple more projects with items I already had, to further reduce clutter. I’ll be sharing those next week, so make sure you come back to see them! Until then I wish you a wonderful, clutter free weekend! 🙂
No Spend January – Project 2: Laundry Supplies Labels
 Shortly after we moved into the new house I found a wood tray from a cannery at an antique store. With three compartments, I knew it would be a great way to organize my laundry supplies. Later when I saw these cool bottles on clearance at Pier One I knew they would be perfect for storing things like bleach. I also keep vinegar and hydrogen peroxide in my laundry arsenal so I got a couple extra bottles to hold those items as well. Luckily, the bottles fit perfectly in the compartments of the tray when paired.
When we had the utility sink this handy little tray lived on the base of the washer/dryer pedestal because there was no room for it around the sink. Now that the cabinet has been installed (cue heavenly music) and there is a workspace, it finally has a respectable home on the countertop.
Since I knew how they were arranged in the tray it didn’t bother me that the bottles weren’t labeled, but the hubs will occasionally start a load of laundry for me and requested that they be so he doesn’t “screw it up”. That seemed like a legitimate request, so I agreed and then promptly put it on my to-do list where it got lost among a myriad of other items.
So while he was working on the laundry cabinet I decided it was high time I cross this task off the list. I originally planned to make a stencil with my Silhouette and etch a letter on each, but that genius hubby of mine pointed out that I could simply use vinyl. That simple idea took this project from difficult to super simple. And because I keep scrap pieces of vinyl for small projects like this I had a perfect sized piece ready to go. The hardest part was choosing the font! Another project checked off the to-do list without a dime spent. Love it. 🙂

First Project of No Spend January – A Laundry Room Cabinet!
I’m so excited to share this project with you all because I’ve been dreaming about it since before we moved in! Our builder provided a basic utility sink in the laundry room which is great for washing large items but didn’t make good use of the space around it so the plan has always been to replace it with a cabinet matching the ones over the washer and dryer. We have a large remnant piece of granite from our kitchen that would create a counter top with a deep sink perfect for pretreating laundry or folding while creating lots of storage underneath for cleaning supplies. Seeing this every day as I enter or leave the house for the last year seriously made me twitch so I was definitely ready for this project to come to fruition.

The plan started to become a reality when I recently found a free cabinet on Craigslist that was the perfect size of the space. Someone was remodeling their bathroom and wanted it gone asap. It needed a replacement door and a paint job but that seemed reasonable for being free so I picked it up and hauled it home.
Before I could start working on rehabbing my freebie cabinet, the hubs told me the backordered Christmas present he got me had finally arrived – two base cabinets matching the upper cabinets already in the laundry room! Because they weren’t a special order item he didn’t have to pay in advance so if we chose not to get them the store would simply sell them as regular inventory with no penalty to us and use the free cabinet to complete the project. Although the new cabinets were obviously more expensive than it would be to update the free cabinet, time was a critical factor making the decision fairly easy. I also knew we’d I’d be happier in the long run if the cabinets were an exact match rather than just similar since they are so close to each other. And because they were my Christmas present they didn’t technically violate my No Spend January!
So the hubs started removing the utility sink and installing the new cabinets as soon as he got them home. I wanted the kitty litter box to be out of sight (and reach of the dogs) yet easily accessible for cleaning so I’d planned to put it inside the cabinet and cut a hole on the side for Luna to use. We did a test fit to determine where we should put the cat door only to discover that the shelf in the back of the smaller cabinet prevented the litter box from fitting all the way into the space. So the hubs removed it. Our second test fit, sans shelf revealed that there wouldn’t be enough room for her to enter the cabinet and get on top of the litter box. Kinda made me feel about the same as seeing that little present inside the litter box does…

I wasn’t giving up on the plan so I decided the litter box would have to be what changed. We had a small plastic tub that we never use tucked away in the broom closet and I knew it would be the perfect size to fit the space. Since it would now be out of the dogs reach I no longer had to worry about having a box with a top, so problem solved. Once we’d decided how the litter box would be positioned, the hubs was ready to cut a hole in the side for Luna, who was apparently ready to give her input on the placement of this very important feature.

With the litter box situated and the kitty door cut, he moved on to installing the second larger cabinet which will hold the sink. He had to cut a hole for the drain pipe on the side and for the water lines on the floor, but everything fit perfectly. Since we don’t have the countertop and sink ready just yet we covered the top with a board for now and left the shelf in the back of the larger cabinet as is until we see how the P-trap sits. I quickly stashed the cleaning supplies that had lived under the utility sink and in the cabinet above the washer away in the second cabinet and stood back to admire the clean look. Plus I now have a spot to store all my laundry supplies within easy reach of the washer. (Cue heavenly music!) It’s so nice I don’t even mind that the cat food storage tin sits in front of the cabinet because it blends in!
 I’m glad we decided to go with the new cabinets because having two cabinets separates Luna’s space from where all the cleaning supplies are stored, which makes storing things she shouldn’t get into easier and keeps kitty litter from migrating into said supplies. I was tickled to find the litter scoop fit right next to the tub and the current litter rug (which is actually a $2 placemat from Home Goods) filled the rest of the space making the possibility of litter being tracked out of the cabinet pretty slim. Plus the drawer in the top of that cabinet provides additional ‘cat proof’ storage.
 Luna seems to like the new arrangement quite well and took to it without a hitch. I think she enjoys being able to sneak away to her box without anyone spying on her while she does her “Princess” business. 🙂
Not only does it make our laundry room much more functional it’s improved the traffic flow through the space since this is only access to the garage. We still need to install the kick panel at the bottom and add some hardware to the drawer and doors but it’s fine as is for now. I have no idea how much it will cost to have the remnant cut to size and fitted for the sink, but it’s certainly less if we had to purchase the material. The hubs ordered a sink he found on sale at Amazon and it should arrive later this month, which gives us time to get a few quotes and choose a company to do the measure and install – sometime after my No Spend January. The cherry on top was selling the un-needed freebie cabinet and old litter box for a few bucks to offset the costs and keep clutter at a minimum! Since I we were on a roll in the laundry room I also tackled labeling my laundry supplies the same day, so watch for a post on that very soon.
Welcome to No Spend January
Happy New Year! Today is a busy one at the DB&DT house. I’m taking down all the Christmas decorations (since I won’t have another chance to do so for weeks) and we’re starting a few of the projects I have planned for 2015. But it’s also the beginning of my choice to have a “No Spend January” as part of my desire to pay off debts and better balance our financial standings.
What is “No Spend January”? It’s actually pretty simple, I will only be purchasing or spending for those items that are necessary – groceries, gas, regular monthly bills. So that means no trips to the thrift store, Target or through the clothing department unless it’s for a necessary item, which isn’t likely. Luckily I got a few gift cards for Christmas – one for $40 at Target and another for $40 at Pier 1, plus I won a second $35 Target gift card in a local contest. So I have a bit of a reserve I can utilize if I just need to go browsing. The hubs and I also got a $100 gift card to Home Depot for Christmas so that provides for any supplies I might need to work on projects in the mean time. The hubs also received a $40 gift card to Lowes for Christmas, but he’s not participating in my no spend project and I’ve told him those dollars are for him to use finishing his egg table.
Since I won’t be shopping, I won’t be bringing in any new projects which will allow me to focus on those that I’ve already purchased supplies for, but not yet completed. That list includes:
- Installing shelves above the desk in the office/studio
- Installing a cabinet in the laundry room
- A bench for the foot of our bed
- Candlestick pedestals for décor
- Crate & Barrel Knock-off hurricane candlesticks
- Applying felt to the legs of our barstools and dining room chairs
- Organizing my fabric stash
- Finishing the guest room closet install
- Labeling my laundry supplies
- Revamping several thrift store finds
- Making a sign with a “Together” vinyl I’ve had for years
- Prepping the items for a gallery wall I’m planning around the family room TV
- Creating a photo collage from a large old window I brought back on our road trip last year
It’s a pretty hefty list, but I’m excited to see all those projects accomplished and removed from my to-do list. Doing it all without spending any more money is the cherry on top! So stay tuned to see how it all turns out over the coming weeks! And if you’d like to join me on this adventure share your journey as well!
Merry Christmas, Happy Birthday and Happy Anniversary – All in one!
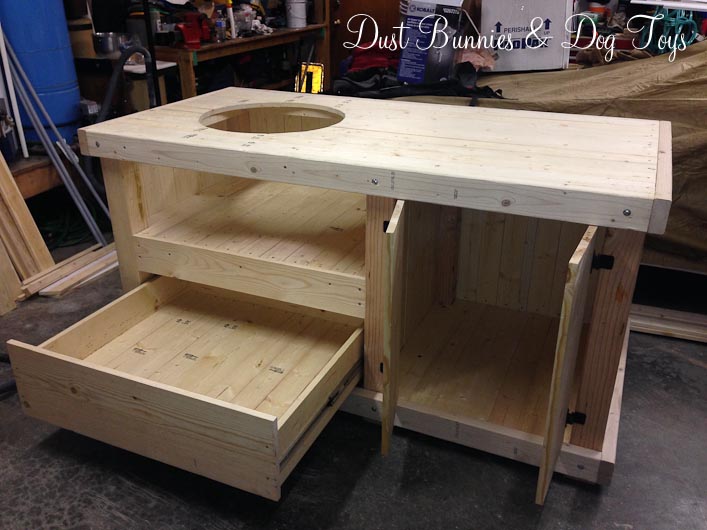
I decided to splurge a bit and get the hubs something special for Christmas so I had a handyman build a table to fit his big green egg BBQ based on the design he’d drawn up several months ago. Although he planned to build it this summer when we start working on the yard again I knew he’d never get to it with all the other projects we I have planned. Hopefully it also serves as an inspiration for all those projects!
It ended up being a bit more expensive than I originally expected, but it will get lots of use and since I told him it’s a Christmas/Birthday/Anniversary gift he isn’t expecting anything else until next Christmas! LOL
I asked the handyman to leave the wood unfinished so the hubs can decide if he wants to paint or stain it, which lets him still have a hand in “making” it. He’ll also add some large casters to the legs, just like he did for my craft cabinet, so the almost 200 lb. egg can be moved around the deck easily. In addition to using a patio paver from our current stash as a thermal base for the egg to sit on, he can put one on the top as a trivet for any hot plates. And maybe down the road he’ll add some fold down extensions on the sides for extra workspace.
But the best part is that there’s now plenty of out of sight storage for all the accessories that have accumulated since we got the egg, including room for the not-so-lovely deep fryer burner and propane bottle! I’m secretly doing a happy dance over that fact. 🙂
I’ll share more photos of it once everything is finished, organized and in place, but it might be a while due to our longer than average winters in Alaska.
The Cutest Pumpkins EVER!

Remember, last week when I said I had a little décor project to wrap up on the porch? Well, it’s finally done and I’m ready to share it with you! Wa-La! The cutest pumpkins EVER! At least to me anyway. 🙂

Besides being adorable, they were super easy to make. First, I spray painted some scrap pieces of 4×4 left over from our fence project. A couple coats of orange and they were looking like very square pumpkins. Now they just needed stems, so I went stick hunting in our woods, much to the dogs delight.

I let my pile of sticks “dry out” on the porch for a few days, ok, weeks – which caused several of them to fall victim to puppy playtime. But I digress. Once I deemed them “dry” I chose a few with interesting texture and curves and marked off sections for the hubs to cut. Yes I could have done it myself, but have a bad history with sharp objects so he came to my rescue.

Once I had all my stems ready to go I tested them out on the different bases and decided the combinations I liked best. A little hot glue and presto, stems!

Cute as they were at this point I felt like they needed a little softening, so I dug out some orange raffia I found at a yard sale long, long ago and tied some around the base of each stem. BAM. Delightful, rustic, recycled wooden pumpkins! On. my. porch!

They are the perfect finishing touch to my other fall decor on the front porch! Apparently Mother Nature didn’t agree because she added some little touches as well… LOL.

