
From the moment we signed the contract to build our home I envisioned a massive wall-to-wall desk in my office/studio, with enough room for both the hubs and I to have workspace. But that wasn’t a high priority project, so the DIY desk we fashioned from a freebie door and two filing cabinets while in the rental was serving the same purpose at the new house. It was certainly functional, but definitely not anything amazing.
After moving into the house we’d purchased a few other filing cabinets to serve as the bases for the rest of the desk, but they sat collecting dust in the garage for months. Then, a few weeks ago the hubs decided it was time to make room in the garage get this project rolling and purchased wood for the desktop. He brought in the other two filing cabinets and then lined up the wood planks to form the top.

At some point we took the top drawer out of one cabinet and Luna decided that was the perfect hiding spot, at least until she realized it was right at doggy viewing height! Tequila was very concerned that her kitty was trapped in the cabinet. 🙂

The hubs had prepped the boards with small biscuits to create joints between the planks. He also predrilled counter-sunk screws down the length of the boards. The combination of the biscuit joints and the screws make the entire top a sturdy and solid piece.


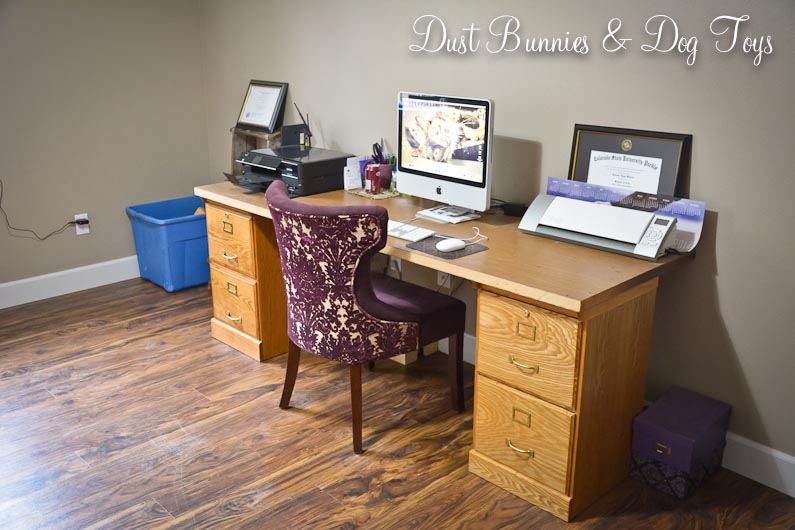
Here’s the new set up! As you can see the desktop doesn’t go all the way to the wall on the near end, but that leaves room to install the sliding barn doors in the future which will allow me to close off the studio for clients when needed.

We still need to add molding around the bottom of the two new cabinets, add a pull-out shelf to the middle cabinet for the printer to sit on, paint all the cabinets white, stain the top and then install shelves above the desk for storage, but for now it’s just nice to have a little extra room for us both to work. I’ve since found a new chair to replace the camp chair on the hub’s side, thanks to a great deal at Target. Watch for a post on that soon!

What are the dimensions of the 3-drawer unit on the very right?
It’s 20.5″ wide and all of the cabinets are 28″ tall.
So my friend and I want to do something similar and we have a massive wall (just shy of 10 ft) that we want to do this on. Can you give me more direction on how you built the desk top?
There’s not much more to share beyond what I have above (cutting a slice for biscuits with wood glue between the boards along the length of the desk and alternating with the kreg drill holes for screws to secure the boards together). The weight of the wood keeps it in place, but we did secure it to the cabinets in a few spots just for good measure. I hope that helps! Good luck with your project – share a link to it when it’s all done so we can see. 🙂
Hello, Just came across your blog and this post! Love it. how thick is your piece of wood desktop? Did you secure the desk top at all to the wall or cabinets? Thank you!
I’m so glad you found us! These are all 2″ thick. I believe there were two 2x10s and one 2×6 used to make it the right depth for our cabinets. The weight of the boards keeps it in place so we didn’t have to secure it to the cabinets or wall, but my hubby did add a few deck screws down into a couple of the cabinets just to be extra sure. Hope that helps! Be sure to browse the site to see the finished project too at https://dustbunniesanddogtoys.com/2015/05/19/the-office-craft-room-studio/
Did you have the wood top hanging off of the back of the cabinets? I can’t seem to find any that are the depth I’m looking for.
Does the top hang out over the cabinets that you have chosen? I can’t seem to find any cabinets that are the depth I’m looking for, so I’m not sure if there is another option.
The top does hang over about an half-inch in the front and quite a bit in the back. If you look closely at the last picture you can see the shadow of the space between the cabinet and the wall. It’s easier to see in the finished photos on this post: https://wordpress.com/read/blogs/50801684/posts/3128 We use that space to run electrical cords for the computers and to store infrequently used display items.