
 The past week has sure been a busy one – hence the brief radio silence here on the blog – but it’s been a pretty productive one. The Hubs has been helping me prepare a booth setup at a big wedding expo, while I continued to purge the house and catch up on editing client images. Today I want to share the expo booth we created.
The foundation of the display were these large wooden barn doors, that the Hubs built for the opening to the office some time ago. When he installed the barn door hardware he realized that these doors were a bit to heavy for the hardware, so he built another set with the same design but different material (I’ll be sharing those soon too!). In the meantime, this pair had been sitting in the garage just taking up space. When I decided to have a booth at the wedding expo I knew I needed something visually appealing that would draw people into my booth, but also wanted to keep the set-up simple and use materials I already had where possible. It was the perfect opportunity to put these doors to work.
I described my plan to the Hubs and he built a simple yet substantial brace system using scrap wood from other projects on the back side of the doors so they would stand on their own. I don’t have details on that part of the project since he handled that on his own, but here’s a few pictures of the back to give you an idea of the arrangement which seems pretty straightforward. I can tell you these beasts were extremely HEAVY and awkward to transport, but they really made a statement and didn’t cost me anything extra.


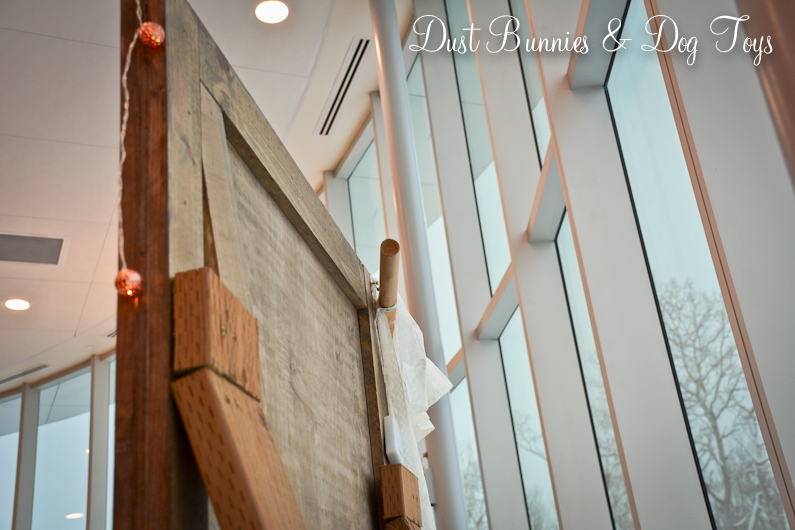
The doors were each 35″ wide so they were a bit shy of filling my 8′ by 8′ booth space. To fix that problem I asked the Hubs to add a rod between the two doors where I could hang a lace curtain. He used brackets left over from another project to loosely hold the ends of the rod (a regular wooden closet rod) so the doors could be angled along the curved wall of windows. When we went to set up I realized the pocket on the curtain I’d purchased was too narrow for the rod, so I just draped it over and tucked it between the rod and the door to hold it in place. To finish off the top of the doors I tacked up these copper string lights I got at Bed Bath & Beyond recently.

I draped the tables with drop cloths (which serve as curtains our guest room in their down-time) and added a burlap runner from our wedding on the longer one. I decorated around my photo display boards with lanterns, our DIY birch candles, wood slices, moss and mason jars of baby’s breath. I borrowed the fruit basket off our kitchen counter to hold my flyers and my cast iron soap dish card holder fit right in with the rustic vibe.

At the end of the long table I positioned a small copper table we’ve had for a while with a little giveaway drawing. I printed up a little sign and put it in a frame I already had, placed pens from my bank in a mason jar and tossed a few moss ‘stones’ in a hurricane votive I thrifted some time ago to collect the entries.

The TV from our bedroom made a perfect display screen for a rotating show of my images on a USB, saving the expense of multiple large photo prints, which would have been difficult to display in the space anyway. I did order two large prints to go on the doors and the larger one on the side table to accompany a smaller one I had from previous shows.

I attached the photo boards on the doors with some removable velcro strips along the diagonal board of the door so I can easily reuse them for another show in the future. The smaller board I already had has an easel back attached to it and I used a simple table top easel from my decor stash for the new larger board.

An upholstered chair from our guest room and a cute little heart pillow from our couch – which I just snagged in the Target Dollar Zone for $5 completed the look and closed off the extra space between my booth and the cake maker’s booth next to me, which worked well as she had a cake displayed on that side of the table and didn’t want anyone to walk by it. The vendor on the other side of me had an adorable metal cart and umbrella which looked very nice next to my display.

I love how it came together, just as I envisioned it in my mind and the fact that the majority of the items came from shopping our home makes it even sweeter. The only things I had to buy to complete the look were the additional photo boards, lace curtain, copper light strands and some baby’s breath, totaling about $215. Plus a few copies of the bridal magazine that featured a wedding I photographed last year for display! 🙂
Now that the show is over and we no longer need the barn doors I’ve posted them for sale on the local buy/sell pages to recoup some of the cost we had in building them originally and free up some storage/work space in the garage since Mother Nature has decided to dump around 15″ of snow on us over the last few days. Thank goodness for heated garages when you’ve got a long list of winter time DIY projects!
Shared on:
