

Today I want to share a quick DIY sign I recently created. I’ve had this Uppercase Living vinyl for some time now, as in more than 3 years because it was purchased for the house we planned to rent in FL when we thought we were being transferred there. Anyway, I loved the phrase so I kept it with the intention of using it at some point. Unfortunately, I’d ordered it in “oat” which was just a shade lighter than our current wall color so I knew it wouldn’t show well if I applied it directly to the wall. I’d considered using a scrap board as a background like I did for the Laundry Room sign, but just hadn’t gotten around to it. Then I spotted this pallet board at Michaels and inspiration struck, especially since I had a coupon for 40% off!
 The construction was pretty basic, several boards secured on the back with cross pieces and a twine hanger at the top. There were several color options – unfinished, white washed and this stained color, which I was immediately drawn to and knew would contrast nicely with the color of the vinyl. With my coupon it cost me around $10.

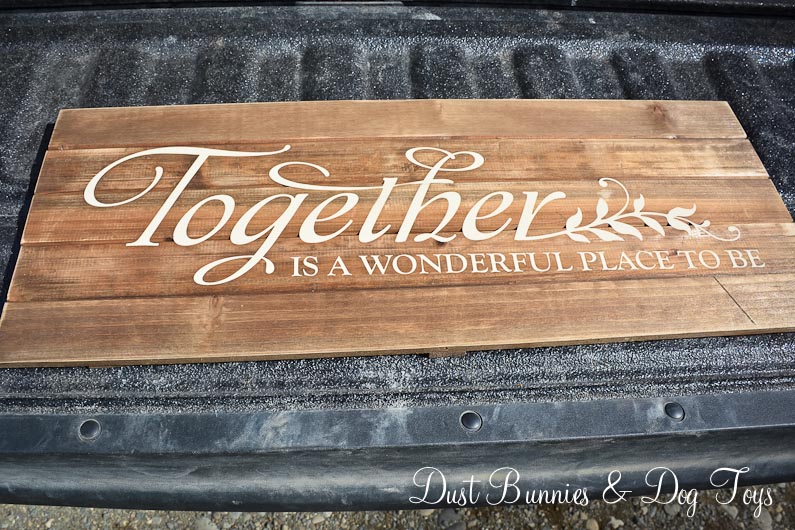
I was pretty sure it was just the right size for the vinyl, so when I got it home I tested it out and it fit perfectly!
 I followed the instructions that came with the vinyl and applied it to the board. I could have called it done then, but I wanted to give it a bit more character so I decided to rough it up a bit with the sander.

Although I did a very light pass on the entire piece there were a few spots that got a little too roughed up due to how they sat on the joints of the wood.

I was slightly distraught about it, but decided to try to find a solution rather than give up on the project.

I started small with the leaf that that was damaged to build my confidence. I used an exacto blade to trim small pieces of damaged vinyl away, reshaping the leaf as needed to work around the missing pieces. I think it worked pretty well.


I did the same on the lettering with decent results. It’s not perfect, but it’s better than the rough edges I started with.

I took a step back to get some perspective and realized that neither spot was very noticeable from a distance. Luckily, our guests don’t typically inspect my décor up close, so it passes muster. I love that the sanding gives it a rustic feel, which also plays into being a little imperfect.
And here it is in our bedroom above the TV. At that height no one will notice my little ‘patched’ areas and it also disguises my other little goof on this project. I’m not saying what that goof was because I want to see if anyone else notices it or if I’m just being too much of a perfectionist! If you think you know what it is, leave a comment below! 🙂


It looks great! Love the phrase too! 😉